Get a Floating License Seat in a Private Network
Notice
This page is related to the new SmartBear ID-based licenses that we've introduced in ReadyAPI 3.8.1.
In this version, we included support for SmartBear-hosted ID-based (online) licenses. Furthermore, from version 3.40.0, we added support for on-premise hosted and offline ID-based licenses.
About
SmartBear provides a special license type, offline, that works on computers without access to the SmartBear license servers. Offline means the license is controlled by the licensing subsystems on your side, rather than SmartBear license servers available online.
To use a floating offline license, install the On-Premises License Server in your network. ReadyAPI running on user workstations connects to this server and consumes license seats from it.
The following step-by-step instructions show how to activate this license. As a licensed user (the person who runs and uses ReadyAPI), you need assistance from your license administrator to perform some steps.
1. License administrator actions
Log in to the SmartBear Licensing Portal as a license administrator.
Download, install, and configure the On-Premises License Server in your network. This server acts as your local Licensing Portal and operates separately from the SmartBear Licensing Portal, which connects to the internet.
Important
Your license must have no users assigned to it. Unassign all users before requesting conversion.
To download the license, click Export License to On-premises License Server.

Note
If you do not have an On-Premises License Server installed, click download and follow the on-screen instructions, or download it from the SmartBear Administration Downloads page.

After installation, open the server in a browser at: http://localhost:40892/#.
Log in to the On-Premises License Server and select Add License.

Copy the server fingerprint data to the clipboard.


Return to the SmartBear Licensing Portal and export the license to the On-Premises License Server.

Upload the server fingerprint to the SmartBear Licensing Portal and download the resulting license file.

The license gets exported.

Upload the downloaded license file to the On-Premises License Server by selecting Add License.

You receive a notification that the license has been successfully added.

Assign a user to the license or share a link from the On-Premises License Server so the user can accept the license assignment.


When the user clicks the link to accept the license and then opens ReadyAPI the license gets activated.

For complete information on these steps, see the SmartBear Licensing Portal documentation.
Note
The On-Premises License Server can manage multiple SmartBear licenses. If you already have it installed in your network, skip the download, installation, and configuration steps and proceed directly to converting and activating the license.
2. User actions
Start ReadyAPI.
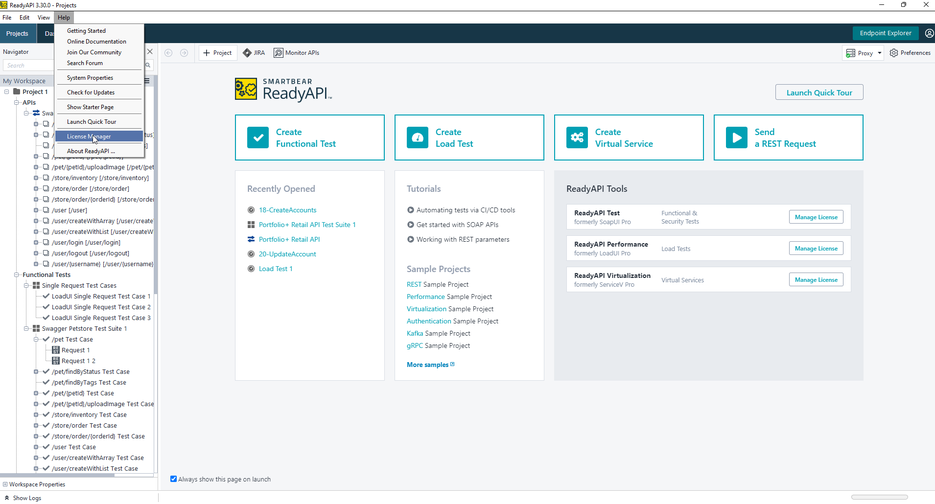
From the main menu, select Help, and then click License Manager.

Click Install License.

Select License from Floating License Server, and enter the License Server address in the License Server field.
Use the Server IP address and port number provided by your License Administrator. For example:
http://192.168.1.20:40892Note
Port
40892is the default. If you are running ReadyAPI on the computer where this License Server is installed, you can uselocalhostas the computer name. In other words, the address looks likehttp://localhost:40892.
Click Finish to connect to the specified License Server and consume a license seat from it. The user should have already accepted the license, or it should have been assigned by the license administrator.
Further actions depend on your On-Premises License Server configuration. The On-Premises License Server may use LDAP or OIDC for authentication. You may need to:
Enter your domain username and password, or
Let ReadyAPI authenticate you automatically through your Windows account (that is, ReadyAPI does not ask for any credentials).
Ask the On-Premises License Server administrator about the configured settings.

For details on configuring the On-Premises License Manager, refer to Configure On-Premise License Manager.
Note
An offline Floating license binds to the computer where the On-Premises License Server runs, not to individual user machines.
Closing ReadyAPI releases the license from the user’s computer.