Management Console
Important Notice for ReadyAPI Customers
Starting from ReadyAPI 3.62.0, VirtServer 3.29.0, and TestEngine 1.34.0, SmartBear Product Family has fully deprecated file-based licenses and transitioned to the ID-based SmartBear License Management (SLM) system. Any customers still using file-based licenses must complete their migration to SLM by September 30, 2025.
From October 1, 2025, existing and activated file-based licenses will continue to work for some time. However, SmartBear will no longer generate new file-based licenses or support activation and deactivation of file-based licenses in ReadyAPI, VirtServer, or TestEngine. All new and updated licenses are now issued in SLM only.
All technical support for file-based licenses has now ceased, and SmartBear no longer maintains the file-based licensing system. Any access or service issues will result in service disruptions that we will not be able to restore.
If you have not completed the process of migrating, contact your Account Manager or SmartBear representative today. Our teams are ready to assist with smooth transition strategies. For additional support, log a request with our SmartBear Support, who are standing by to help.
For further information and timelines, refer to the File-Based License End-of-Life Policy page.
You use the Licensing Server Management Console to create, change, and delete user accounts and user groups on the license server.
Note
You can import user accounts from an LDAP server if needed. To automate the creation of user accounts, consider changing the configuration file that the license server uses.
Run the Management Console
The Management Console executable is in the <Protection! Licensing Server installation>\bin folder, for example, C:\Program Files\ProtectionLS 4.9.0\bin\ManagementConsole.exe. Run this executable.
Tip
You do not need to run the Management Console on the same machine where you run the license server. If needed, you can connect the console to the license server running on a remote machine.
In the Management Console, switch to the License Storage tab:

Select Edit > License Users:

In the License Users dialog, click New.
Configure the user attributes:
Option
Description
Name
The username that is displayed in the interface.
Username
The name the user has in the system. Usually, the same name is used to log in to the computer.
Important
This value is case-sensitive.
Host
The user's computer name.
IP Address
The user’s private IP address. Only IPv4 addresses are supported.

If necessary, associate a user with an already existing user group on the Member Of tab.

Click OK in both dialogs to save the changes.
Add user group
Switch to the License Storage tab:

Select Edit > License User Groups:

In the License User Groups dialog, click New.
Configure the user group attributes:
Option
Description
Name
The user group name that is displayed in the interface.
Host
The range of computer names of users that can belong to the group. Supports the
*and?wildcards.IP Address
The range of IP addresses of users that can belong to the group. Supports the
*and?wildcards. Only IPv4 addresses are supported.
If necessary, add the existing users to the group or remove them from it on the Members tab.

You can also add users from the LDAP directory to the group. To learn how to do this, see Work With LDAP Servers.
Click OK in both dialogs to save the changes.
To provide users with access to the installed license, you need to configure user group settings:
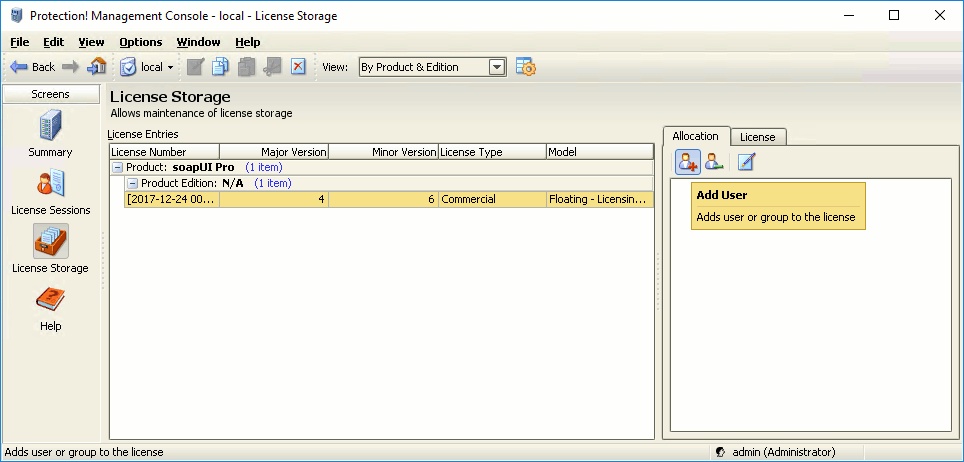
Select the license file from the License Entries list, then click Add User on the Allocation tab of the toolbar on the right:

The following dialog will appear:

In the dialog, select the desired group and click OK.
Delete users and user groups
To delete a user or user group, open the corresponding dialog and click Delete.
Limit user access to licenses
You can create block lists and allow lists to limit users who can work with licenses. The lists work on several levels:
List | Applies to |
|---|---|
Global | Any actions with licenses. |
Lock License – Named User | Requests for licenses that use the Named User Licensing model. |
Lock License – Floating User | Requests for licenses that use the Floating User Licensing model. |
Obtain License | Requests to obtain a license from the license server. |
 |
To configure the lists:
Select Edit > Access Control List > <The List You Need> > <White or Black> List Conditions.
In the Conditions dialog, click New or New Complex and configure the condition you need. You can find detailed instructions in the license server documentation.
 |
Get usage reports
You can get usage reports for your licenses on the Summary page. Click Download Reports in the Licensing Statistics tile. Then, select the report you need:
Usage per User – The number of licenses each user uses on the server.
Total Users (Succeeded) – Information about users who successfully checked out a license.
Total Users (Failed) – Information about users who failed to check out a license.
Statistics – Overall information about the license operations.
All reports are created in the .csv format.