6. Get Data From the MySQL Database
Now you have a test case and a project, so you can create the Data Source test step.
Create a data source
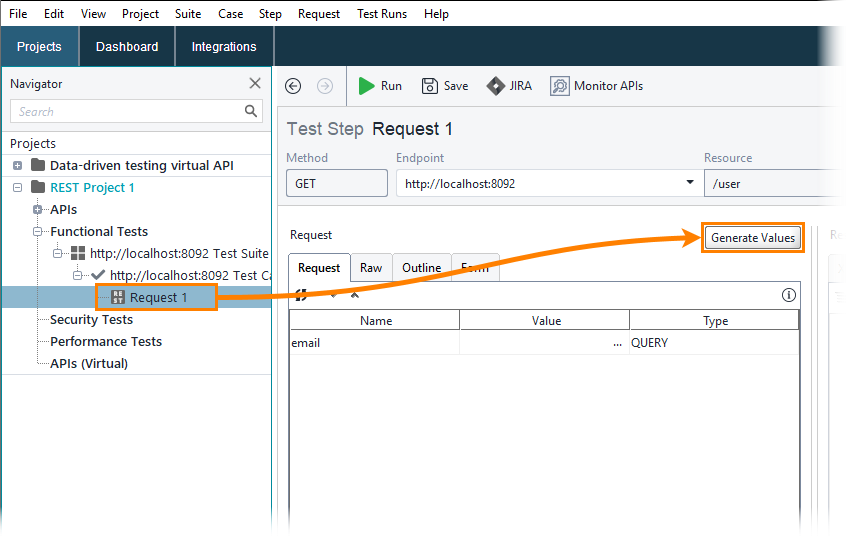
In the request editor, click the Generate Values button:
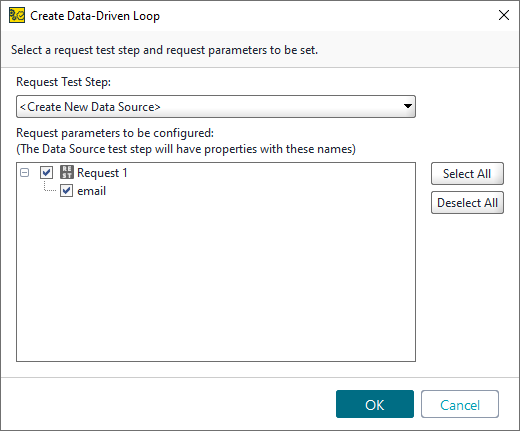
In the Create Data-Driven Loop dialog, select the request parameters that will be configured automatically:
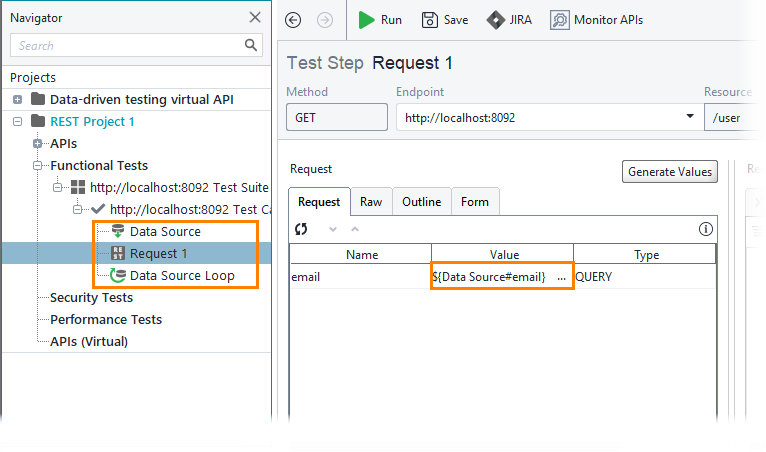
ReadyAPI will automatically create a data source loop and add a property expansion that will refer to the email property in the Data Source test step:
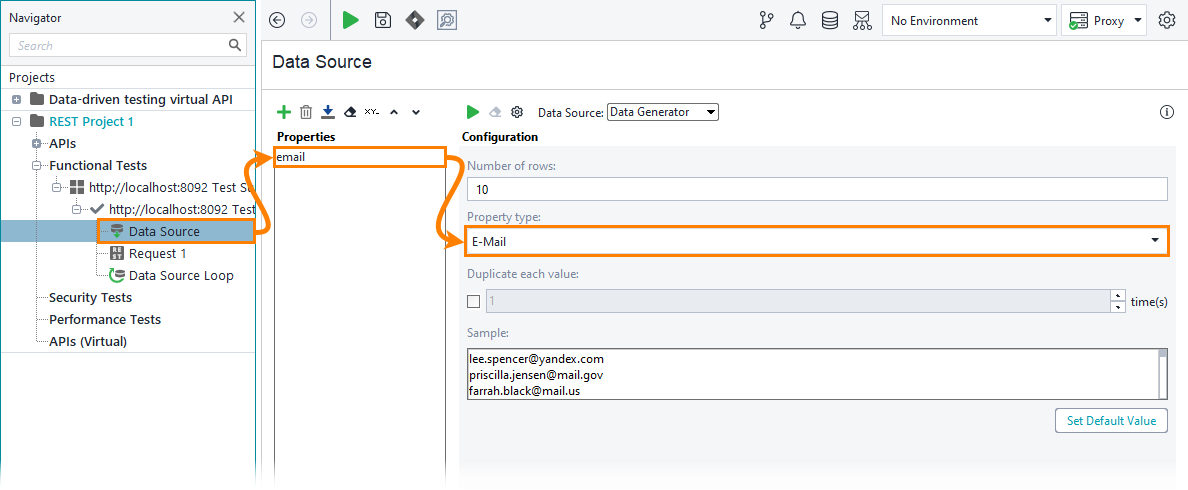
Open the Data Source test step. As you see, ReadyAPI has automatically configured the data source to generate random email addresses as values of the email property:
Configure a JDBC connection
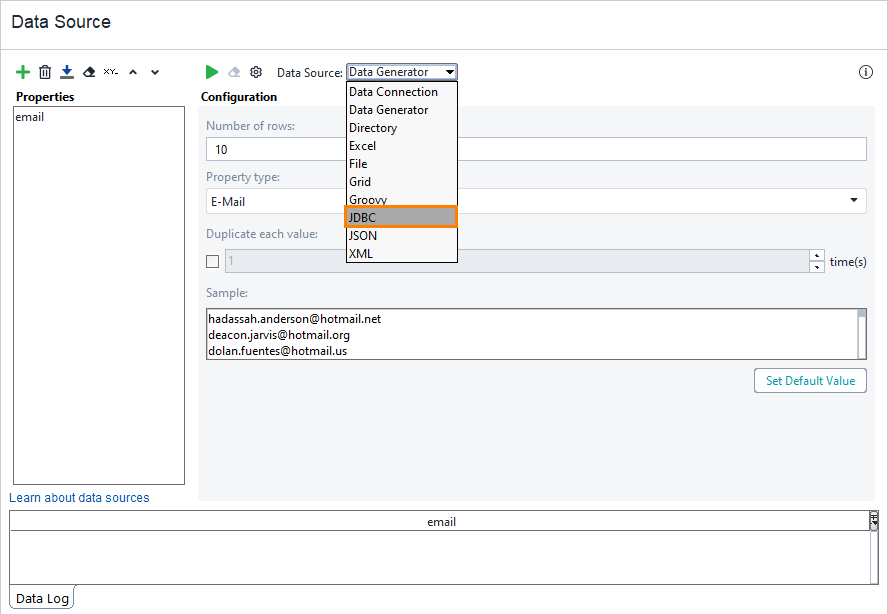
In the data source editor, select the JDBC data source type.
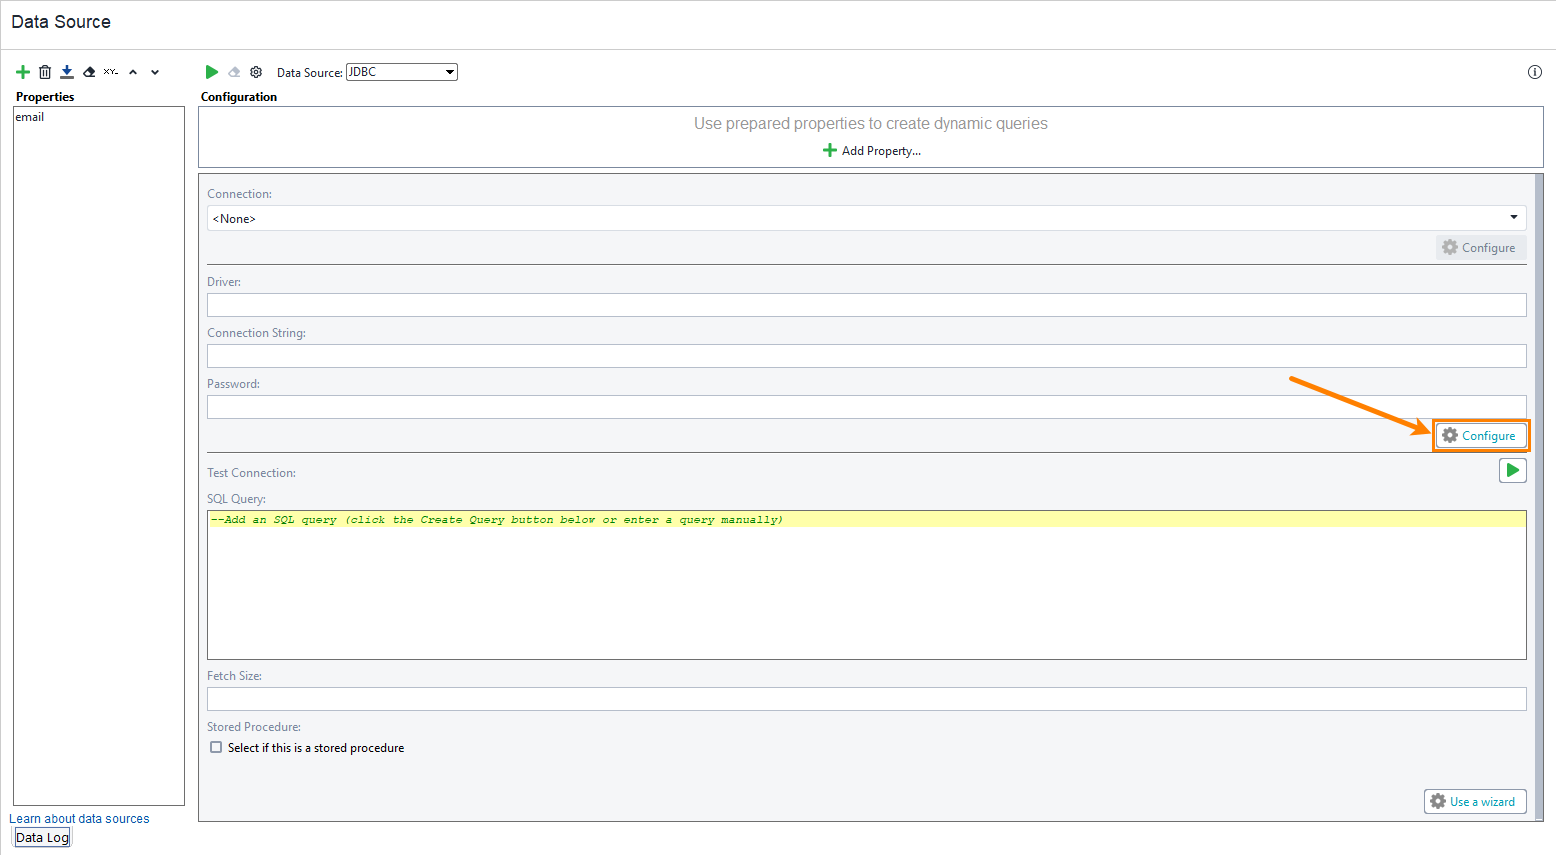
To configure the connection string, click Configure.
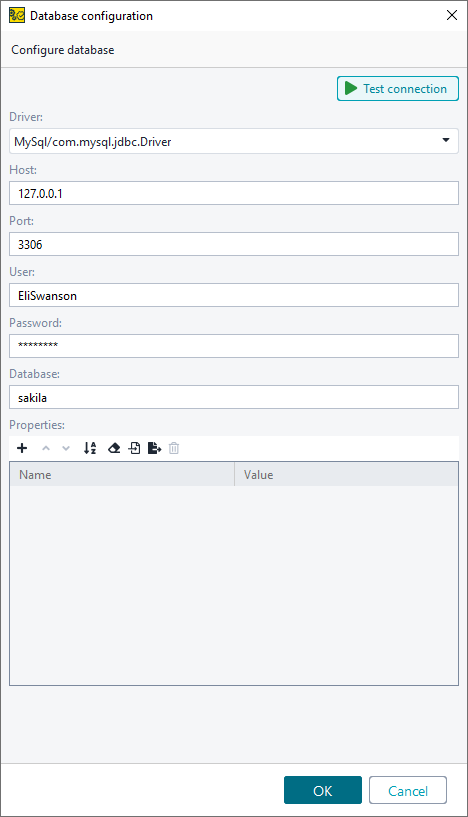
In the Database Configuration dialog, select the MySQL JDBC driver.
Specify the settings of your MySQL Server: the host, port and so on.
In the Database field, specify the
sakilasample database.Click Test connection to verify the settings are correct.
Click Yes in the Change Connection Properties dialog.
The Build SQL Query wizard will appear.
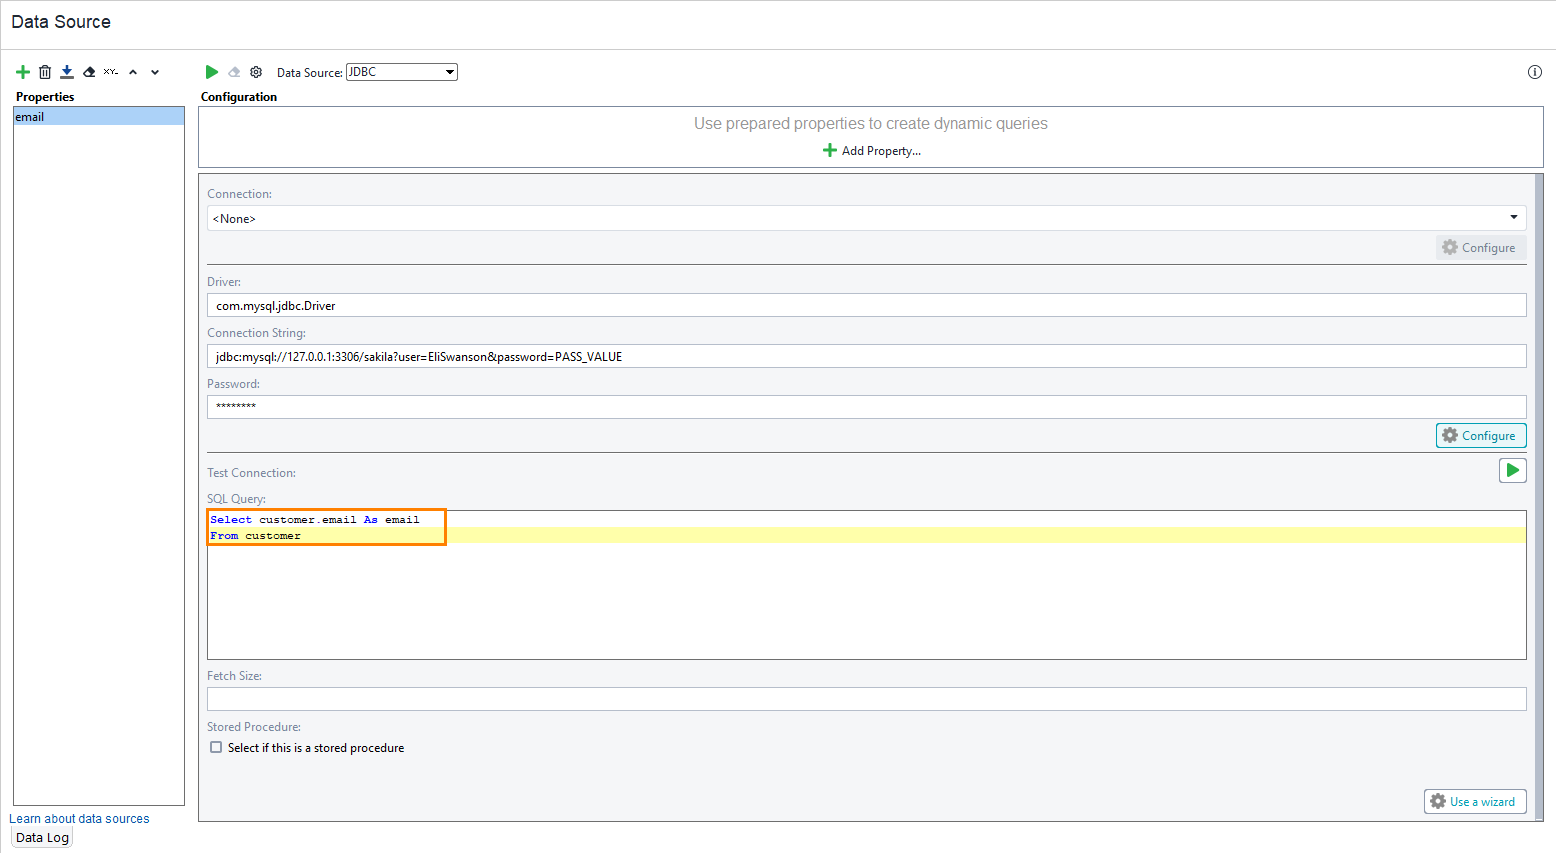
Select the customer table in the list of tables and check the email column in the list of table columns.
In the Alias column, input
email– the name of the property in the data source test step.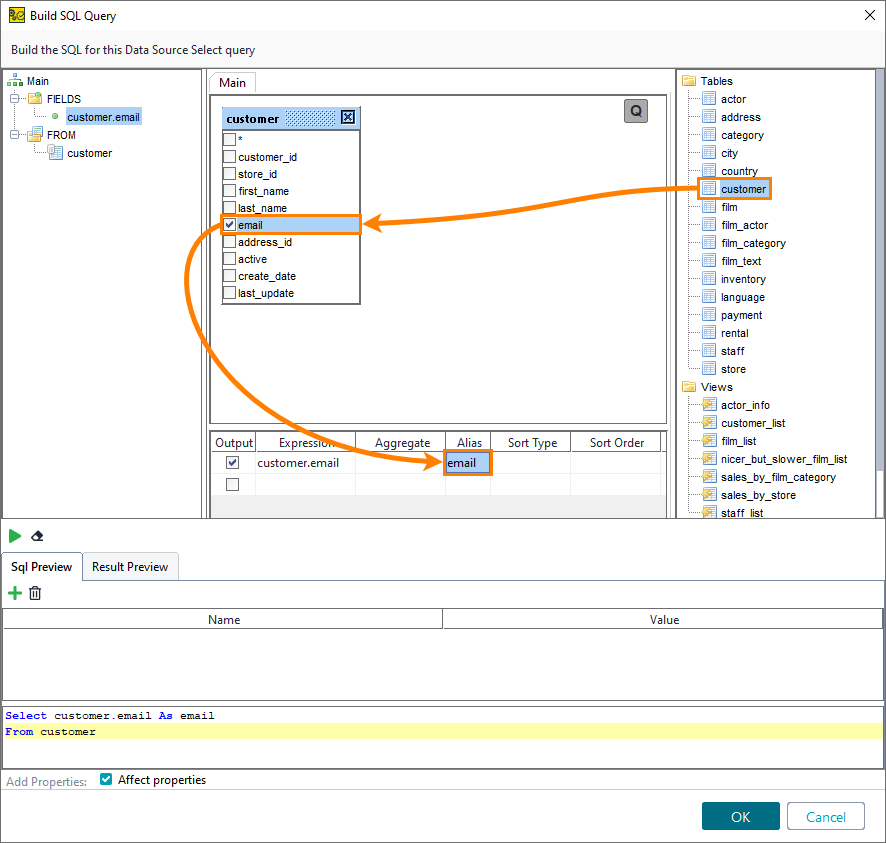
Click OK to add your new query to the data source configuration.
For this tutorial, you need to set a limit for the amount of data you will get from the database.
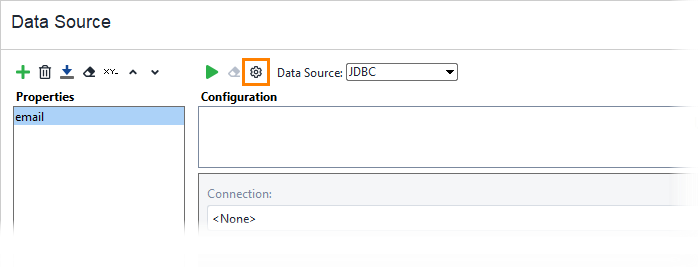
Click
 in the data source toolbar at the top.
On the Settings tab, set End Row to
5.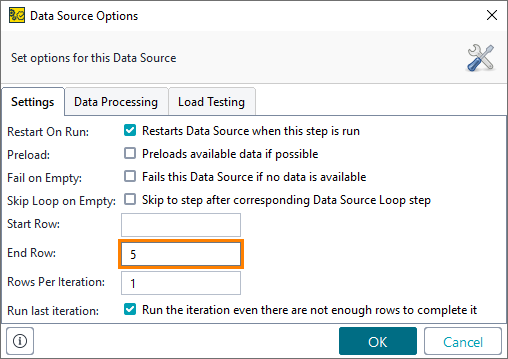
Click OK.
Now you can run your test.