Commit Changes to Git Repository

To commit your changes to a Git repository, do the following:

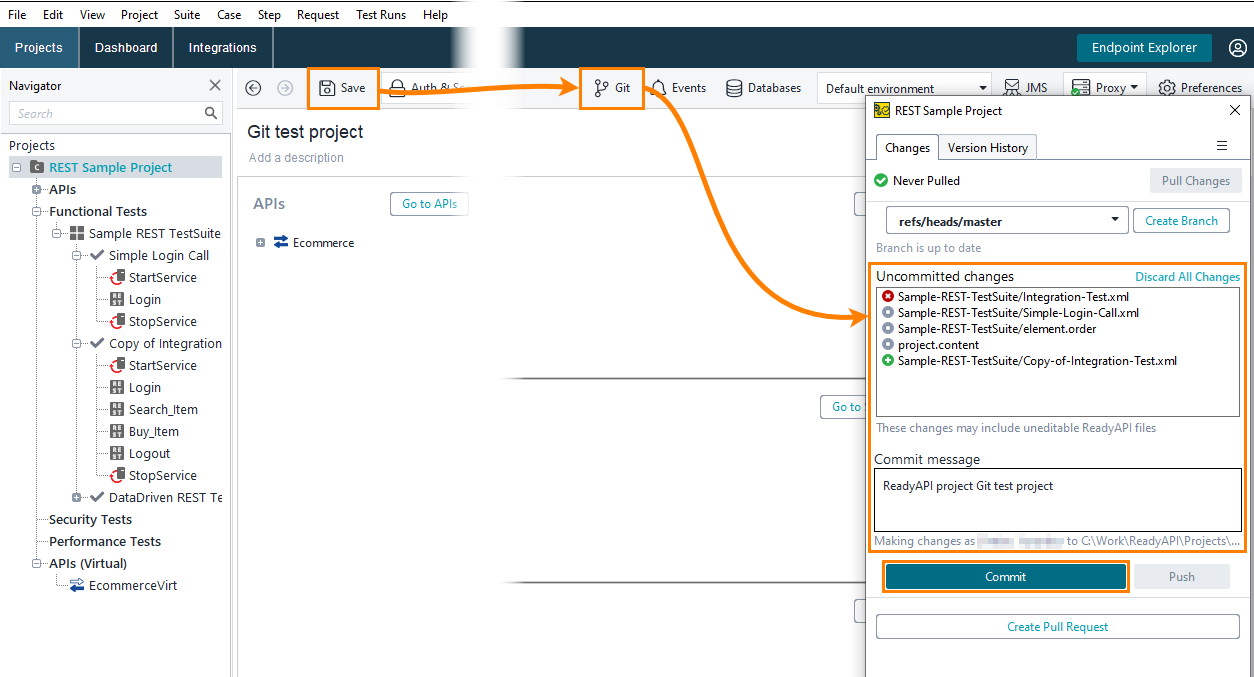
  1. Save your project and click Git on the main toolbar.

  2. In the Uncommitted changes field, you will see changes that your project has compared to the local repository.

    Tip

    Click an item to see what changes have been made.

  3. In the Commit message field, enter the commit message or leave the default one.

  4. Click Commit.

    Git integration in ReadyAPI: Commit changes in Git panel

Note

  • You must save your project for the changes to appear in the panel.

  • You cannot choose which changes to commit in the Git panel. If you want to commit specific changes and leave other ones uncommitted, commit via the project menu.

  • To learn about the project structure and the items that appear in the dialog, see Composite Project Structure.

  • Whenever you save a project, the corresponding project files get updated. If and when you connect to Git, Git will detect that change and ask you to commit and push it.

  • You can configure to delete the Commit message once you have committed your changes in the ReadyAPI Git Preferences panel.
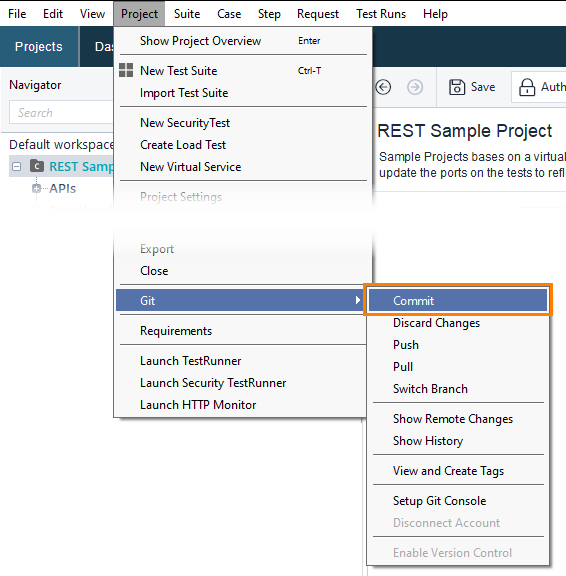
Commit via the Git project menu

To commit your changes to a Git repository using the project menu, follow these steps:

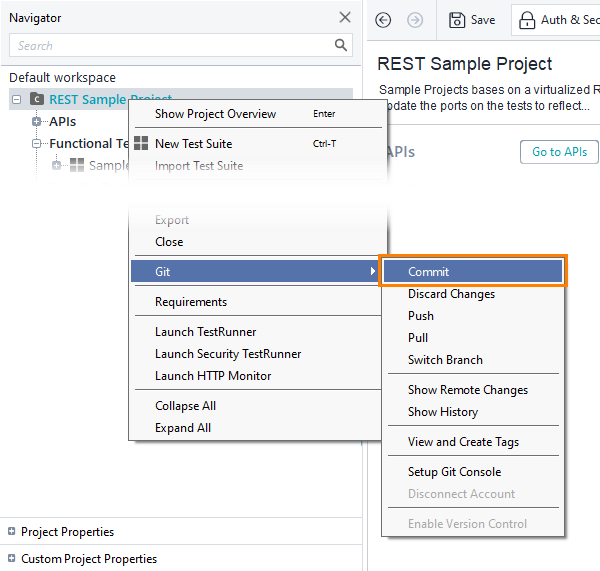
  1. Right-click the project in the Navigator panel and select Git > Commit from the context menu.

    Git integration: Commit command in context menu

    — or —

    Select Project > Git > Commit from the main menu.

    Git integration: Commit changes

    Important

    This action will automatically save the project.

    Note

    If the command is disabled, make sure you enable integration with Git.

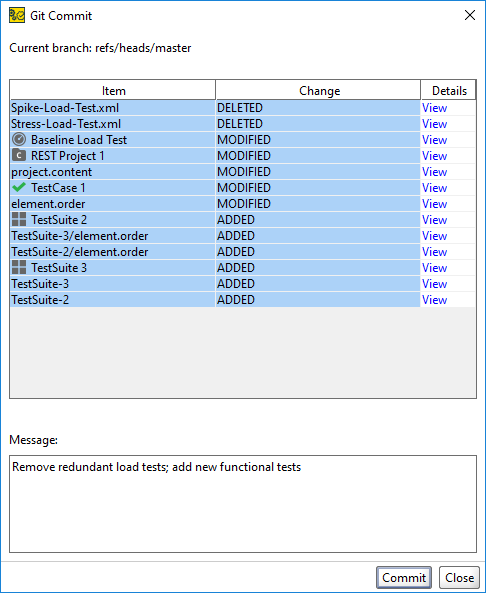
  2. The Git Commit dialog will appear:

    Git integration: Git Commit Dialog

    The dialog lists the changed files. To compare file versions, see Viewing Differences. To learn what each file is used for, see Composite Project Structure.

    In the dialog:

    • Select the changes to commit.

    • Enter a commit message.

    • Click Commit.

Viewing Differences

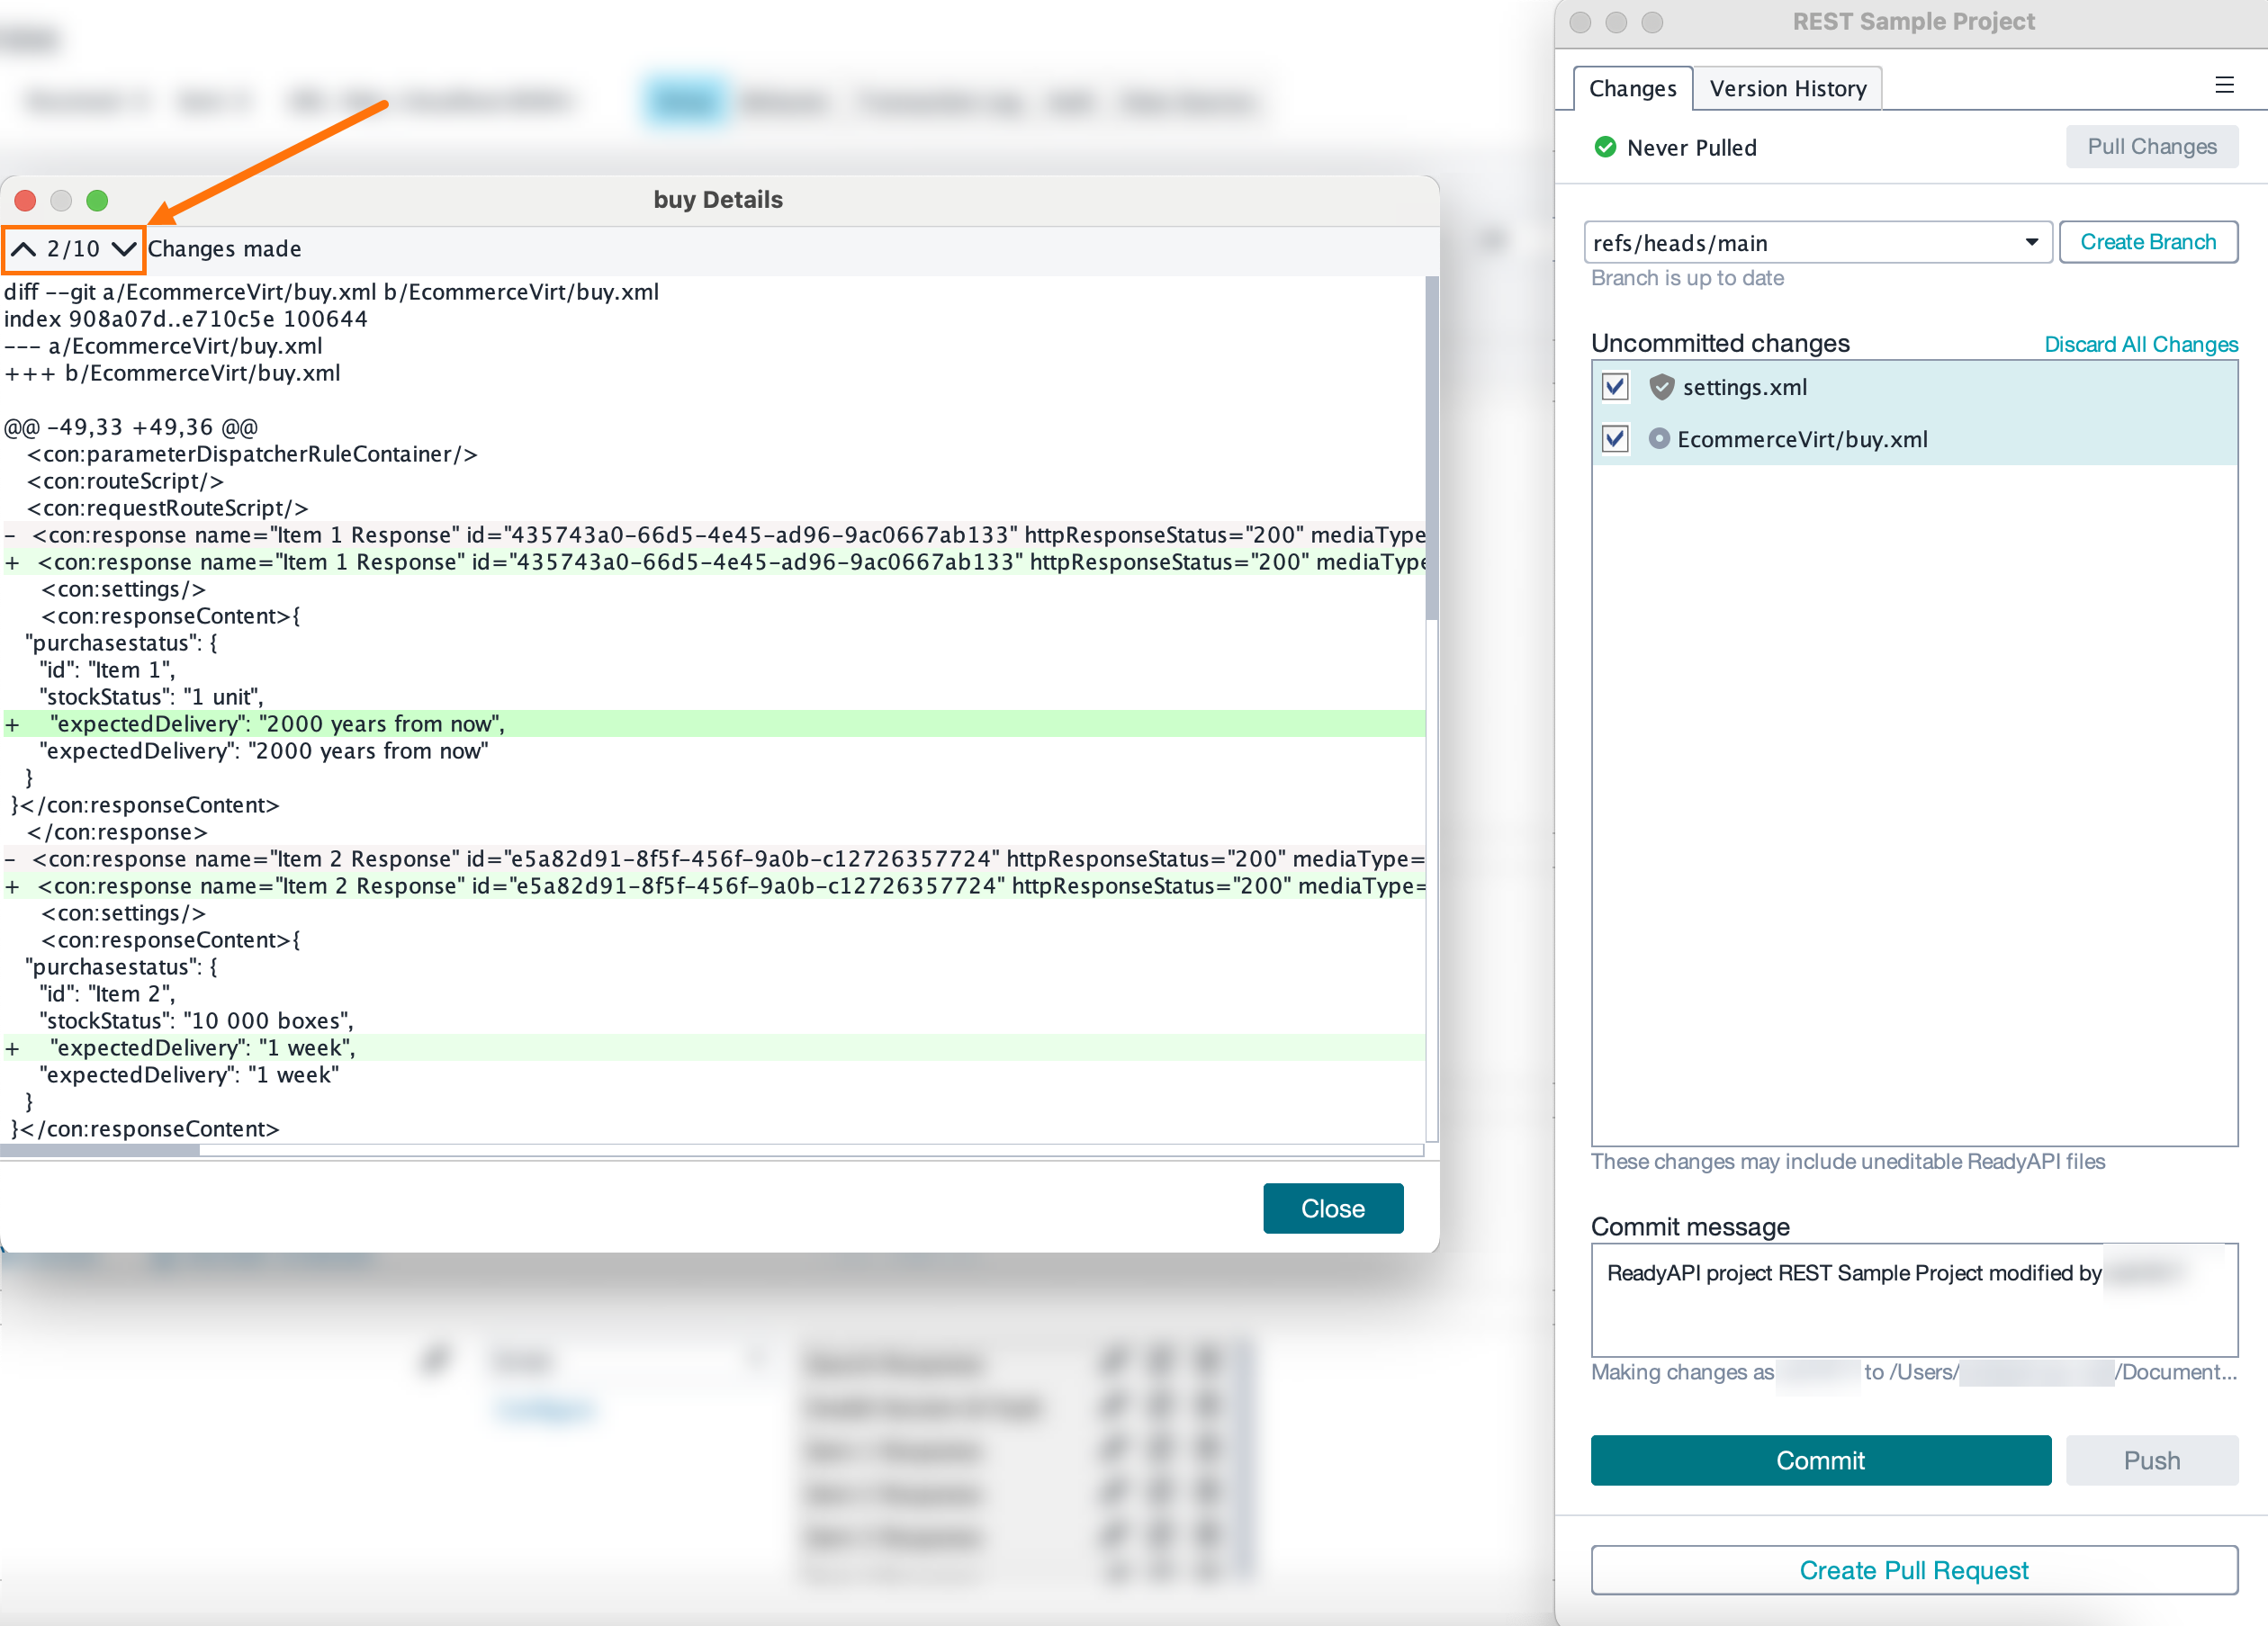
To compare file versions, click View in the Details column. A window opens, displaying the differences.

Tip

If 3 or more lines are updated, chevron buttons ( and ) allow you to navigate between the changes. An indicator (for example, 2/10) shows your position in the diff view.

RAPI_screenshot_Git_integration_arrow_buttons.png

Identifying Auto Updates

If a file contains only safe-to-commit changes—changes made automatically by ReadyAPI and not by the user— the safe commit changes icon RAPI_screenshot_shield_check.png appears when viewing file differences. Hover over the icon to see the tooltip: ReadyAPI Auto Update: This change was made automatically and is safe to commit.

RAPI_screenshot_Git_integration_safe_changes.png

After you commit the changes to a local Git repository, you may want to push them to a remote repository.

See Also

Publication date: