4. Validate With Assertion
After configuring the Data Source test step, you can add an assertion to validate response data. In this tutorial, we will use Smart Assertion that is automatically generated based on the patterns recognized in responses.
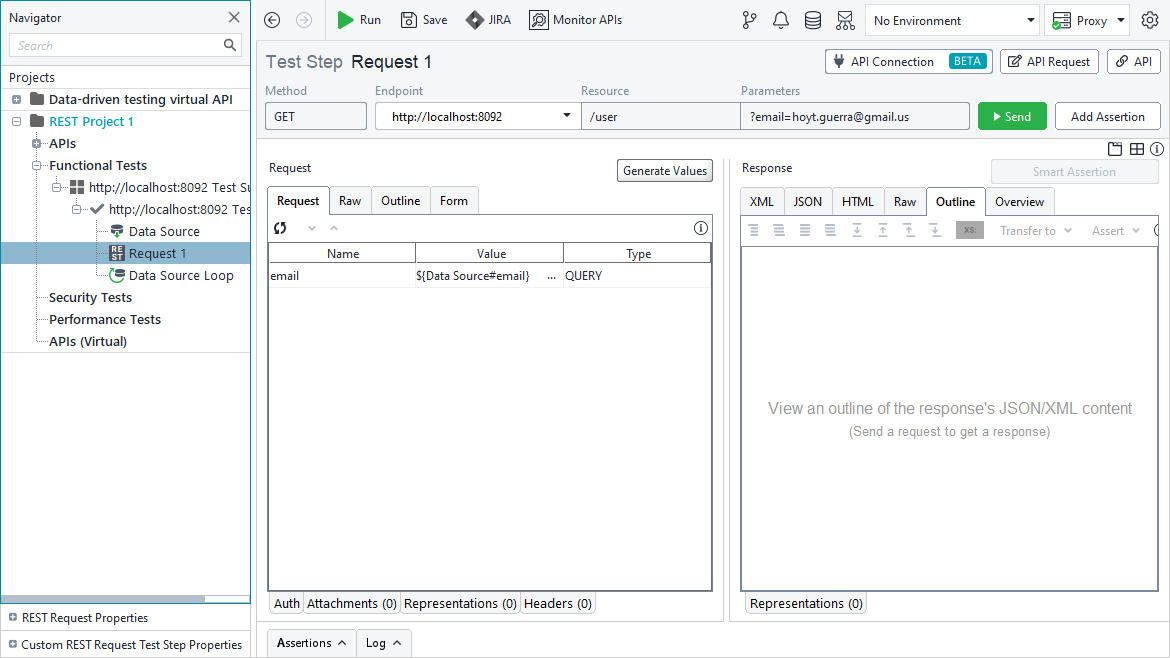
Your test case should have the REST Request test step that uses data from a data source:
 |
1. Get response
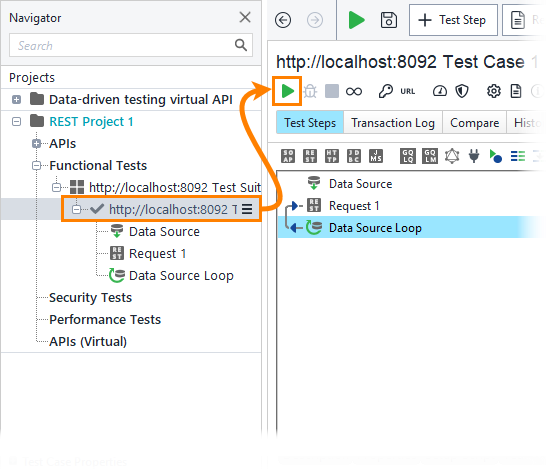
To begin, you need to simulate a request and get some sample responses. ReadyAPI will use the data to automatically configure assertion properties.
Switch to the test case editor and click  on the editor toolbar:
Now, you can create an assertion.
2. Create an assertion
Switch to the REST Request and click Smart Assertion:
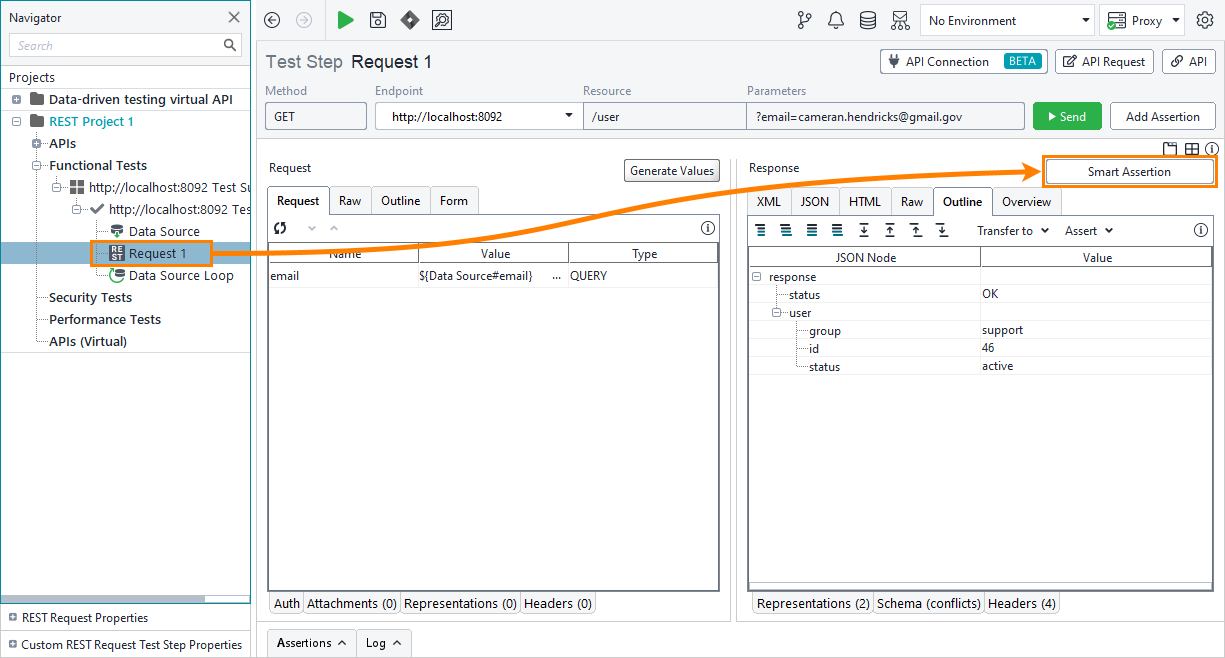
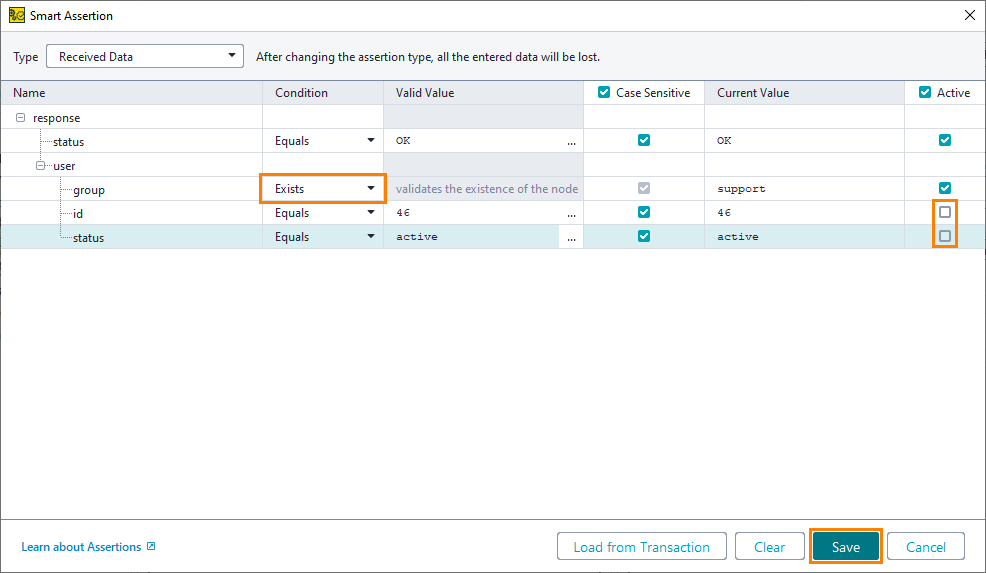
ReadyAPI will create an assertion based on the most recent response and automatically configure which values are expected for which data fields:
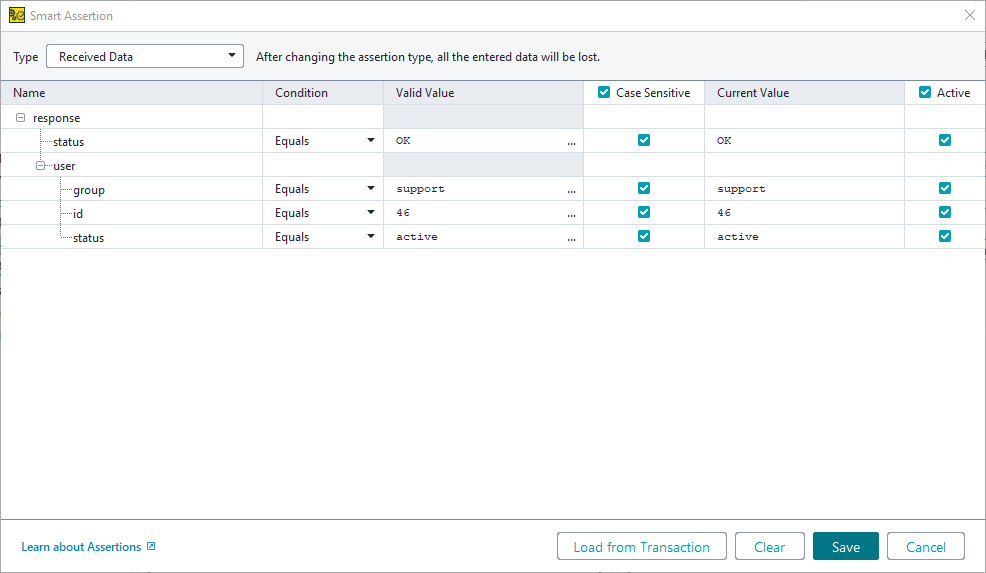
You can uncheck boxes to exclude certain fields from the assertion or configure comparison operators and expected values. When you are done, click Save:
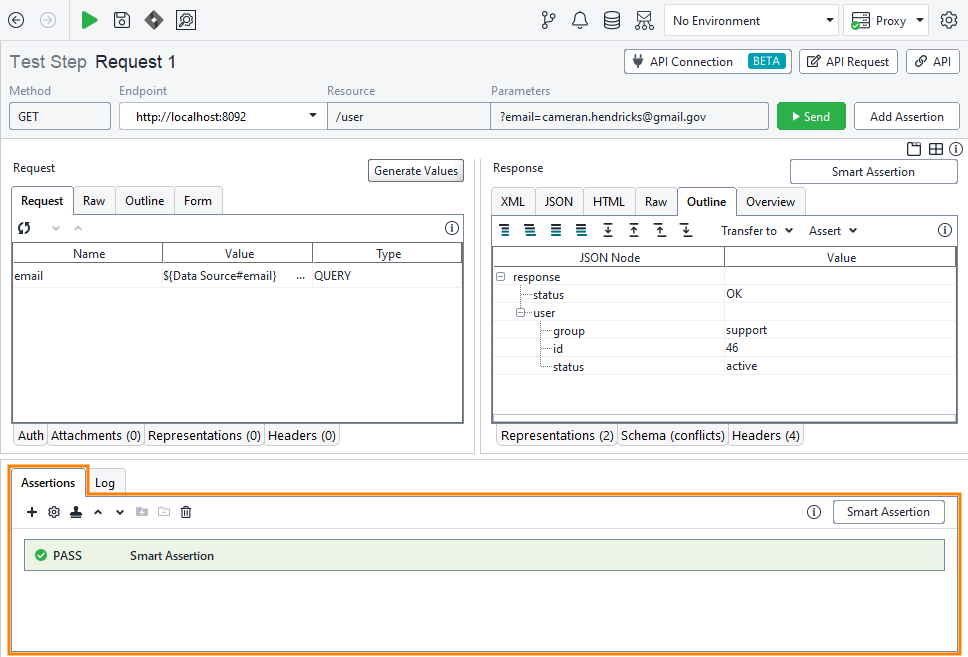
You have added the Smart Assertion to your test request. It will verify that the response data matches the expected values. You can find the added assertion in the Assertions panel:
 |
Now you can run the test.