Bitnami Patch
This page outlines what approach you should take regarding the recent changes to the Bitnami catalog. You will learn:
If you are affected by these changes
What happens if you take no action
What actions you should take if you are affected by the changes
Am I Affected?
2.x only
You are affected if you:
Run online installations AND
Use internal databases OR have Advanced Search enabled
You are not affected if you:
Run air-gapped installations OR
Use external databases AND have Advanced Search disabled
What Happens If You Take No Action
Existing Cluster Installations - when you attempt your next upgrade, or there is any modification or update to your instance (for example, taking nodes out of service for OS updates, maintenance activity, and so on), your application will no longer function until the remediation patch below is applied.
Embedded (kURL) Installations - when you attempt your next upgrade, your application will no longer function until the remediation patch below is applied.
Warning
If you do find yourself in a failed state, apply the remediation patch to restore service before any further upgrades.
Next Steps
If you are affected by the changes, here's what you should do:
Existing Cluster Installations - apply the remediation patch immediately and after any subsequent upgrade to version 2.12 or earlier.
Embedded (kURL) Installations - when you run an upgrade to version 2.12 or earlier, apply the remediation patch immediately after the upgrade.
Plan an upgrade to the latest On-Prem mandatory release 2.12 and apply patch 2.12.1 which will have a permanent fix for the Bitnami incident. Once you have upgraded to 2.12.1, the remediation fix is no longer needed.
Remediation Patch
Note
This patch needs to be applied:
to all affected instances of SwaggerHub that you are running.
following each upgrade until you reach version 2.12.1.
Warning
Applying this procedure will trigger a restart of all pods, including internal databases. This can result in a few minutes of downtime.
Existing Cluster Installations
Tip
Adjust the --namespace parameter in the kubectl commands to match your installation.
For OpenShift installs, replace kubectl in the commands with oc.
Important
Ensure that KOTS has been upgraded to version 1.121 or above before applying this procedure.
Run:
kubectl kots download --namespace swaggerhub --slug swaggerhub --current
Open
swaggerhub/overlays/downstreams/this-cluster/kustomization.yamland add this to the file:images: # Postgres - name: docker.io/bitnami/postgresql newName: proxy.replicated.com/proxy/swaggerhub/smartbear/sonp-bitnami-postgresql - name: bitnami/postgresql newName: proxy.replicated.com/proxy/swaggerhub/smartbear/sonp-bitnami-postgresql - name: proxy.replicated.com/proxy/swaggerhub/bitnami/postgresql newName: proxy.replicated.com/proxy/swaggerhub/smartbear/sonp-bitnami-postgresql - name: proxy.replicated.com/proxy/swaggerhub/docker.io/bitnami/postgresql newName: proxy.replicated.com/proxy/swaggerhub/smartbear/sonp-bitnami-postgresql # Elastic - name: docker.io/bitnami/elasticsearch newName: proxy.replicated.com/proxy/swaggerhub/smartbear/sonp-bitnami-elasticsearch - name: bitnami/elasticsearch newName: proxy.replicated.com/proxy/swaggerhub/smartbear/sonp-bitnami-elasticsearch - name: proxy.replicated.com/proxy/swaggerhub/bitnami/elasticsearch newName: proxy.replicated.com/proxy/swaggerhub/smartbear/sonp-bitnami-elasticsearch - name: proxy.replicated.com/proxy/swaggerhub/docker.io/bitnami/elasticsearch newName: proxy.replicated.com/proxy/swaggerhub/smartbear/sonp-bitnami-elasticsearch # MongoDB - name: docker.io/bitnami/mongodb newName: proxy.replicated.com/proxy/swaggerhub/smartbear/sonp-bitnami-mongodb - name: bitnami/mongodb newName: proxy.replicated.com/proxy/swaggerhub/smartbear/sonp-bitnami-mongodb - name: proxy.replicated.com/proxy/swaggerhub/bitnami/mongodb newName: proxy.replicated.com/proxy/swaggerhub/smartbear/sonp-bitnami-mongodb - name: proxy.replicated.com/proxy/swaggerhub/docker.io/bitnami/mongodb newName: proxy.replicated.com/proxy/swaggerhub/smartbear/sonp-bitnami-mongodb # os-shell - name: docker.io/bitnami/os-shell newName: proxy.replicated.com/proxy/swaggerhub/smartbear/sonp-bitnami-os-shell - name: bitnami/os-shell newName: proxy.replicated.com/proxy/swaggerhub/smartbear/sonp-bitnami-os-shell - name: proxy.replicated.com/proxy/swaggerhub/bitnami/os-shell newName: proxy.replicated.com/proxy/swaggerhub/smartbear/sonp-bitnami-os-shell - name: proxy.replicated.com/proxy/swaggerhub/docker.io/bitnami/os-shell newName: proxy.replicated.com/proxy/swaggerhub/smartbear/sonp-bitnami-os-shell # bitnami-shell - name: docker.io/bitnami/bitnami-shell newName: proxy.replicated.com/proxy/swaggerhub/smartbear/sonp-bitnami-bitnami-shell - name: bitnami/bitnami-shell newName: proxy.replicated.com/proxy/swaggerhub/smartbear/sonp-bitnami-bitnami-shell - name: proxy.replicated.com/proxy/swaggerhub/bitnami/bitnami-shell newName: proxy.replicated.com/proxy/swaggerhub/smartbear/sonp-bitnami-bitnami-shell - name: proxy.replicated.com/proxy/swaggerhub/docker.io/bitnami/bitnami-shell newName: proxy.replicated.com/proxy/swaggerhub/smartbear/sonp-bitnami-bitnami-shell
Note
If you have other patches in this file, ensure you don't overwrite them.
Versions 2.10 and earlier only: repeat step 2 for the file
swaggerhub/overlays/downstreams/this-cluster/charts/swaggerhub/kustomization.yaml.Other versions: go to step 4.
Run:
kubectl kots upload --deploy --namespace swaggerhub --slug swaggerhub swaggerhub/
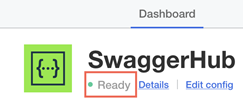
Open the KOTS admin console and verify that the deployment returns to a Ready state:

This may take a while.
Embedded Installations (kURL VM)
Download the patch file from
https://maintenance.sonp.swaggerhub.com/swaggerhub-bitnami-patch-embedded.sh.Copy the file to the SwaggerHub VM.
Use SSH to access the VM.
Run the script, for example:
bash swaggerhub-bitnami-patch-embedded.sh
If run successfully, the last line of the output should be: The patch has successfully been applied. The services will now restart.
Open the KOTS admin console and verify that the deployment returns to a Ready state:

This may take a while.
FAQ
What happens if I run the remediation patch and then create a backup of my current instance?
A backup made after applying the patch will work as expected. Since the patch permanently fixes the configuration of your installed version, creating a full backup allows you to preserve this corrected configuration.
What happens if I run auto-upgrades?
You must apply the remediation patch after every automatic upgrade until your instance reaches version 2.12.1.
What happens if I rehydrate my instance?
For any fresh installation of a version earlier than 2.12.1, you must run the remediation patch immediately after the installation completes.