Airgapped Installation Into Existing OpenShift Cluster
If your OpenShift cluster is not connected to the Internet, you can install SwaggerHub On-Premise in airgapped (offline) mode.
Prerequisites
This guide assumes a OpenShift cluster has been prepared as specified in the Minimum Requirements.
This guide also assumes a private Docker container registry in the network as specified in the Airgapped Installation Requirements.
All commands assume a jumpbox with connectivity to the cluster.
OpenShift CLI must be installed. The kubectl binary included with the OpenShift CLI must also be installed.
Install with namespace-scoped access
By default the installer assumes that your user has the cluster-admin role at the cluster level. Alternatively, you can install with namespace-scoped access if your user only has cluster-admin access on a single project. Be aware that installing without cluster-scoped access limits some functionality:
Without access to cluster-scoped resources, some preflight checks will not be able to run. These tools continue to function, but return less data.
Support bundles will only be able to collect limited information.
The admin console "Snapshots" feature will not work because the admin console can't access the velero namespace.
The
kubectl kots velero ensure-permissionscommand can be used to create additional Roles and RoleBindings to allow the necessary cross-namespace access. For more information, see velero ensure-permissions in the kots CLI documentation.Airgap installs must be done in headless mode by passing the path to the airgap bundle in the CLI command.
This install guide includes the commands needed to install with namespace-scoped access.
Create a project for SwaggerHub in OpenShift
On a computer with the OpenShift CLI and cluster access, log in to your cluster:
oc login -u USERNAME
If you do not already have a project for SwaggerHub in OpenShift, create it. If you do not have permissions to create a project you may need to ask your administrator to complete this step:
oc new-project swaggerhub
Or, if you have created a project previously, switch to it:
oc project PROJECT_NAME
In this guide we will assume that the project name is swaggerhub.
Download installation files
Before you proceed with the airgapped installation, contact Sales or your account manager and ask for a link to download the installation files. You will receive a link and password to access the download portal. The link is customer-specific and looks like this:
https://get.replicated.com/airgap/#/kots/swaggerhub/<UNIQUE-ID>
On a computer with Internet access:
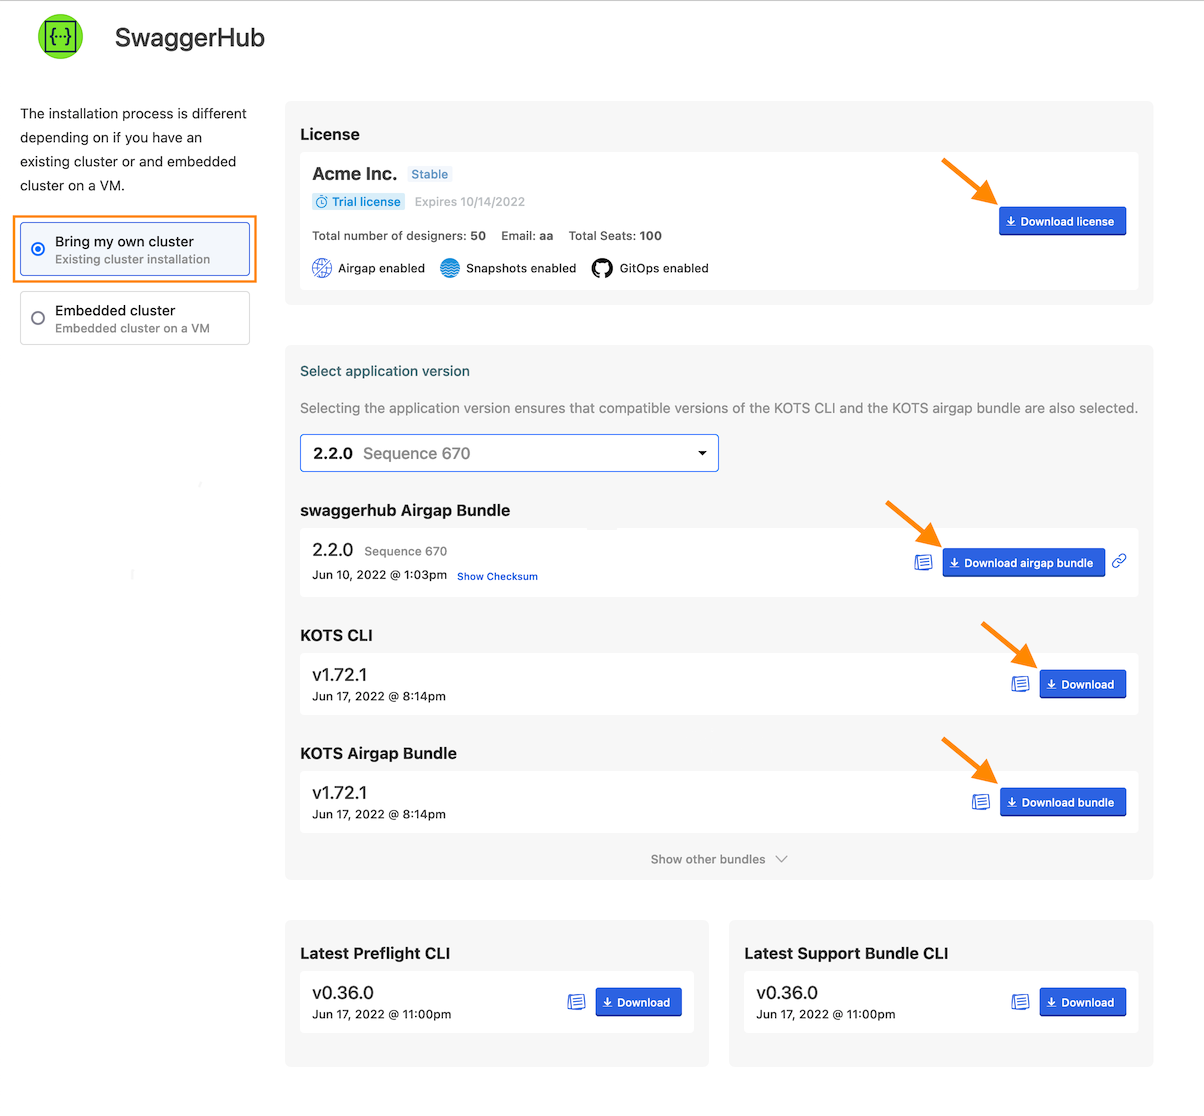
Log in to the download portal using the provided link and password.
Select Bring my own cluster on the left.
Download the following files:
Your license (.yaml)
Latest Kots CLI (
kots_linux_amd64.tar.gz) - if not already installedNote
This version of KOTS CLI is for Linux and WSL. If you are running
kubectlon macOS, you can download the macOS version of KOTS CLI from GitHub:Latest Kots Admin Console Airgap bundle (
kotsadm.tar.gz)Latest SwaggerHub Airgap bundle (
SwaggerHub-<version>.airgap)
The total size of the files is about 3 GB.
 |
Copy these files to a temporary directory on your jumpbox.
Install KOTS to kubectl
Note
Here and in the rest of this guide, the commands are to be run on the jumpbox.
SwaggerHub 2.x uses KOTS to manage the installation, licensing, and updates. KOTS is a plugin for kubectl. SwaggerHub requires KOTS 1.76.1 or later.
First, check if KOTS is already installed:
kubectl kots version
If you see Replicated KOTS 1.x.x and the version is:
1.76.1 or later --> skip to the next section;
1.76.0 or earlier --> updrade KOTS to the latest version.
If you see the “unknown command” error, install KOTS:
Unpack the
kots_<platform>.tar.gzfile. In this example, we unpack it to thekots-clidirectory:mkdir kots-cli tar -zxvf kots_linux_amd64.tar.gz -C kots-cli
Rename the
kotsexecutable tokubectl-kots:cd kots-cli mv kots kubectl-kots
Copy the renamed
kubectl-kotsto anywhere on thePATH, for example, to/usr/local/bin/:sudo mv kubectl-kots /usr/local/bin/
Verify successful installation:
kubectl kots version
Push images
Extract KOTS Admin Console container images and push them into your private Docker container registry:
kubectl kots admin-console push-images ./kotsadm.tar.gz private.registry.host/swaggerhub \
        --registry-username rw-username \
        --registry-password rw-password
Replace private.registry.host with your registry host and port (if used). Examples: myregistry.example.com, 10.100.20.24:5000.
Registry credentials (rw-username and rw-password in the command above) must have push access. These credentials will not be stored anywhere or reused later.
Install Admin Console
The next step is to install the Admin Console using images pushed in the previous step.
Registry credentials provided in this step (rw-username and rw-password in the command below) must have push access.
kotsadm-registry is the registry host in the format host[:port]. Examples: myregistry.example.com, 10.100.20.24:5000.
kotsadm-namespace is the namespace within the registry where SwaggerHub container images will be pushed. For example, swaggerhub.
To install with cluster-scoped access, run this command:
kubectl kots install swaggerhub \
  --namespace swaggerhub \
  --license-file ./license.yaml \
  --airgap-bundle /path/to/application.airgap \
  --kotsadm-namespace swaggerhub \
  --kotsadm-registry private.registry.host \
  --registry-username rw-username \
  --registry-password rw-password
Alternatively, to install with namespace-scoped access, run this command:
kubectl kots install swaggerhub \
  --namespace swaggerhub \
  --license-file ./license.yaml \
  --airgap-bundle /path/to/application.airgap \
  --kotsadm-namespace swaggerhub \
  --kotsadm-registry private.registry.host \
  --registry-username rw-username \
  --registry-password rw-password \
  --use-minimal-rbac \
  --skip-rbac-check
With namespace-scoped installs you may see some error messages like "Failed to get OpenShift server version". This is a known issue and the messages can be safely ignored.
Once this has completed, the KOTS will create a port forward to the Admin Console on port 8800. The Admin Console is exposed internally in the cluster and can only be accessed using a port forward. The port forward will be active as long as the CLI is running. Pressing Ctrl + C will end the port forward.
  • Press Ctrl+C to exit
        • Go to http://localhost:8800 to access the Admin Console
Once this message is displayed, visit http://localhost:8800 to set up SwaggerHub On-Premise using the Admin Console.
Configure SwaggerHub
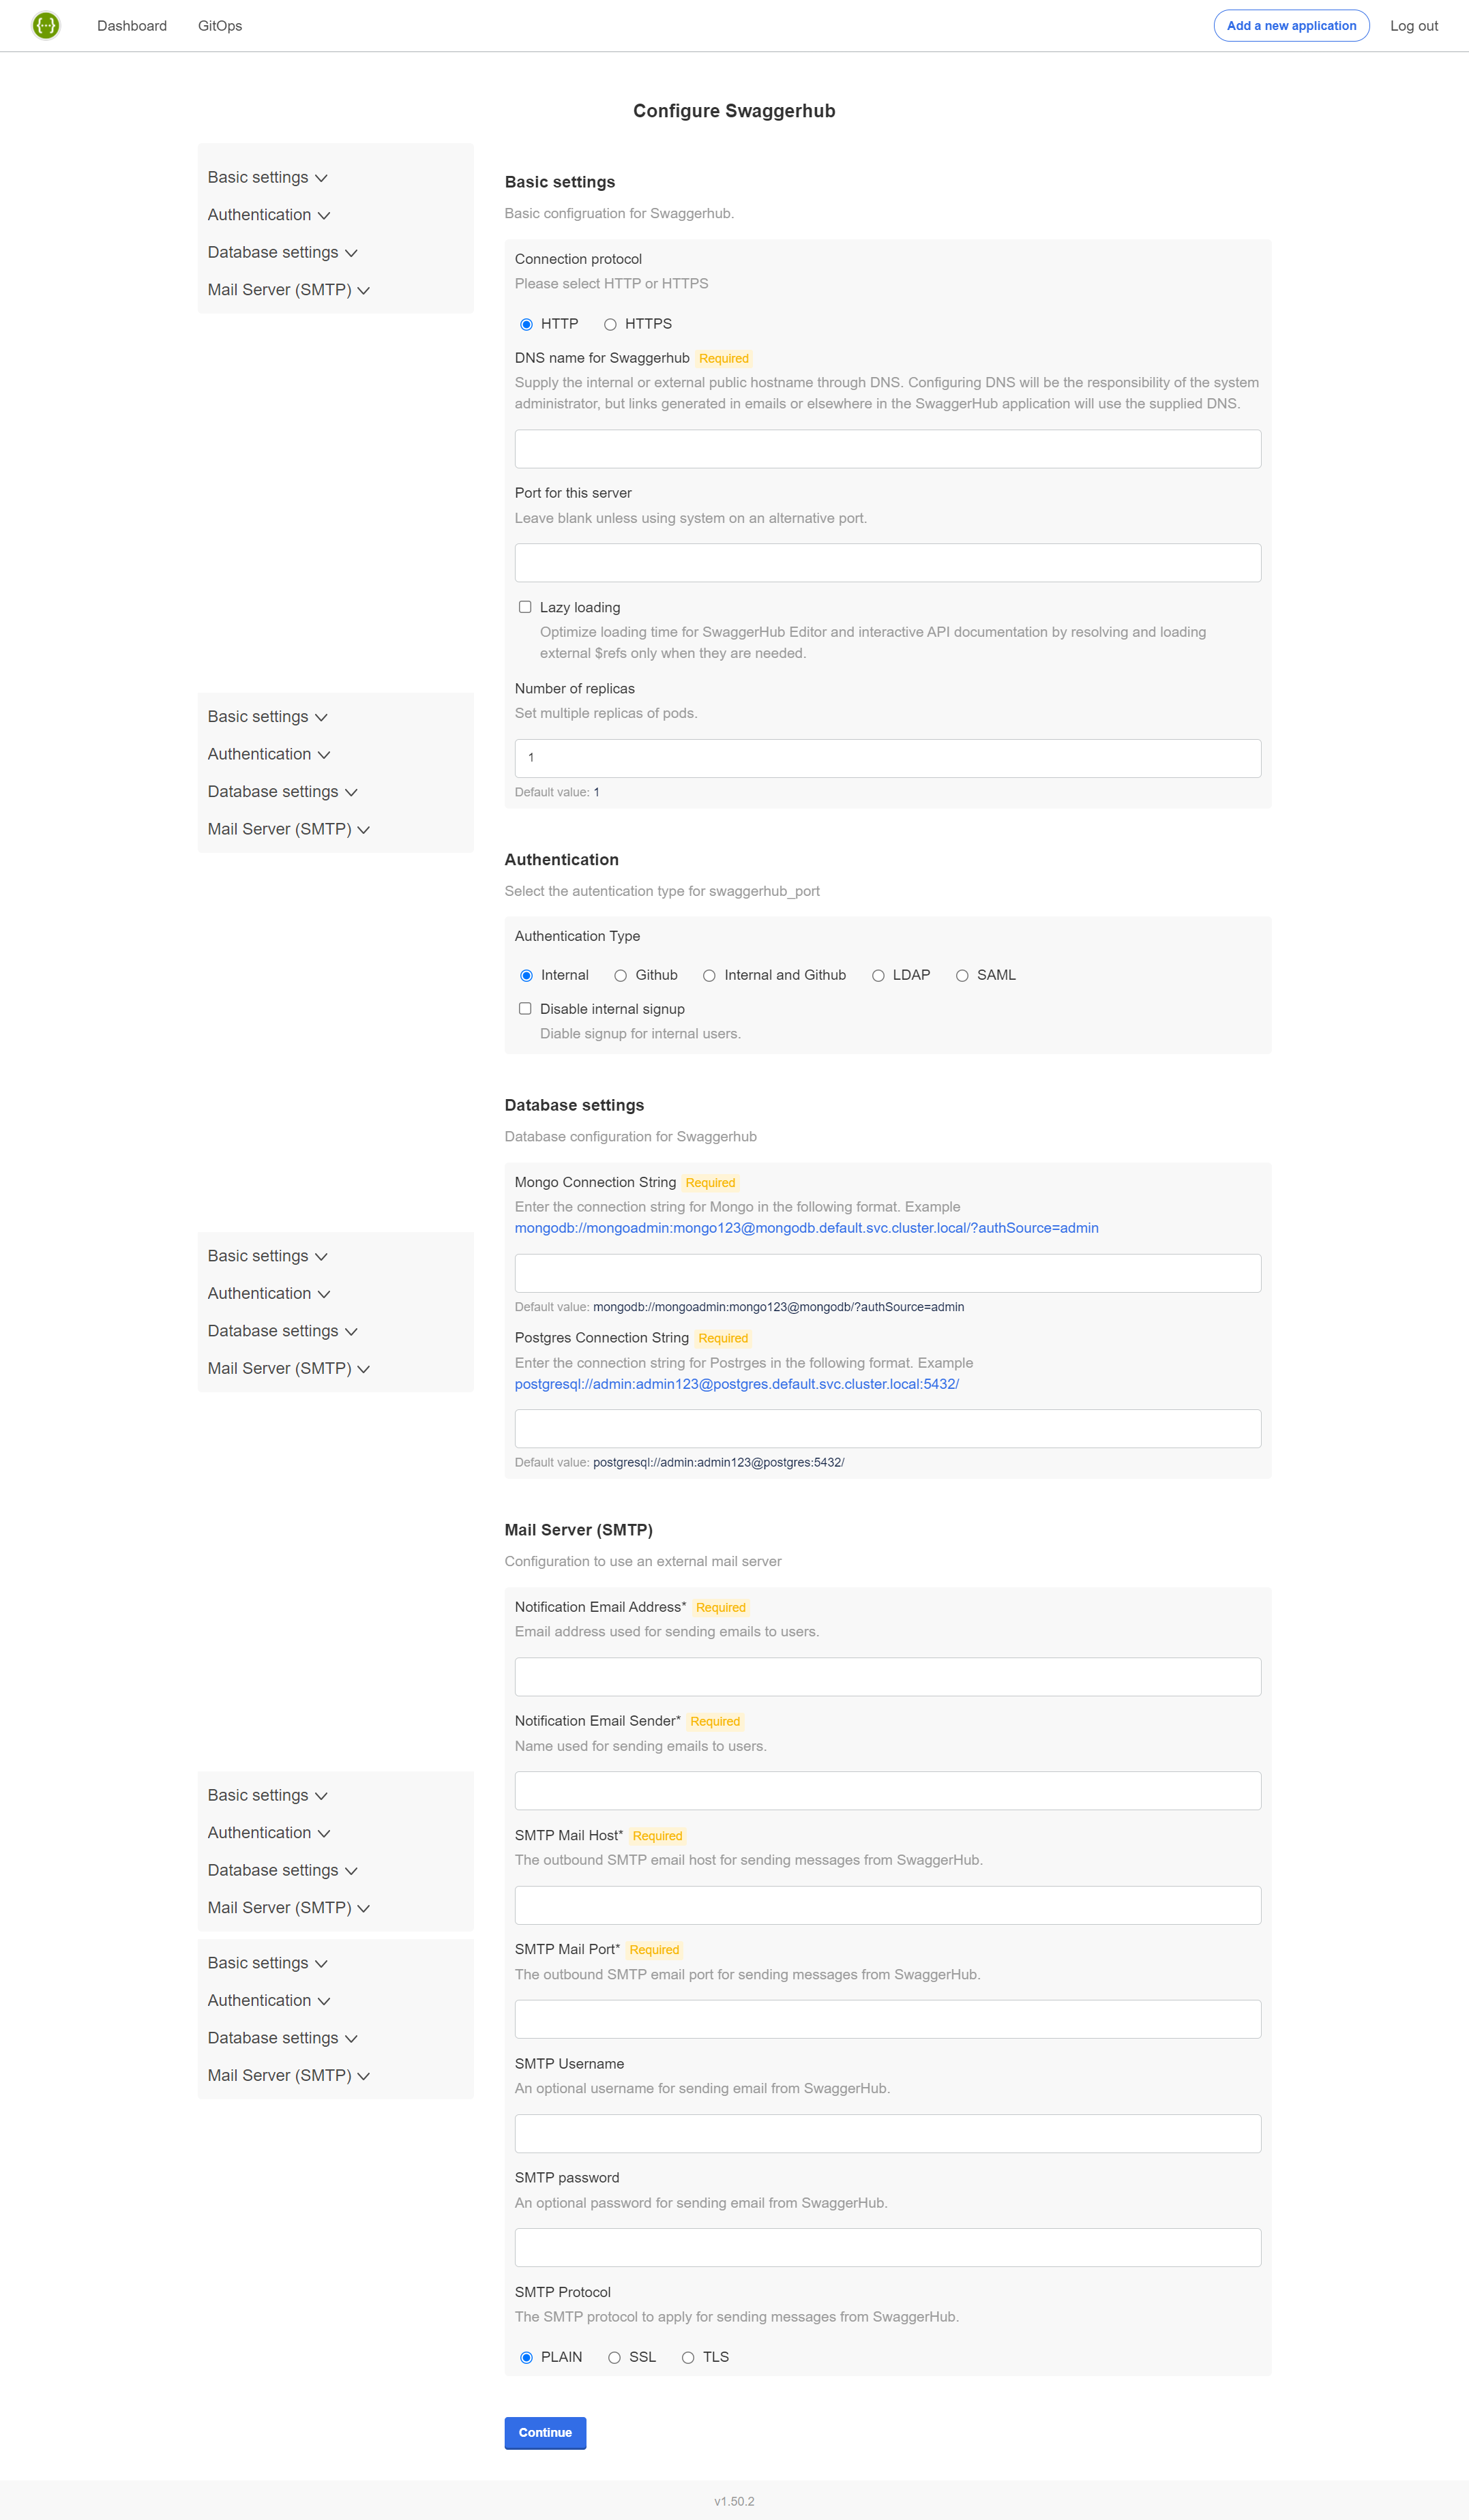
On the next page, you can specify the configuration settings for SwaggerHub. The required settings are:
DNS name for SwaggerHub - Specify a public or internal domain name that will be used to access SwaggerHub on your network. For example, swaggerhub.mycompany.com.
This domain name must already be registered in your DNS service. You will need to point it to the ingress controller.
Database settings - Choose between internal or external databases. If using external databases, you need to specify the database connection strings.
Important
It will not possible to switch from internal to external databases or vice versa after the initial configuration.
SMTP settings - Specify an SMTP server for outgoing email.
Other settings are optional and depend on your environment and the desired integrations. Most settings can also be changed later. See SwaggerHub Configuration for a description of the available settings.
 |
Preflight checks
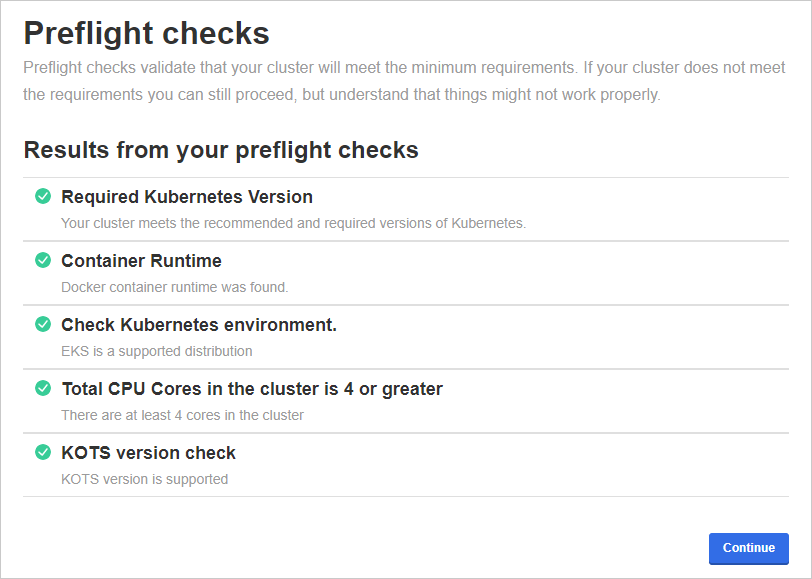
The next step checks your OpenShift cluster to ensure it meets the minimum requirements.
Note
If you are installing in namespace-scoped mode you will not be able to run the preflight checks in the UI. Follow the on-screen instructions to run the checks from the CLI.
If all preflight checks are green, click Continue.
If one or more checks fail, do not proceed with the installation and contact Support.
 |
Status checks
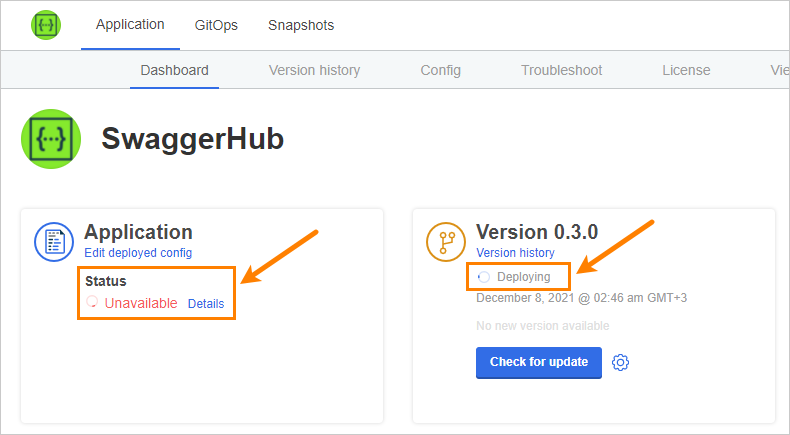
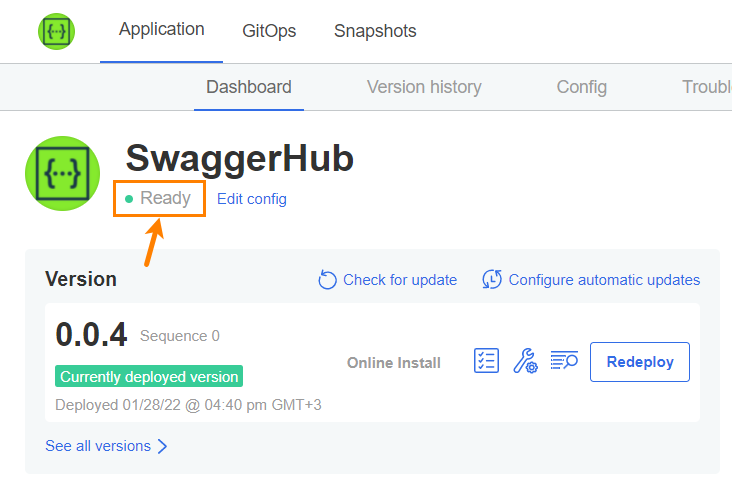
While the installer allocates resources and deploys workloads, the application status on the dashboard will be Unavailable. If it stays in this state for more than 10 minutes, generate a support bundle and send it to the Support team.
 |
Tip: To monitor the deployment progress, you can run
kubectl get pods -n swaggerhub
a few times until all pods are Running or Completed:
NAME                                       READY   STATUS      RESTARTS   AGE
kotsadm-85d89dbc7-lwvq2                    1/1     Running     0          32m
kotsadm-minio-0                            1/1     Running     6          13d
kotsadm-postgres-0                         1/1     Running     5          13d
spec-converter-api-584cc46657-hbfmd        1/1     Running     0          9m55s
swagger-generator-v3-6fc55cb57d-brwg6      1/1     Running     0          9m55s
swaggerhub-accounts-api-8bb87565b-xthkv    1/1     Running     0          9m55s
swaggerhub-api-service-546b56b94b-6jxch    1/1     Running     0          9m55s
swaggerhub-configs-api-794847bd79-jnlhl    1/1     Running     0          9m55s
swaggerhub-custom-rules-5ccfd45599-d5bxc   1/1     Running     0          9m55s
swaggerhub-frontend-69b7c55595-n7vsj       1/1     Running     0          9m55s
swaggerhub-notifications-bbd5f8794-ggz99   1/1     Running     0          9m55s
swaggerhub-operator-758c997747-hnjt7       1/1     Running     0          9m55s
swaggerhub-pre-install-r9c2f               0/1     Completed   0          13d
swaggerhub-pre-upgrade-cg664               0/1     Completed   0          10m
swaggerhub-products-api-6dd446b654-7w7wn   1/1     Running     0          9m55s
swaggerhub-registry-api-886997fd7-8q8c7    1/1     Running     0          9m54s
swaggerhub-virtserver-79fdf54f98-wpmt8     1/1     Running     0          9m54s
Once the application has become ready, the status indicators on the Dashboard become green.
 |
Create admin user and default organization
Run the following command to create an admin user and a default organization in SwaggerHub. Note the space in -- cmd.
Example:
kubectl exec -it deploy/swaggerhub-operator -n swaggerhub -- cmd create-admin-user admin -p p@55w0rd [email protected] myorg
The admin username must be between 3 to 20 characters and can only contain characters
A..Z a..z 0..9 - _ .The admin password must be at least 7 characters long with at least 1 lowercase letter and 1 number. If the password contains characters that have a special meaning in Bash (such as
! $ &and others), enclose the password in single quotes (like-p '$passw0rd') or escape the special characters.
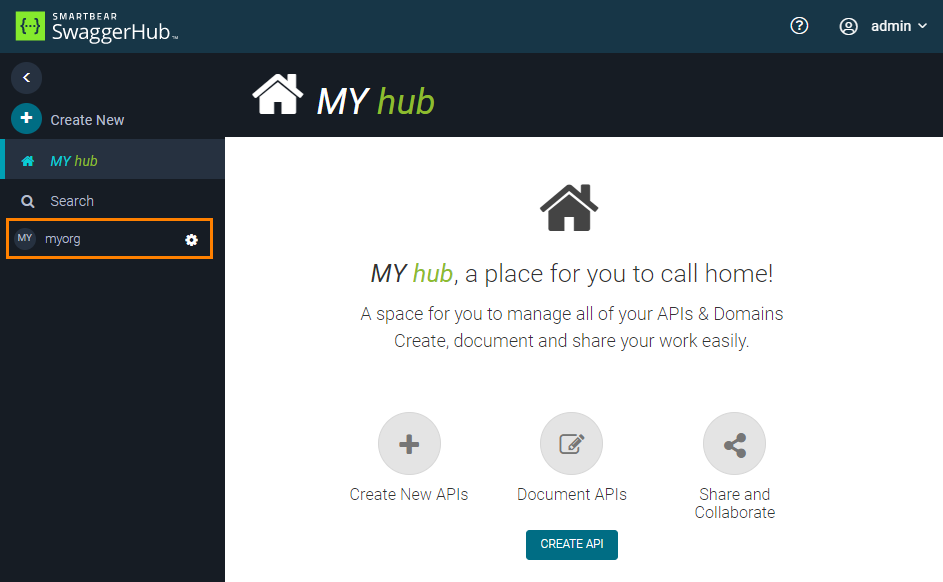
Once done, open the SwaggerHub web application at http://DNS_NAME and log in using the admin username and password. You should see the created organization in the sidebar:
 |
What’s next
Now that SwaggerHub is up and running, you can:
Add users to your organization in SwaggerHub and set their roles – either manually or using the User Management API.
Configure Single Sign-On using SAML, LDAP, or GitHub.
