Upgrade From SwaggerHub On-Premise 1.27-1.29.x to 1.29.2
The upgrade to SwaggerHub On-Premise 1.29.2 from versions 1.27, 1.28, 1.29.0, or 1.29.1 is a direct in-place upgrade that involves running an upgrade script on your instance.
If upgrading from an earlier version, see these guides instead:
Considerations for upgrades from v. 1.27
The upgrade to v. 1.29.2 is only supported for Ubuntu 20-based instances of SwaggerHub On-Premise 1.27. These are instances launched from a fresh 1.27 image – either as a new installation or as part of a previous Ubuntu 20 migration.
To verify the Ubuntu version, you can connect to the instance using SSH and run lsb_release -r.
If it is version 20, you can proceed with the upgrade to 1.29.2.
If it is an earlier Ubuntu version, you must migrate to Ubuntu 20 first before attempting further upgrades. See Ubuntu 20 migration guide for detailed instructions.
Online vs offline upgrade
The upgrade can be performed online or offline depending on where the upgrades are downloaded from.
Online upgrade requires that your SwaggerHub VM be able to connect, either directly or through a proxy, to the following domains over HTTPS (TCP port 443):
auth.docker.io
hub.docker.com
index.docker.io
registry-1.docker.io
Note
These domains do not have fixed IP addresses, you need to use the domain names in your firewall rules.
Offline upgrade does not require outbound Internet connection from your SwaggerHub VM. Instead, you will need to download the upgrade bundle manually and point your SwaggerHub VM to the location of these files on your network. The VM must be able to access this location directly (not through a proxy).
1. Before the upgrade
Create a VM snapshot for backup
Before upgrading, create a snapshot of your SwaggerHub On-Premise instance. If you encounter problems during the upgrade, you can use the snapshot to restore the instance to the previous state.
Note: Make sure no other backup processes will be running during the upgrade timeframe as they would conflict with the upgrade activities.
Take the instance offline
Another important thing is to take your SwaggerHub On-Premise instance offline so that it is inaccessible to users. This ensures that no unexpected traffic (such as user activities or external API calls) will hit the instance during the upgrade.
2. Upgrade procedure
If performing an offline upgrade:
Download the image bundle for the offline upgrade:
 https://s3.amazonaws.com/onprem-files/swaggerhub-offline-images.zip
Unzip the bundle. You will get multiple smaller ZIP files named like this:
activemq-<ver>.zip
installation-service-<ver>.zip
notifications-server-<ver>.zip
smartbear-licensing-api-<ver>.zip
...
Leave these smaller ZIP files as is, do not unzip them.
Put these ZIP files on a web server that is accessible from your SwaggerHub VM. All the files must be in the same folder on the web server. The URL path can be HTTP or HTTPS and should not require authentication.
Important
FTP and network shares (\\server\share) are not supported.
Select Settings on the left.
In the Software update URL field, specify the URL path to the folder that contains SwaggerHub upgrades. Use the following format:
http(s)://server(:port)/path/to/files/
Important
Your SwaggerHub VM must have access to the specified URL.
Click Save Changes and Restart.
Download the upgrade script:
 https://s3.amazonaws.com/onprem-files/upgrade-swaggerhub.enc
Open the Admin Center (if not already open).
Select System Upgrade on the left.
Click Browse and upload the upgrade script (.enc file).
Confirm you have backed up SwaggerHub and click Backed Up and Ready.

Click Upgrade.

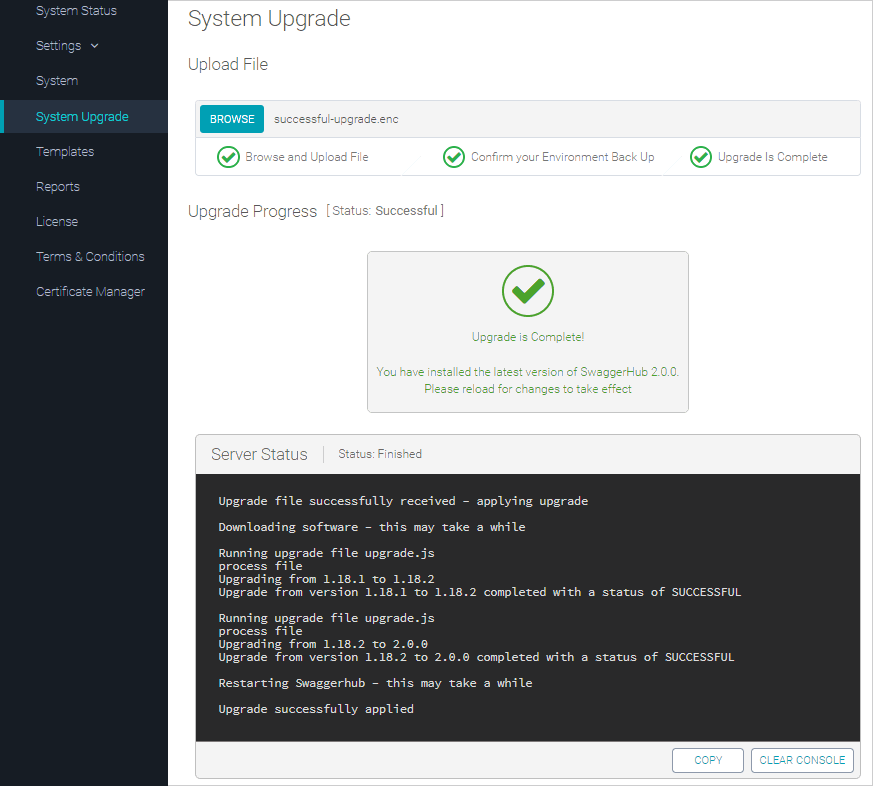
Wait until the upgrade is finished. If everything is OK, you will see a success message:

If the upgrade fails
If any of the upgrade steps fail, you can restore your SwaggerHub instance from the latest snapshot. Follow these steps:
Copy the upgrade script output or take a screenshot.
Download the system logs from the System page of the Admin Center (use the Download logs button).
Open a support ticket, attach the logs and provide other relevant information.
Restore the system from the VM snapshot taken before the upgrade. To learn how to do that, please refer to the hypervisor documentation:
AWS:
Azure:
VMware:
VirtualBox:
The Support team will look into the logs to learn why the upgrade failed. Meanwhile, you can continue using SwaggerHub. You will be able to upgrade later when the Support team provides you with further instructions.