Bitbucket Server Sync
This guide is for self-hosted Bitbucket Servers (formerly Stash). If you use Bitbucket.org, see Bitbucket Cloud Sync.
Bitbucket Server Sync integration allows you to synchronize your API definition, auto-generated server code, or client SDK with the specified Git repository on your Bitbucket Server. The synchronization is made every time you save the API in SwaggerHub. You can fully control which files will be added, updated or ignored in the target repository.
Supported API versions
Bitbucket Server integration supports OpenAPI 2.0, OpenAPI 3.0. and AsyncAPI 2.x. If you use SwaggerHub On-Premise, note that syncing OpenAPI 3.0 definitions requires v. 1.19.1 or later.
Requirements
SwaggerHub SaaS
Your Bitbucket Server must be accessible from the public Internet and allow connections from our IP addresses. If this is not possible, use SwaggerHub On-Premise which you can deploy in your own network.
If your Bitbucket Server uses an SSL certificate, it must be issued by a publicly-trusted certificate authority (CA), such as VeriSign, DigiCert, or others. See Request a CA certificate in Atlassian documentation.
Self-signed certificates and private CAs are not supported in SwaggerHub SaaS, but are supported in SwaggerHub On-Premise.
SwaggerHub On-Premise
Your Bitbucket Server must be accessible from the SwaggerHub On-Premise server, either directly or via proxy.
Before using the integration, specify target Bitbucket Server in the Admin Center. See Configuring Bitbucket Server Integration.
Note
SwaggerHub On-Premise v. 1.21.0 and later can integrate with multiple Bitbucket Servers. The one specified in the Admin Center is used as the default server for newly added integrations. Users can override the target server in the integration parameters.
If your Bitbucket Server uses a self-signed SSL certificate or a certificate issued by a private CA, you need to add it to the trusted certificates on your SwaggerHub On-Premise instance. See Trust self-signed SSL certificates.
Miscellaneous
To configure the integration, you must be the API owner or a collaborator with Edit permissions.
The integration is bound to a specific version of the API and is not automatically copied to new versions. When you add a new version, you need to configure the integration for the new version manually.
Prepare the repository
The target Git repository must not be empty. If it is empty, add at least one file to it, for example, a README or .gitignore file.
Note for SwaggerHub On-Premise users: To push to project-owned repositories, you need v. 1.20.0 or later.
Generate a personal access token
This information applies to Bitbucket Server 5.5 and later.
The integration requires a personal access token to connect to your Bitbucket Server. To create the token:
Log in to Bitbucket Server as the user that will be used to authorize the integration. This user must have push access to the target repository. It can be your personal account or a service account created specifically for integration purposes.
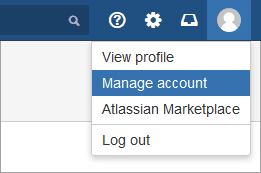
Click the profile photo and select Manage account.
On the left, select Personal access tokens.
Click Create a token.

Click the image to enlarge it.
Enter SwaggerHub as the token name and select the following permissions:
Projects: Read
Repositories: Write
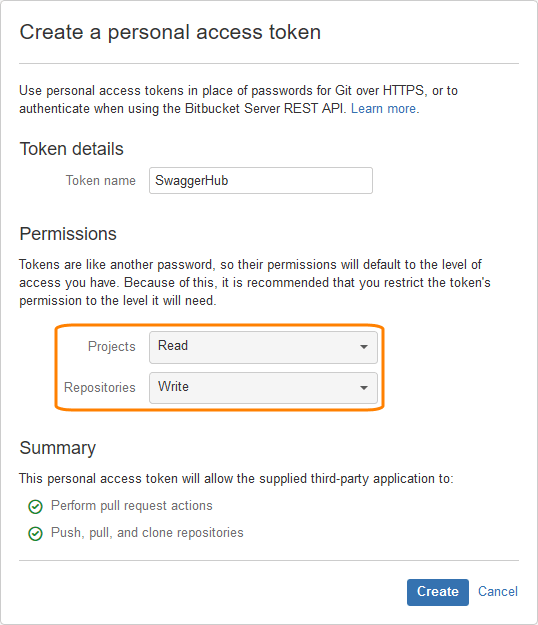
Click Create.
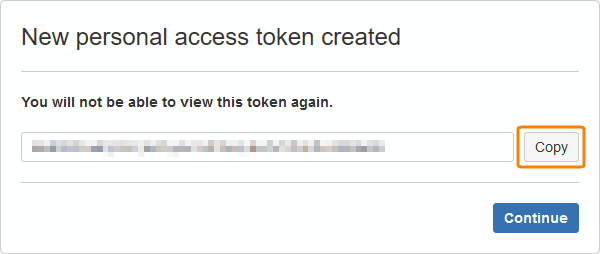
Copy the generated token. This is the only time you can see it.
Note
If you ever need to revoke this access token and generate a new one, be sure to update the token in the integration settings before you revoke the old token. Otherwise, you will not be able to open the integration settings and will have to delete and re-create the integration.
Configure the integration
Open the API in the SwaggerHub editor.
If the API has several versions, select the version whose code you want to store in Bitbucket:

Click the API name to open the API Info panel.
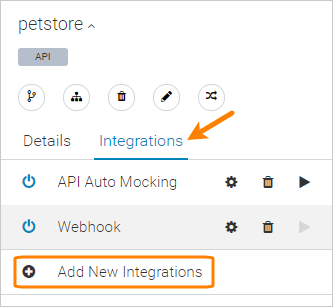
In the info panel, switch to the Integrations tab, and click Add New Integrations:
Select the Bitbucket Server Sync integration (or Bitbucket Sync if you use SwaggerHub On-Premise).
Specify the integration parameters:
Name – Required. A display name for the integration.
Bitbucket Host – The URL of your self-hosted Bitbucket Server, for example:
https://bitbucket.mycompany.com
http://203.0.113.42:7990
Make sure to include https:// or http:// at the beginning.
SwaggerHub On-Premise note: The default Bitbucket Server for new integrations is specified by the Bitbucket API URL option in the Admin Center. Since v. 1.21.0, users can override the target server in the integration parameters.
Username –The Bitbucket username that will be used to update the target repository.
Password – The personal access token that you generated earlier. If you use Bitbucket Server 5.4 or earlier, enter the password for the Username account.
Click Next to continue.
Repository Owner – Select the owner of the Bitbucket repository you want to push the code to.
SwaggerHub On-Premise note: To push to project-owned repositories, you need v. 1.20.0 or later.
Repository – Select the repository to push the code to. This repository must not be empty. It must contain at least one commit, for example, a README or .gitignore file.
Sync Method – Select the synchronization type:
Sync method
Description
Basic Sync
SwaggerHub will manage all files in the specified branch and folder: new files will be added, existing files will be overwritten, and unused files will be deleted.
Note: In SwaggerHub On-Premise versions up to 1.23.1, Basic Sync always pushes to the branch named SWAGGERHUB. To use a different branch, select Advanced Sync or upgrade your SwaggerHub On-Premise instance to the latest version.
Advanced Sync
Similar to Basic Sync, but you can specify which files will be overwritten or ignored. Use this method if the output folder contains existing files that you want to keep.
Branch – Required. The name of the branch in the repository where your API code will be stored.
Generated API Code – Required. Select what you want to generate: server code, client SDK, API documentation, or the OpenAPI definition itself as YAML or JSON. See here for a list of supported languages and frameworks.
Tip
To customize code generation options, such as package names, use the Export > Codegen Options menu in the SwaggerHub editor. See Code Generation Options for details.
Output Folder – The output folder for the generated code, relative to the repository root. For example, server or sdk/android. If this folder does not exist, it will be created. If the output folder is not specified, SwaggerHub will create files and folders in the repository root.
Important
Use forward slashes (
/) as path separators:folder/subfolder1/subfolder2 – Correct
folder\subfolder1\subfolder2 – Incorrect
Output file – Only used if Generated API Code is JSON or YAML, that is, the OpenAPI definition itself. Specifies the name of the .json or .yaml file to create, for example, swagger.yaml or petstore.json. This file will be created in the Output Folder.
Paths – Available only if you selected Advanced Sync. Use these options to control which files and folders will be created, updated, deleted, or ignored during synchronization. All the paths are relative to the Output Folder. You need to specify either Partially Managed Paths or Fully Managed Paths.
Partially Managed Paths – These files and folders will be created if they do not exist, but the existing files and folders will not be modified. The wildcard
*indicates all files and folders in the Output Folder.Fully Managed Paths – These files and folders will be completely managed by the integration: new files will be added, the existing files will be overwritten, and the files that are no longer used will be deleted. You can use
*as a wildcard for all files.Ignored Paths – These files and folders will remain as is and will not be changed in any way.
Important
Use forward slashes (
/) as path separators, for example, sdk/android/README.md.Enable – Keep this check box selected for the integration to work. Unselect it to disable the integration temporarily.
Click Create, then Done.
Push to Bitbucket Server
When you are ready to push your changes, click Sync on the editor toolbar, enter a commit message and click Push. SwaggerHub will generate the specified target (server code, client code, API documentation or an OpenAPI JSON or YAML file) and push it to the configured repository and branch.
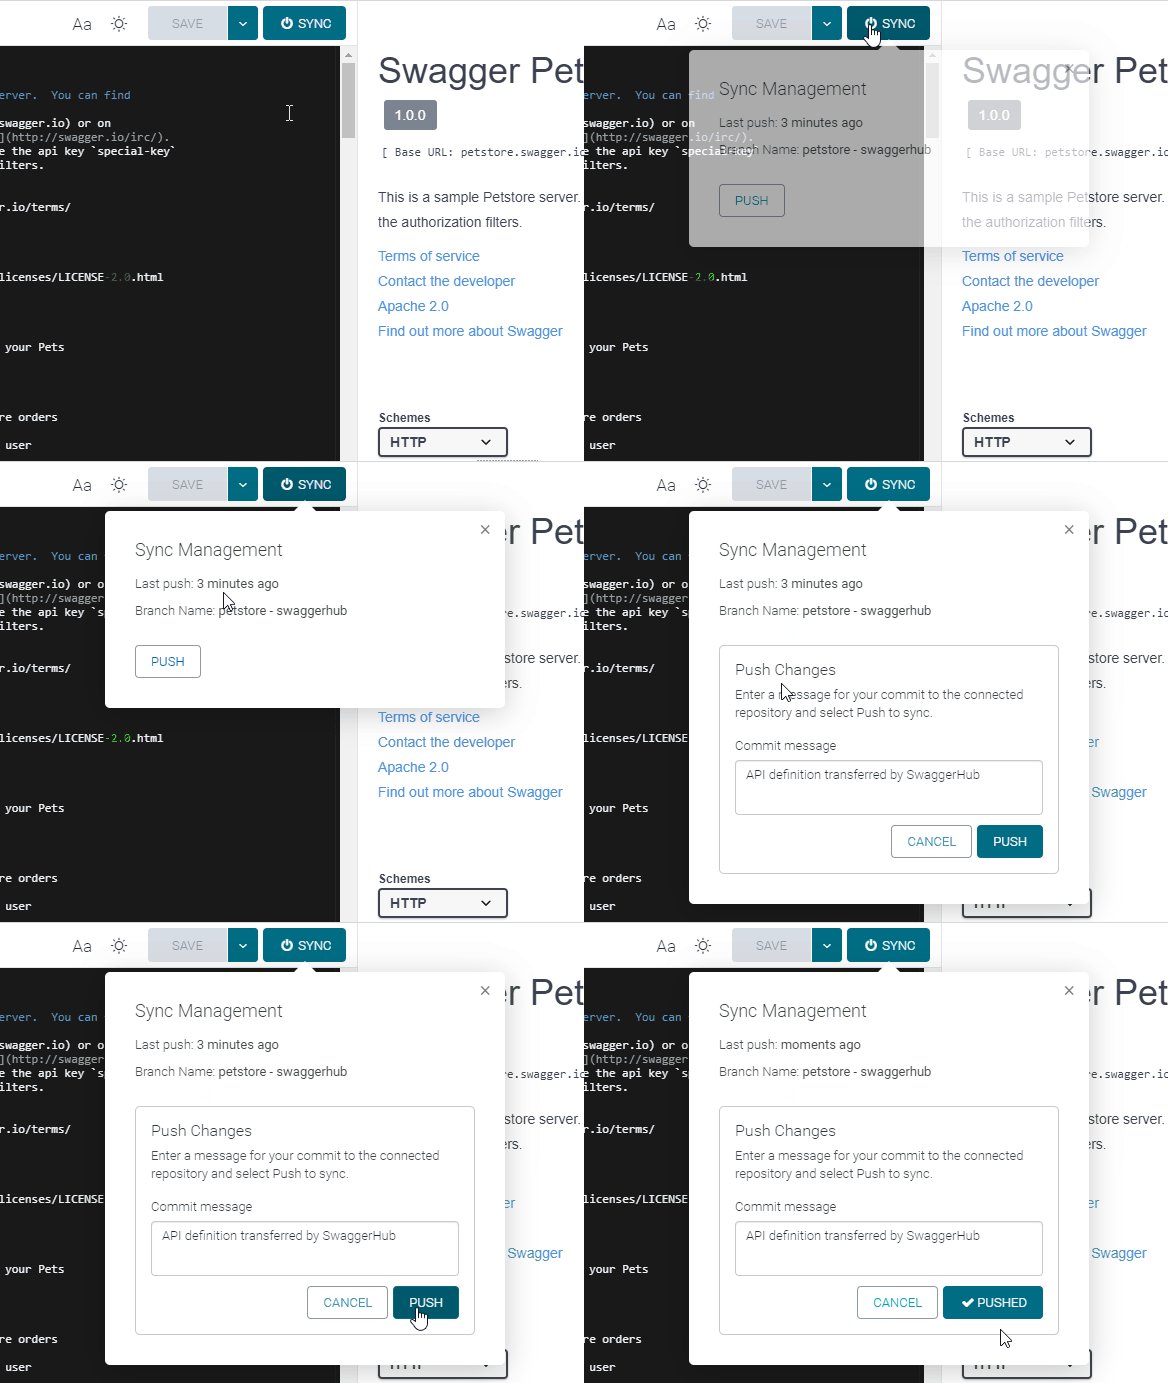
Commits are made on behalf of the user associated with the access token. If synchronization fails (for example, due to a permission problem), you will see an integration error at the top of the SwaggerHub Editor.
Tip: How to generate multiple targets
You can add multiple instances of the integration for different targets. For example, one for the Node.js server and another for the Android client SDK. You can push all the targets to the same repository, but be sure to use different Output Folders to avoid conflicts.
Disable the integration
If you no longer want to sync with Bitbucket Server, you can disable or delete the integration. The existing files will remain in your Bitbucket Server repository, but SwaggerHub will not update them anymore.
Troubleshooting
Integration fails with an error, or the files are not updated in the repository
Make sure the target repository is not empty. If this is a new repository, commit something to it, for example, a README file.
Cannot open the integration settings ("Failed to connect to Bitbucket. Please verify your token or username/password.")
This can happen if the Bitbucket personal access token used by the integration was revoked. To resolve the issue:
Generate a new personal access token in Bitbucket Server.
Delete the existing integration in SwaggerHub.
Add and configure the integration again.