How to: Single Sign-On With Okta
This information applies to SwaggerHub On-Premise 1.x. For SwaggerHub SaaS, click here.
Okta is a SAML identity provider (IdP) that can be used to authenticate with SwaggerHub On-Premise. Integrating SwaggerHub with Okta includes the following steps:
Adding SwaggerHub as an application in Okta.
Assigning the SwaggerHub application to Okta users and groups.
Specifying Okta details in the SwaggerHub configuration.
Prerequisites
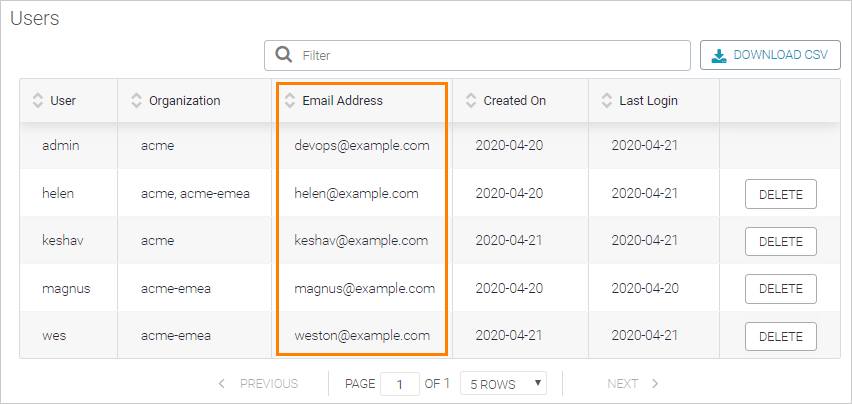
Before enabling Okta SSO, review the user list on the License page of the Admin Center and make sure the email addresses of all the existing users (including you, the admin) are the same as in your identity provider.
Users with non-matching email addresses will have to update the email address in their SwaggerHub settings. Otherwise, SSO logins will not be linked to those existing users, and SwaggerHub will create new users.
 |
Add SwaggerHub as an application to Okta
Log in to Okta as an admin.
If you are on the developer dashboard (as indicated by the < > Developer Console label in the top left corner), switch to Classic UI.

Click Applications and then Add Application.

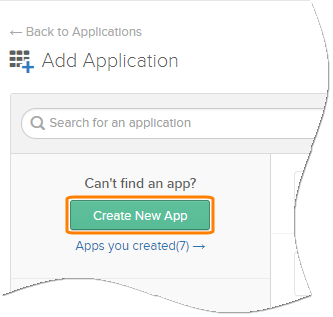
Click Create New App.
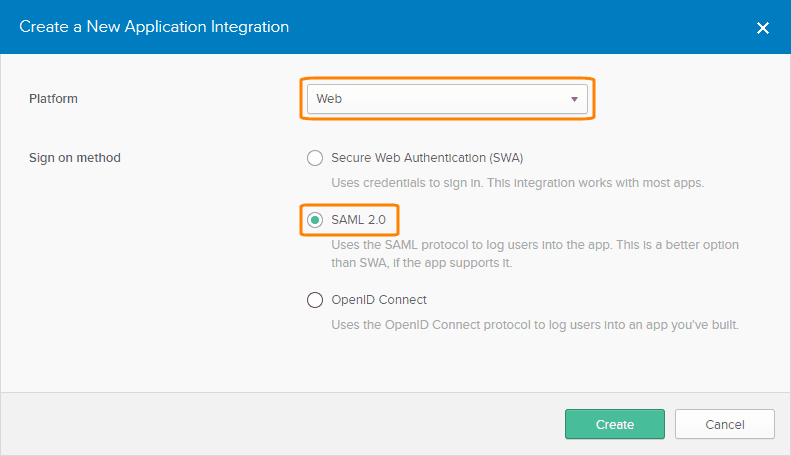
Select Web as the platform, SAML 2.0 as the sign-in method and click Create.
Enter SwaggerHub as the App name and click Next.
Specify the following settings:
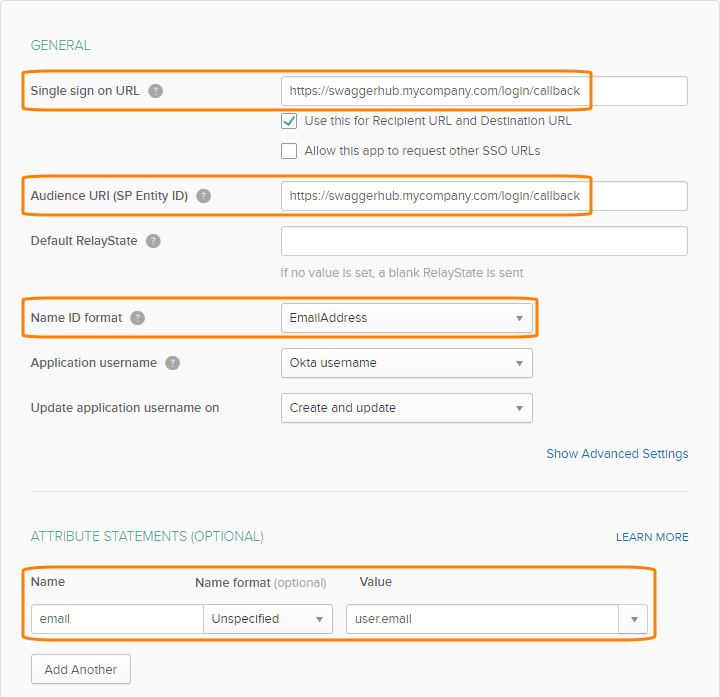
Single sign on URL –
http(s)://{SWAGGERHUB}/login/callbackAudience URI (SP Entity ID) –
http(s)://{SWAGGERHUB}/login/callbackReplace
{SWAGGERHUB}with the domain name or IP address of your SwaggerHub instance. Usehttps://if SSL access is enabled, otherwise, usehttp://.Name ID format –
EmailAddressAttribute statements:
Name
Name format
Value
email
Unspecified
user.email
Leave everything else by default and click Next.
On the feedback page, select I’m an Okta customer adding an internal app, and click Finish.
Switch to the Sign On tab and click View Setup Instructions.
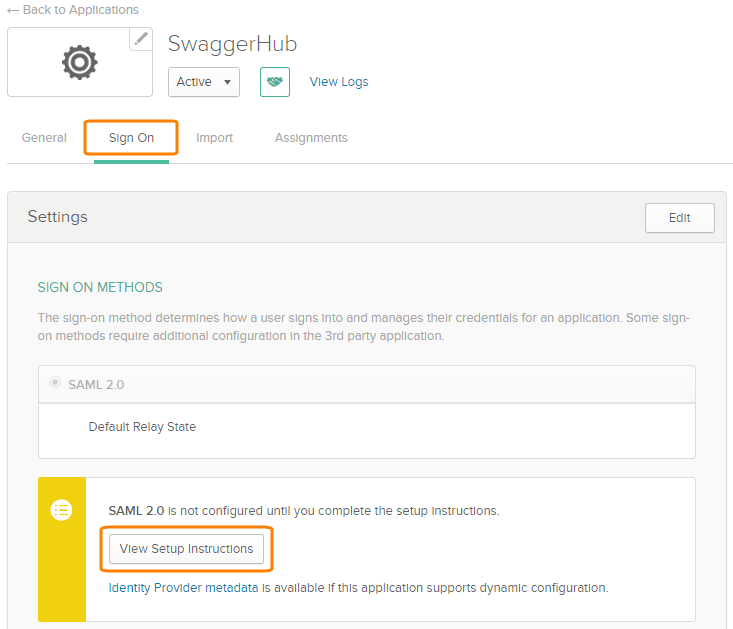
This will open a new browser tab containing SAML metadata that you will later have to specify in SwaggerHub to complete the integration. Keep this tab open for now.
Assign SwaggerHub to Okta users
Next, configure which Okta authenticated users will have access to SwaggerHub:
In Okta, go to Applications and click Assign Applications.

On the left, select the SwaggerHub application, and on the right select the users that need access to SwaggerHub.
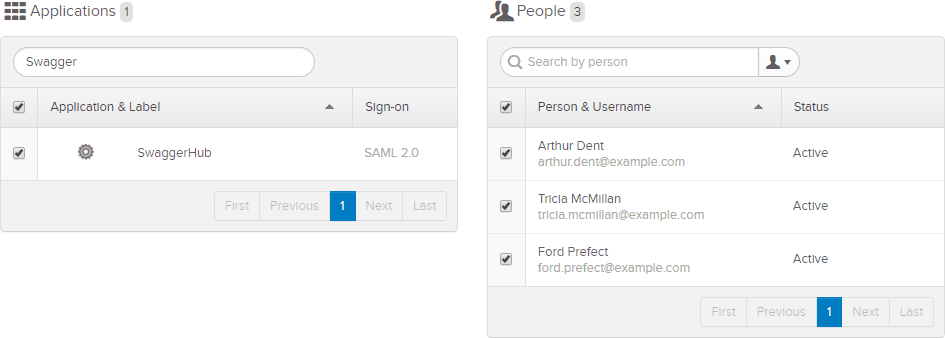
Click Next and confirm the assignments.
Configure SwaggerHub
Open the Admin Center.
Select Settings on the left.
Under Integrations & Authentication, specify the following:
Authentication Type – change to SAML.
SAML Identity Provider EntityID (Issuer) – paste Okta’s Identity Provider Issuer value.
SAML Identity Provider SSO URL – paste Okta’s Identity Provider Single Sign-On URL.
SAML Identity Provider Certificate – paste Okta’s X.509 Certificate here, including the
-----BEGIN CERTIFICATE-----and-----END CERTIFICATE-----lines.
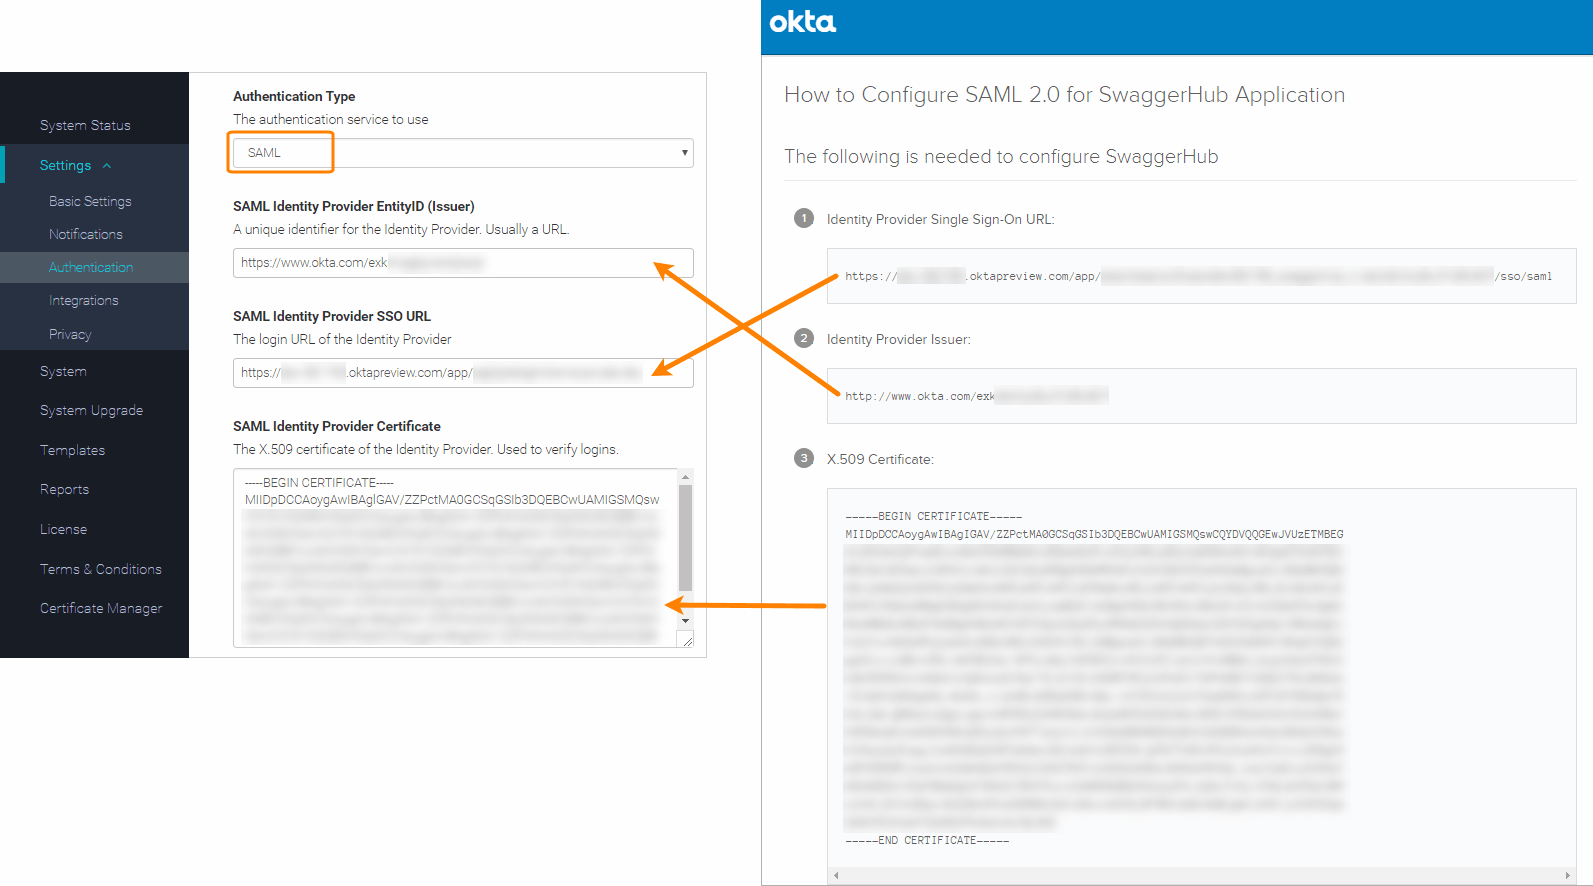
Click Save Changes and Restart.
In v. 1.19.1 or earlier, click Save Changes, then switch to the System page and click Restart SwaggerHub.
Wait a few minutes for the system to restart completely.
Migrate existing SwaggerHub users to single sign-on
This information applies to SwaggerHub On-Premise versions prior to 1.20.1.
In earlier SwaggerHub On-Premise versions, the existing internal users (such as the admin user) need to be enabled for SSO before they can log in via Okta. To learn how to do this, see Migrating Existing Users to Single Sign-On.
Test single sign-on
To test SSO initiated from SwaggerHub:
Log out from SwaggerHub and from Okta.
(Recommended) Open a new browser tab in incognito mode.
Open the SwaggerHub home page and click Log In.
You will be redirected to Okta.
Log in to Okta using your Okta credentials.
You will be redirected to SwaggerHub and will be logged in.
To test SSO initiated from Okta:
Log out from SwaggerHub
In Okta, navigate to My Applications.
Click SwaggerHub in the application list.
You will be redirected to SwaggerHub and will be logged in automatically.
Troubleshooting
If you experience errors when logging in to SwaggerHub via Okta, see the Troubleshooting page for tips to resolve common issues.