Parametrization and Data Set
Data parameterization involves using different sets of data inputs to run the same test case across various scenarios. This technique helps increase test coverage and efficiency and ensures the software behaves as expected under multiple data conditions without creating duplicate test cases. The parameter is only for the Rich Text, where the user has to enable the rich text.
For parameterized, you will,
Identify common test scenarios.
Set up parameters for changing inputs.
Create data sets with different values.
Link parameters to data sets for automatic substitution.
Execute test cases across data sets and analyze results.
Important
The data parameterization feature is currently an Alpha release introduced in 8.2. This feature helps users understand the introduction to parametrization. This technique has been introduced so that users can understand the basics of parametrization.
Perform the following steps to set up parameters:

Log in to Zephyr Enterprise using your Zephyr Enterprise administrative user credentials.
Click Administration.
From the left pane, select System Setup. See System Setup .
Under System Setup, click the Customizations option. See Customizations.
In the Customizations screen, under Advanced, select the Miscellaneous tab.
The Miscelleaneous dialog box appears, select the Parameterization checkbox and click Save.
The Parameters tab gets added and appears under Test Cases.
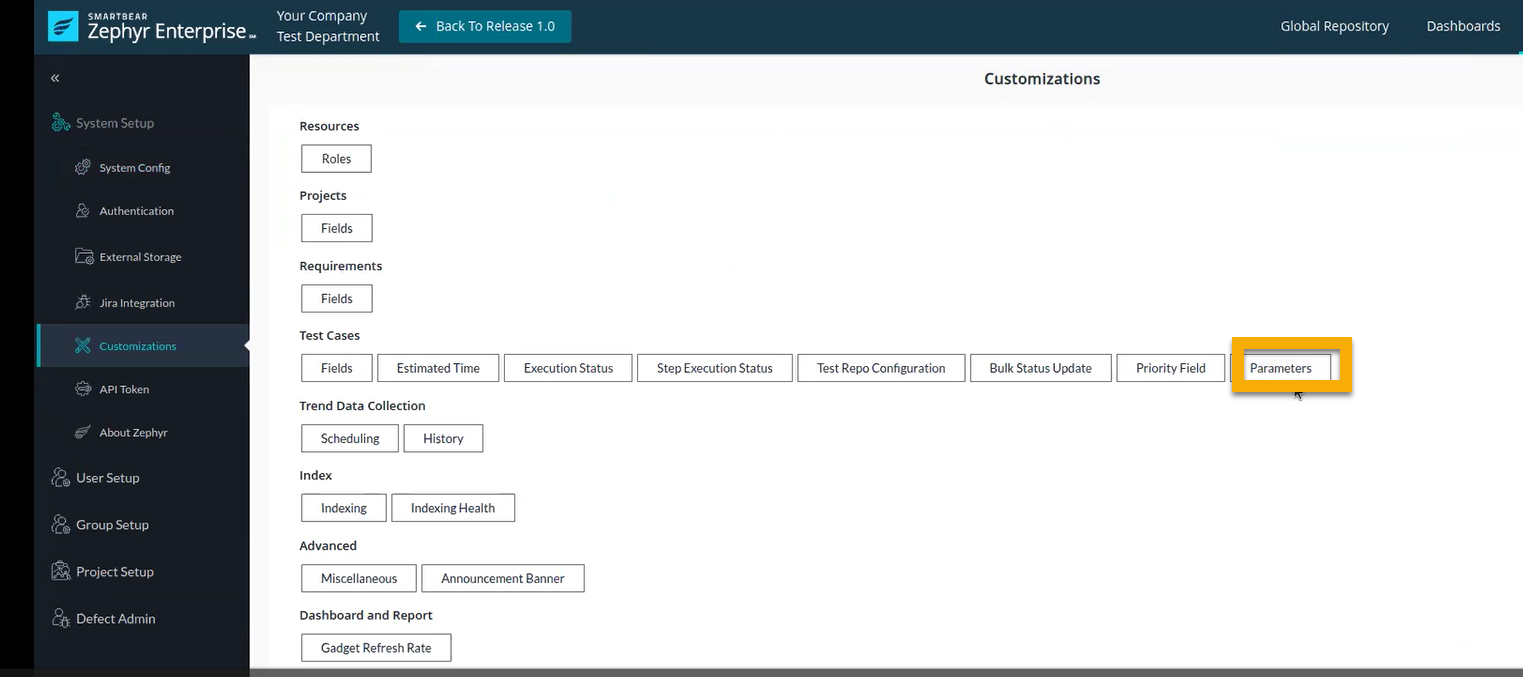
In the Customizations screen, under Test Cases, select the Parameters tab.
The Parameters tab is where you define and manage the parameters for data-driven testing to streamline your testing process.
Creating and Managing Parameters. Perform the following steps to create and manage parameters:
On the Parameters dialog box, click the add (+) button at the top right corner of the Parameters list.
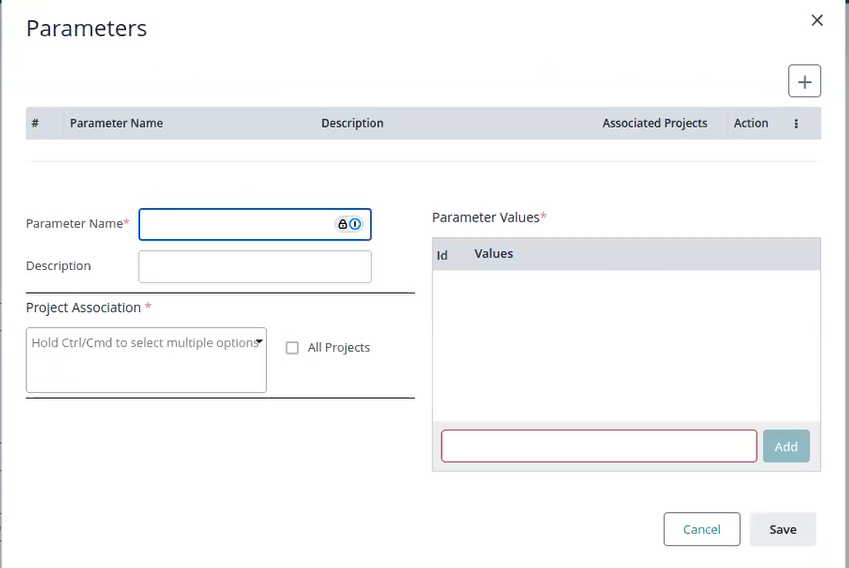
The parameter window appears to create a new parameter.

Define the parameters by entering the following details:
Enter a unique name for the parameter in the Parameter Name box.
Add a description of the purpose or usage of this parameter in the Description box.
Select the projects from the Project Association that are still available. If the change applies to all projects, select the All Project check box.
In the Parameter Values section, enter a parameter value to add as a parameter.
Once you have entered the desired value, click Add.
The value will appear in the list above under the Values column, along with an automatically assigned ID. You can click the delete icon next to the value to delete a value or the editicon to edit the value.
Click Save to save the parameter values.
(Optional) Click Cancel to close the window and exit without adding any values.
Adding Test Data. You can add test data to a test case by creating a new test case using the parameters developed in the preceding steps. Perform the following steps to add parameters to a new test case:
You can manually navigate to enter data during test execution in the Repository. You can select an existing test case or create a new one. See Adding a Test Case and Editing a Test Case.
Click Add to create a new test case and enter the required details, such as the test case name, description, and test steps.
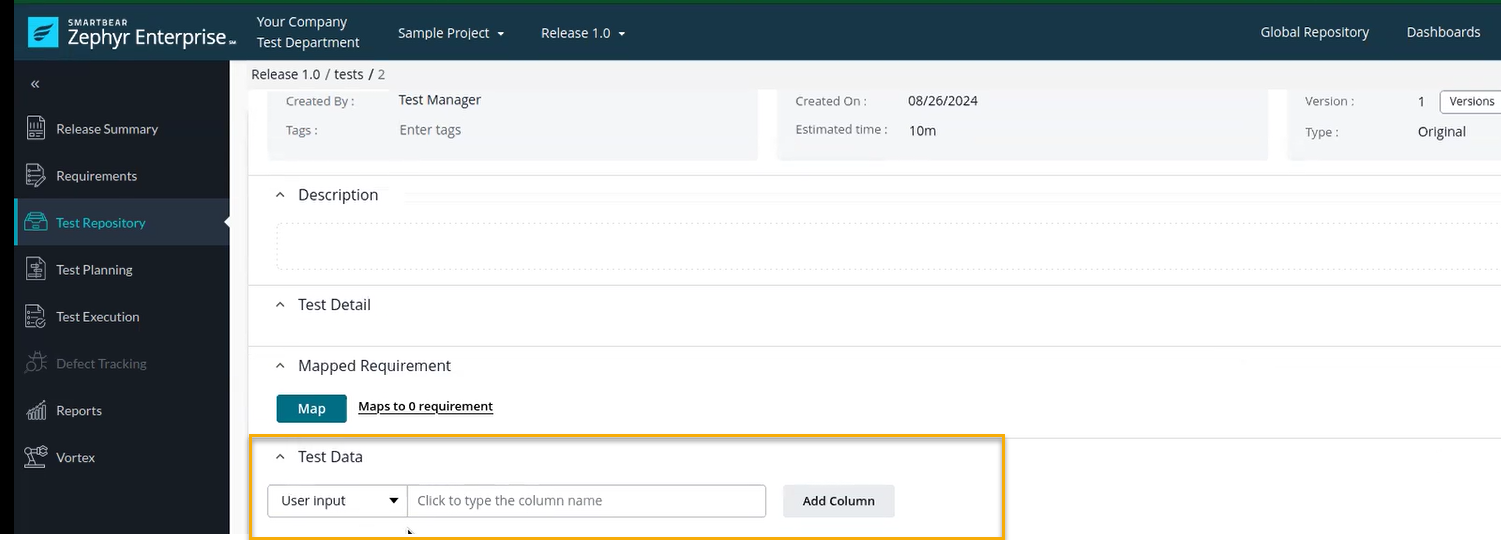
Navigate to Test Data.

In the User Input drop-down list, you can select the following two options:
User input - Select this to manually create a column to enter data during the test case creation.
Parameter - Select this if you want to use a predefined parameter set up in the Administration section.
Enter a column name after selecting either the User input or Parameter option.
Click Add Column to add the column name.
The new column will appear in the Test Data section, ready to accept data or parameter values.
If you select User input, you can manually add the value during the test case creation.
If you select Parameter, the column will automatically use the values associated with that parameter during the test case creation.
Save the test case after adding the necessary columns and configuring your test data. This ensures the configuration is stored and ready for test execution.
Creating a Test Step Using Parameters and User Inputs. Perform the following steps:
Navigate to Test Steps. See Add Steps to Tests.
In the Test Steps box, write the action or condition you want to test. You can add the parameters and user inputs that you have defined earlier, also called the parameter or Tedefined earlier, also called the parameter or test data.
In the Test Data column, specify any additional data relevant to the test step.
In the Expected Results column, define the expected outcome of the test when the step is executed.
Save the Test Case. Save the test case once you have defined the test step with the relevant parameters and user inputs.
You can view the results once you execute the test.
Test Execution
Perform the following steps for executing the test case:
Navigate to Text Execution .

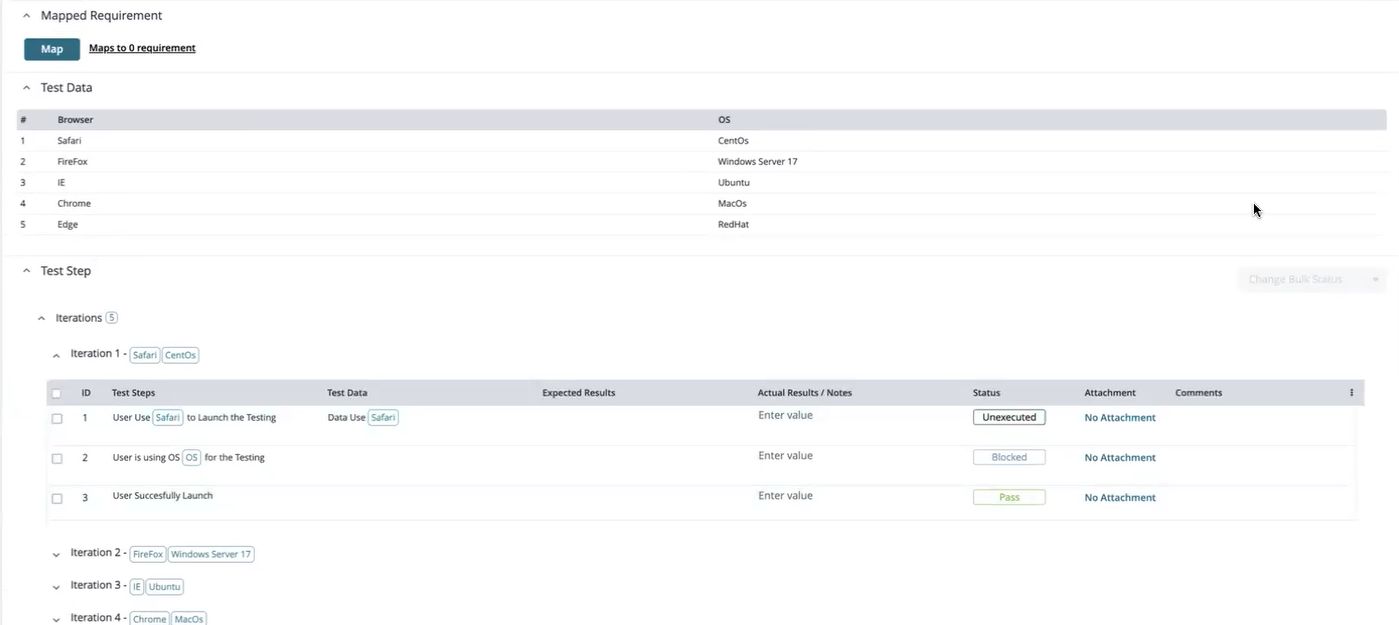
In the Test Execution screen, expand Test Data.
This section lists the parameters and the requirements that need to be tested.
In the Test Execution screen, expand Test Step.
Here, you can view the number of rows defined in Test Data, determining the number of iterations.
Click and expand the Iteration. Each iteration represents a single test case executed based on the parameters and their respective requirements specified under Test Repository. The number of rows defined in Test Data determines the number of iterations.

Under each interaction, you can add the actual results or notes and the attachment.
Each row in the Test Data is and determines a source for parameters fed into automated test scripts, driving each iteration's environment setup and execution.