Importing Test Cases
When you import test cases, note the following:
Only test cases in Excel formats XLSX are supported.
Only the first tab is imported.
Special formatting is not supported (merged cells, formulas, etc.).
If importing in bulk, all source test case files should be located on the same machine where the Zephyr server is installed or on mapped or network drives. If the source test case files are located on the same machine where the Zephyr server is installed, then the import process should be run only from a desktop launched on the server machine. If located on mapped or network drives, ensure you have specified the path correctly.
Individual files can be imported from a user's local machine.
Three discriminators are supported to demarcate test cases: ID change, name change, and a blank line between test cases.
We recommend breaking large files into smaller ones with no more than 5000 rows for fast importing.
About
Besides creating test cases from scratch, you can also import Excel files containing test case data to Zephyr and thus generate test cases. An Excel file can include one or multiple test cases separated by discriminators. Each column letter of an Excel file corresponds to a mapped Zephyr field. Imported test cases are placed in the Imported folder in the tree of test cases on the Test Repository page:
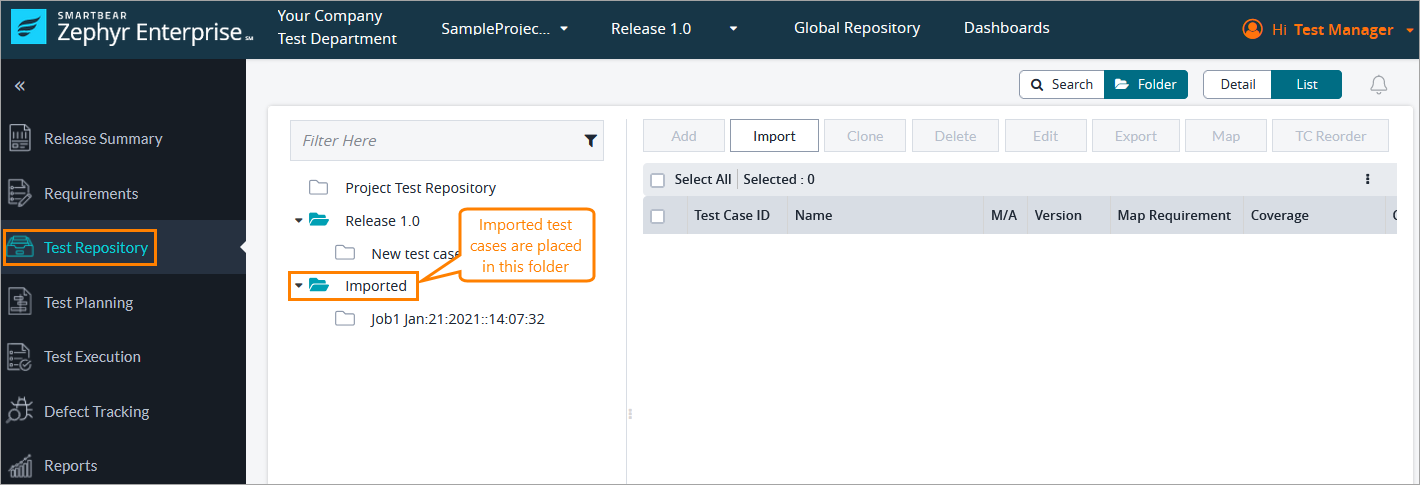
Import test cases
To import test cases, perform the following steps:
Map Excel columns to Zephyr fields
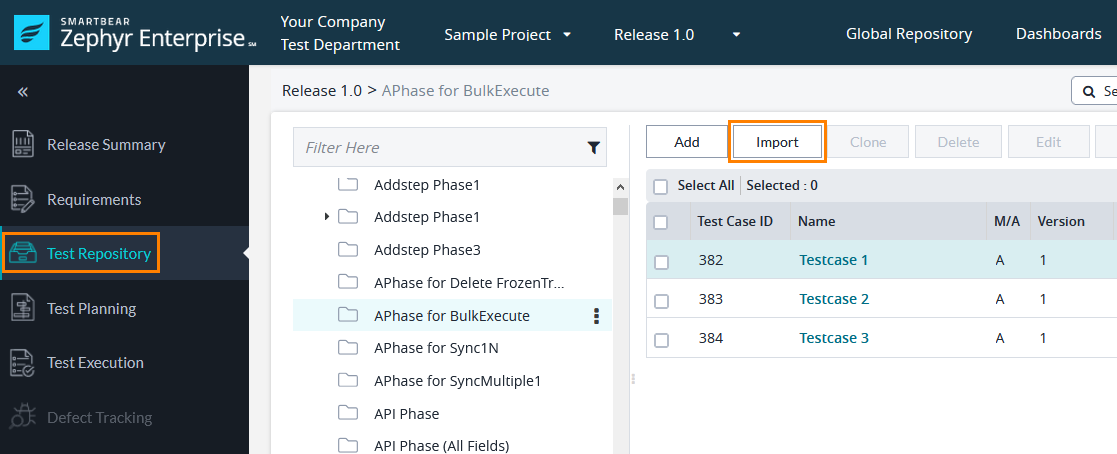
Click Test Repository in the menu on the left, and then click Import above the list of test cases:
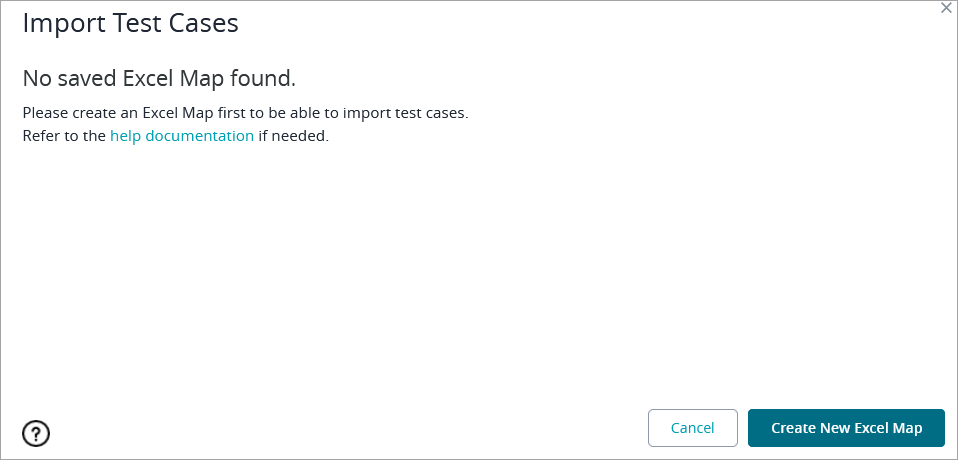
If you have no Excel maps yet, you need to create one. In the subsequent Import Test Cases dialog, click Create New Excel Map:
In the Create New Excel Map dialog, populate all the required fields (the ones marked with an asterisk):
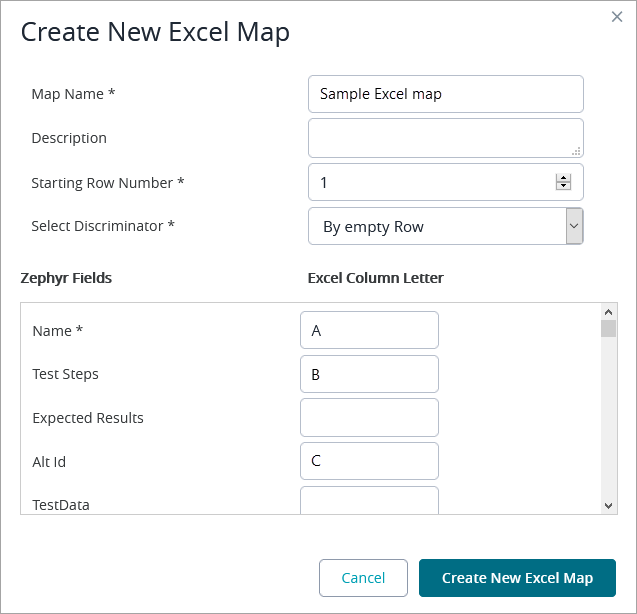
A list of fields available in the dialog:
Table 4.Field name
Description
Map Name
The name of your Excel map.
Description
Additional information about your Excel map.
Starting Row Number
The number of rows from which to start importing. For example, some header rows might need to be ignored.
Select Discriminator
Discriminators allow Zephyr to distinguish between multiple test cases in an Excel file. Possible values:
By empty row
By ID change
By test case name change
The dialog also contains a list of Zephyr fields (Name* is the test case name) with empty fields next to them where you can specify a column letter of the Excel file. To map a field to an Excel column, just enter the column letter in the empty field (see the image above). The section can also list custom fields that are available in the project.
After populating the fields, click Create New Excel Map. Zephyr will show the created map in the Import Test Cases Dialog:
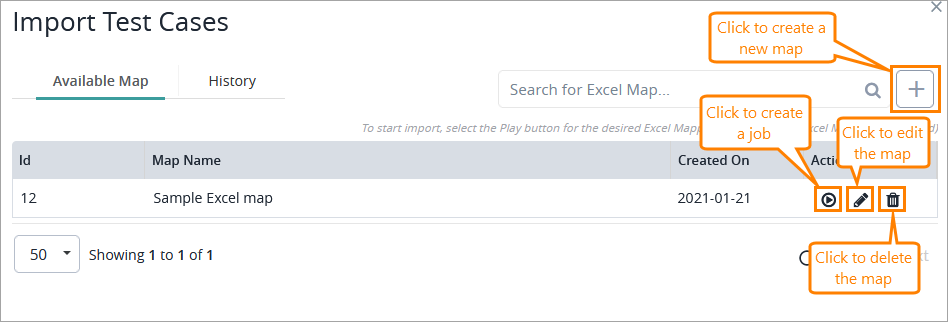 |
The dialog has two tabs:
Available Map - lists all the available Excel maps.
History - shows the history of job runs. Clicking a job reveals its details.
Each map in the list has three actions:
Click the Play icon to create a job that will import the data.
Click the Pencil icon to edit the map.
Click the Trash icon to delete the map.
To create a new Excel map, click the plus icon in the top right corner of the dialog.
Create and run a job.
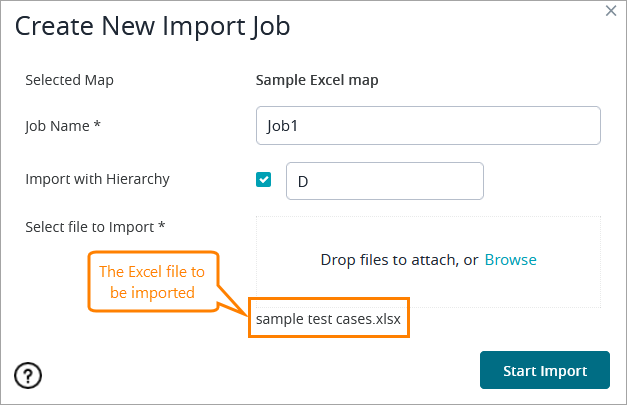
After creating an Excel map, you must create a job to import the data. To do that:
Click the Play icon on the right, and in the subsequent dialog, specify the job name, upload the file/attachment to be imported, and click Start Import:
Important
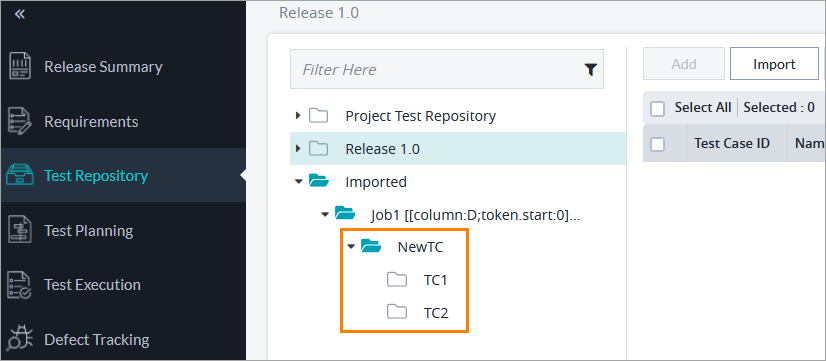
If you want to import a folder containing sub-folders, select the Import with Hierarchy check box and specify the letter of the Excel column containing the folder names. For example, if you have the NewTC folder that has two sub-folders (TC1 and TC2) in Excel, the strings will look like this:

In Zephyr, the imported hierarchy will be under the folder having the name of the import job:
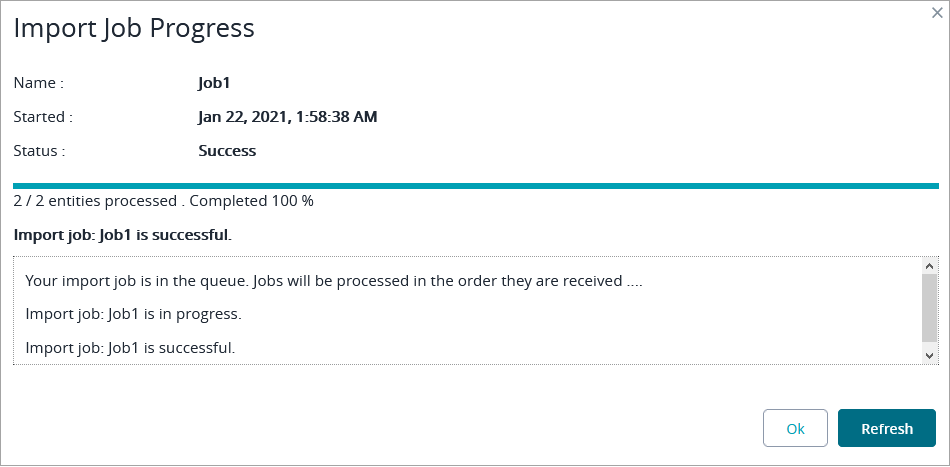
After the job run is over, Zephyr will show the details of the run:
View imported test cases.
Now, to view the imported test cases, go back to the Test Repository page, click Imported in the tree of test cases, and select the folder with the name of your job. The imported test cases will be in the table on the right:
 |
You can rename the imported folder, move it to another place, or just drag and drop the imported test cases to any folder in the tree.