Appium
Appium is an open-source automation tool that allows you to automate the testing of mobile applications (both iOS and Android) using a unified and cross-platform framework. It enables the creation and execution of test scripts for mobile apps, making it easier to ensure their functionality and quality across different devices and operating systems.
1. Create an Appium Script
To run automated tests with BitBar, create an Appium test on your own computer using Appium's documentation as a guide.
Tip
You can generate sample scripts when configuring your automated test runs in BitBar. If you decide to use your test instead of the sample one, check that it functions correctly on your local machine before running it in BitBar.
2. Create an Automated Test in BitBar
After logging in to your BitBar account, click Automation in the left navigation menu, then select Create Automated Test.
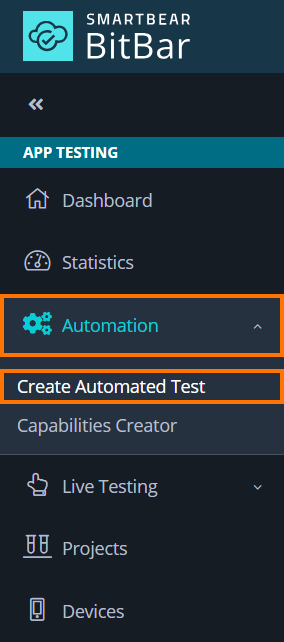
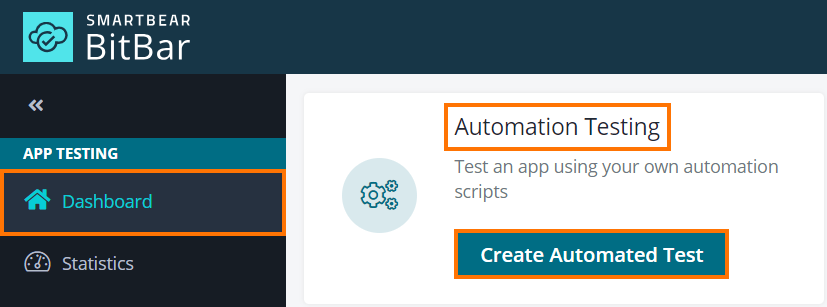
Alternatively, click Create Automated Test in the Automation Testing section on the Dashboard.
In the Select a target OS type step, select the mobile operating system on which you would like to execute the automated test.
In the Select a Framework step, select the Appium test framework.
Table 11. Appium Framework OptionsOperating System
Appium Framework Options
iOS
Appium iOS Client Side
Server Side (Appium and other frameworks)
Server Side (Appium and other frameworks) with biometry
Android
Appium Android Client Side
Server Side (Appium and other frameworks)
Configure your test run, based on whether you require client-side or server-side testing:
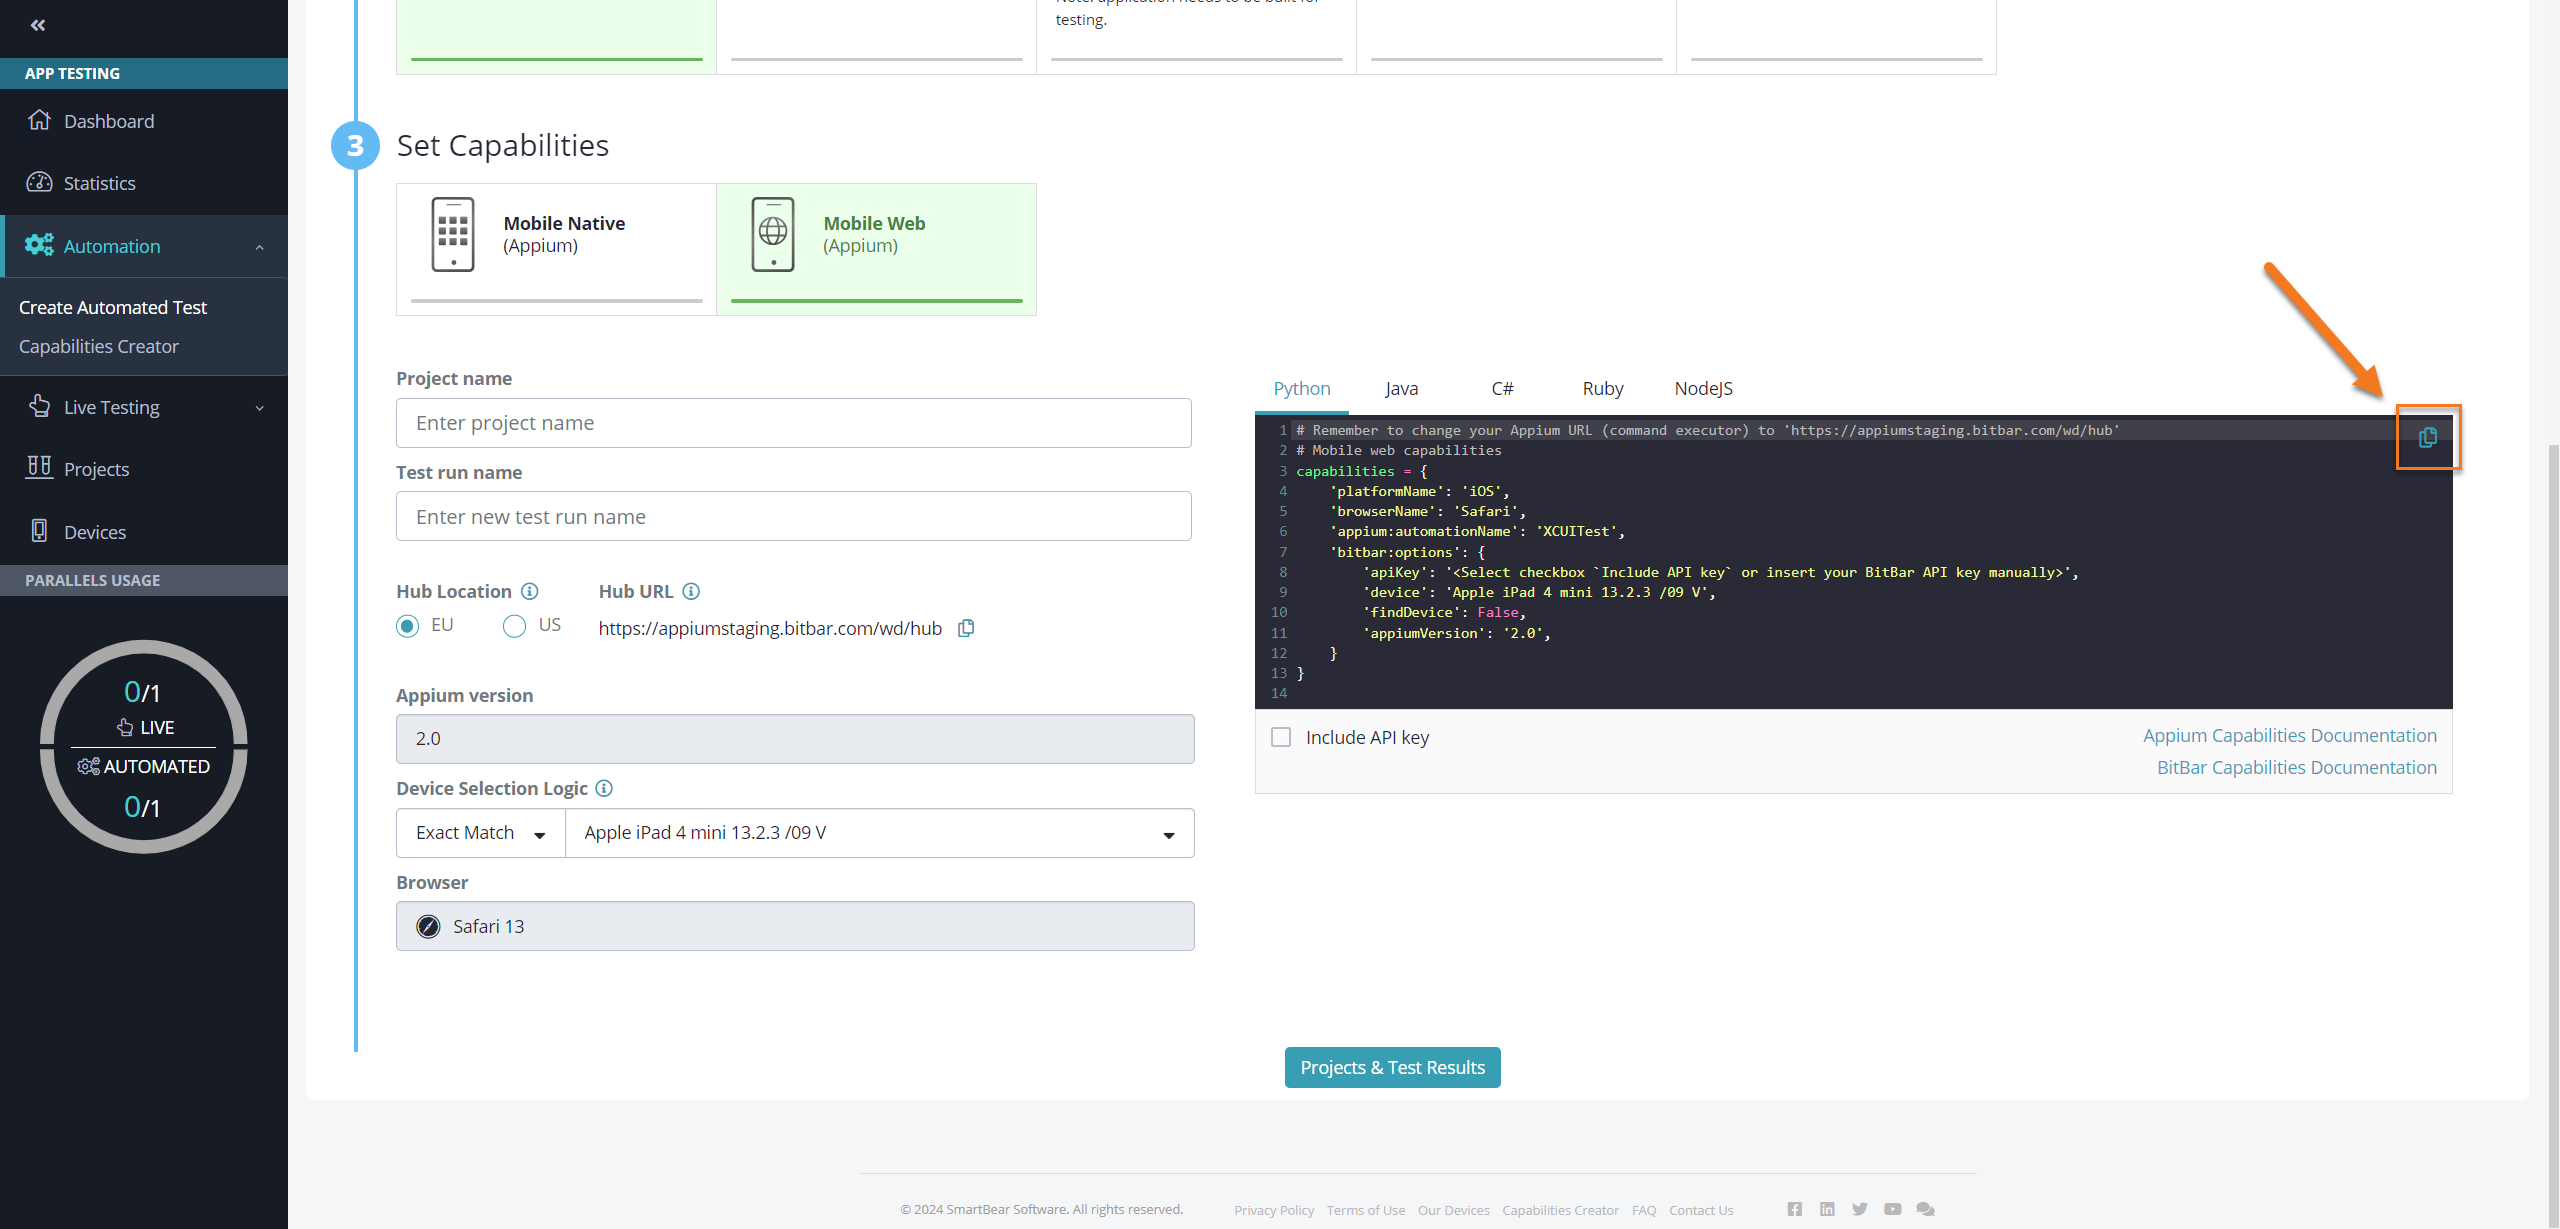
Client-side test configurationIn the Set Capabilities step, click Mobile Web (Appium).
Enter the name of your project and test run.
Select the nearest Hub Location for better performance.
Update your test script with the Hub URL.
Configure the Appium version, Device Selection Logic, and Browser for your test run (these are known as capabilities).
Note
For iOS devices, the Appium version capability is provided in read-only mode. The Browser capability is also read-only for both iOS and Android.
BitBar will generate script code in commonly used languages and provide a preview.
Tip
Select the Show full sample script checkbox to utilize the script code generated by BitBar.
Copy the code by clicking and then paste it into your Selenium script on your computer.
Server-side test configurationIn the Choose files step, select your files:
Table 12. File Selection for Mobile OSMobile Platform
File Extension
iOS
App with
.ipaextension.Test with
.zipextension.
Android
App with
.apkor.aabextension.Test with
.zipextension.
In the Choose Devices step, select your devices:
Select existing device group
Use chosen devices
Use currently idle device(s)
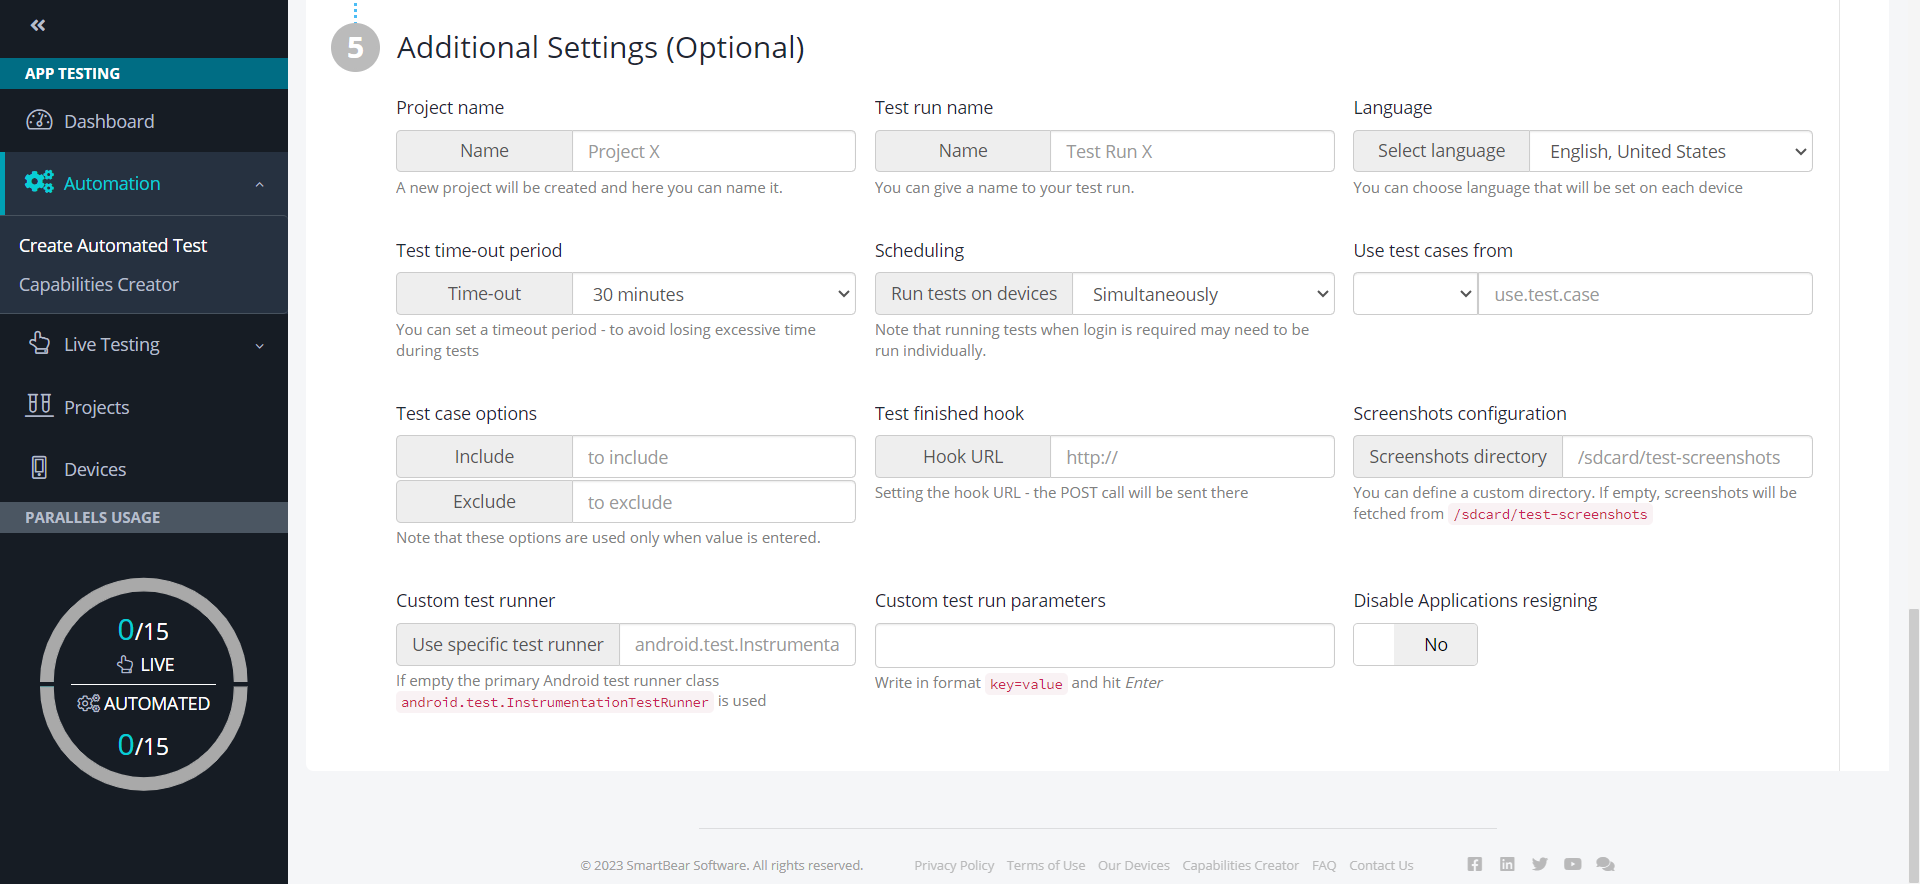
(Optional) In the Additional Settings (Optional) step, configure additional settings.
3. Configure the Appium Script
Important
It is essential that you insert your API key to the copied script code and that you modify the Appium Grid address in your test.
Insert the API Key
You can insert your API key in one of the following ways:
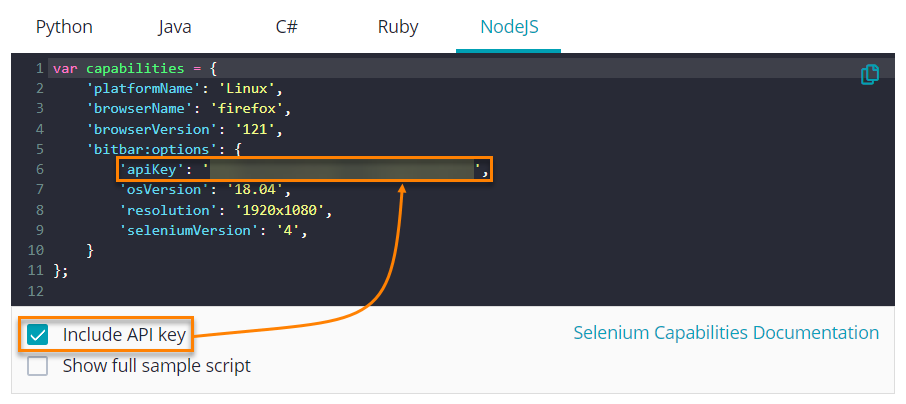
Instant Insertion:
In Capabilities Creator, click the Include API key checkbox located below the code snippet.
Manual Input:
Acquire your API key:
Log in to BitBar.
Click > Security Center.
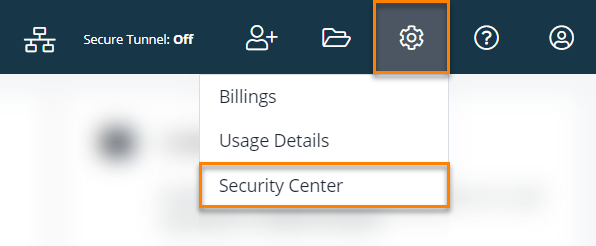
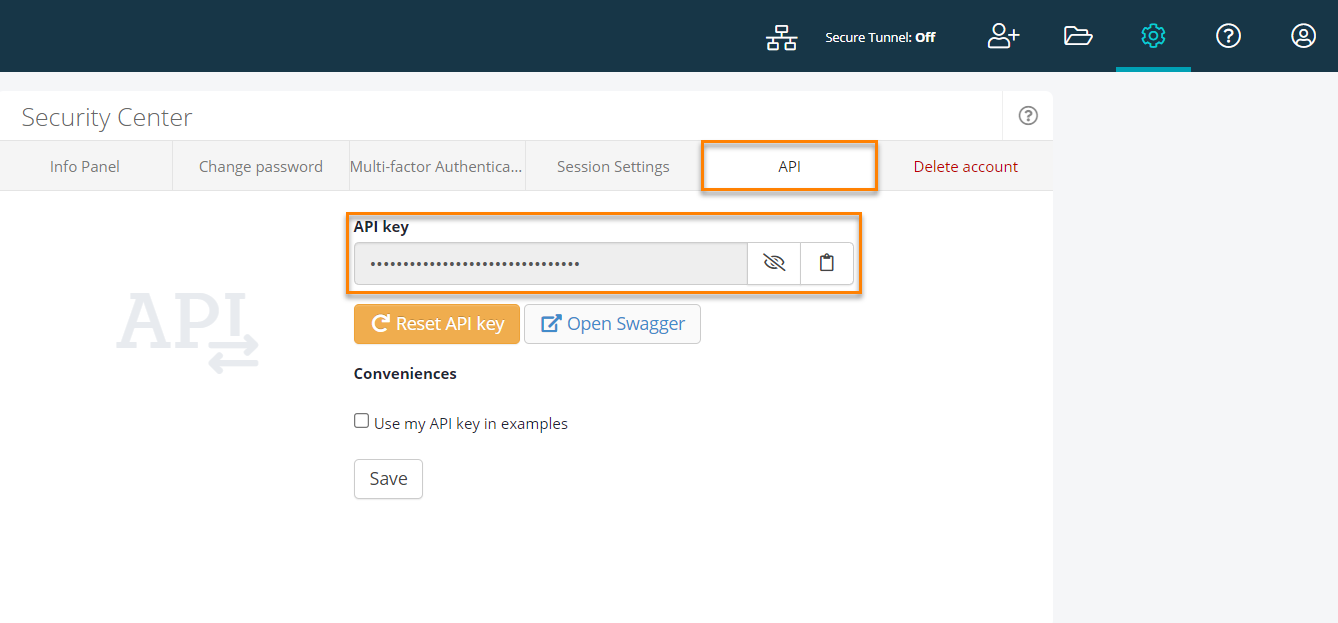
Click the API tab and copy the API key value.
Set the API key as the value for the
apiKeyparameter:Table 13. API Key Configuration SamplesLanguages and Runtimes
Sample
Python
capabilities = {
	...
	'bitbar:options': {
		'apiKey': '<insert your BitBar API key here>',
		...
	}
}
Java
MutableCapabilities capabilities = new MutableCapabilities();
...

HashMap<String, String> bitbarOptions = new HashMap<String, String>();
bitbarOptions.put("apiKey", "<insert your BitBar API key here>");
...
C#
DriverOptions capabilities = new DriverOptions();
...

IDictionary<string, string> bitbarOptions = new Dictionary<string, string>();
bitbarOptions.Add("apiKey", "<insert your BitBar API key here>");
...
Ruby
capabilities = Selenium::WebDriver::Remote::Capabilities.new({
	...
	'bitbar:options' => {
		'apiKey' => '<insert your BitBar API key here>'
		...
	}
})
Node.js
var capabilities = {
	...
	'bitbar:options': {
		'apiKey': '<insert your BitBar API key here>',
		...
	}
};
Set the Appium Grid Address
You need to modify the Appium Grid address in your test’s capabilities. The value to use depends on the target location, where the tested browser will run:
US: APPIUM – https://us-west-mobile-hub.bitbar.com/wd/hub
EU: APPIUM – https://eu-mobile-hub.bitbar.com/wd/hub
Now you are ready to run your test.
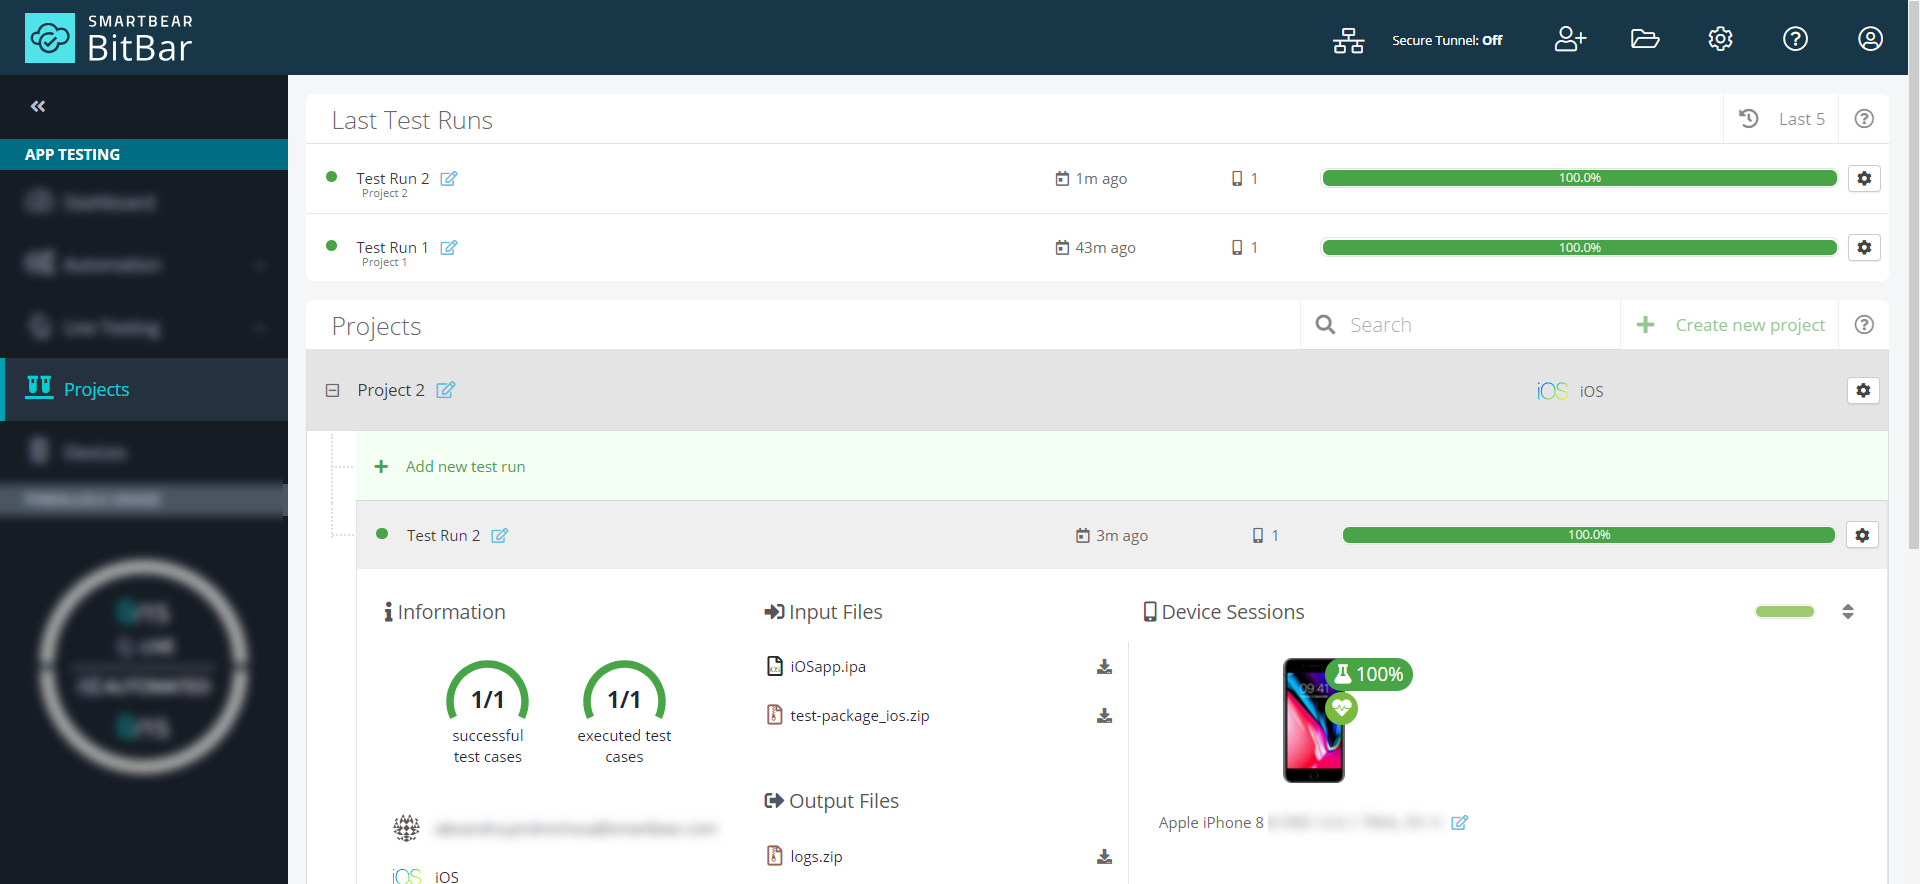
4. Run Your Test and View Results
Run your test as you would normally do this. The results will go to BitBar. You can view them on the Projects screen under the project and test run node, whose name you specified in capabilities:
 |