Running Espresso Tests in BitBar Testing
To get your tested app run on BitBar Testing using Espresso scripts, some steps are needed.
Create test configuration
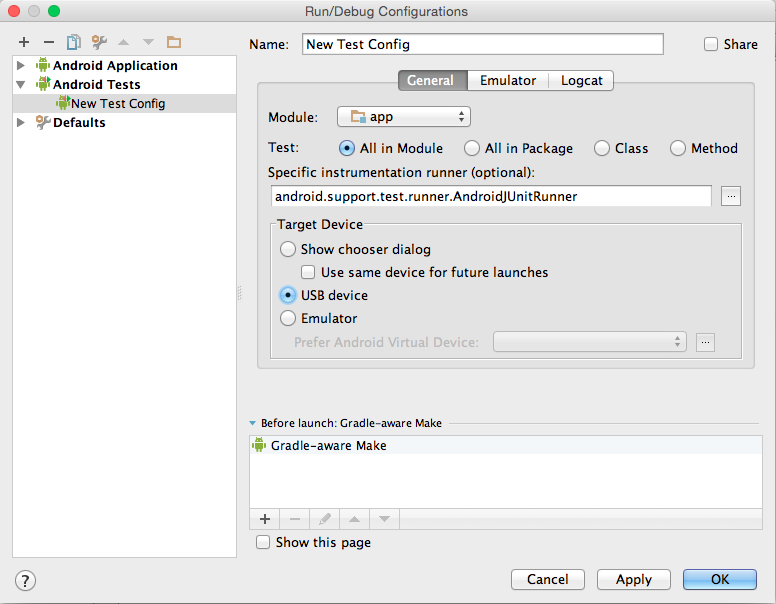
First, a test configuration in Android Studio needs to be created.
Navigate to Run > Edit Configurations.
Click + in the top left corner and add a new Android Tests configuration.
Give it a name, for example, New Test Config.
Select app from the Module dropdown.
Specify the instrumentation runner, for example,
android.support.test.runner.AndroidJUnitRunner.
Now, the environment should be properly configured to build instrumentation packages.
Build test project
Once the test project is configured, build it and upload into BitBar Testing.
On the Dashboard, click Create Automated Test in the Automation Testing widget.
-- or --
Select Automation > Create Automated Test on the left sidebar.
Follow the step on the Create Automated Test screen:
Select Android in the Select a target OS type step.
Select Android Instrumentation in the Select a framework step.
Upload one or more app files to be tested in the Choose files step. You can upload up to 3 files.
Select the action to perform over the uploaded files:
Select a device or a device group in the Choose devices step:
Use existing device group – Select this option if you want to use trial devices or have an existing device group.
Use chosen devices – Select this option if you want to choose devices from the list of available devices.
Run on currently idle devices – Select this option if you want to run your test on random devices that are not currently used.
Optional. Configure other project settings in the Additional settings (optional) step:
Project name – The name of the project.
Test run name – The name of the test run.
Language – The language that will be set on the selected devices.
Test time-out period – How long the test engine will wait before reporting a timeout error.
Scheduling – Select how to run tests on the selected devices: simultaneously, on one device at a time, or on available devices first only.
Use test cases from – Select a test case to be used from a or , if any.
Test case options – The test case options to be included or excluded.
Test finished hook – The hook URL to which the POST request will be sent.
Screenshots configuration – The directory where screenshots will be stored. The default value:
/sdcard/test-screenshots.Custom test runner – The test runner to be used. The default value:
android.test.InstrumentationTestRunner.Test user credentials – The login and password for test applications that require authentication.
Custom test run parameters – Your test run parameters in the
key=valueformat.
Click Create and run automated test.