SecureTunnel
Local testing can be performed on BitBar using the SmartBear SecureTunnel. The SecureTunnel is available as a desktop application and a command-line utility.
Why SecureTunnel
SecureTunnel enables you to run live and automated tests on web, hybrid and mobile applications that are hosted on (or need to access resources hosted on) your internal development environment, behind a corporate firewall or on localhost. These sites, services, and environments are typically isolated from the global network to prevent unauthorized external access. For this reason, devices and browsers hosted by BitBar need a secure connection to those local resources — a tunnel.
Setting up the SmartBear Secure Tunnel
You can configure SmartBear Secure Tunnel using the following methods:
The desktop app is a wrapper on the command-line functionality. It provides a visual interface to the tunnel settings and works on Windows and Mac OS systems. It works with both HTTP and HTTPS traffic. The command-line utility is helpful when you need to automate the tunnel to start and stop.
The SecureTunnel utility is available as a desktop application and as command-line utility for Windows, Linux, and Mac OS operating systems.
You can download both options from the BitBar website.
Utility form | Usage |
|---|---|
Desktop app | Windows, MacOS |
Command-line package | Windows, Linux, MacOS |
Installing BitBar tunnel
To set up a tunnel, perform the following steps:
Use the lightweight SecureTunnel utility
Download the utility
Install the utility
To download the utility, perform the following steps:
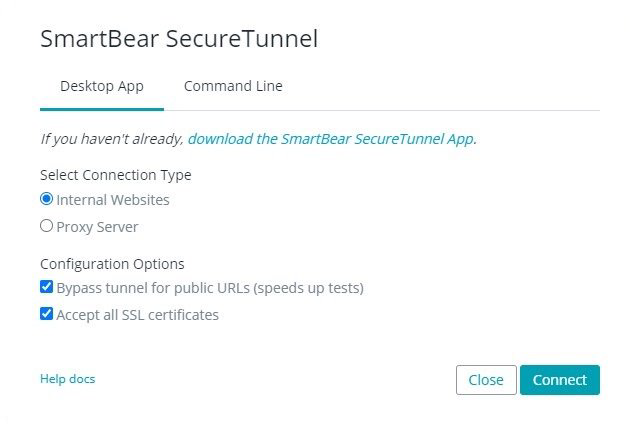
Click on Secure Tunnel: Off.
SmartBear SecureTunnel popup screen is displayed.

Note
By default, Desktop App tab is selected.
Under Select Connection Type, select the appropriate connection type.
Under Configuration Options, select both the options.
Note
BitBar automatically provides the package that matches your operating system.
Click download the SmartBear SecureTunnel App.
The download will start.
To install the utility, perform the following steps:
After the download is complete, navigate to the location where the file is downloaded.
Double-click the installer file to install the application.
Note
The operating system may request your permission to run the downloaded executable, depending on your security settings. Grant the permission.
The installer will launch the SecureTunnel desktop app automatically.
Log-in and specify the tunnel settings and create a connection.
Note
Run the app manually if it does not start automatically for some reason (this may occur on some systems).
After the installation is complete, launch the desktop app at least once to complete its configuration.
How does tunnel work?
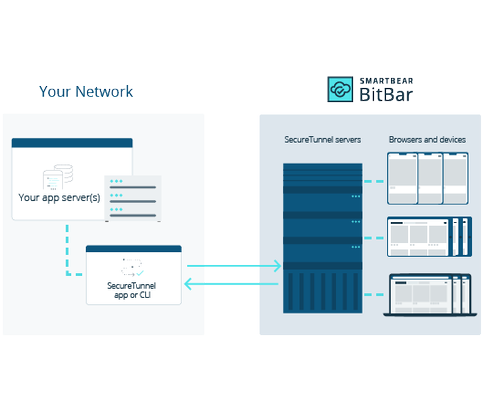
After the application is installed, you can run the utility on a computer with access to both global Web and the tested web service. The test device working in the BitBar farm connects to your local resources through this tunnel.
Note
The way you install the tunnel app, launch it, run tests, and terminate the connection is determined by whether you use the tunnel as a desktop application or a command-line utility.
 |
The following are the steps involved in setting up and using a tunnel :
The tunnel client opens a secure outbound WebSocket connection to the BitBar and connects to the
geo.tunnel.smartbear.comserver through port 443.Note
Proxies and firewalls in your network should allow access to these URLs and ports.
HTTP and HTTPS traffic will be routed over the connection by testing devices.
Requests sent through the tunnel are handled on the machine where the tunnel is running. The tunnel resolves URLs using the computer's DNS server and forwards requests to the tested server. It also receives responses from the tested server and sends them to the BitBar cloud device used in the test session.
Tunnel Settings
Refer to Tunnel Settings for more information on connection types and other tunnel parameters.
