Running XCTest Tests
This is the guide on getting existing XCTest test projects running on BitBar Testing Cloud. To start testing in a cloud, the application package and the test package need to be uploaded to the cloud.
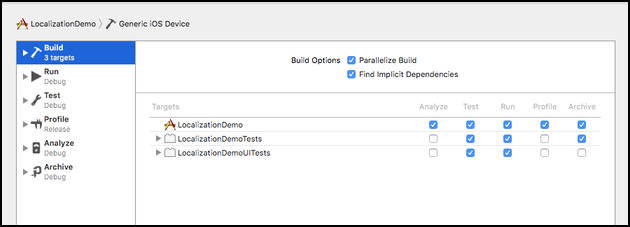
Compiling Unit tests - This should be the default setting, but it’s worth double-checking. Open the Build action settings for the scheme in the Scheme Editor. Verify that in the Run column, your test targets are checked. This means that when typing Command-B or even running the app, the tests are compiled too.
 |
In order for the classes under test to be available within the test bundle, they need to be included with test target membership. In the example project, MyModel.swift was a class under test, so it needed to be added to the test target membership. Normally, this isn’t required with Swift because the @testable annotation imports the required modules.
 |
Compile tests for the device, select from the menu and press Command-B:
 |
In Xcode 8 and above, .xctest can be found inside of the .app file, so in order to locate it, right-click the app and select Show in Finder. Right-click the app again in Finder and select Show Package Contents.
 |
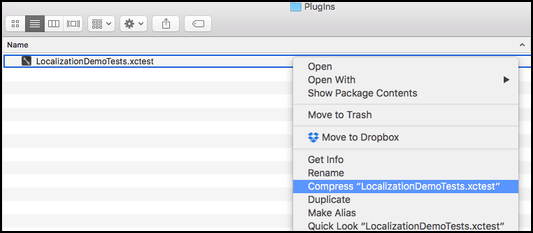
Then, go to the Plugins folder and right-click the .xctest file and select Compress:
 |
Now, the XCtest package (zip) exists and can be uploaded to BitBar Testing Cloud with the IPA package created earlier.
 |
XCTest test run
To run XCTest tests, an XCTest test project needs to be created in BitBar Testing.
When creating the test run, upload the .ipa file when asked for the application file and the zip package for test cases.