Setting up Jira Integration
Establishing Connection between Zephyr and Jira
For Zephyr and Jira to exchange data, they should be accessible to each other through the network. This is especially important if you use an On-Premises (Server) instance of Zephyr and a Cloud instance of Jira, or vice versa. You may need to configure proxies and firewalls working in your network to provide the connection. See Connection Between Server and Cloud Instances.
1. Configure connection to Jira
The connection to Jira you set up in Zephyr Enterprise can use either a Personal Access Token (PAT), OAuth, or Basic authentication (Basic authentication is called cookie-based authentication in Zephyr UI).
The connection type you use depends on the Jira instance type you use.
Follow the links below to learn how to configure the connection parameters:
Jira Cloud
Jira Server / Data Center
Tip
Basic authentication is simpler, but OAuth 2.0 is more secure. We recommend using OAuth 2.0 connections where possible.
2. Configure your Zephyr project
After you have configured the Jira connection, you need to map your Zephyr project to a Jira project:
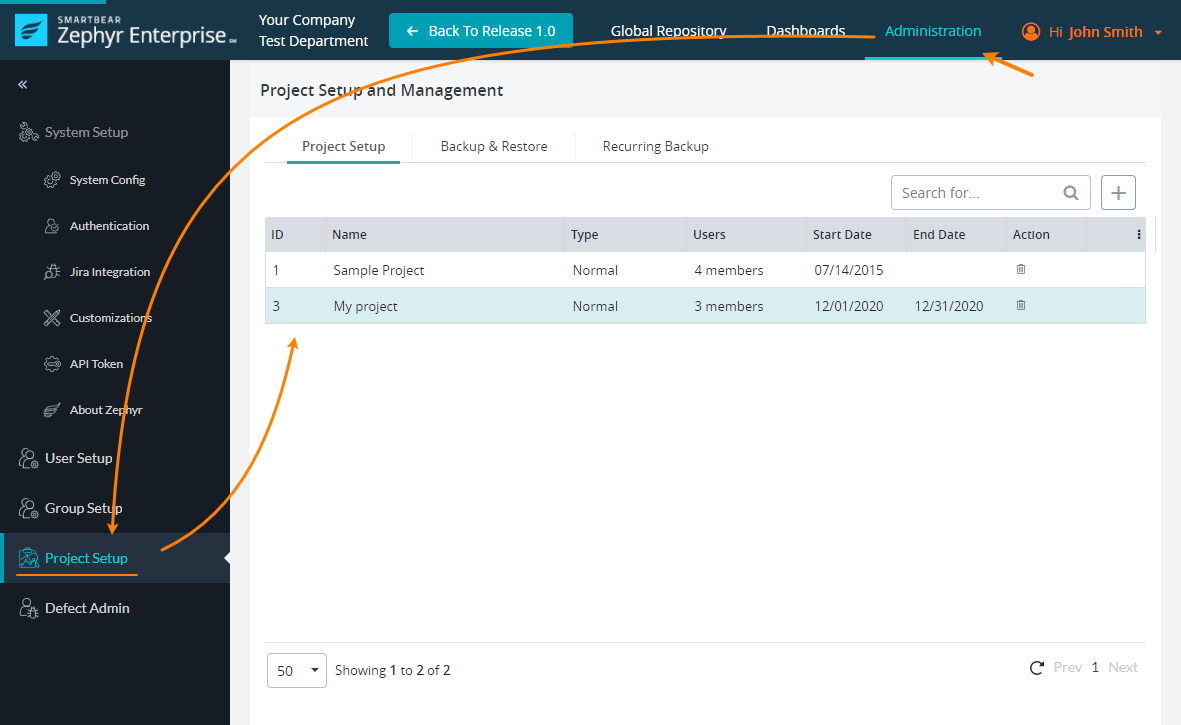
Log in to Zephyr Enterprise as a user with administrator permissions. Then, go to Administration > Project setup settings:

Select your project on the Project setup tab and move through the page down to the Edit Project section.
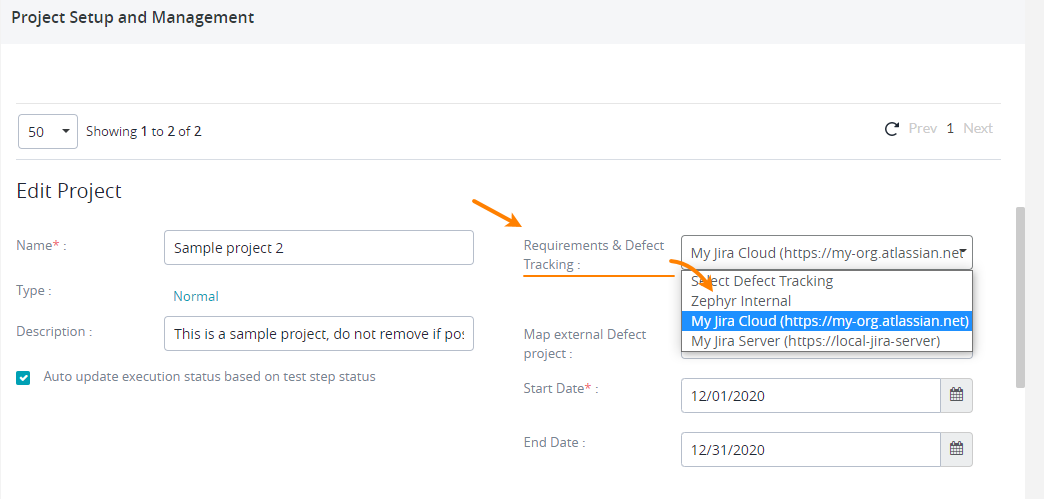
In the Requirements & Defect Tracking box, select the Jira connection you created in the previous step.

Important
Choose carefully. Selecting another defect tracker after you map Zephyr items to Jira tickets might be problematic.
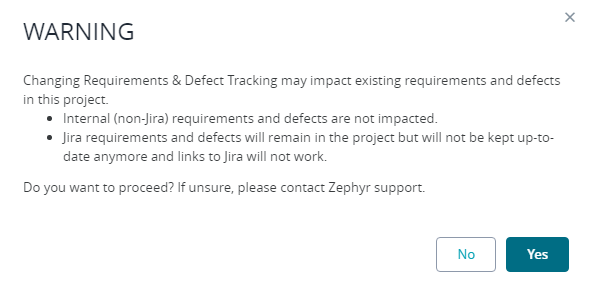
Confirm the connection in the subsequent message box:

Zephyr will load a list of projects from your Jira instance and will show it in the Map external Defect project list (this list is invisible until you select a Jira instance for your project).
Note
If you rename your Jira project, the Jira project will be unmapped in Zephyr, and you will have to map it again.
Click Reset Jira Project Cache to find your project in the list and reset the Jira project cache.
This clears and rebuilds the cached project data related to Jira projects in ZE.

Select the Jira project in that list to link it to your Zephyr project.

Scroll down the page and click Save to save your changes.
The Zephyr project is mapped to a Jira project.
Note about webhooks
Webhooks are an essential part of Zephyr integration with Jira. They synchronize Zephyr and Jira requirements and information about defects.
Webhooks can be created in two ways:
Zephyr automatically creates a pre-configured webhook when mapping a project in Zephyr. In this case, there is no need to perform additional actions, but you need to have a Jira account with special permissions (for example, Browse Projects). You can view the created webhook in Jira settings: go to
 > System (under Jira Settings) > Webhooks (under Advanced).
Important
Don’t delete this webhook, and don’t change its properties. It has all the needed settings enabled. Later, you can update the webhook if required.
As an administrator, you can create and manage webhooks manually. This can be useful if you do not have (or do not want to make) a Jira service account with permissions required for automatic webhook management.
After you set up the integration, you may need to configure specific settings in Jira and provide better support for Jira custom fields:
