Mapping Test Cases to a Requirement
To map a test case to a requirement, do the following:
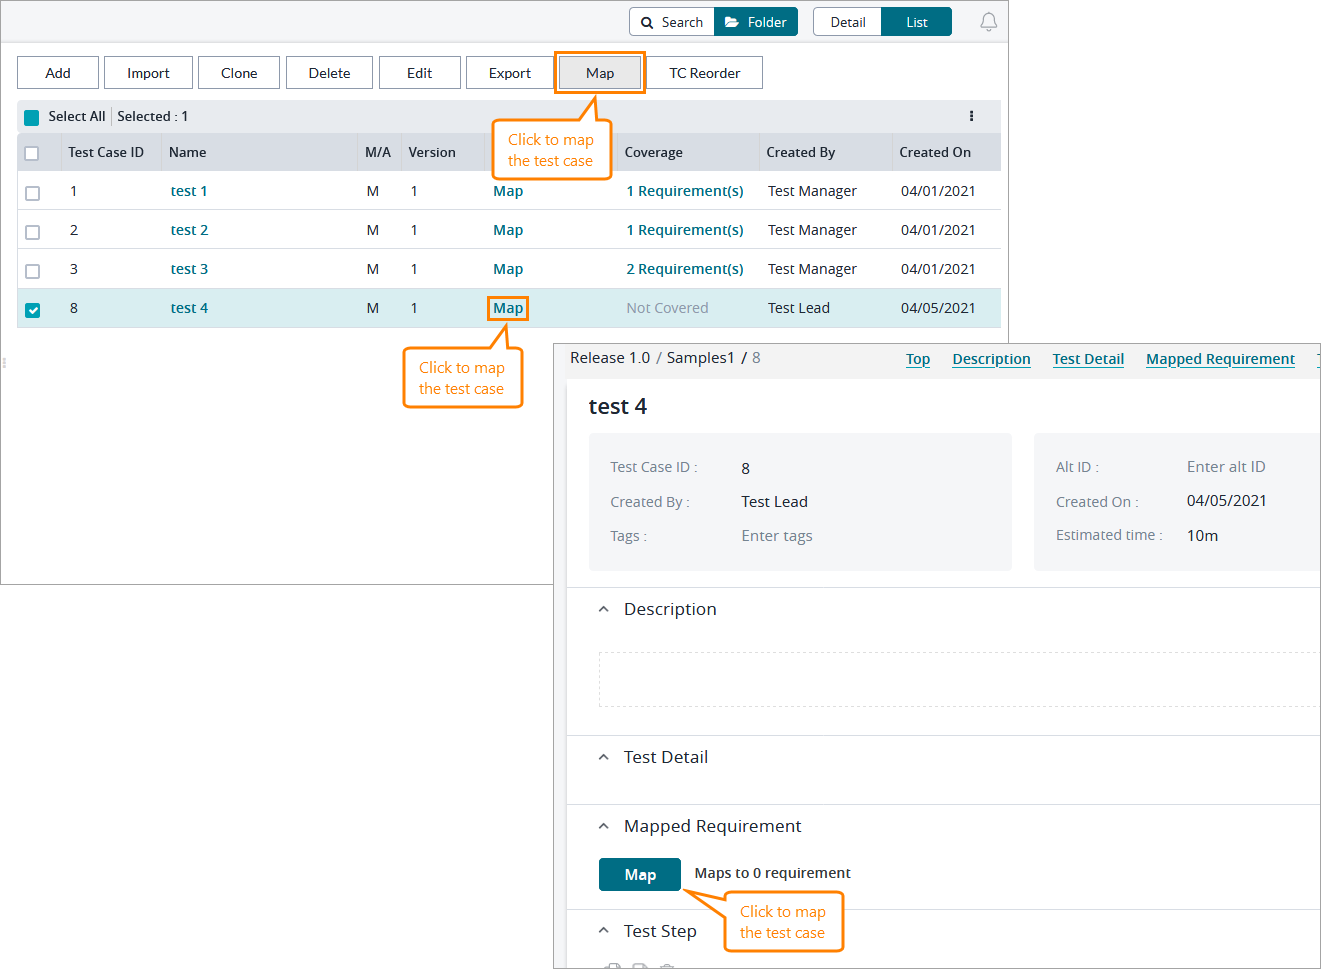
Navigate to Test Repository and select the folder containing the test case you want to map.
Now you can do one of the following:
Select the test case you want to map and click Map above the list of test cases.
Click Map on the line of the test case you want to map.
Click the test case name, and then click Map in the Mapped Requirement section.

On the subsequent page, select the folder containing the requirement you want to map to your test case in the panel on the left, choose the needed requirement on the right, and click Save.
Now you can see that the test case is mapped to one requirement.
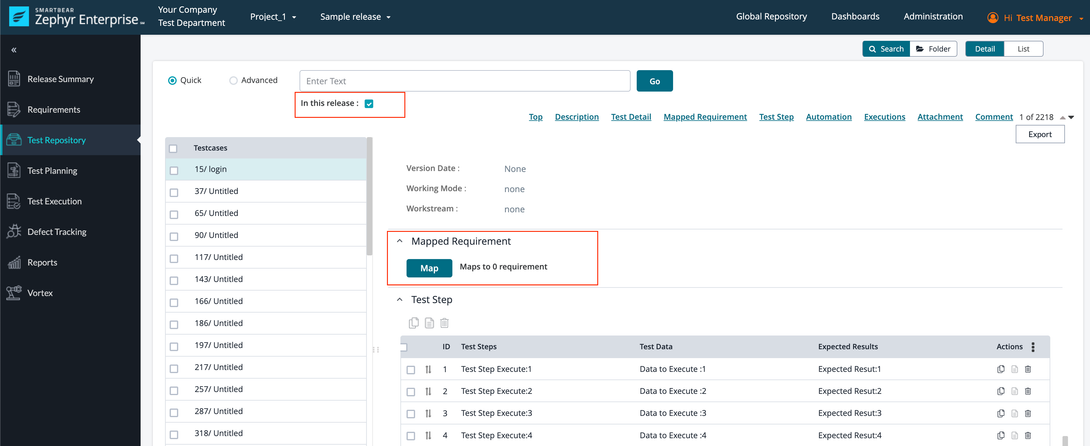
To map a test case to a requirement from the Search, do the following.
You will have ability to map directly a requirement to the test case from the search view if “In this release“ checkbox is enabled.

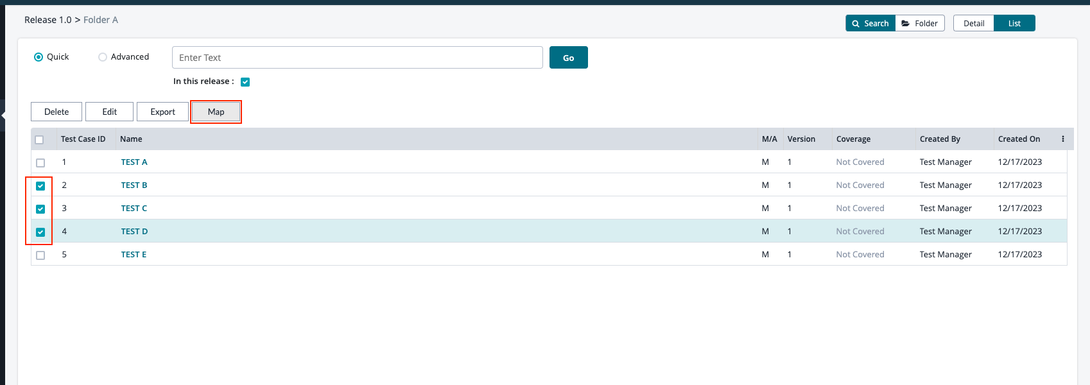
You can also perform the bulk Mapping from the Search if the “in this release“ checkbox is enabled. Select the test cases that you would like to bulk edit using the checkboxes on the left-hand side of the table.
Note
The Map Button will be only visible if ‘In this release’ is checked.
A user can Map a maximum of 100 testcases at a time.

Notice
Deleting a requirement or test case removes the mapping as well.
To learn how to map a shared test case, see Map shared test cases.