SSO Setup with Auth0
Setup
Step 1. Auth0 IdP Client
Create a "Regular Web Application" in Auth0.
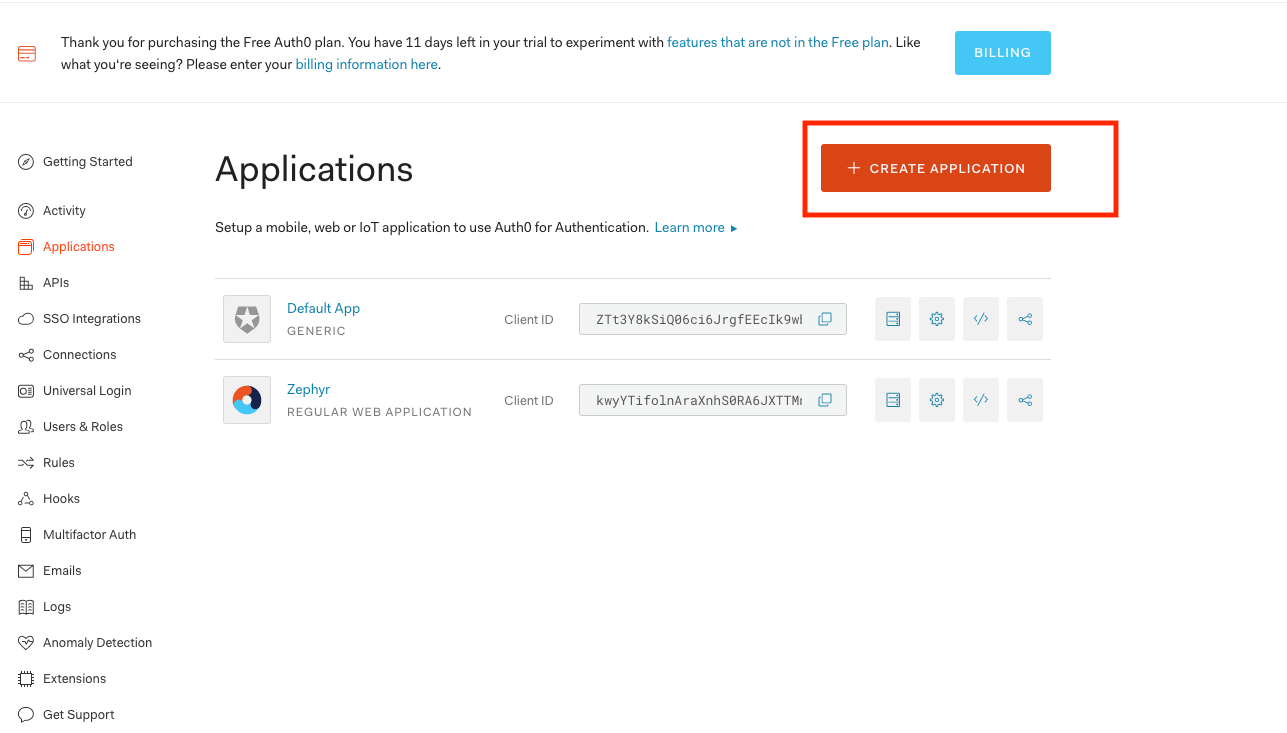 |
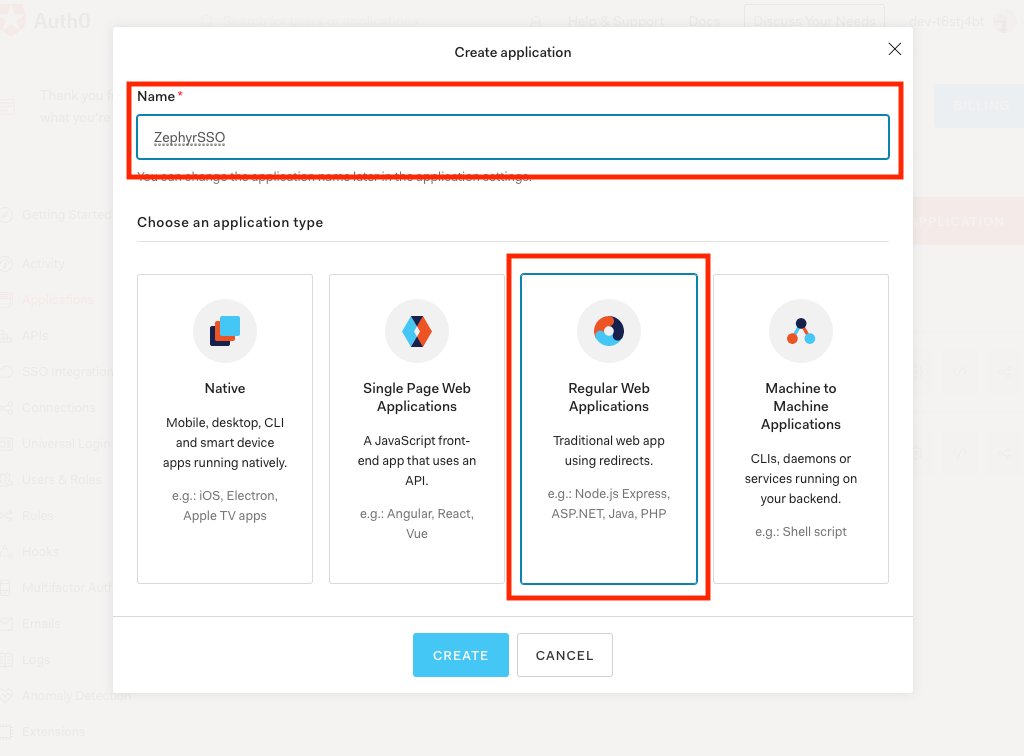 |
Step 2. Auth0 IdP Client Once Application is created Navigate to Settings
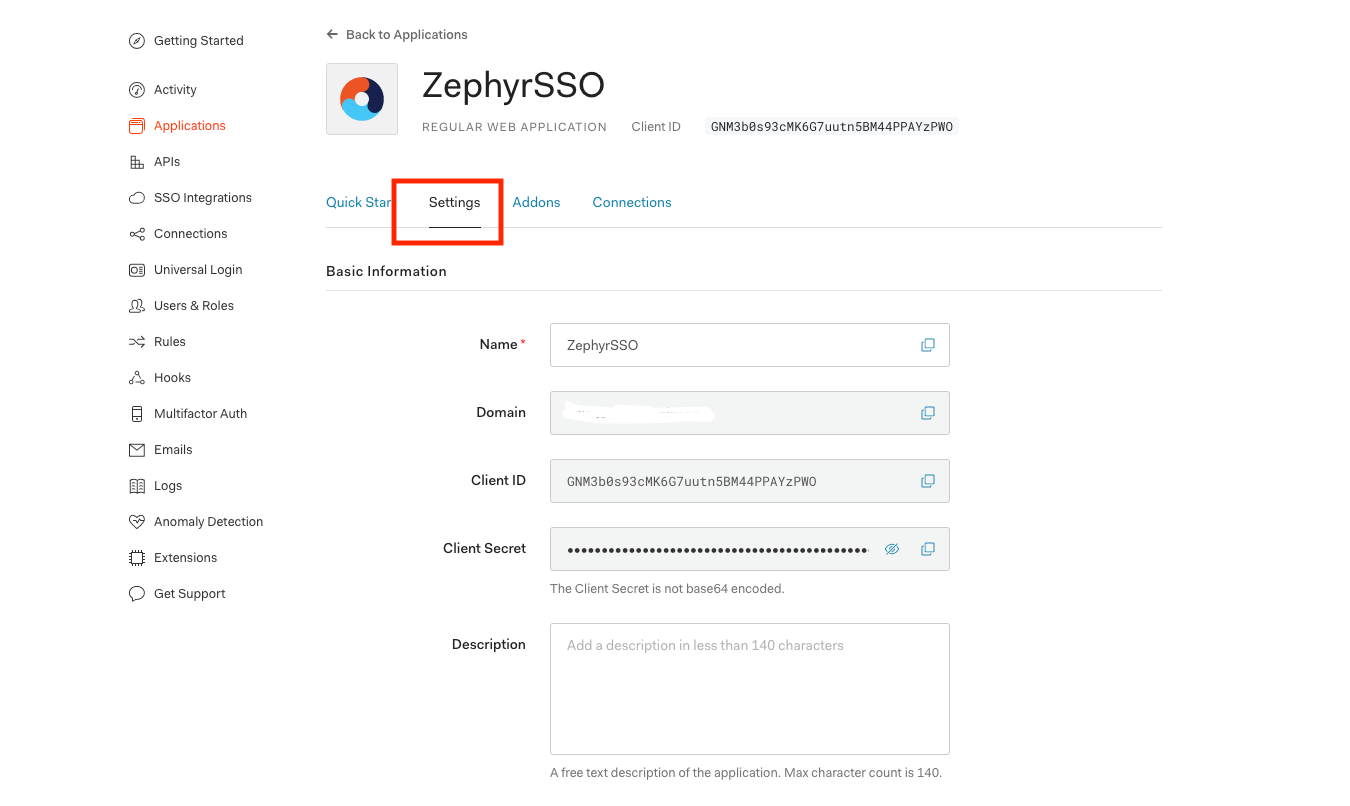 |
Step 3. In Settings, navigate to the Application URIs Section and add https://domain.yourzephyr.com/flex/https://domain.yourzephyr.com/flex/saml/sso as value for:
Application Login URl
Allowed CallbackURLs
Save the changes.
Example:
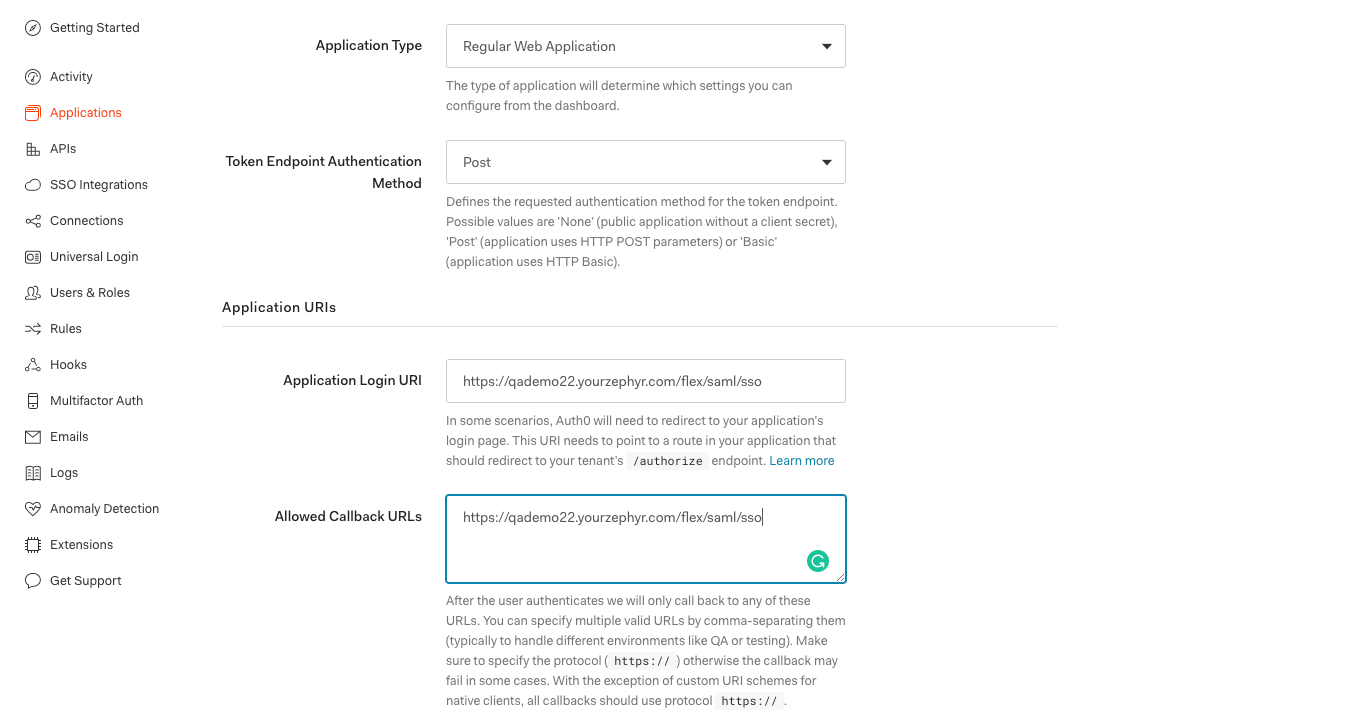 |
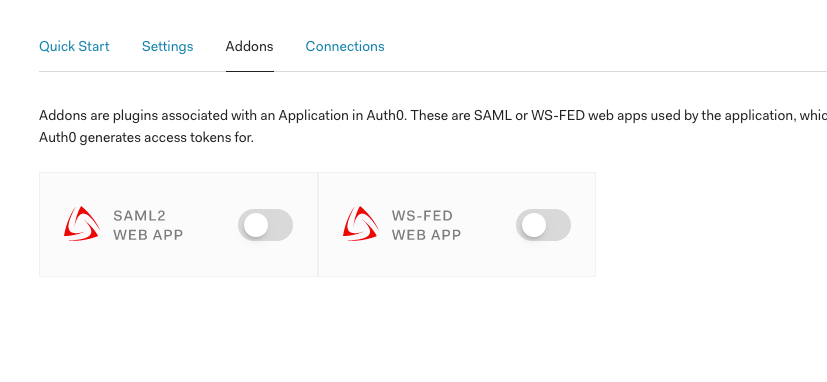
Step 4. Navigate to AddOn Section and enable the SAML 2 WEB APP
 |
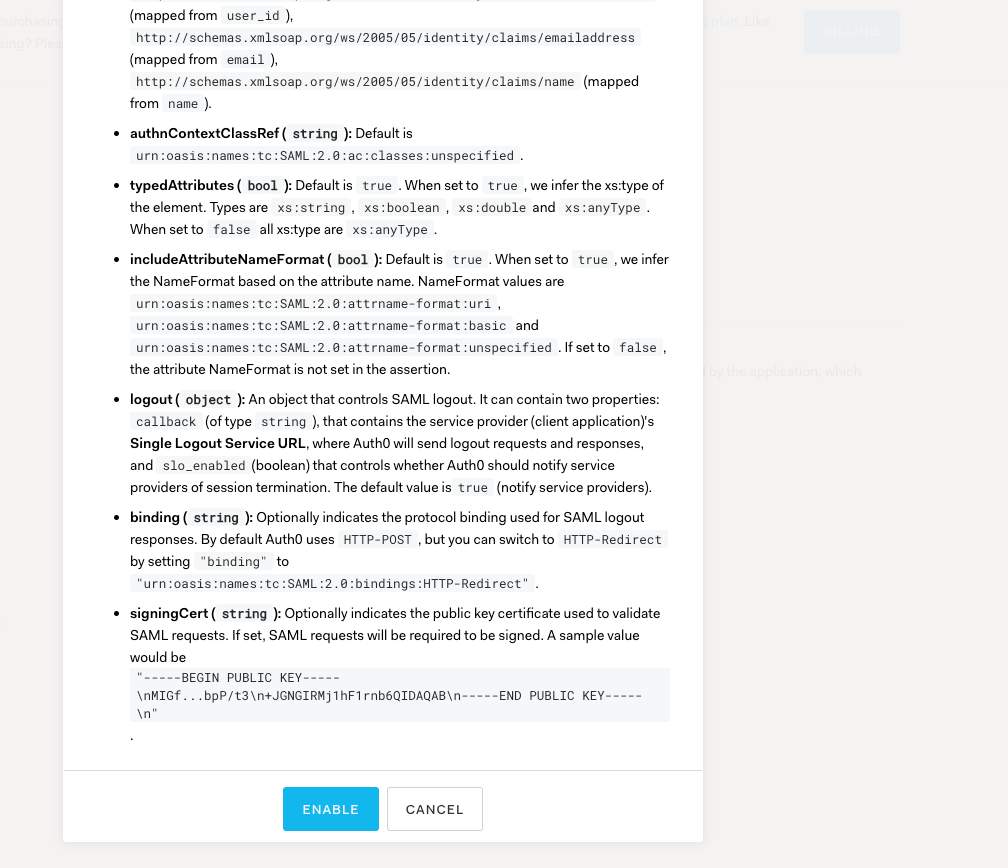
Step 5. In AddOns Enable the SAML2 in the setting of SAML2 WEB APP
 |
Step 6. In AddOns SAML2 WEB APP Navigate to Usage
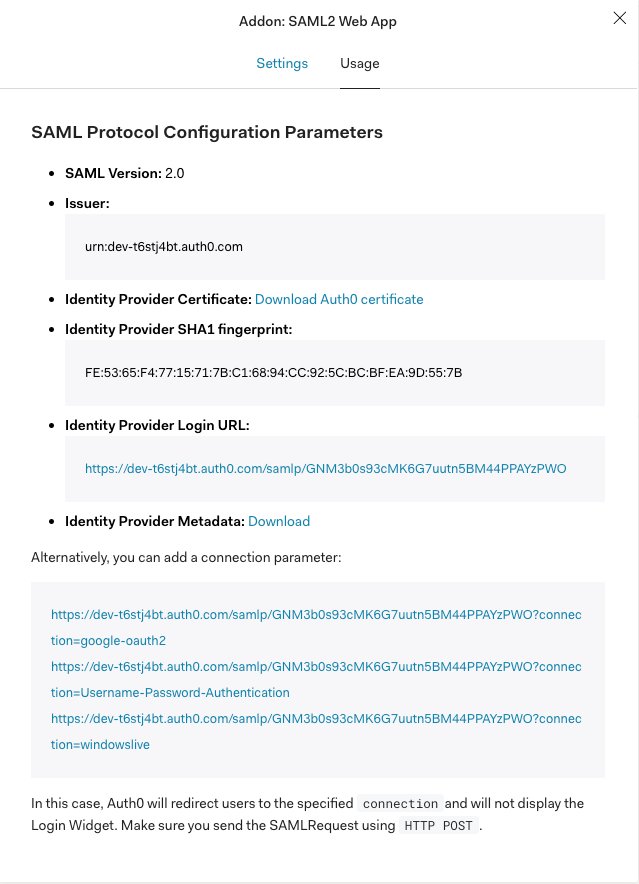 |
Step 7 Download the Certificate from the usage
Identity Provider Certificate: Download Auth0 certificate
Step 8
Copy the Issuer:
urn:dev-t6stj4bt.auth0.comCopy Identity Provider Login URL:
https://dev-t6stj4bt.auth0.com/samlp/GNM3b0s93cMK6G7uutn5BM44PPAYzPWO
Step 9 In Zephyr, provide the following information
In Administration, navigate to Authentication → Select the SSO.
Update the following Information:
Identity Provider URL → Copy Identity Provider Login URL (from step 8)
Identity Provider Issuer Id → Issuer (from step 8)
Identity Provider Certificate: (from step 7)
Enable Auto-Provisioning and add the following values:
First Name:
http://schemas.xmlsoap.org/ws/2005/05/identity/claims/givennameLast Name:
http://schemas.xmlsoap.org/ws/2005/05/identity/claims/surnameEmail:
http://schemas.xmlsoap.org/ws/2005/05/identity/claims/emailaddress