Setting Up Single Sign-On (SSO) with AWS
Perform the following steps to set up SSO with AWS:
Log into the AWS Management Console as the account owner using your AWS credentials.
Open the IAM Identity Center console.
In the IAM Identity Center console, click the IAM Identity Center console option, and then click Add Application.
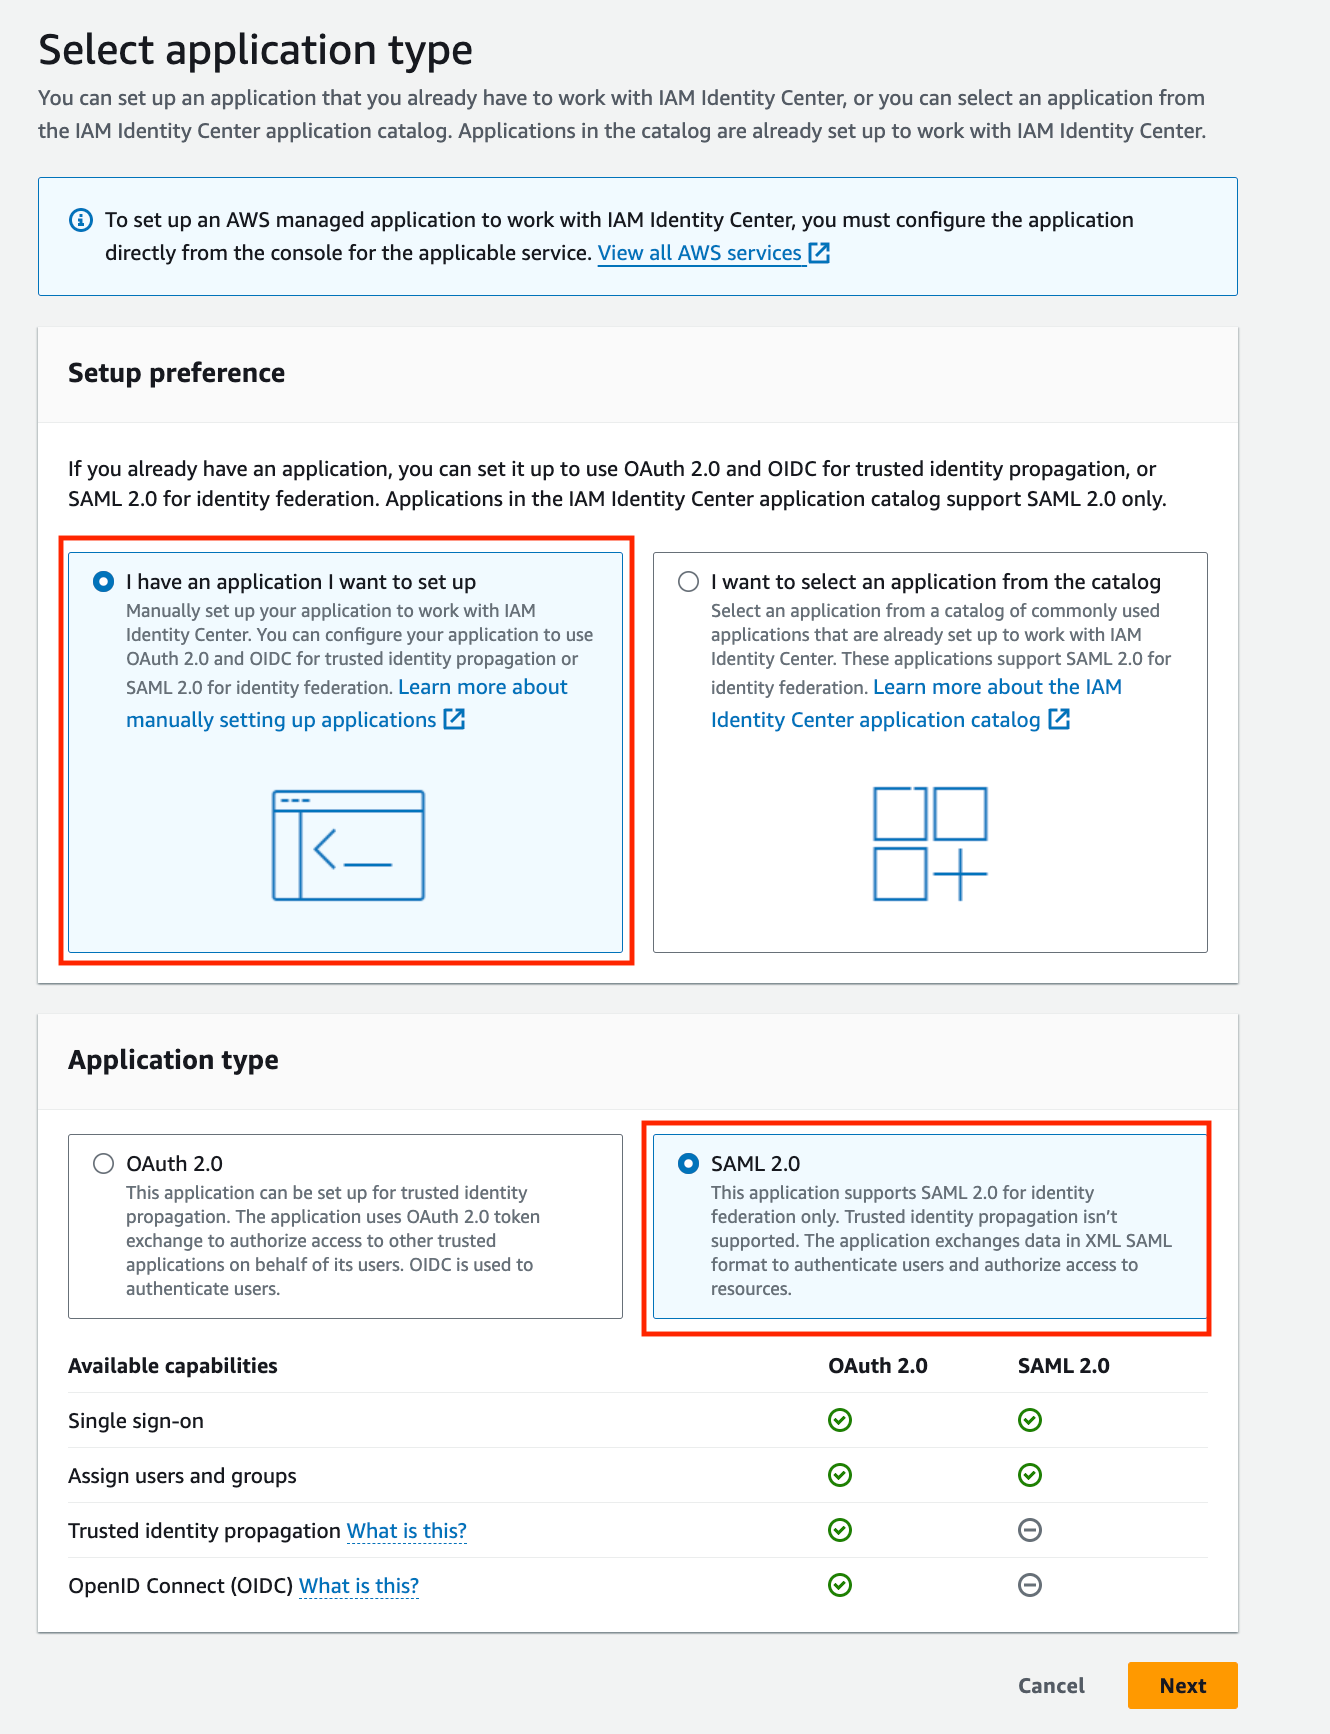
Select I have an application I want to set up. C
For Application Type, select SAML 2.0, and then click Next.
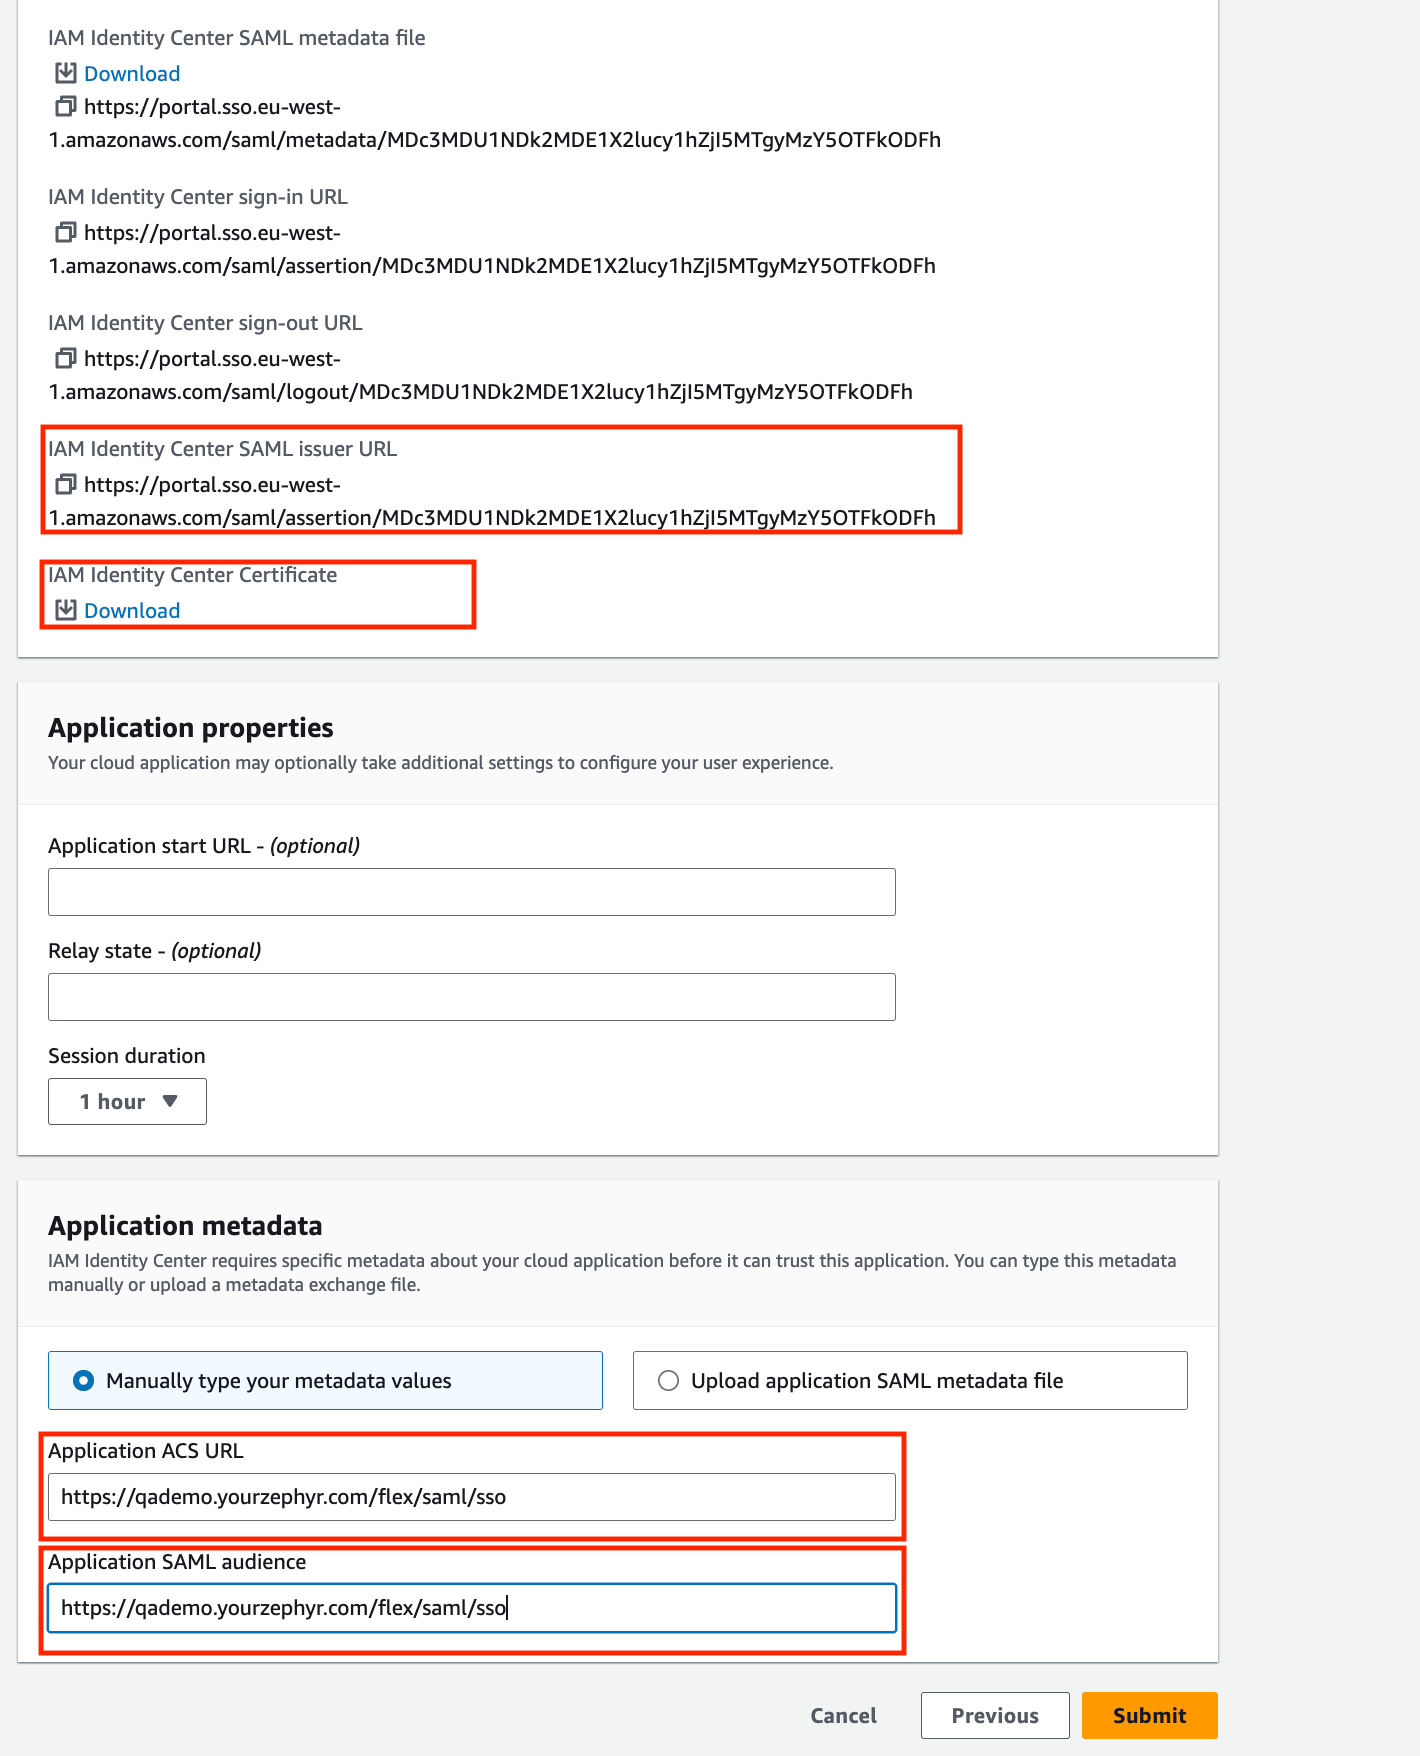
Copy the IAM Identity Center SAML issuer URL, and then download the IAM Identity Center Certificate.
Under Application Metadata perform the following steps:
Copy and paste the URL from Zephyr Administration >Authentication > SSO under Single Sign-On URL: https://qademo.yourzephyr.com/flex/saml/sso to Application ACS URL and Application SAML audience box.
Click Submit.
Once the application is created, under Actions, select Edit attribute mapping.
Add the following attribute and save the changes.

Subject
${user:subject}
unspecified
FirstName
${user:givenName}
unspecified
email
${user:email}
unspecified
LastName
${user:familyName}
unspecified
Assign users and groups to the application, and then navigate to Settings under IAM Identity Center. .
Click the AWS access portal URL.
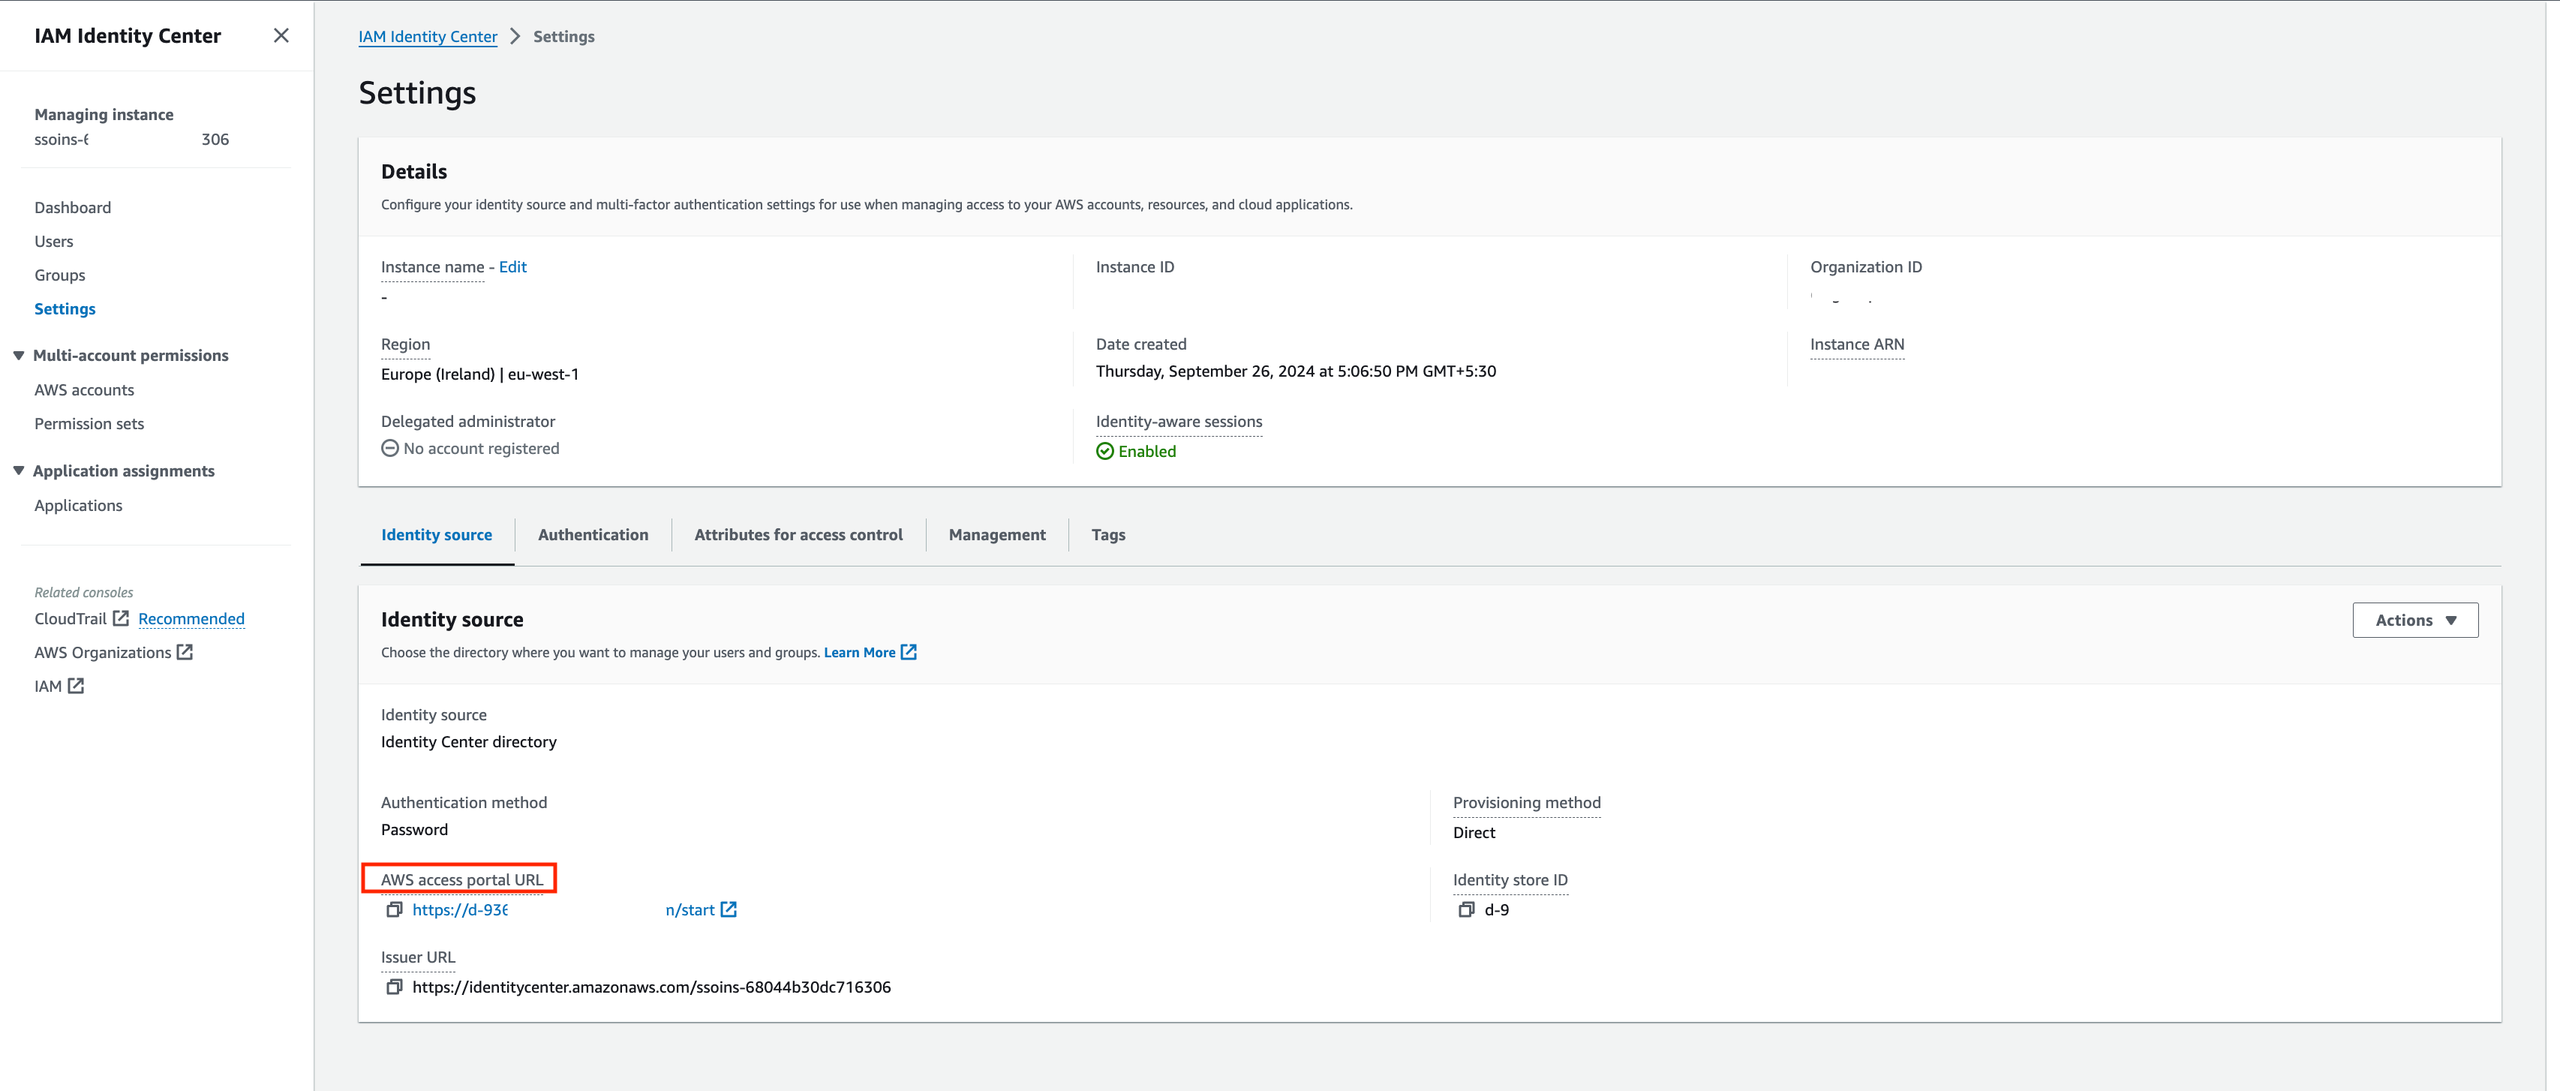
Right-click on the application and copy the URL.
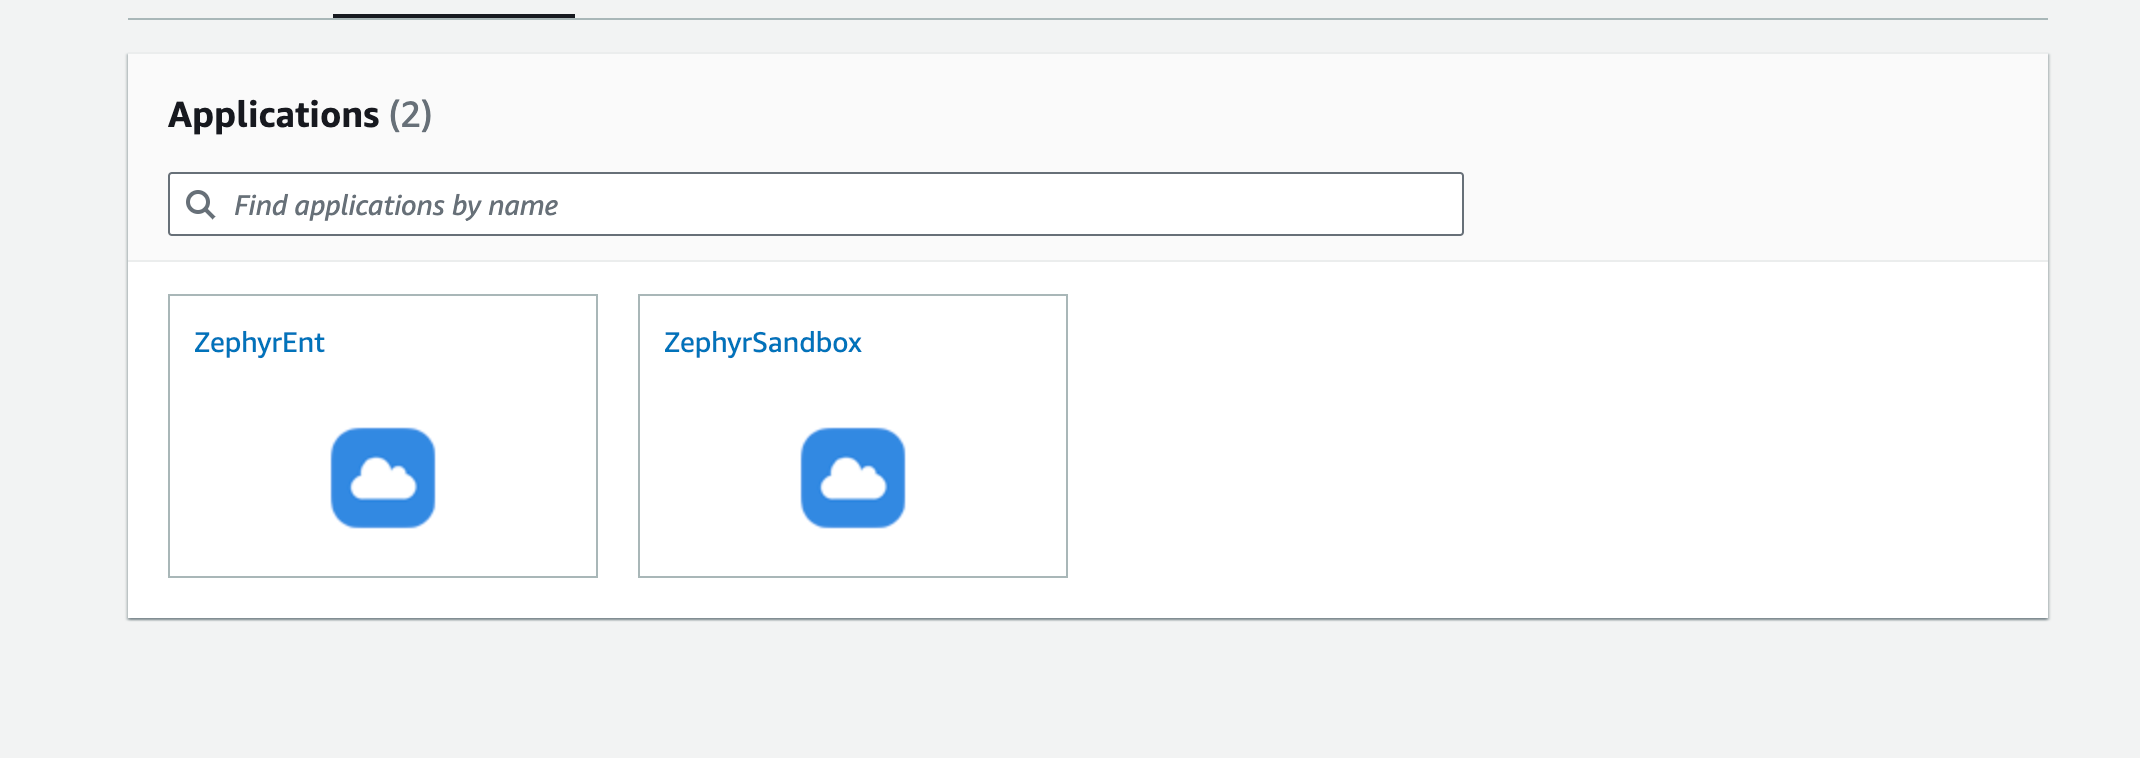
Log in to Zephyr as admin.
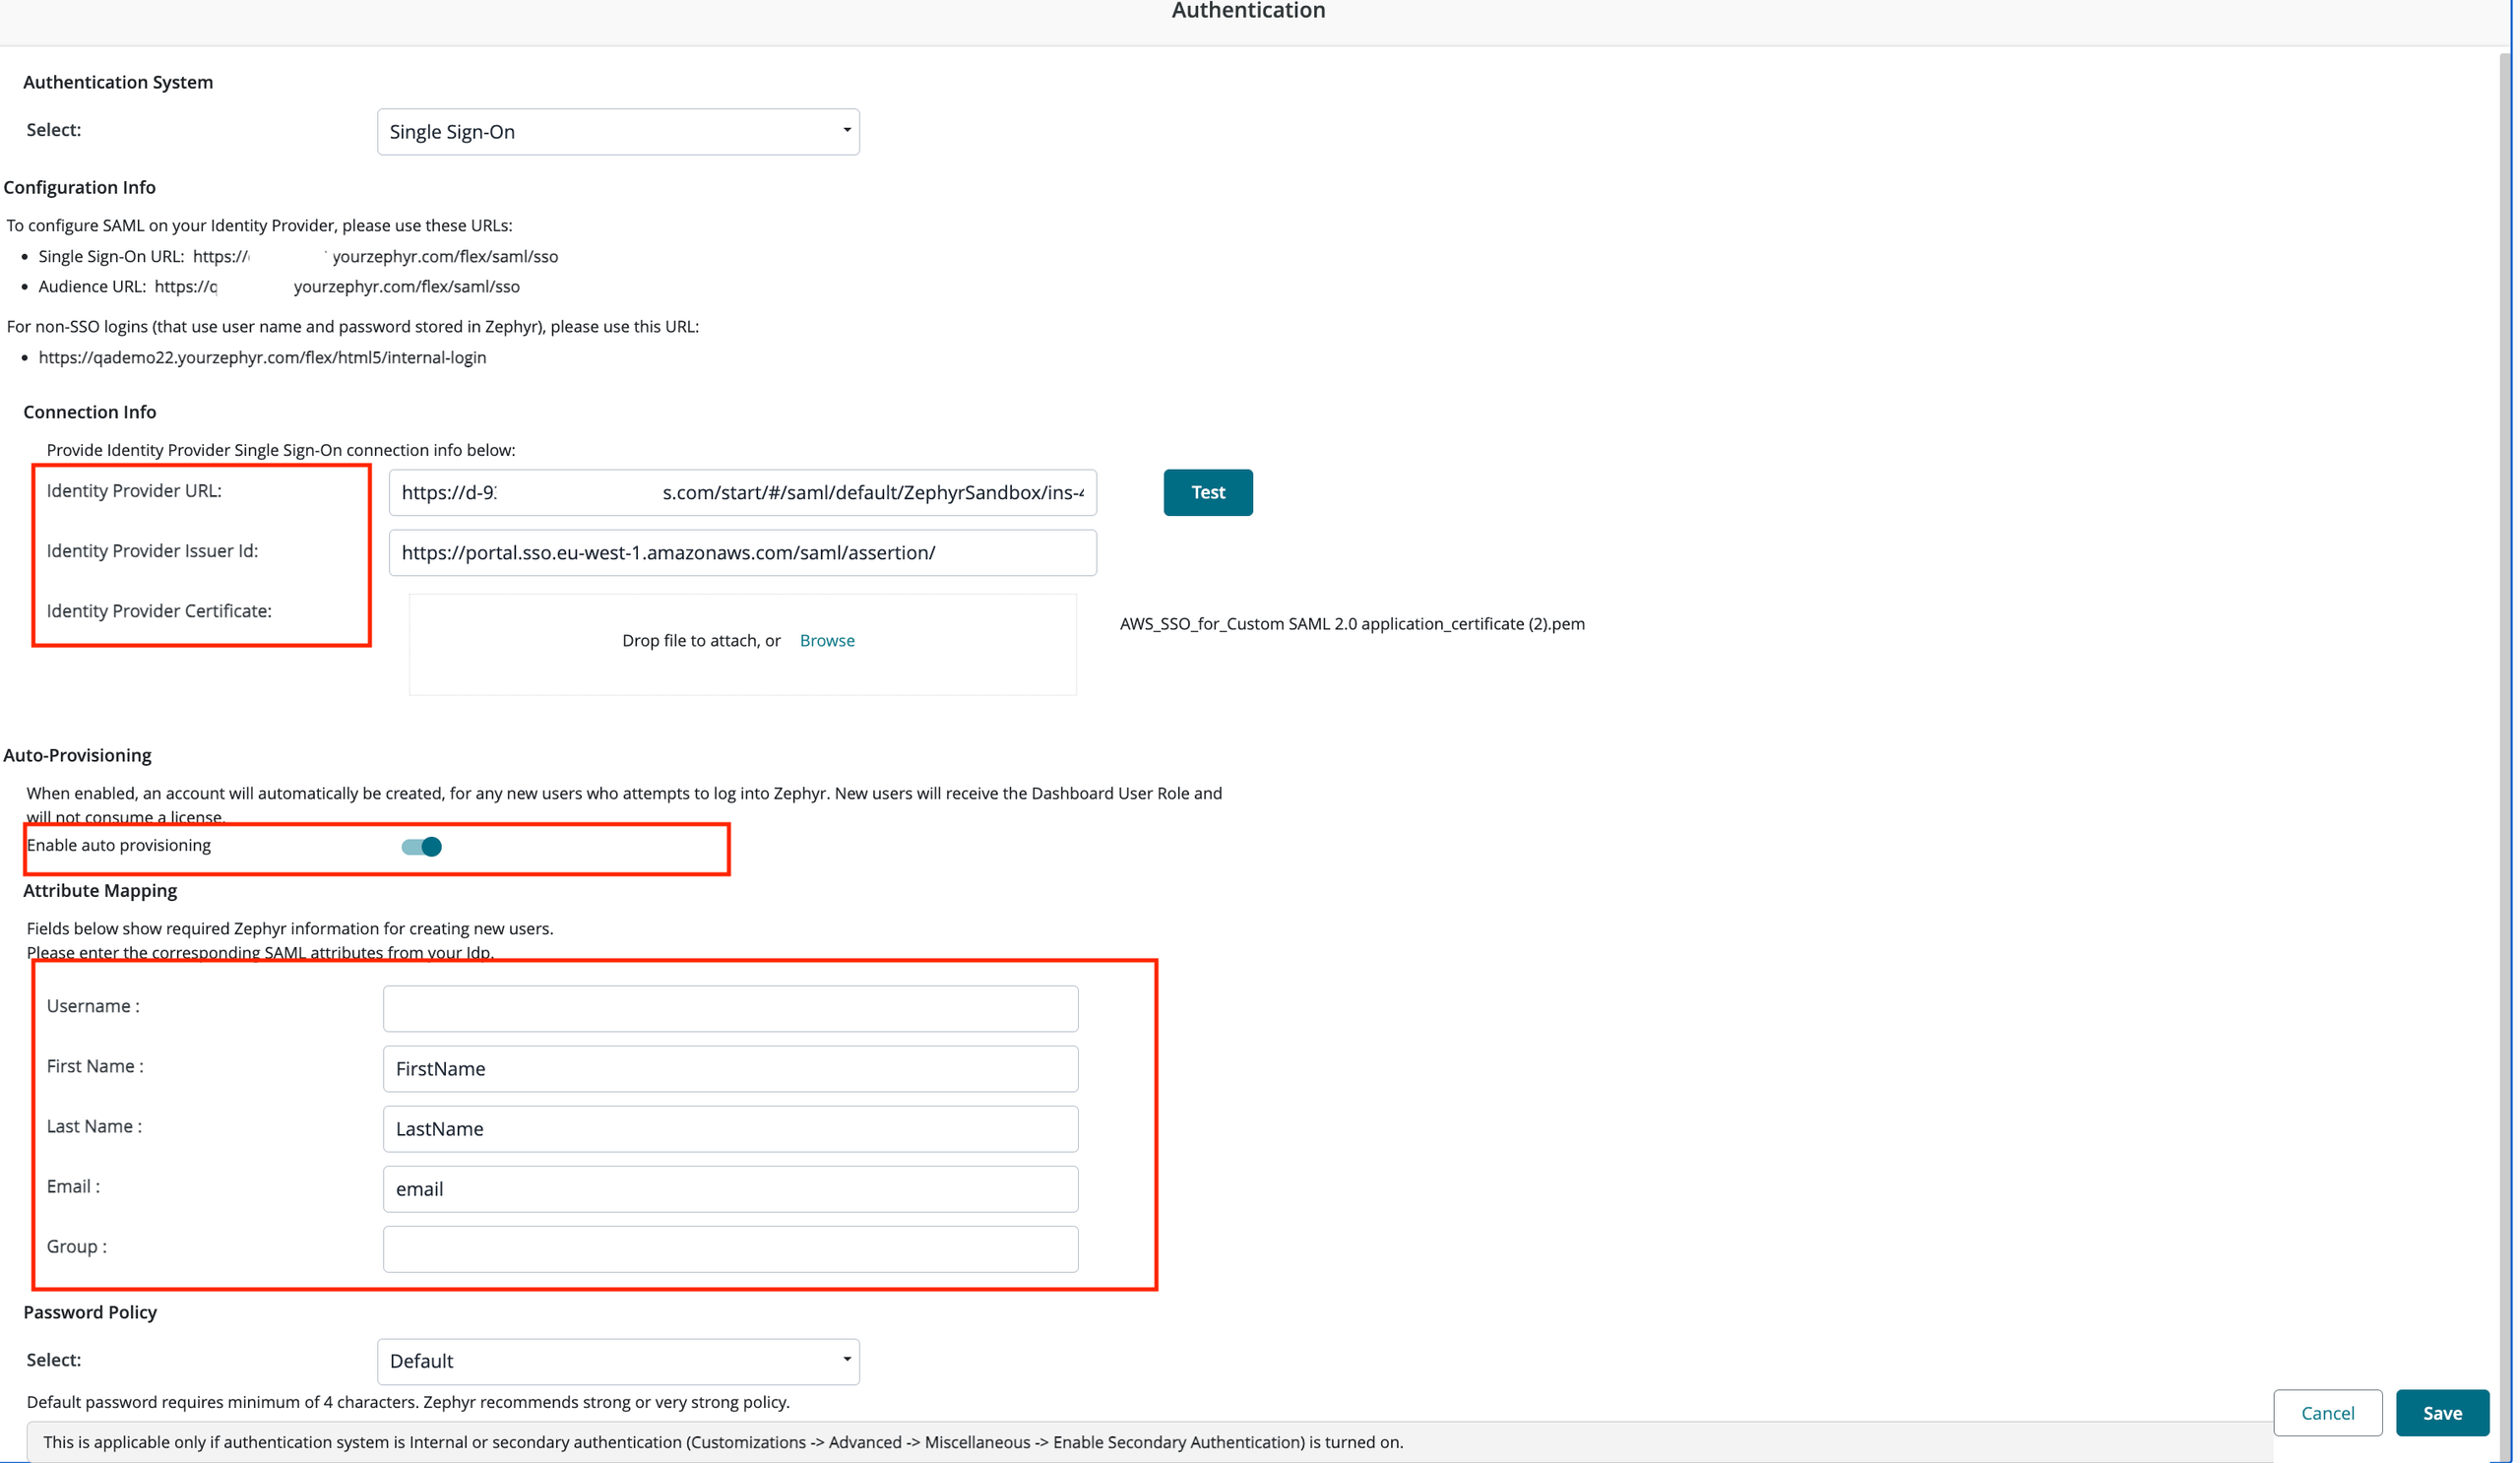
Navigate to Administration > Authentication > SSO.
On the SSO page, perform the following:
In the Identity Provider URL box, enter the URL copied. See step 16.
In the Identity Provider Issuer ID box, copy the IAM Identity Center SAML issuer URL. See step 7.
Add the downloaded IAM Identity Center Certificate.
Enable auto-provisioning, and then enter the value.
Click Save.
