Version Control
Overview
Version control is enabled by default and allows teams to collaborate and manage multiple versions of test cases simultaneously while maintaining data integrity and providing a history of changes. Versions can be viewed together and compared for audit purposes.
Note
Changes to testing details only affect test executions using the current version. Changes to test steps do not affect test executions automatically to preserve the results history. However, the following notification appears on the Test Player screen:
This test script is outdated because the test case has been changed.
If you choose to update the test script, the steps are synced and updated.
You cannot create a new version directly from an older version, but you can make changes to older versions. Also, by default all lists, grids, searches, queries, etc., display the latest version of test cases.
You can manage the ability to create new versions in Project Settings.
Create New Test Case Versions
The following steps detail how to create new test case versions. If you encounter issues, you may need to review your project settings.
Open a project and click the Tests view.
Click New. The Create Test Case screen appears.
Add a name, objective, and precondition.
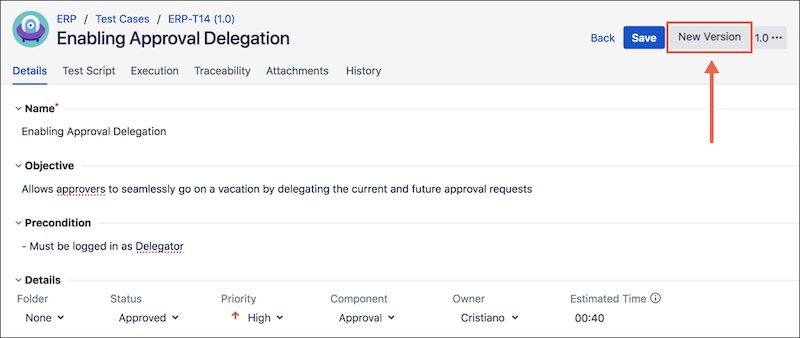
Click Save. A new version of the test case is created (1.0).
Click New Version.

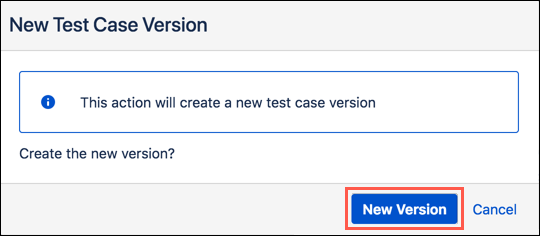
A prompt appears.
Click New Version on the prompt.

A new version of the test case (2.0) is created. You can click the dropdown with the version number to navigate to different versions.
Tip
You can click the History tab to view and compare all of your versions compared. This is often helpful for auditing purposes.
Just select the versions you want to compare, then click Compare Versions.