Configuration
Configure Zephyr Server
Zephyr Server is highly customizable, and you can configure every part of the system (testing statuses, environments, labels, custom fields, etc.) to suit your specific project’s needs.
But before you configure Zephyr Server, you may want to configure some of your Jira settings, both at the global and project levels. It is also a good idea to familiarize yourself with how to locate the configuration settings and how to use the delete and archive functions before you get started.
Locate the configuration settings
To access the configuration settings, click the Configuration button in the upper-right corner of any screen.

There are three sections for you to customize: General, Statuses, and Custom Fields.
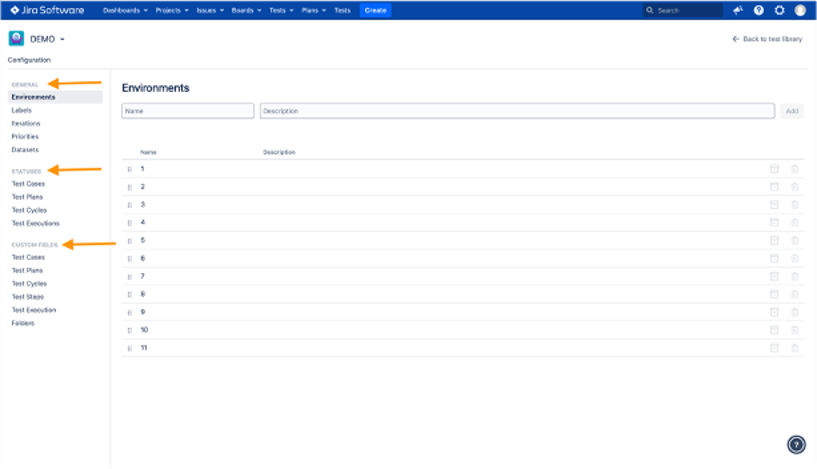
Customize environments, labels, iterations, datasets, and priorities
Click either Environments, Labels, Iterations, Datasets, or Priorities.
Type a name.
If you’re adding an environment, iteration, or priority, you can also enter a description, though one isn’t required.
Click Add. Your addition appears on the list.
Customize priorities
Go to Priorities.
Enter a priority name. You can also enter a description. This is optional.
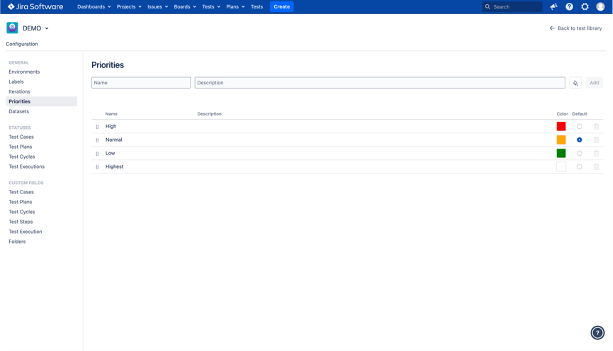
Select a color to represent the priority (optional but recommended).

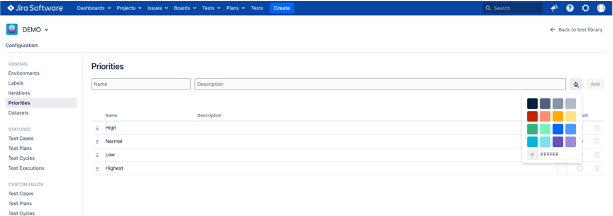
Click Add. Your priority appears at the bottom of the list.

Remember that you need to have at least one active priority (not deleted). You can't delete all of the priorities from your list.
Default priorities
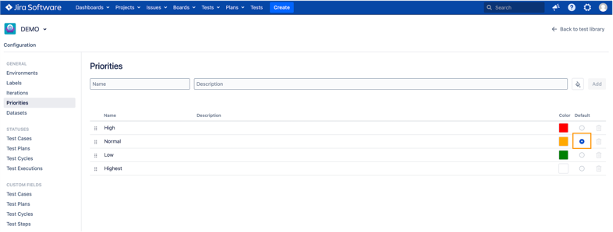
Zephyr applies automatically one priority to all your new test cases. You can change it. Pick priority from the list and mark it as default:
Customize statuses
You can create custom statuses for test cases, test cycles, test plans, and test executions.
Click an option in the Statuses section.
Enter a status name. You can also enter a description. This is optional.
Select a color to represent the status (optional but recommended).
Click Add. Your status appears on the list.
Default statuses
You can't rename or delate a few essential statuses in Zephyr. These statuses have the following icon:

You can still archive default statuses.
Caution
Remember that you need to have at least one active status (not deleted). You can't delete all of the statuses from your list.
Customize fields
You can create custom fields for test cases, test cycles, test plans, test steps, test executions, and folders.
The following field types are available:
Checkbox
Date Picker
Decimal Number
Number
Select List (Multi-Choice)
Select List (Single Choice)
Text Field (Multi-Line)
Text Field (Single Line)
User Picker
You can define whether each field is required, and you can drag-and-drop to reorder fields.
Click one of the options in the Custom Fields section: Test Cases, Test Plans, Test Cycles, Test Plans, or Test Steps.
Enter a field name.
Select a field type from the drop-down list. If you choose one of the Select List types, you are prompted to add list options. Simply enter a value, then click Add.
Optional step: Check the Required box to make the field required. Required fields must have a value before a new item (test case, test step, etc.) can be saved.
Click Add. Your custom field appears on the list. Hover over the row to edit or delete the field.
Custom fields appear on the Details tab (More Information section) of each test case/plan/cycle/step/execution or folder in the project.
Labels
Labels can only be deleted, not archived.
When you delete a label, you are prompted with information on how the label is used throughout Zephyr. If the label is used on test artefacts, you are given the option to select a replacement label.
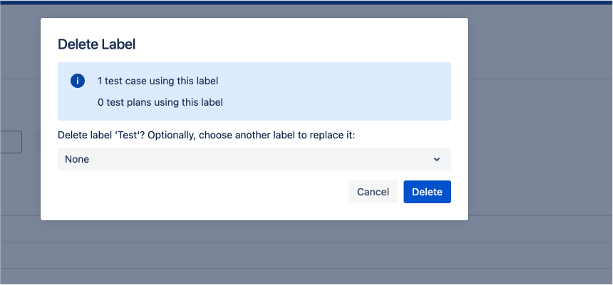
If you select None, there is no replacement for the deleted label.
Delete and archive customized options
You can delete or archive any custom additions you make to Zephyr.
Delete - Permanent removal from the app.
Archive - Renders the option invisible and inactive throughout Zephyr but saves it in the configuration settings in case you want to activate it later.
Hover over any row, and click the cog to access the drop-down options.

If you click Delete, you are prompted to verify your choice, as deletion is permanent. Some items currently in use within the app cannot be deleted.
If you click Archive, your item becomes gray and inactive. You can reactivate it by clicking the cog, then Unarchive.