Test Player
The Test Player is where actual testing occurs and is tracked within Zephyr. Regardless of how many test cases you want to execute, the Test Player is where the fun happens.
Launch the Test Player (execute/run tests)
Test executions are completed in the Test Player via test cycles. A test cycle can contain as few or as many test cases as you wish.
From the Cycles view, you can launch the Test Player in two ways:
Select a test cycle, then click Run.
Click a test cycle’s key or name link.
These options allow you to begin testing or continue testing.
Track your progress
To improve the accuracy of your planning, the Test Player tracks testing estimates and actual testing time.
Time summaries appear at both the test-cycle level as well as at the test-case level.
 |
Click the image to enlarge it.
Click Play to begin testing. The test-execution timer begins to run.
 |
Click the image to enlarge it.
Tip
You can also enter testing time manually by clicking the ellipses button, entering the hours and minutes (hh:mm), and clicking Save. 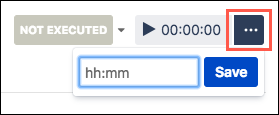
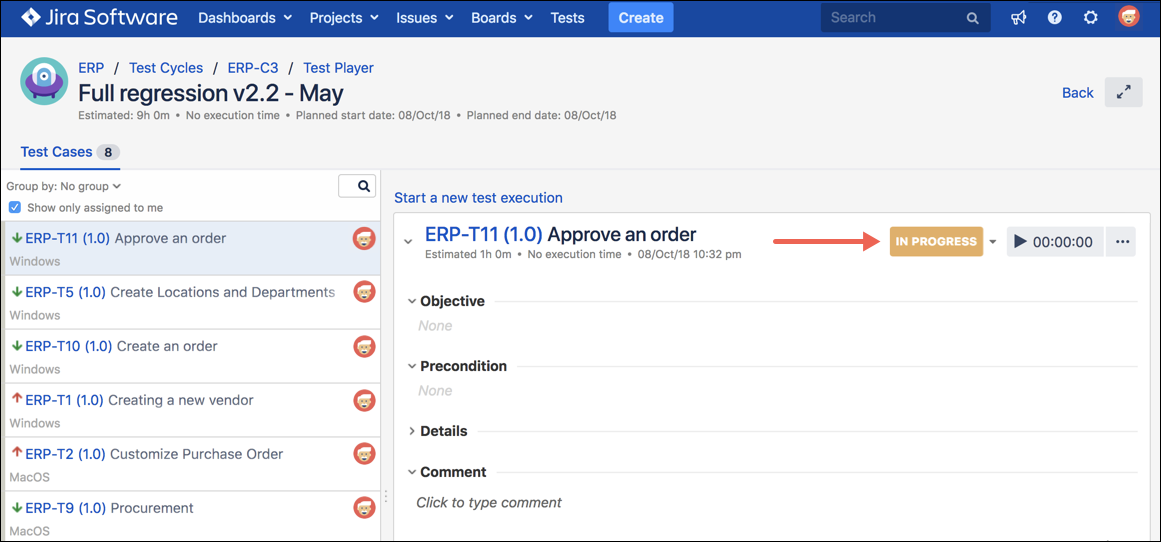
The status of the test case updates as you input test-script results.
Group tests
The group-by option in the Test Player allows you to filter and reorganize tests into more useful views.
Click the Group By dropdown to select from available grouping options.
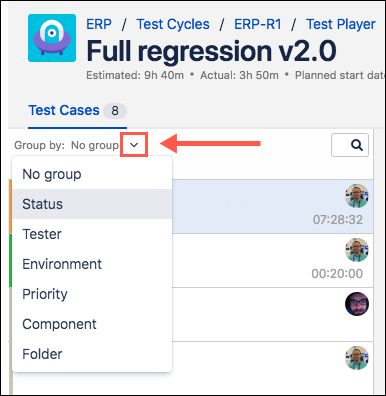
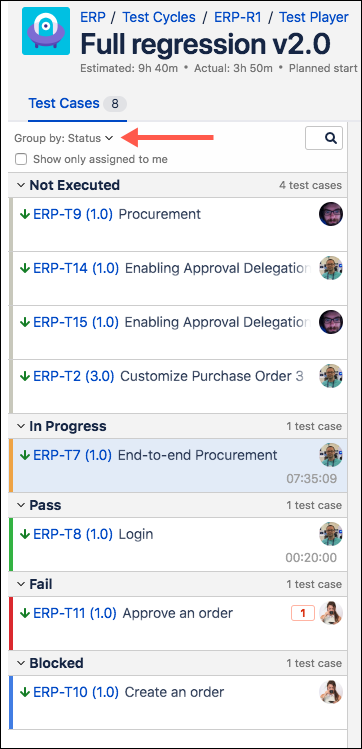
The test cases restructure to give you a better sense of the data you’re looking for. For example, this set of test cases is grouped by status:
 |
Click the image to enlarge it.
Execute tests
Complete testing for each test case, and set the result for each test step by clicking the Pass, Fail, or Blocked icons.
 |
Click the image to enlarge it.
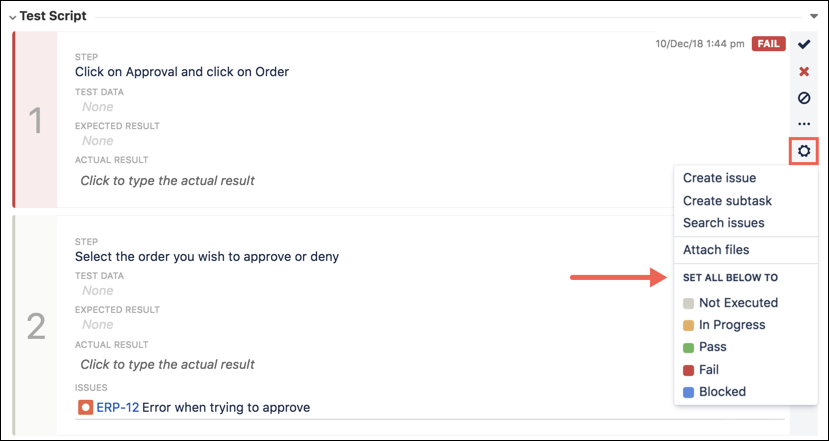
If necessary, you can update the results of any remaining steps in bulk. To do this, click the cog icon, then select your desired result from the Set All Below To section.
 |
Click the image to enlarge it.
Create or link to a defect
You can create a new or link an existing defect to a test case or to a test step.
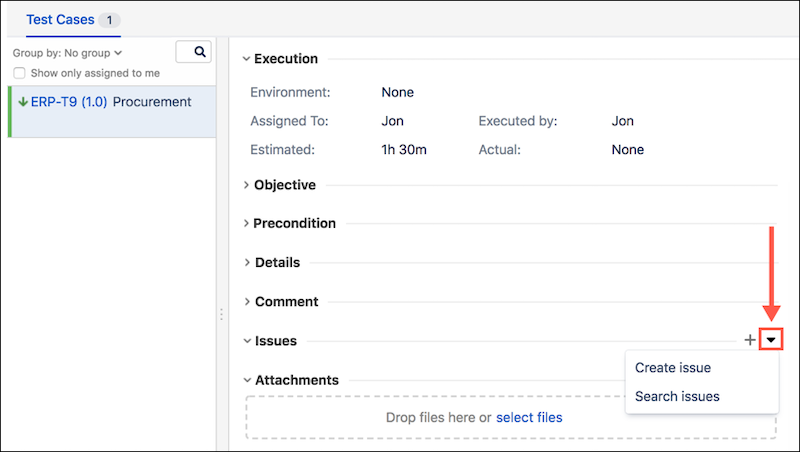
At the test-case level, use one of the following two options in the Issues section.
 |
Click the image to enlarge it.
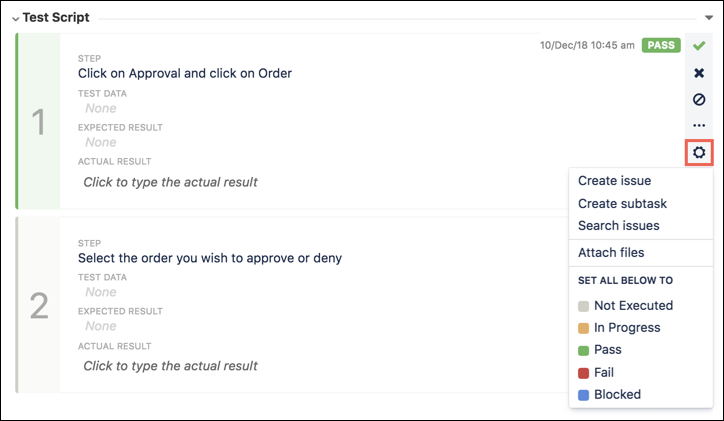
At the test-step level, you can create a new or link an existing defect to any test step by clicking the cog icon, then selecting Create issue or Search issues.
 |
Click the image to enlarge it.
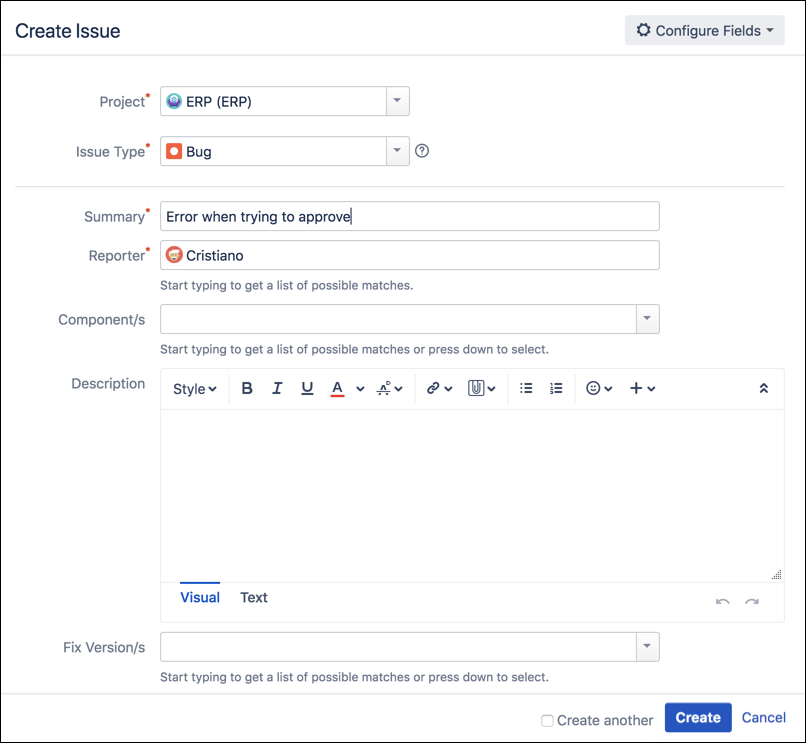
If you click Create issue, fill out your desired fields on the Create Issue screen, then click Create to link the new issue to the test step.
 |
Click the image to enlarge it.
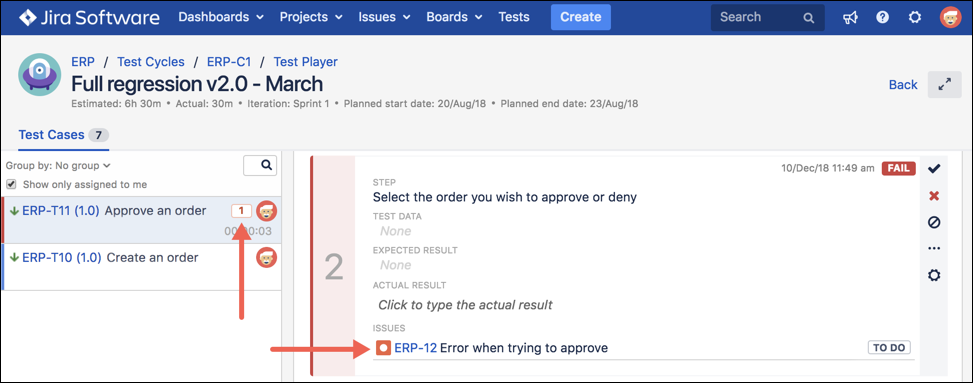
You can see the linked defect in both the test-case list and the step.
 |
Click the image to enlarge it.
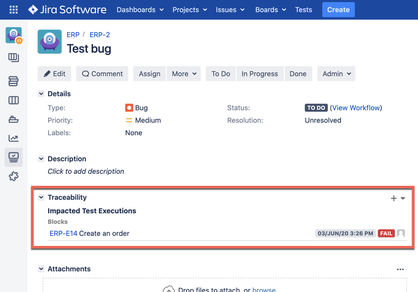
Links also appear on the defect in the Impacted Test Executions section.
 |
Click the image to enlarge it.
Images in test steps
You can attach files to a step in three ways.
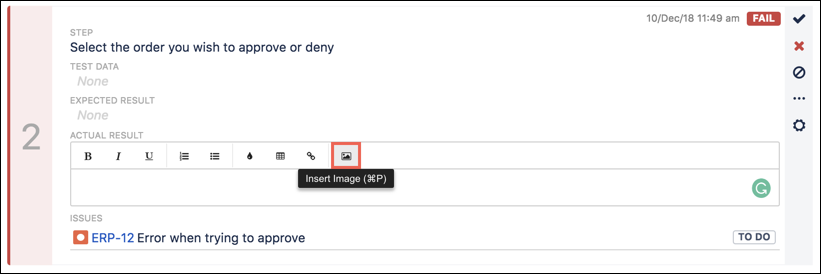
Click Insert Image in the Actual Result section.
This attaches the actual image to the step rather than the file (which requires a click to open and view).
Click the image to enlarge it.
Click the cog icon to attach files to the step.
Drag-and-drop an image file onto the test step.
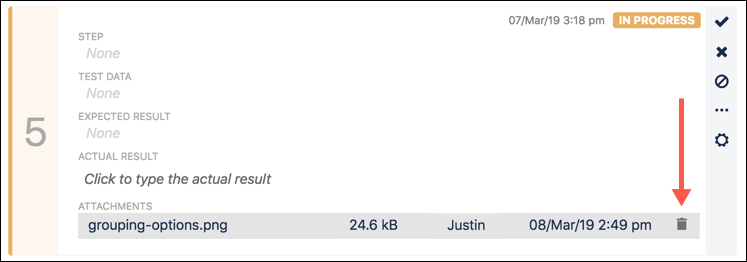
You can remove an image file by hovering over it and clicking Delete.
 |
Click the image to enlarge it.
Rerun tests and view history
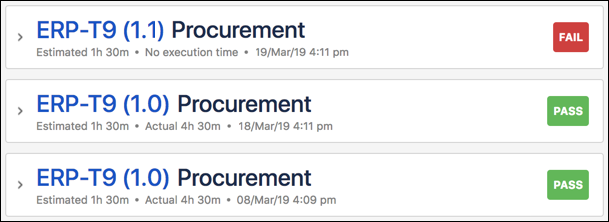
When the time comes to reuse a test cycle and rerun the test cases, click Start a New Test Execution. This archives the previous test data and allows you to start testing from scratch.
 |
Click the image to enlarge it.
Scroll to the bottom of the Test Player screen to view archived test cycles. The most recent tests appear at the top of the list.
Click > to expand and view the archived test data.
 |
Click the image to enlarge it.
Delete a test execution
When you’ve executed a test case and clicked Start a new test execution, the current execution will be saved below. To delete a previous test execution, all you have to do is click the trash icon next to the execution. Remember, this action can’t be undone.
