Configuring Jenkins
This guide walks you through the initial steps for using Jenkins with Zephyr.
Create a feature file
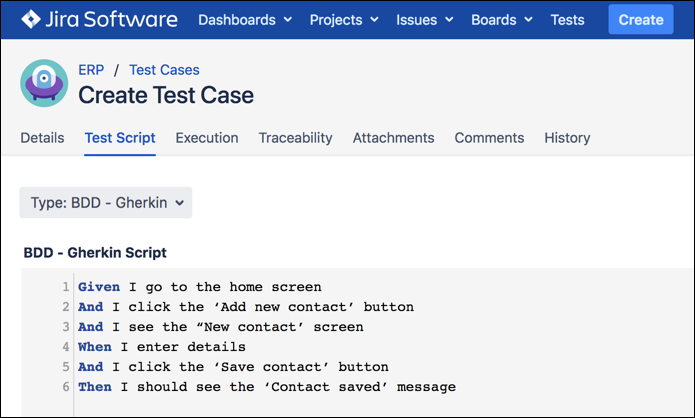
In Zephyr, open a test case and switch to the Test Script tab.
Select BDD - Gherkin from the Type list.
The Gherkin editor appears.
Write your test case.
Remember not to include Feature or Scenario.
Click the image to enlarge it.
Click Save when you are finished, and close the test case.
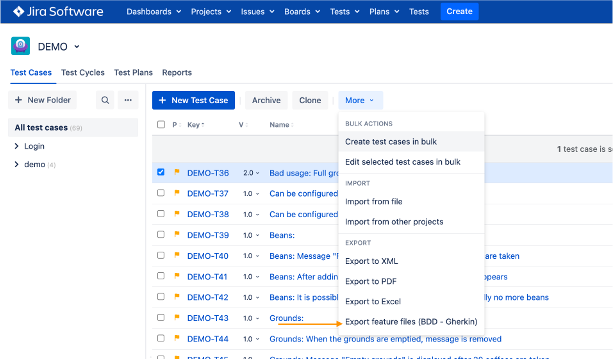
Click More and select Export Feature Files (BDD - Gherkin) to download the feature file for your new test case (or the selected test cases).
Click the image to enlarge it.
The zip file downloads to your computer. Developers using your company’s supported BDD tool can reference this information when writing automated tests related to the test case.
Install the Zephyr plugin for Jenkins
On the Jenkins home page, click Manage Jenkins.
Click Manage Plugins.
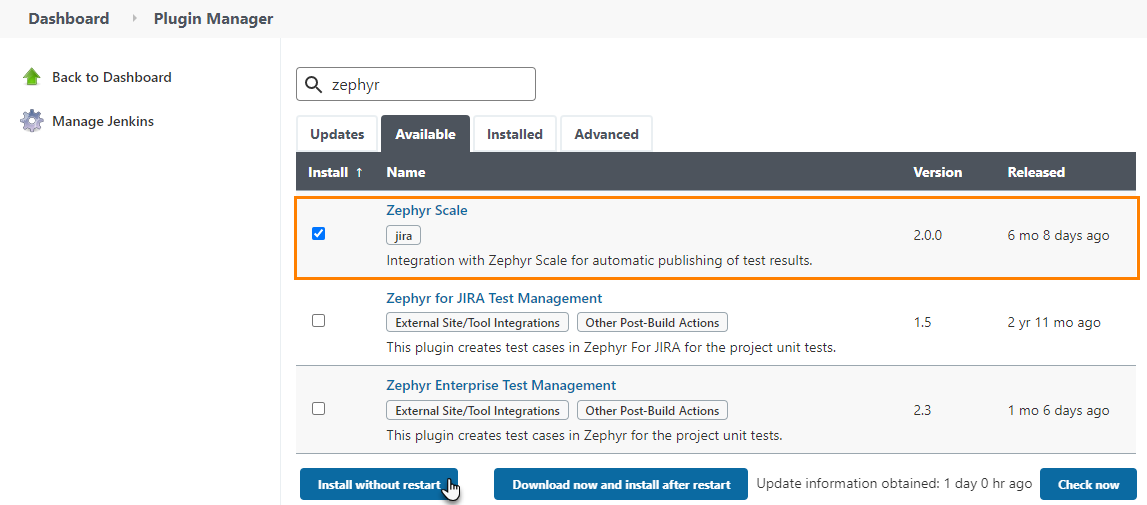
Switch to the Available tab.
Search for Zephyr and select the Zephyr plugin.
Click the image to enlarge it.
Click Install without restart.
You can also download the Zephyr Jenkins plugin from here:
Configure the plugin
On the Jenkins home page, click Manage Jenkins.
Click Configure System.
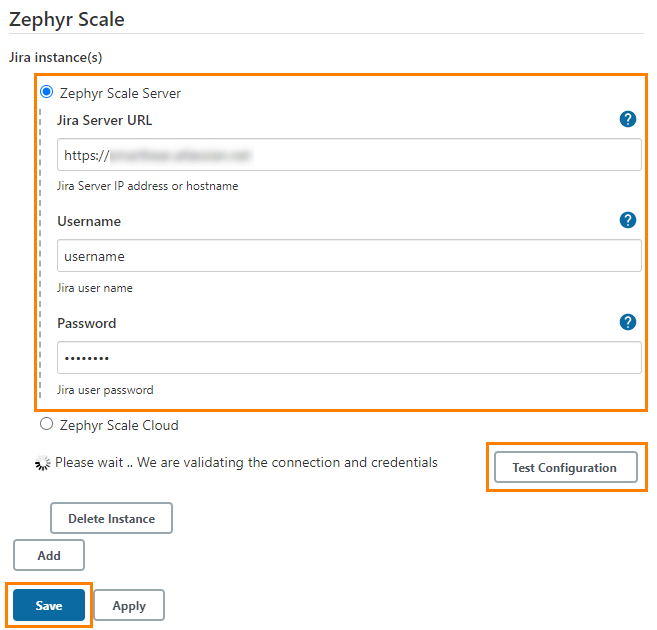
Scroll to the Zephyr section, click Add, and select Zephyr Server.
Enter your Jira Server URL and credentials. Click Test Configuration to validate the details, then click Save.
Click the image to enlarge it.
Setting Up the Zephyr Plugin for Jenkins using Jenkins Configuration as Code
Go to the Jenkins home page.
Click Manage Jenkins.
Choose Configuration as Code.

Click the image to enlarge it.
Select Download Configuration to get a pre-made configuration file or create a custom YAML file.
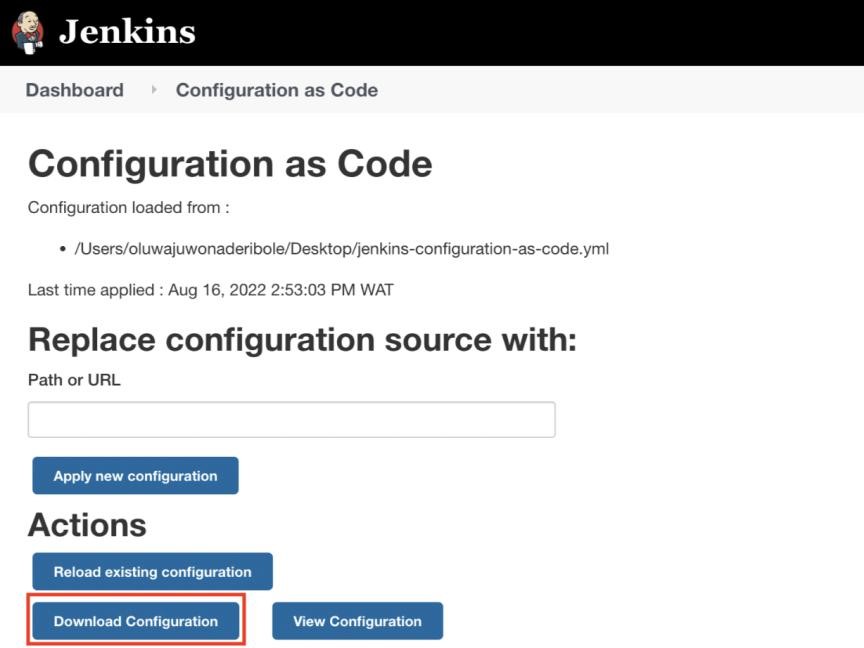
Click the image to enlarge it.
Open the downloaded file and scroll down to the Zephyr section at the bottom.
Click the image to enlarge it.
In the configuration file, specify the type of instance you want to configure: Cloud or Server.
If Cloud, provide 2 attributes as below.
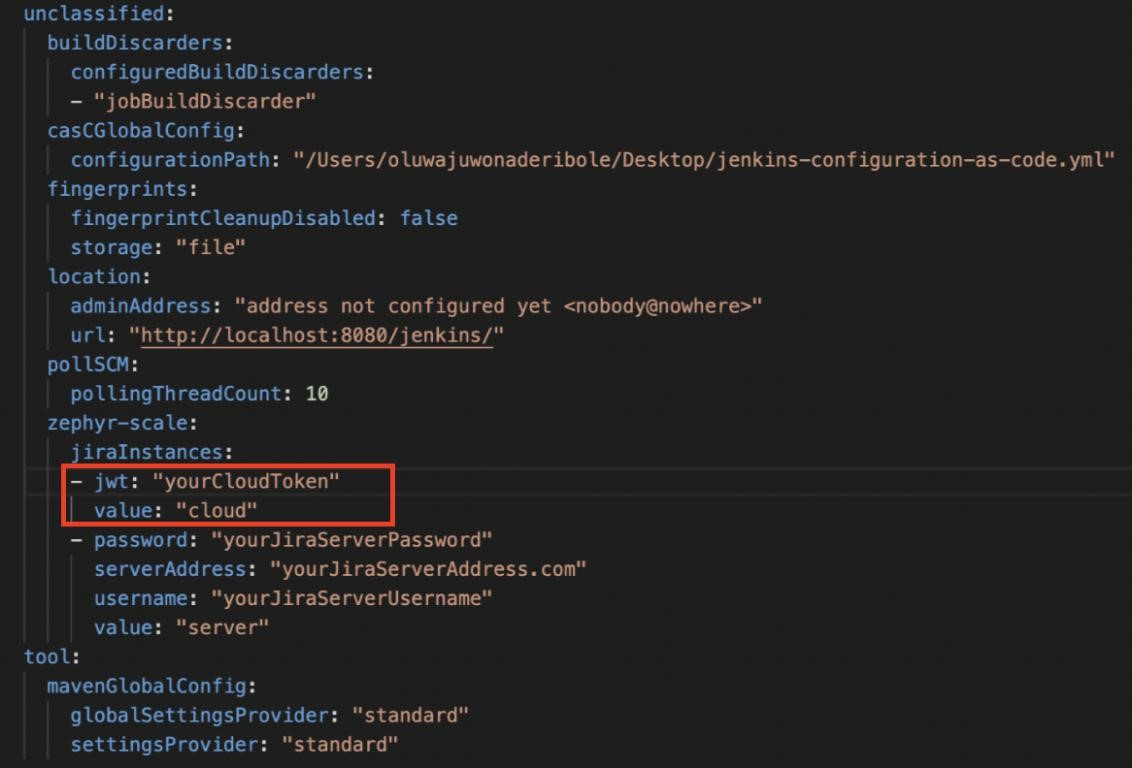
Click the image to enlarge it.
If Server, specify 4 attributes as below.
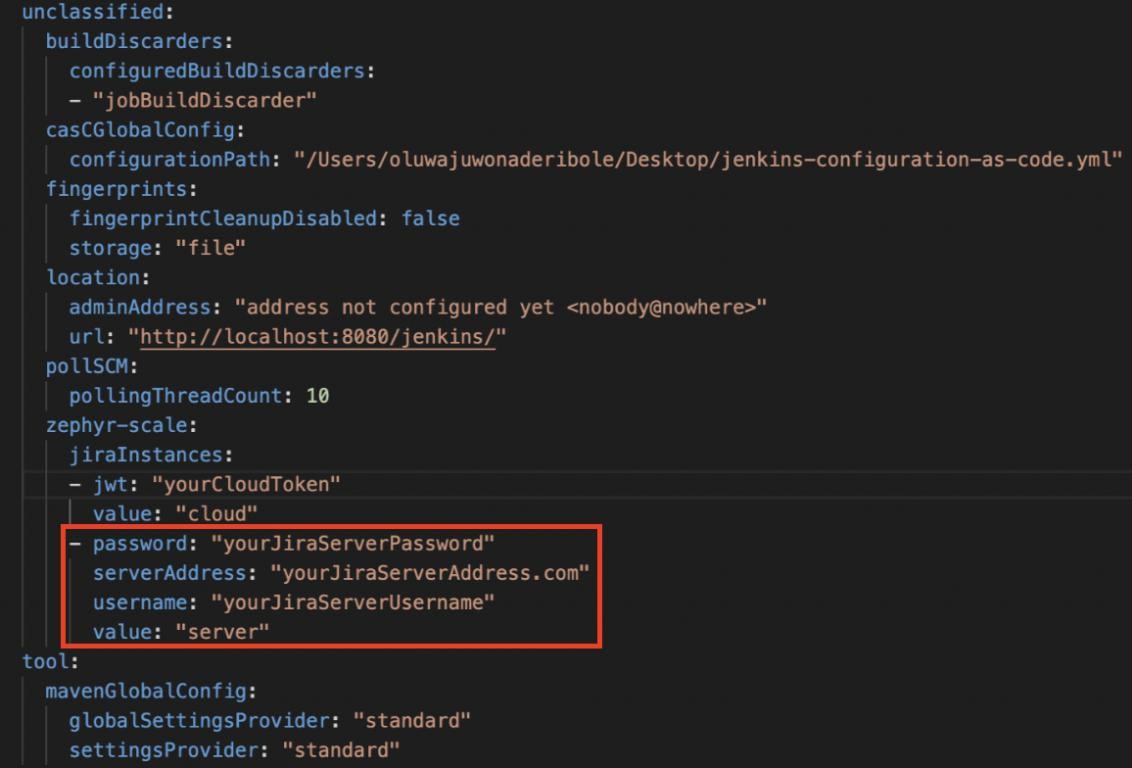
Click the image to enlarge it.
If using a custom configuration file, ensure to include following attributes:
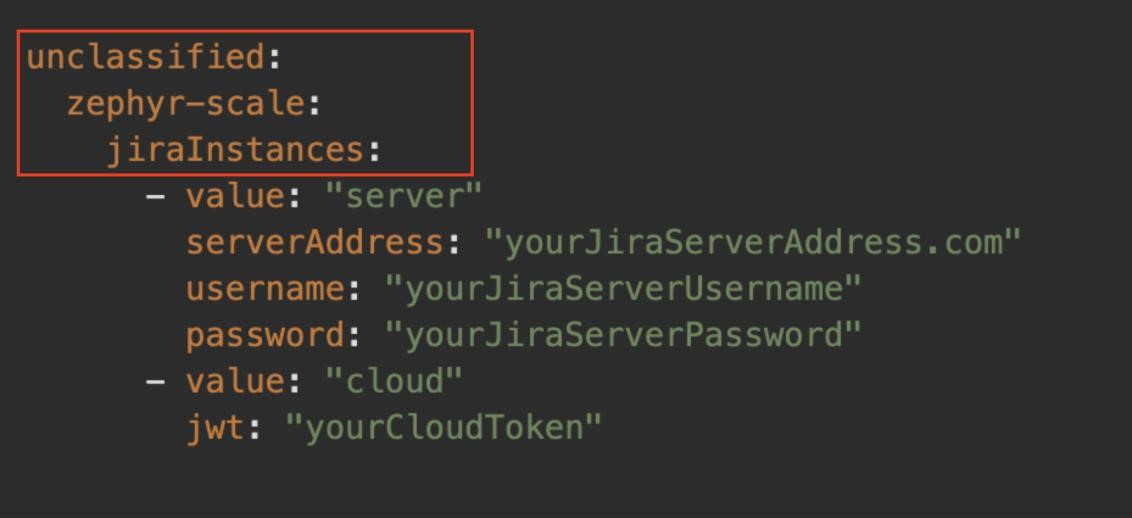
Click the image to enlarge it.
When the configuration file is completed, specify the path to the file on your local machine and click Apply new configuration.
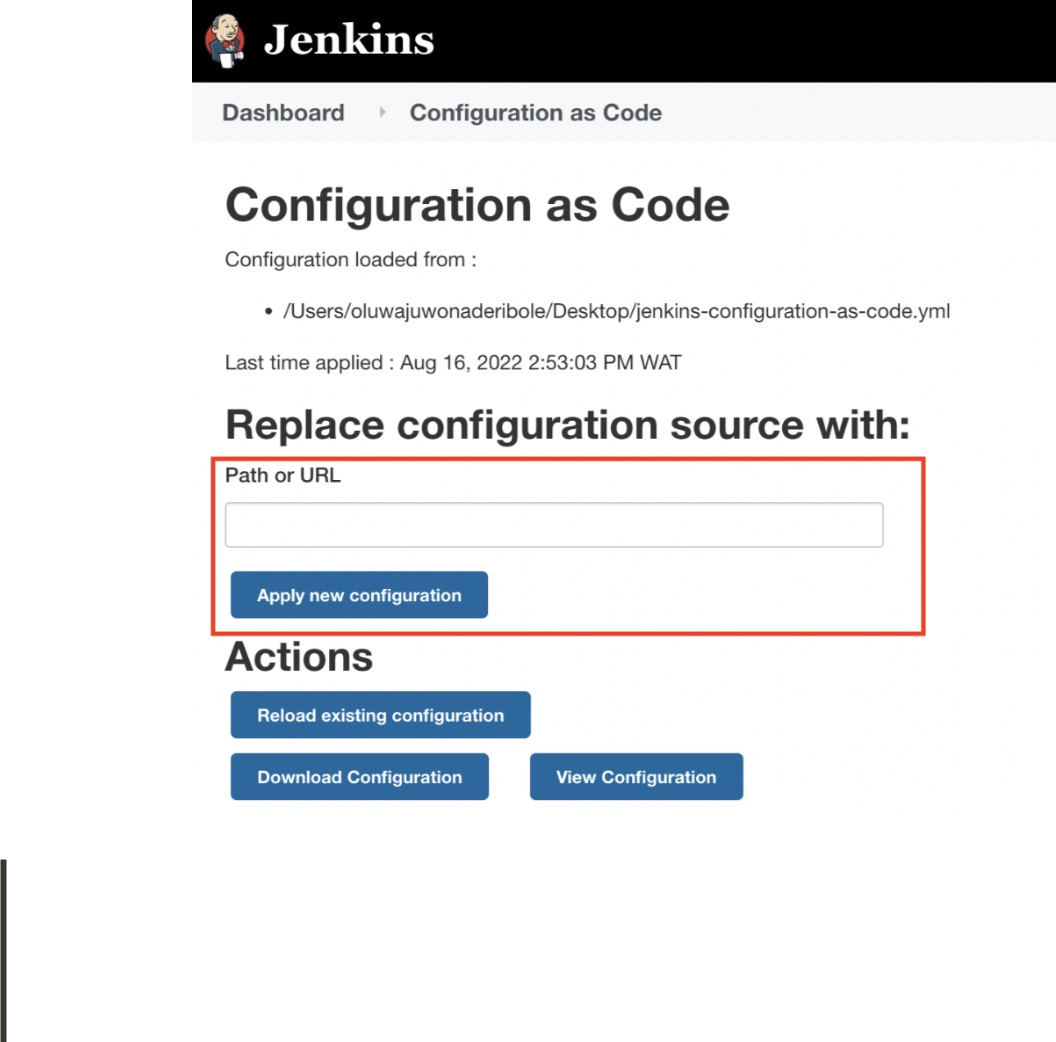
Click the image to enlarge it.
Note
If the YAML file is configured incorrectly (wrong user data or missing attributes), no instances would be configured.
Publish Jenkins test results to Zephyr
The post-build task explained here helps you configure the publishing of Jenkins automated-test results to Jira once a project build completes.
Select your Jenkins project, then click Configure.
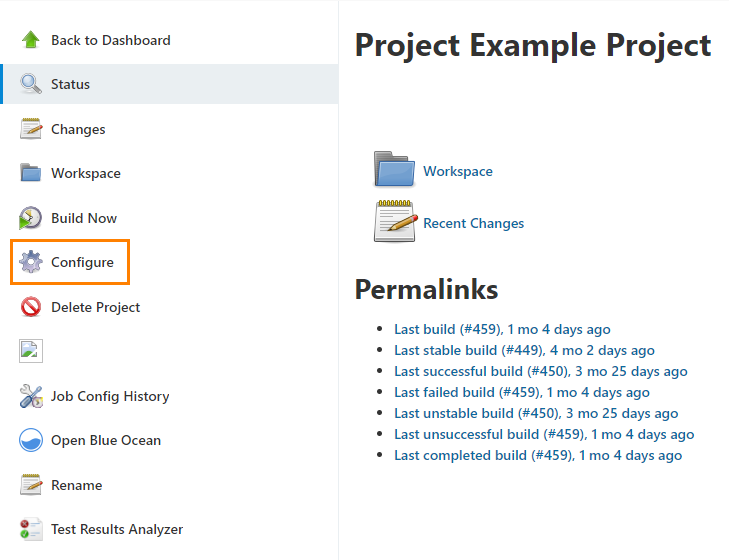
Click the image to enlarge it.
Scroll to the Build section.
Click Add build step and select Zephyr: Download Feature Files from the list.
Specify the following information:
Jira instance - One of the preconfigured Jira instances. If you do not have any, please go to Manage Jenkins > Configure System to set up and configure Jira instances.
Project key - The Jira project key used to filter test cases.
Target path - The path where the exported feature files are to be placed.
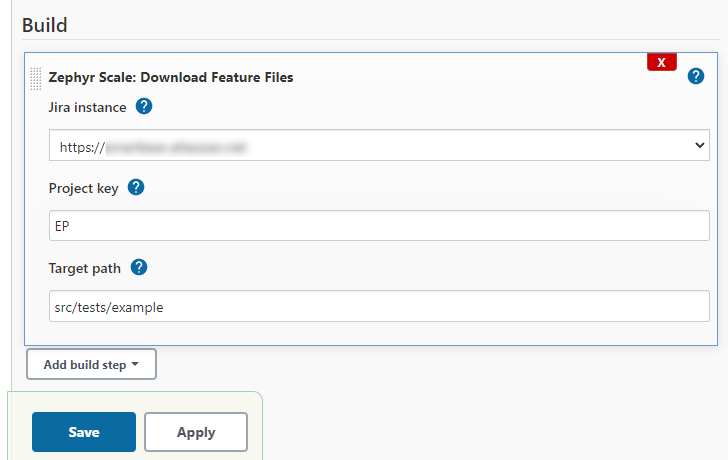
Click the image to enlarge it.
Click Apply.
Scroll to the Post-Build Actions section.
Click Add Post-Build Action and select Zephyr: Publish Test Results from the list.
Specify the following information:
Jira instance - One of the preconfigured Jira instances. Go to Manage Jenkins > Configure System to set up and configure Jira instances.
Project key - The Jira project key used to filter test cases.
Test framework - The test framework where the test results are to be generated from.
File path - The path where the build places generated test result files. You can also use Ant-style patterns, such as
*/test-reports/.json.(Optional) Select Automatically create non-existing test cases to automatically create a new case for a test when a test case key is not provided.
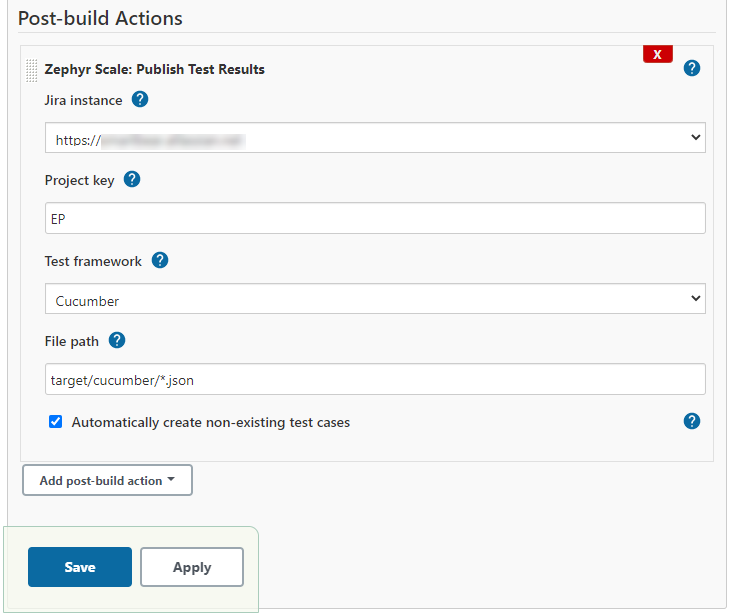
Click the image to enlarge it.
Click Save.
