Zephyr Squad With Team-Managed Projects
To use Zephyr Squad in team-managed projects (formerly known as next-gen projects), you must enable Zephyr Squad for individual projects and set up a Test issue type. This is important as the Test issue type is used throughout Zephyr Squad. You won't be able to interact with the Zephyr Squad menu until the Test issue type is created and enabled.
You can change the issue type used by Zephyr Squad later if needed.
Create an issue type for Zephyr Squad
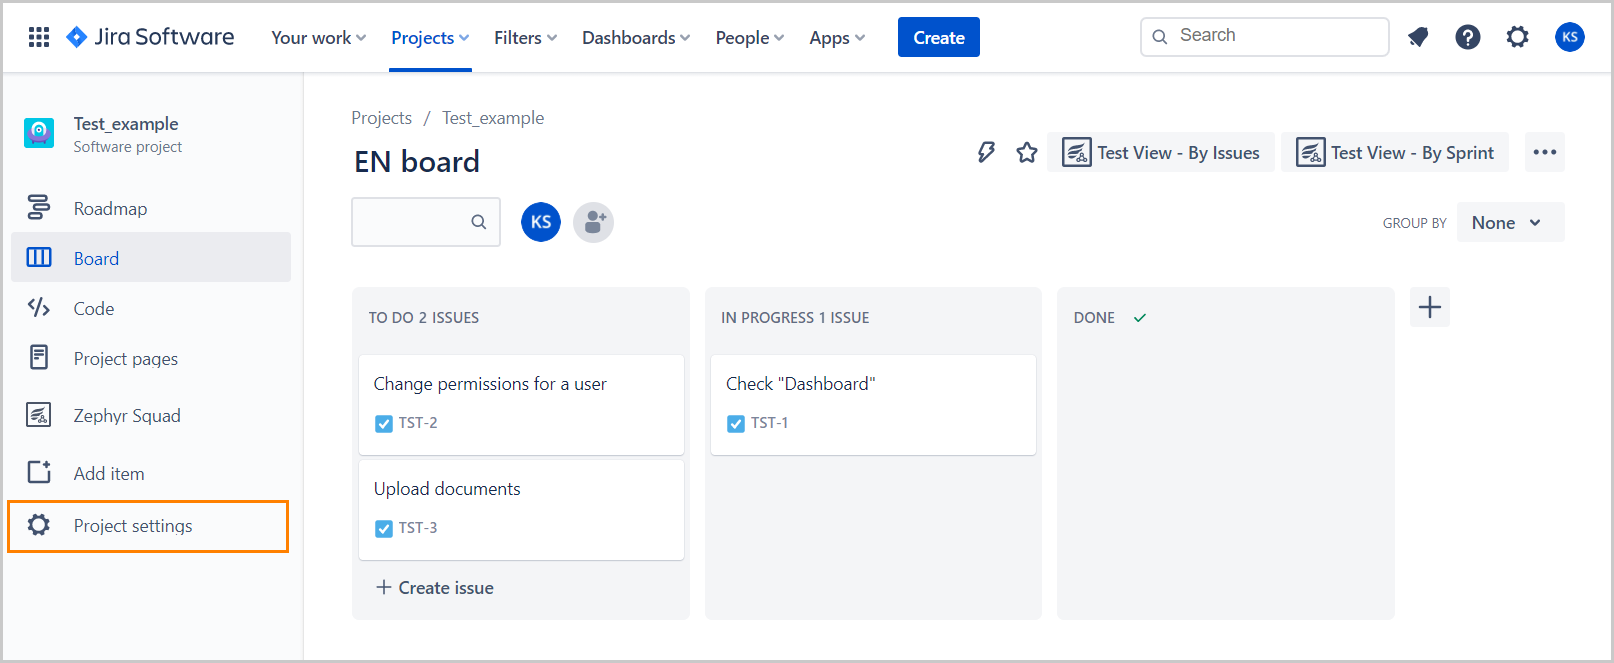
Navigate to the project settings for your team-managed project.
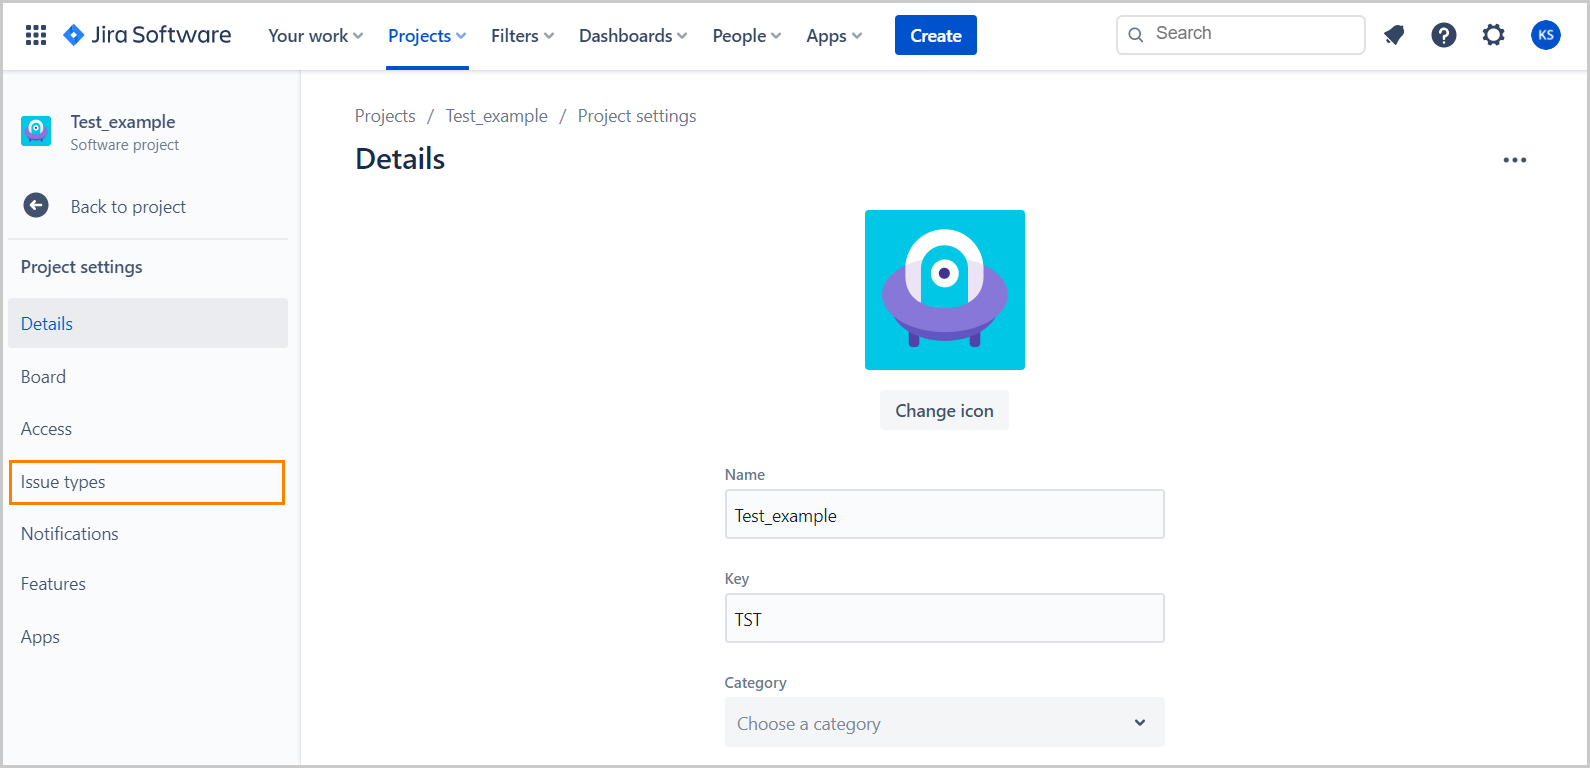
Click Issue types on the sidebar.
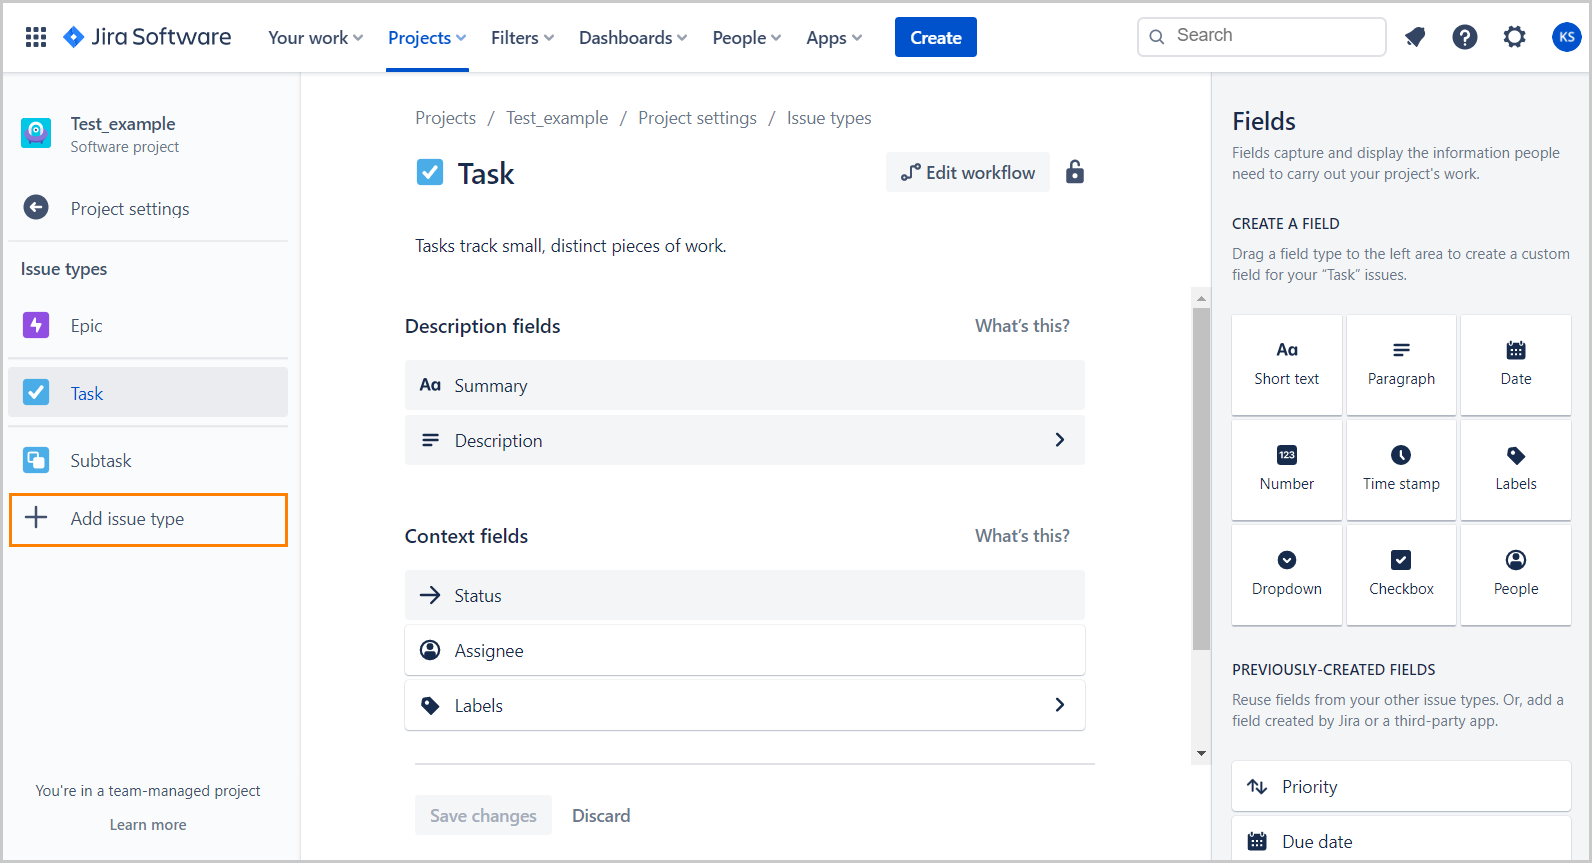
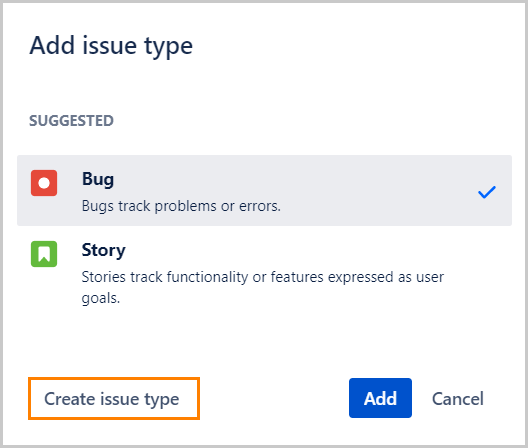
Click Add issue type.
Click Create issue type.
Enter the name for the issue type, for example, Test. You can also add a description and change the issue icon if you want.
Note
We recommend using the Zephyr Squad icon as it allows you to easily distinguish a test.
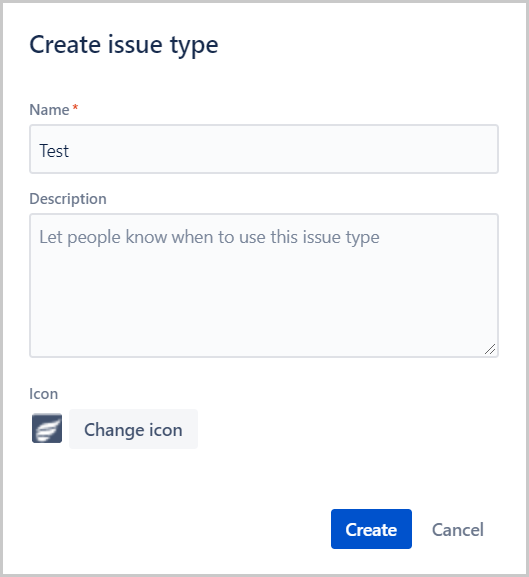
Click Create.
Enable Zephyr Squad in a project
Click Zephyr Squad in the project sidebar.
Select the issue type that you want to use for Zephyr tests. If you have not created one yet, follow the steps above to create it.
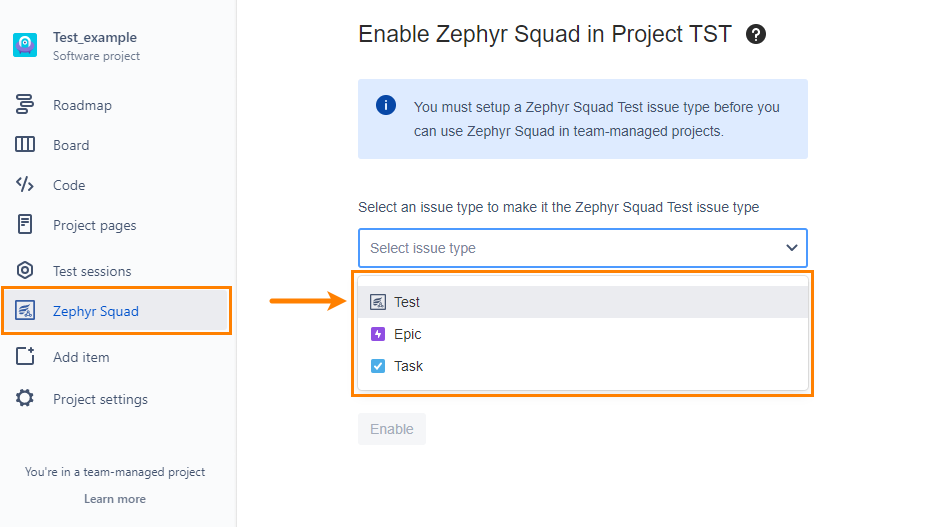
Click Enable.
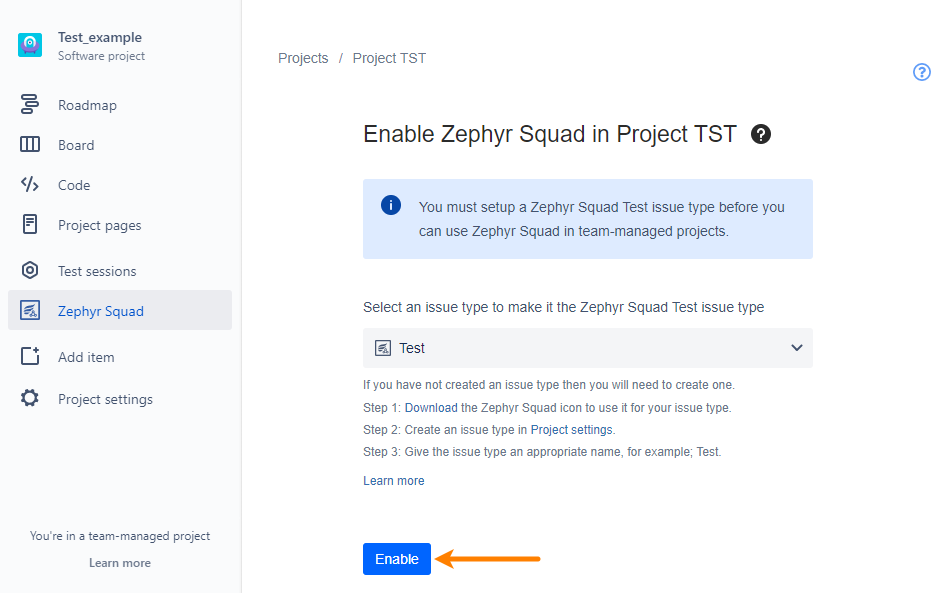
Now you can create and use Zephyr Squad tests in your project.
Change the issue type used by Zephyr Squad
If needed, you can change the issue type used for Zephyr Squad tests (for example, from Test to Task or similar).
Go to Project settings > Apps > Zephyr Squad.
Click Change.
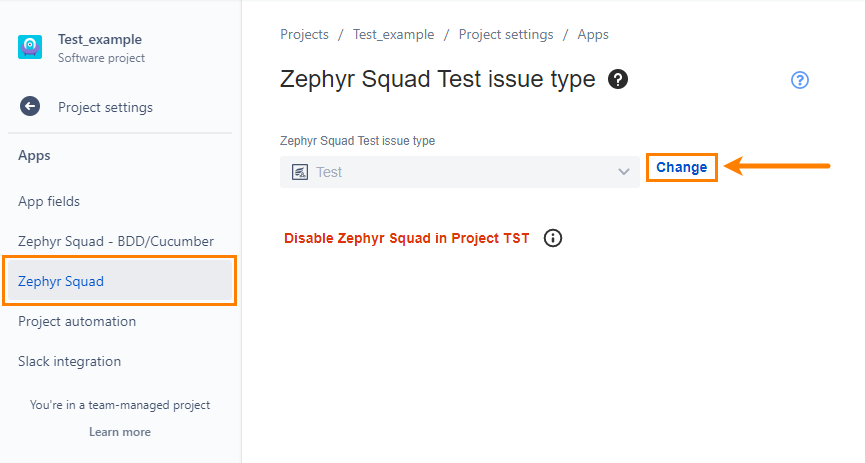
Select another issue type to use for Zephyr Squad tests. To create a new one, follow the steps above.
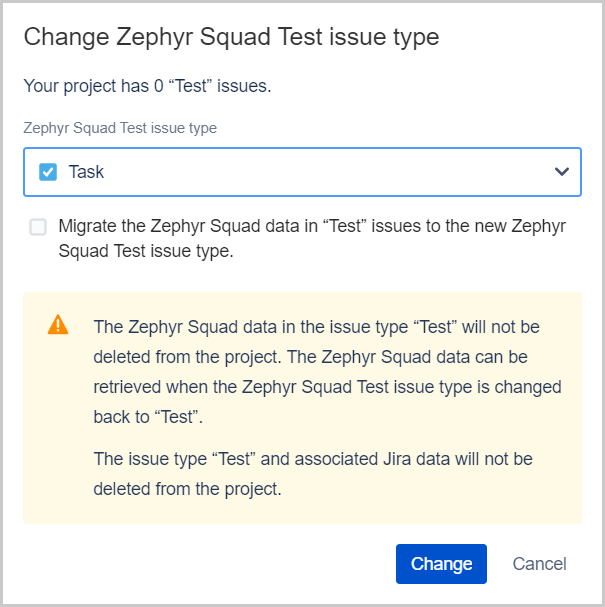
Important: Choose whether to migrate existing Zephyr Squad data from the old to the new issue type.
To migrate the data, select the Migrate the Zephyr Squad data in <IssueType> to the new Zephyr Squad Test issue type check box.
If you do not migrate the data, all pre-existing data for the original issue type will be deleted forever.
Click Change.
Disable Zephyr Squad in a project
Go to Project settings > Apps > Zephyr Squad.
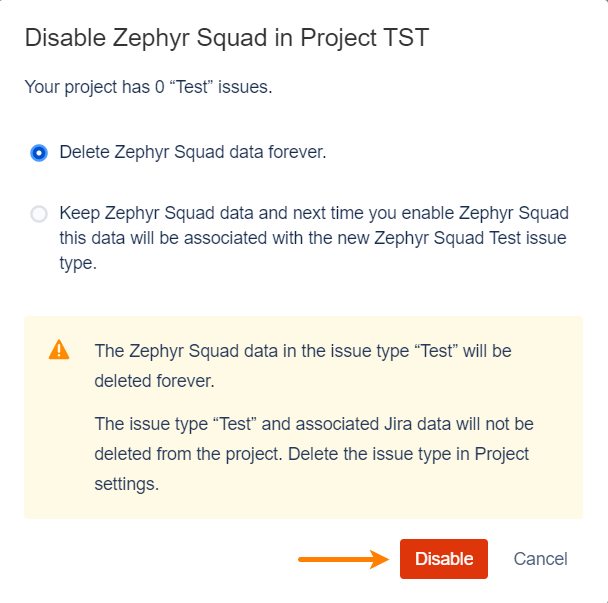
Click Disable Zephyr Squad in Project XXX.
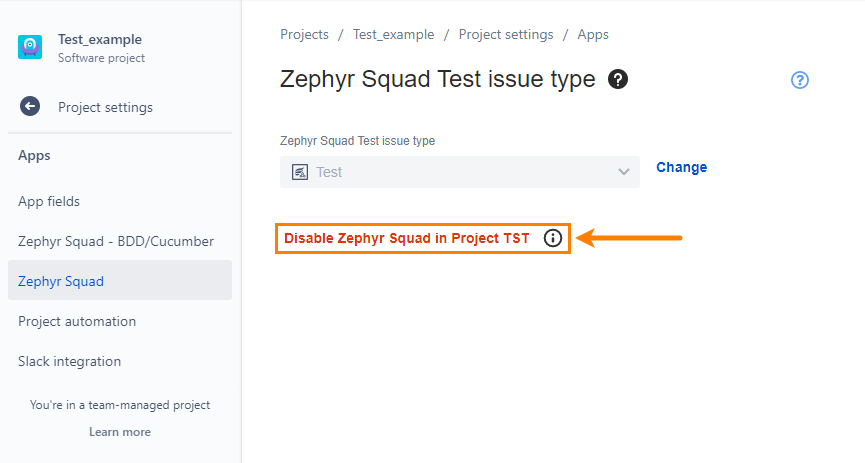
Choose whether you want to delete or keep Zephyr Squad data:
If you choose to , it will be completely removed and cannot be recovered.
If you choose to , the next time you enable Zephyr Squad, the pre-existing data will be associated with the Test issue type mapped.
Click Disable.
