Customize Test and Step Execution Statuses
Zephyr Squad uses a number of statuses to indicate the current state of your test or test step execution. You can edit these statuses or create new ones.
Requirement
You need Jira Administrator permissions to customize execution statuses.
Add execution status
Go to Apps > Manage your apps.
On the application managing page, click Customize Test Status or Customize Step Status. On the View Execution Statuses page that opens, the first line is for adding new statuses:
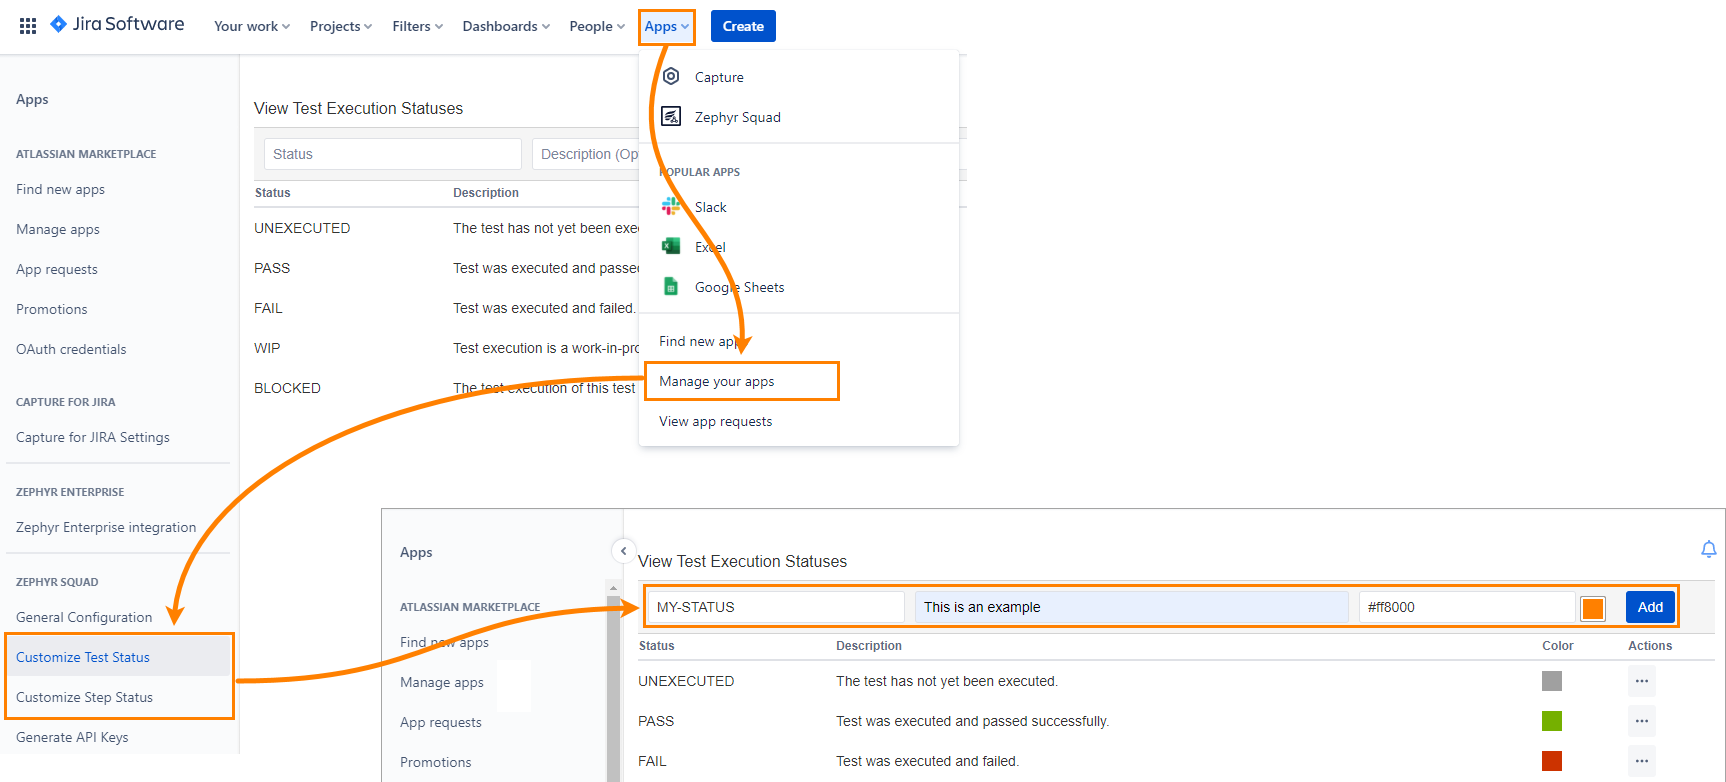
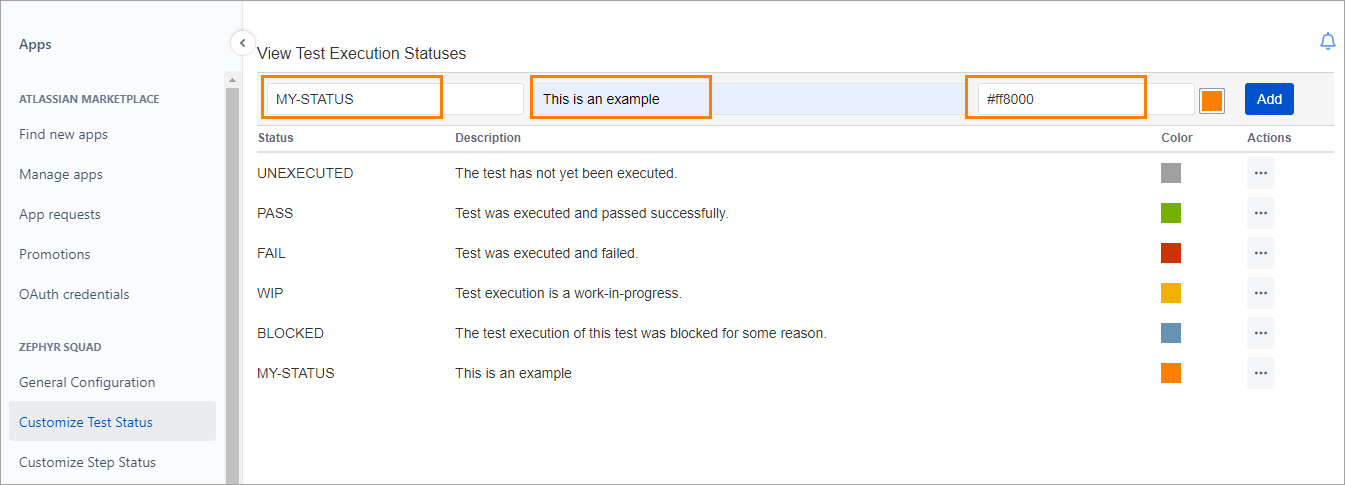
Enter the status name, description (optional), select a color, and click Add. A new execution status will be displayed in the table:
Edit execution status
You can modify the name, the description, and the color of any execution status. However, Test Automation uses predefined statuses with their default meaning, so, if you change the PASS execution status name to VERIFIED, Test Automation will display the renamed VERIFIED status when a test passes.
You can modify the name, description, and color of any status.
Note
Test Automation uses predefined statuses with their default meaning, so, for example, if you rename the PASS status to VERIFIED, Test Automation will show VERIFIED for passed tests.
Go to Apps > Manage your apps.
On the application managing page, click Customize Test Status or Customize Step Status:
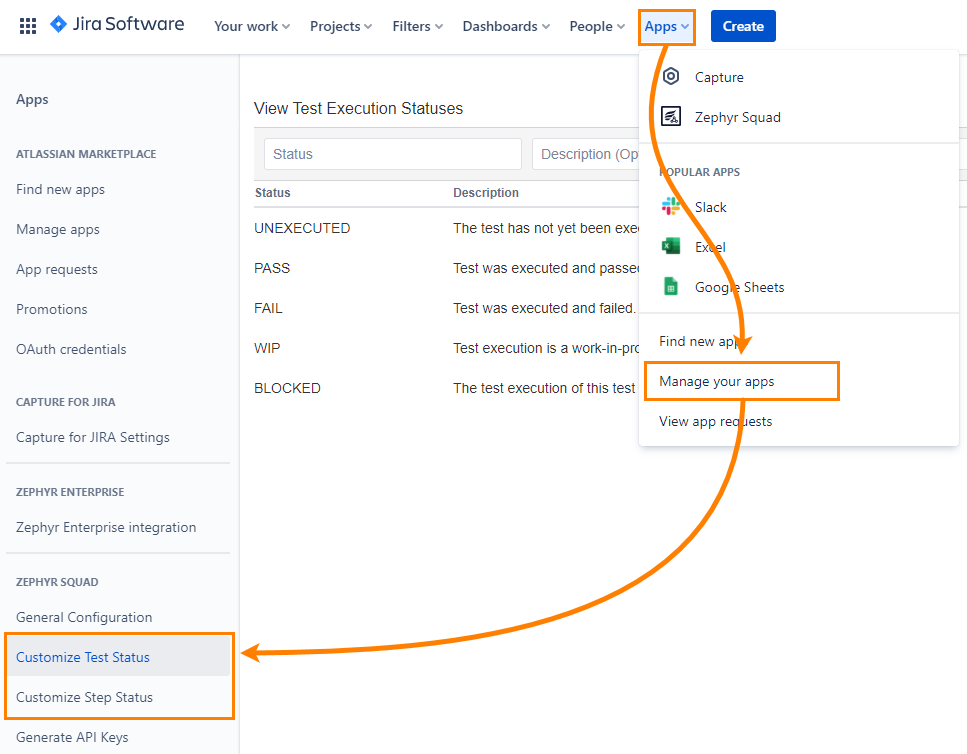
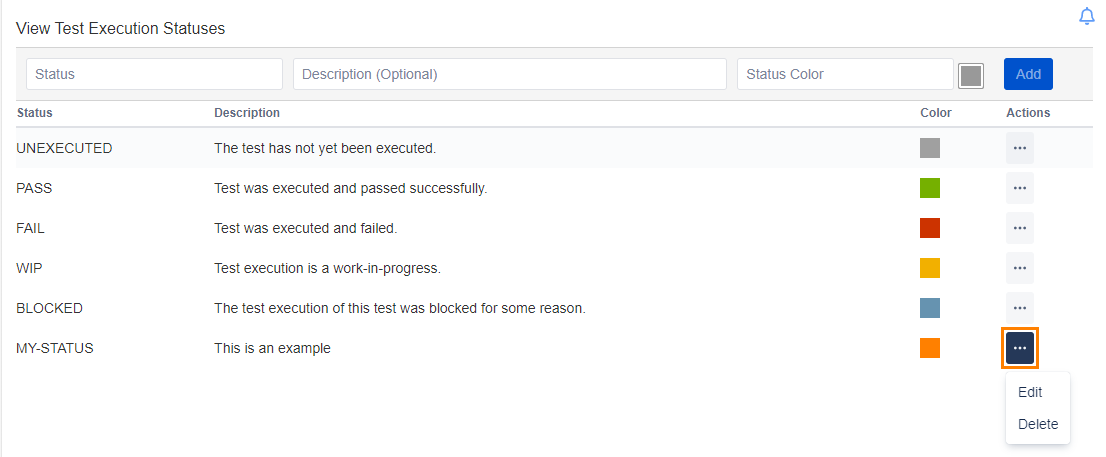
On the View Execution Statuses page that opens, click Actions for the needed status, then click Edit:
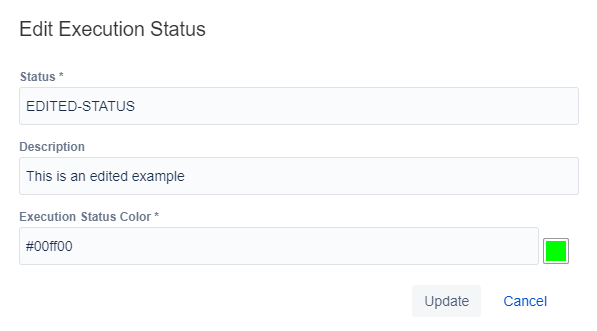
In the dialog, edit the status details, then click Update to confirm the changes:
Delete execution status
You can delete only the statuses you created. Predefined statuses are available for editing only.
Important
The removal cannot be undone.
To remove a custom execution status:
Go to Apps > Manage your apps.
On the application managing page, click Customize Test Status or Customize Step Status:

On the View Execution Statuses page that opens, click Actions for the needed status, then click Delete:

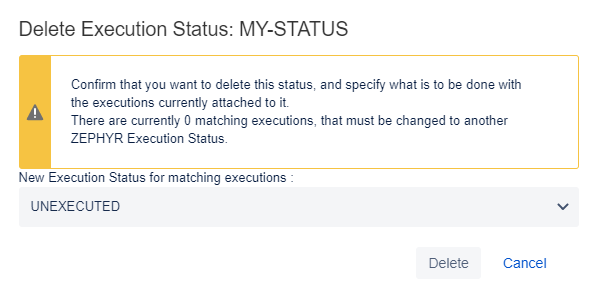
Zephyr Squad will ask you to specify the existing execution status that is going to replace the deleted one. Click Delete to confirm the removal:
