Create a Test Case
This guide provides a step-by-step process for creating test cases in Zephyr Scale, including key features and tips for efficient test management.

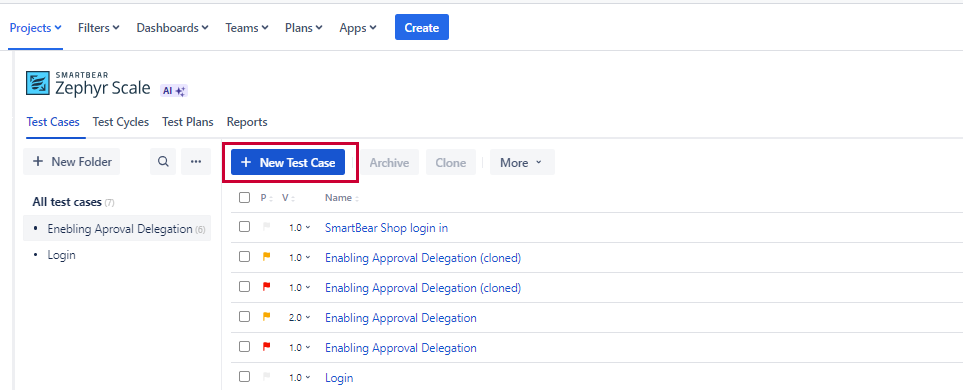
Open your desired project in Zephyr Scale and click Tests Cases on in the navigation menu.
In the Folders panel on the left, do one of the following:
Click New Folder, enter a name for the folder, and click the checkmark to save.
Select an existing folder where you want to create a new test case.
Click New Test Case at the top.
In the modal that appears, fill out the required fields. The Name is the only mandatory field. Once the details are filled out, choose one of the following options:
Create. Save the test case and return to the test case library.
Create and Edit. Save the test case and proceed to the Test Case Details screen for further configuration.
On the Details tab, provide information such as:
Folder. The folder where the test case is stored (as specified earlier).
Status. Indicates the readiness of the test for planning and execution (e.g., Draft, Approved).
Components. Imported from Jira; manage these on the Jira project’s administration page.
Additional fields, such as Labels or Priority, if applicable.
Define Test Steps. Navigate to the Test Script tab and add steps by clicking on the relevant section. You can drag and drop steps to reorder them and add or delete steps as needed.
Configure Other Tabs. Use the other tabs to enhance the test case:
Traceability Tab. Link issues from Jira or add new ones. You can also link external web URLs.
Execution Tab. Track previous test execution results.
History Tab. Review changes made to the test case.
Click outside the field to autosave your Test Case.
By following these steps, you can efficiently create and manage test cases in Zephyr Scale, ensuring a structured and traceable approach to test management.