Comparisons
The Comparisons screen
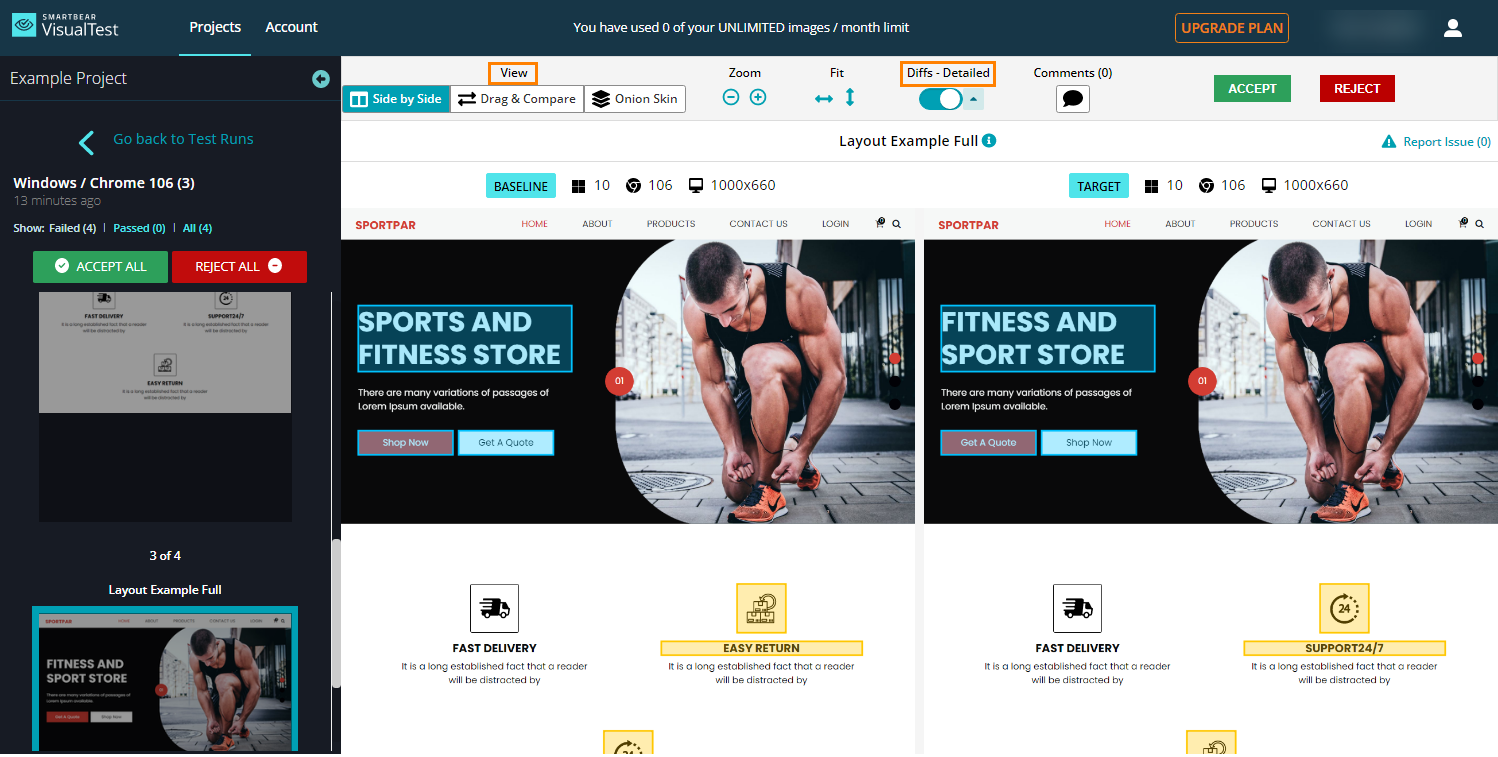
Clicking on a test run tile brings up its Comparisons screen:
 |
The left comparison pane
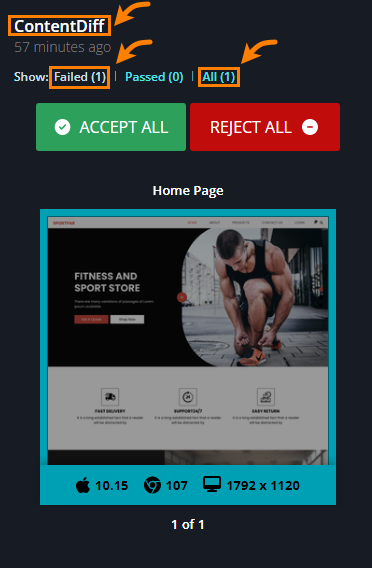
The left pane of the Comparisons screen, shown below, includes the following information:
The name of the test run
The number of images passing or failing
Thumbnails (set to Failed images by default)
In this example, the test run named "ContentDiff" has identified one failing image, called "Home Page", shown as a thumbnail beneath.
 |
Tip
You can search for images. Clicking All (marked above) brings up a search box.
If all the images in the thumbnails are confirmed intentional changes, click Accept All. If you need to look in detail, use the main comparison pane.
The main comparison pane
The main comparison pane offers the following tools to assist review:
View - choose from the following:
Side by Side (make a visual side-by-side comparison)
Drag & Compare (move a slider across compared versions)
Onion Skin (compared versions are superimposed)
Comparison mode - choose from the following:
Detailed - review content and design changes
Layout - review structural changes
For more information, see our Comparison mode section.
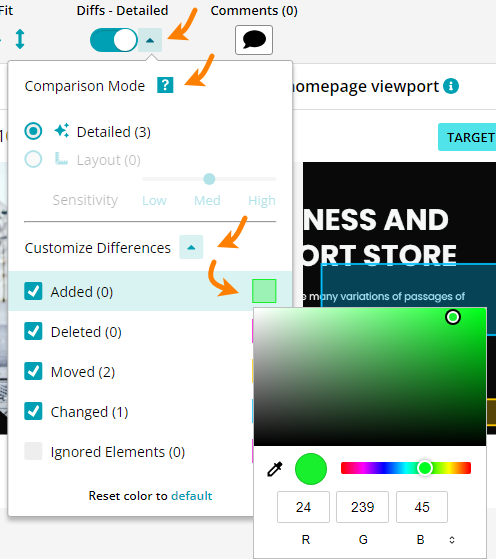
Diffs - turn this on to highlight differences. Click the dropdown triangle next to Diffs to access Comparison Mode and Customize Differences panels. To control how different diff types are displayed, click the dropdown triangle by Customize Differences and select from the following subcategories:
Added
Deleted
Moved
Changed
 |
Tip
Customize the highlight color to stand out well from the website's principal color scheme. Click the color swatch beside each of the subcategories - it opens up a palette of color options.
Tip
You can define regions to be left out of the comparison. To unhide these regions, click the Ignored Elements checkbox shown above. For more information about ignoring elements, see Dynamic Content.
After you've accepted or rejected all the images that failed the test, the flag for this test back on the Test Runs screen changes to green, indicating REVIEWED.
The following video shows a user reviewing differences found.
Comparison mode
VisualTest allows you to choose between two comparison modes:
Detailed - shows both content and design differences:
Text
Font
Color
CSS elements
Layout - ignores content diffs, and shows only structural, web layout changes:
Boxes
Grids
Columns
Sensitivity
Layout mode is available in three sensitivities. Each highlights elements of different sizes relative to the page width:
Low - only large elements (medium and small element shifts are ignored).
Medium - medium and large elements (small element shifts are ignored).
High - small, medium and large elements (most granular).
Which comparison mode is right for me?
If the site under test has frequent content updates, such as an online banking, news or shopping site, Layout mode may be more suitable.
However, for sites with stable content, such as landing pages, choose Detailed mode.
Comparison modes illustrated
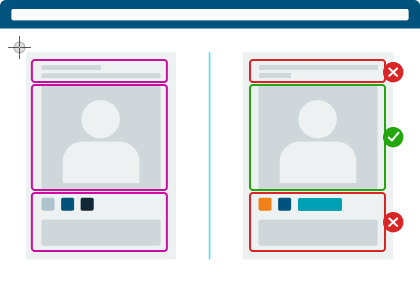
The below gives an example of a VisualTest comparison in Detailed mode. It flags content diffs in the top and bottom elements.
 |
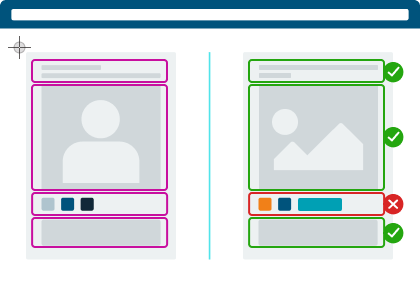
The below is an example of the same VisualTest comparison, but in Layout mode at 'high' sensitivity. VisualTest finds four regions to compare and flags one layout diff as failing. Only small-sized areas are considered when looking for differences.
 |
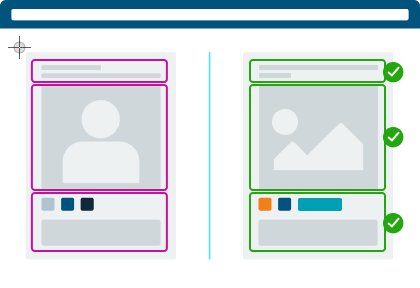
The below is as above, but at 'medium' sensitivity. VisualTest finds three regions to compare and passes all of them, as only medium-sized areas are considered when looking for differences.
 |
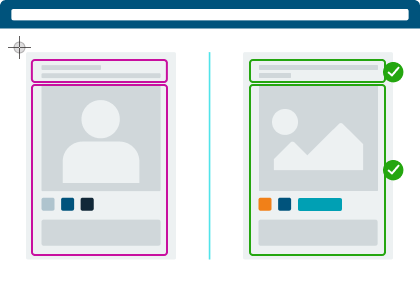
Lastly, the below is as above, but at 'low' sensitivity. VisualTest finds two regions to compare and passes them both, as only large areas are considered when looking for differences.
 |
Comparison mode and test runs
By default, test runs execute in Detailed mode. You can change this in Settings. Your choice determines what diffs are found in the test run and flagged for review.
Note
Switching between modes in the UI, as in the image below, only shows you what would have been flagged if you had run your test in the other mode. It does not:
change the comparison's results
update the choice of comparison mode in Settings
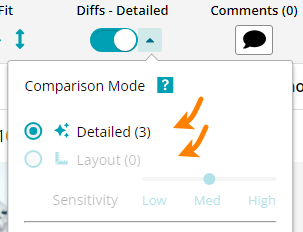 |
You might want to combine both Detailed and Layout modes in your test runs, across your various screen captures. For this, you can customize your SDK to over-ride the default setting on a capture-by-capture basis. See examples in the SDK customization sections: Java, Python, and Cypress.
Other diff controls
If you find that VisualTest keeps flagging valid dynamic content as potential bugs, see our Screenshot Consistency section for tools to address this.
Comparison details and image metadata
You can bring up details about the comparison on this screen. Below the main comparison pane's toolbar is the field giving the name of the comparison (boxed in orange below).
 |
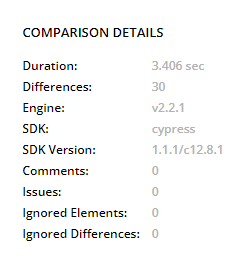
Hover your pointer over the  to bring up comparison details, as shown below:
 |
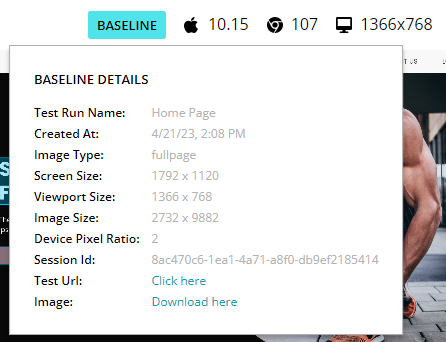
You can also view metadata on the Baseline image and Target image by hovering over their respective buttons (in blue in the following picture). These data include:
the date and time the image was created
a link to the image's online location
a link to download the image
 |
Global Image Search
Use the global image search to find and review specific images, enhancing your ability to navigate through visual content with ease.
Navigate to the Projects screen and click the project you want to search for an image within.
Note
Presently, the ability to search for images is limited to automated test runs and does not include manual ones.
Type the name of the capture into the search field and then click the Search button to find the corresponding image.
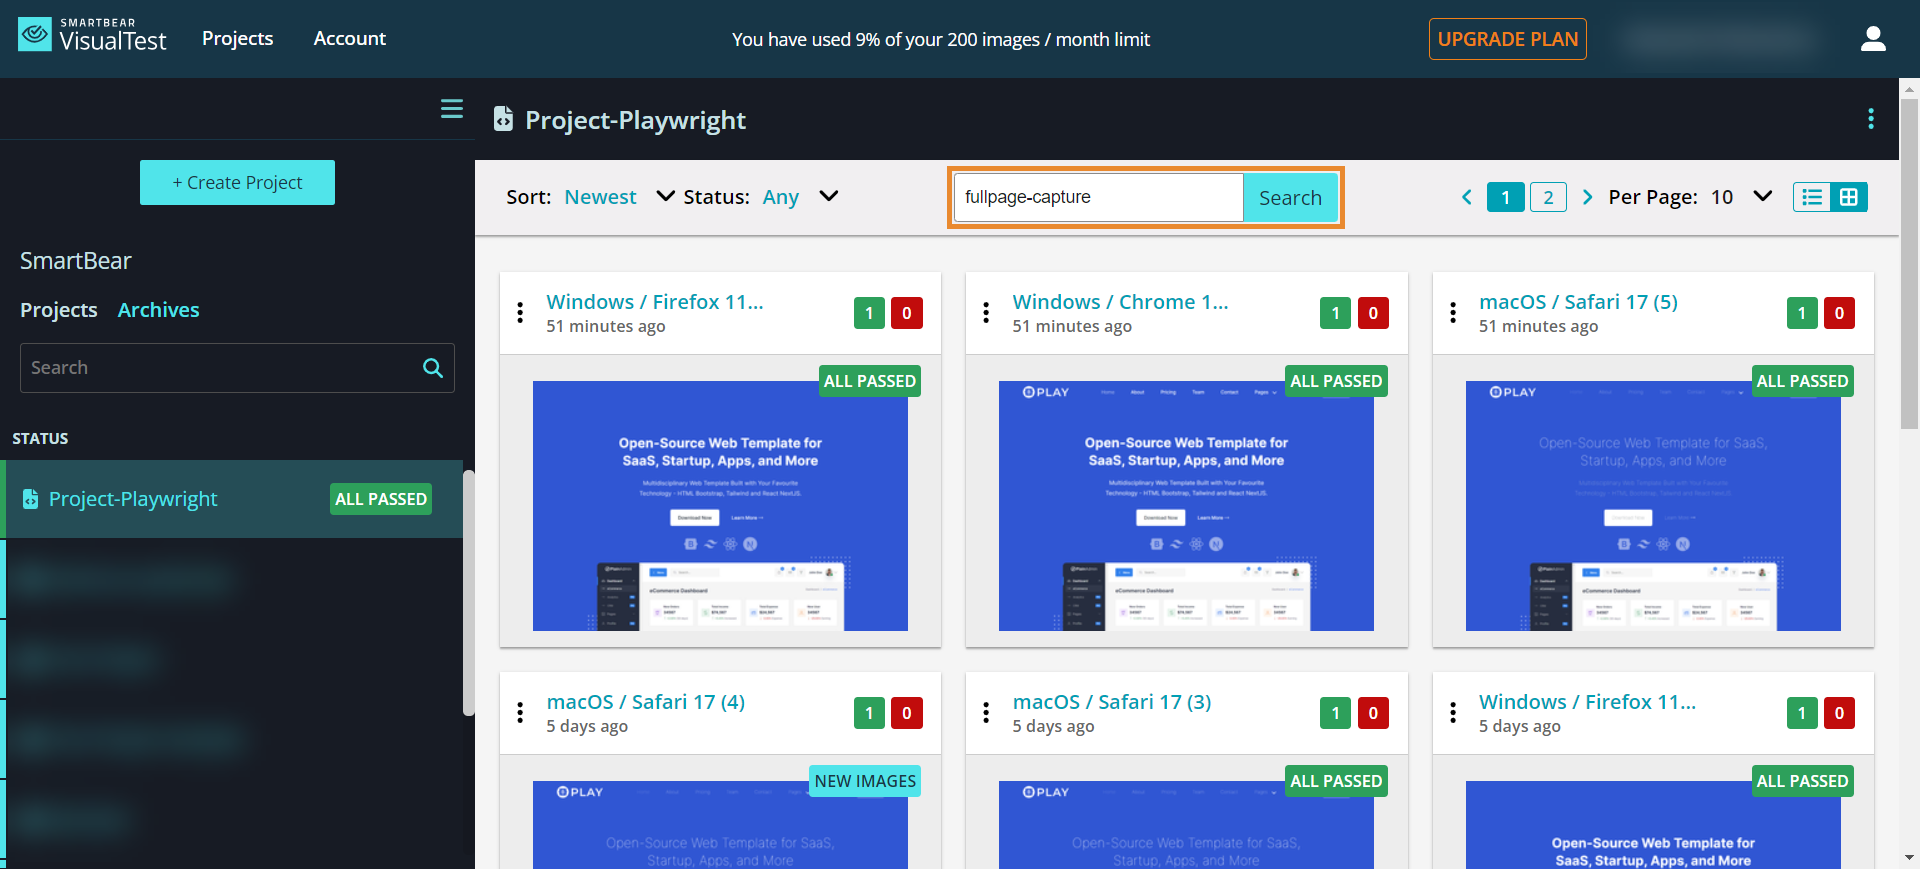
The system displays the results that meet your search criteria.
Tip
You have the option to refine your search results by status and organize them by choosing either the oldest or newest sorting criteria, providing greater flexibility in managing your content.
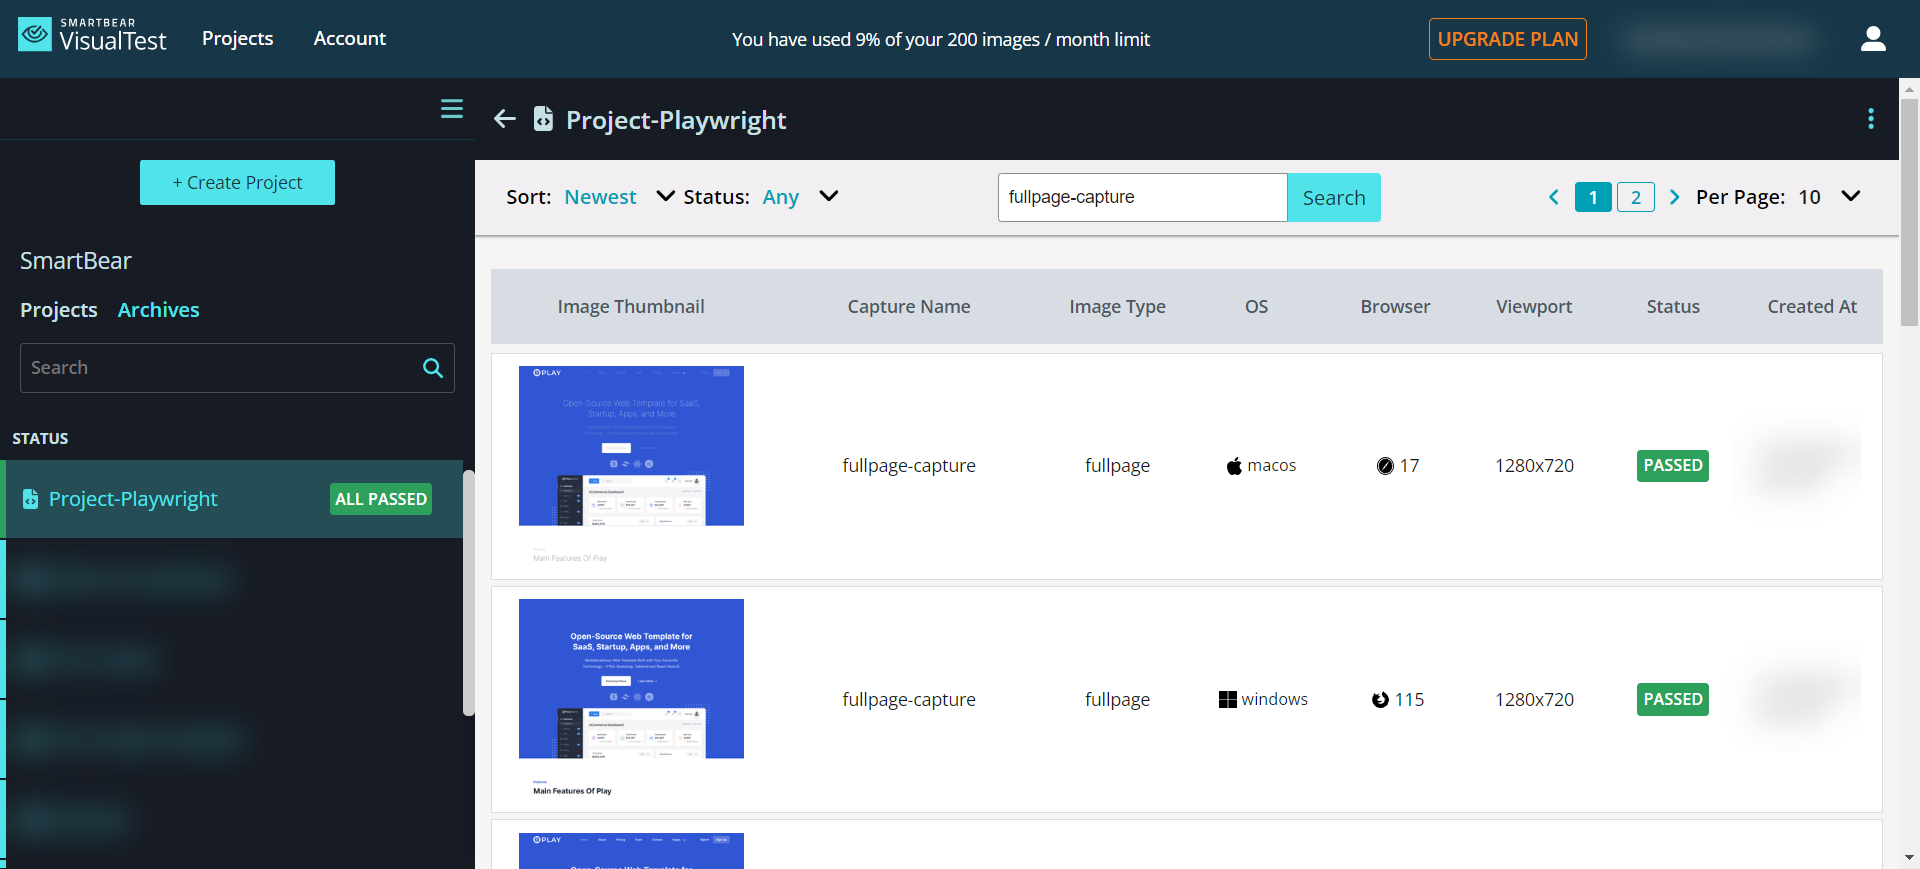
Comments
You can leave comments for yourself or your team members on your comparisons as follows:
Click the Comments icon (boxed in orange below).
Click and drag to place the Comment box.
Begin typing your comment.
Submit your comment by clicking the Save icon. You can edit or delete comments after you submit them.
Hide or show all comments by clicking on the Comments icon.
 |
Accessibility
The Accessibility feature allows you to check your website for any visual accessibility violations that are compatible with the Web Content Accessibility Guidelines (WCAG).
Note
Checking possible Accessibility violations is only available for full-page captures.
Accessibility checking
Click  to display accessibility violations.
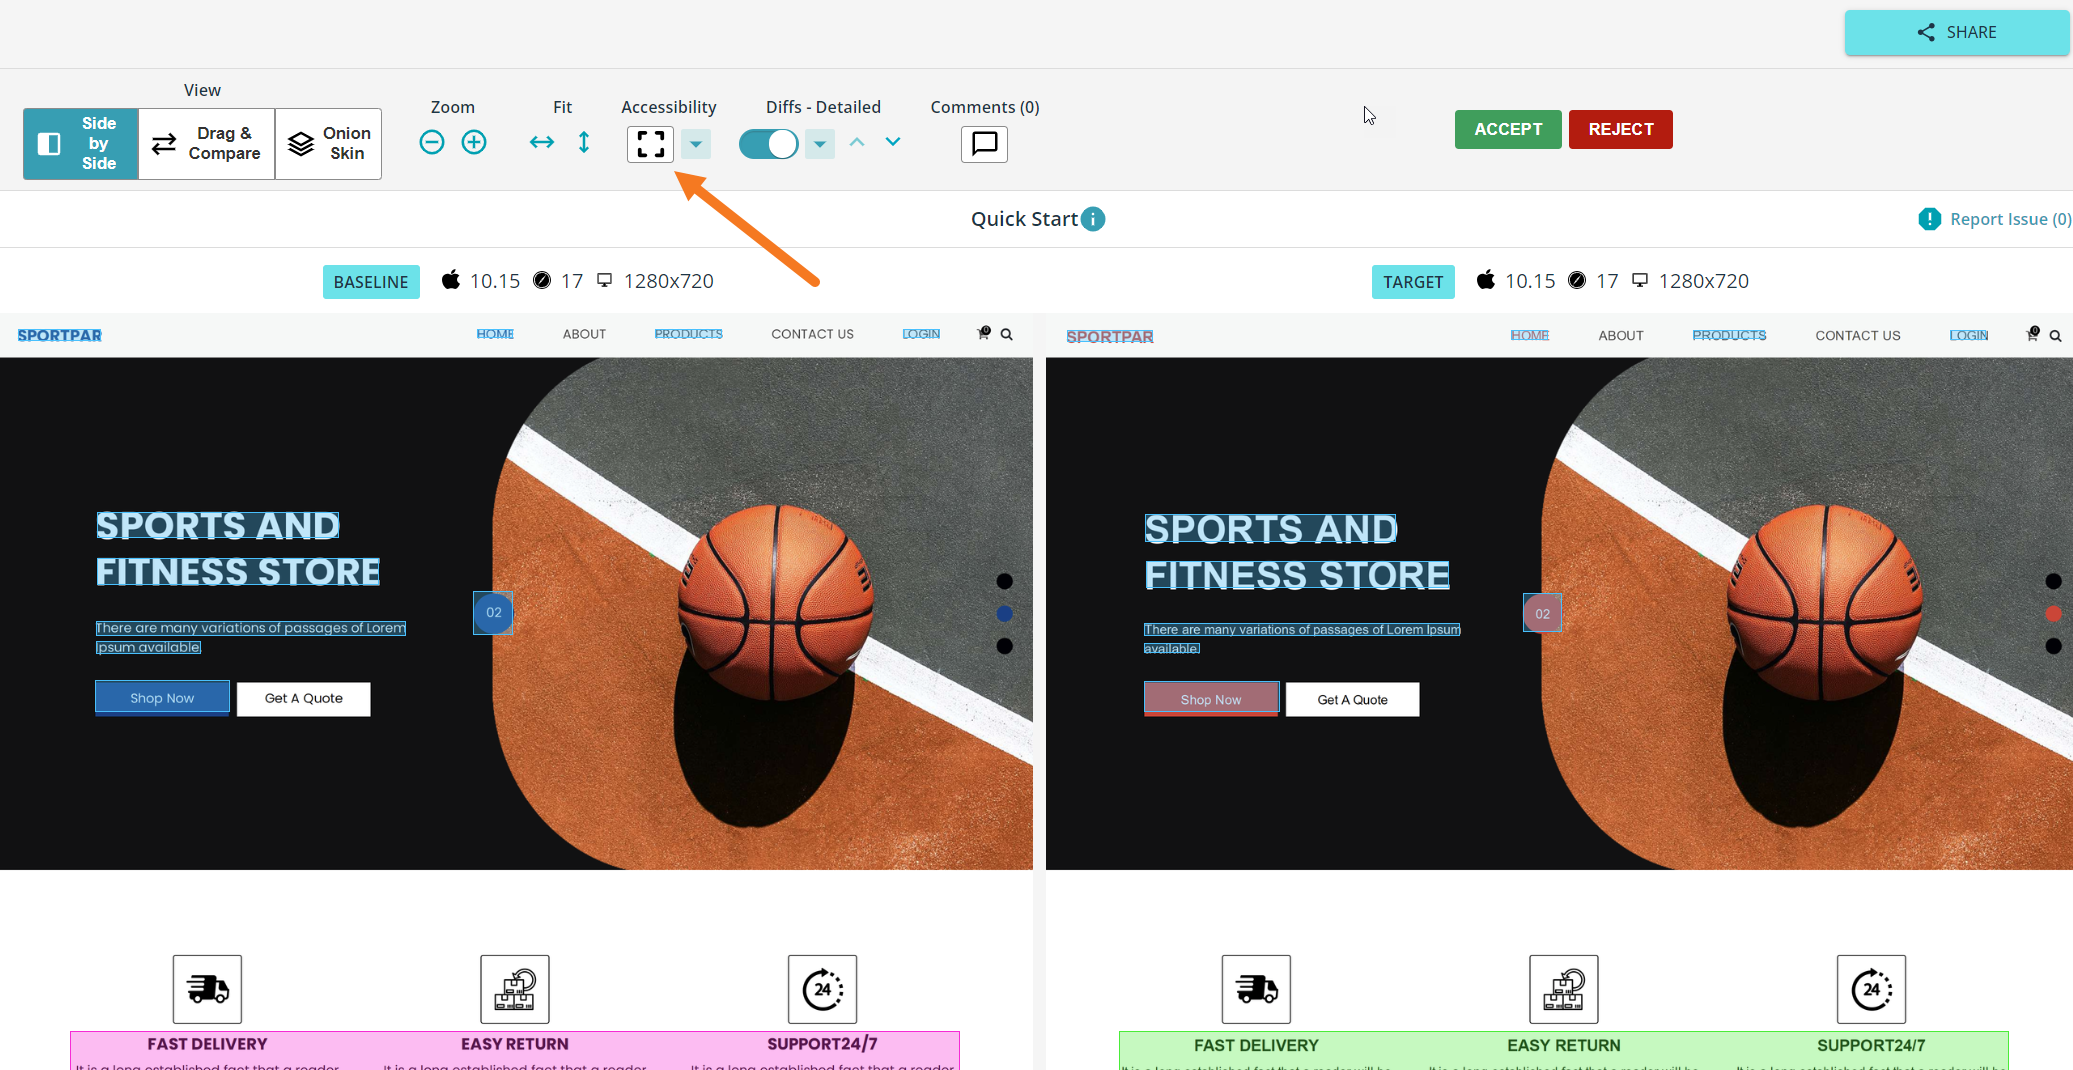 |
Note
If there are no accessibility violations, the Accessibility button is inactive.
All accessibility violations will be marked with red boxes. When you hover the cursor over an accessibility violation, its red box becomes thicker.
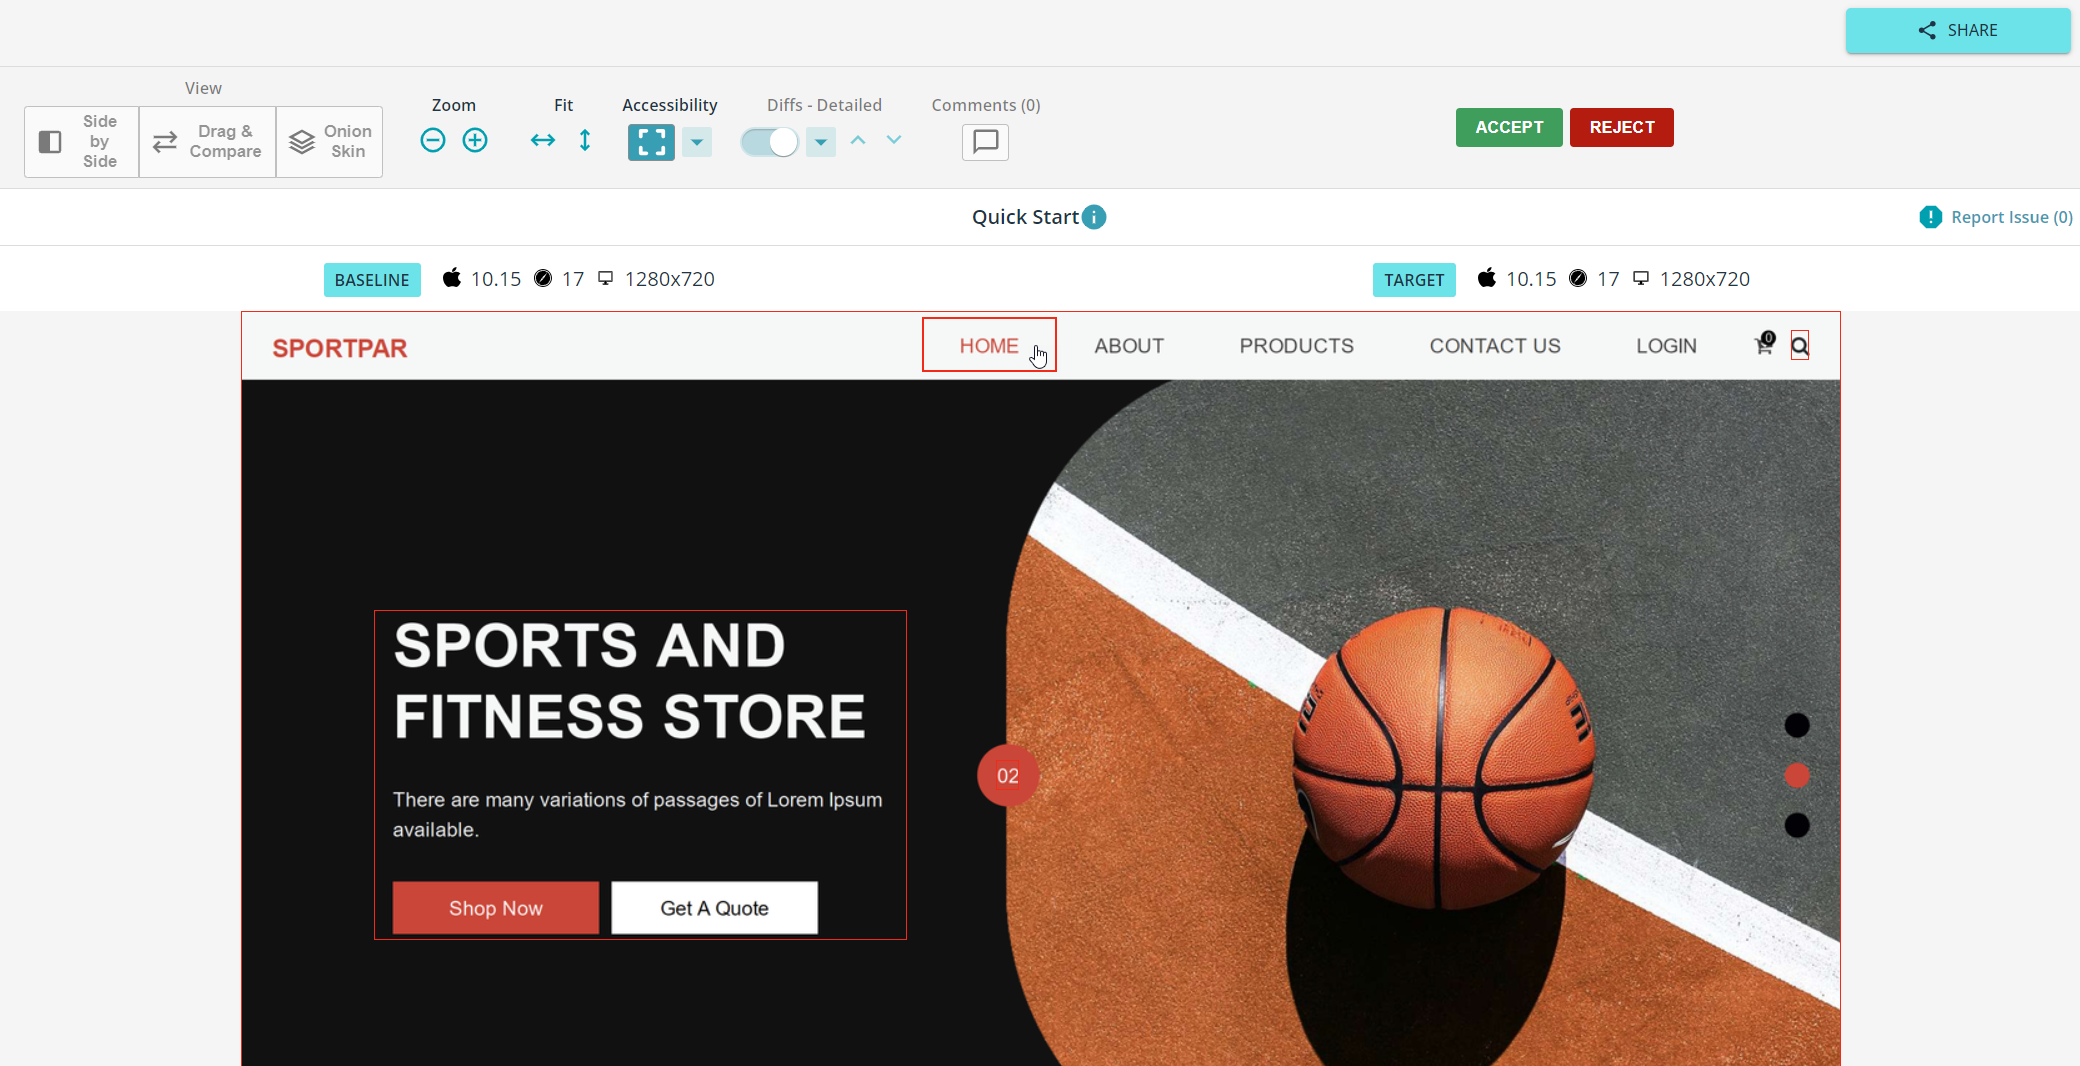 |
Click an accessibility violation to see its details.
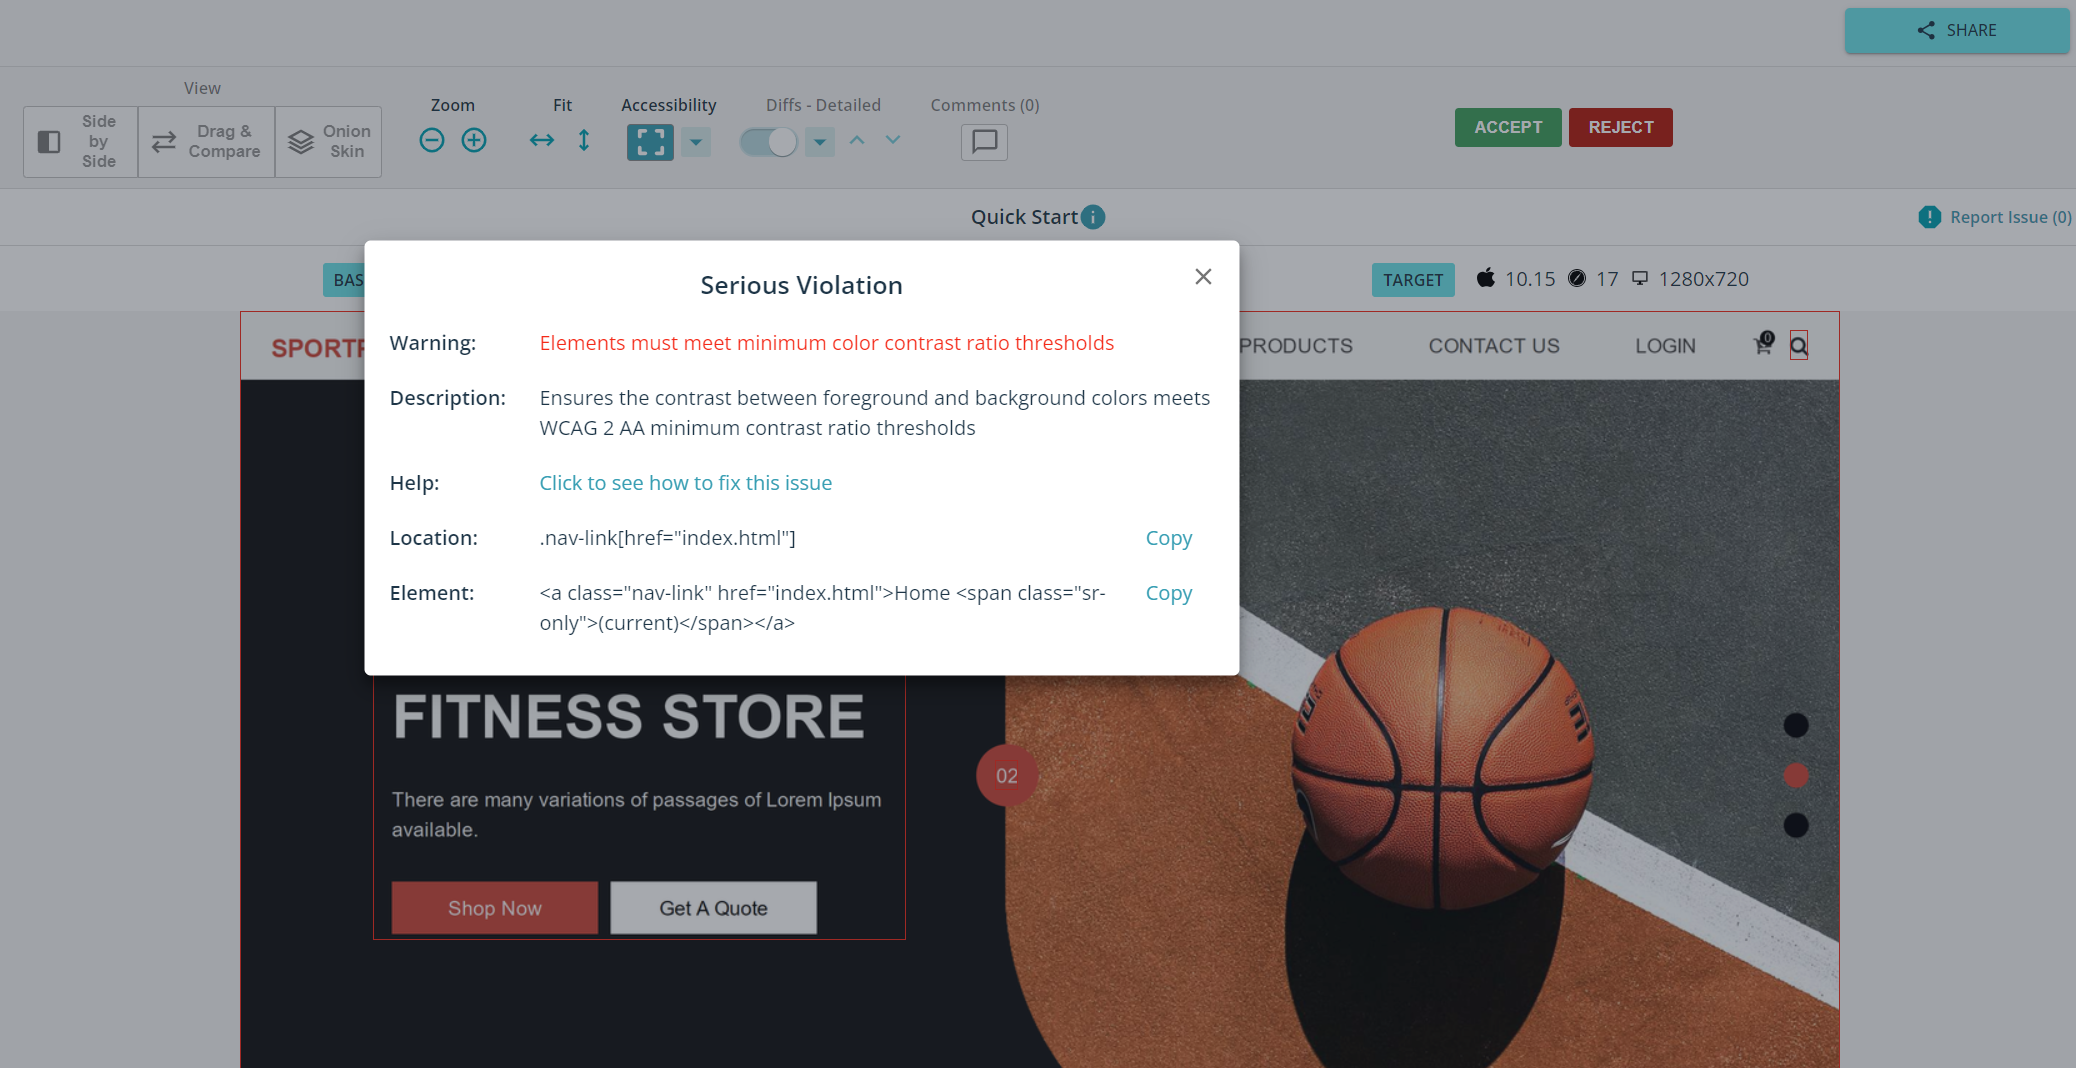 |
You can filter out the violations based on their impact. To do that, click next to  and select from Minor, Moderate, Serious and Critical impact categories.
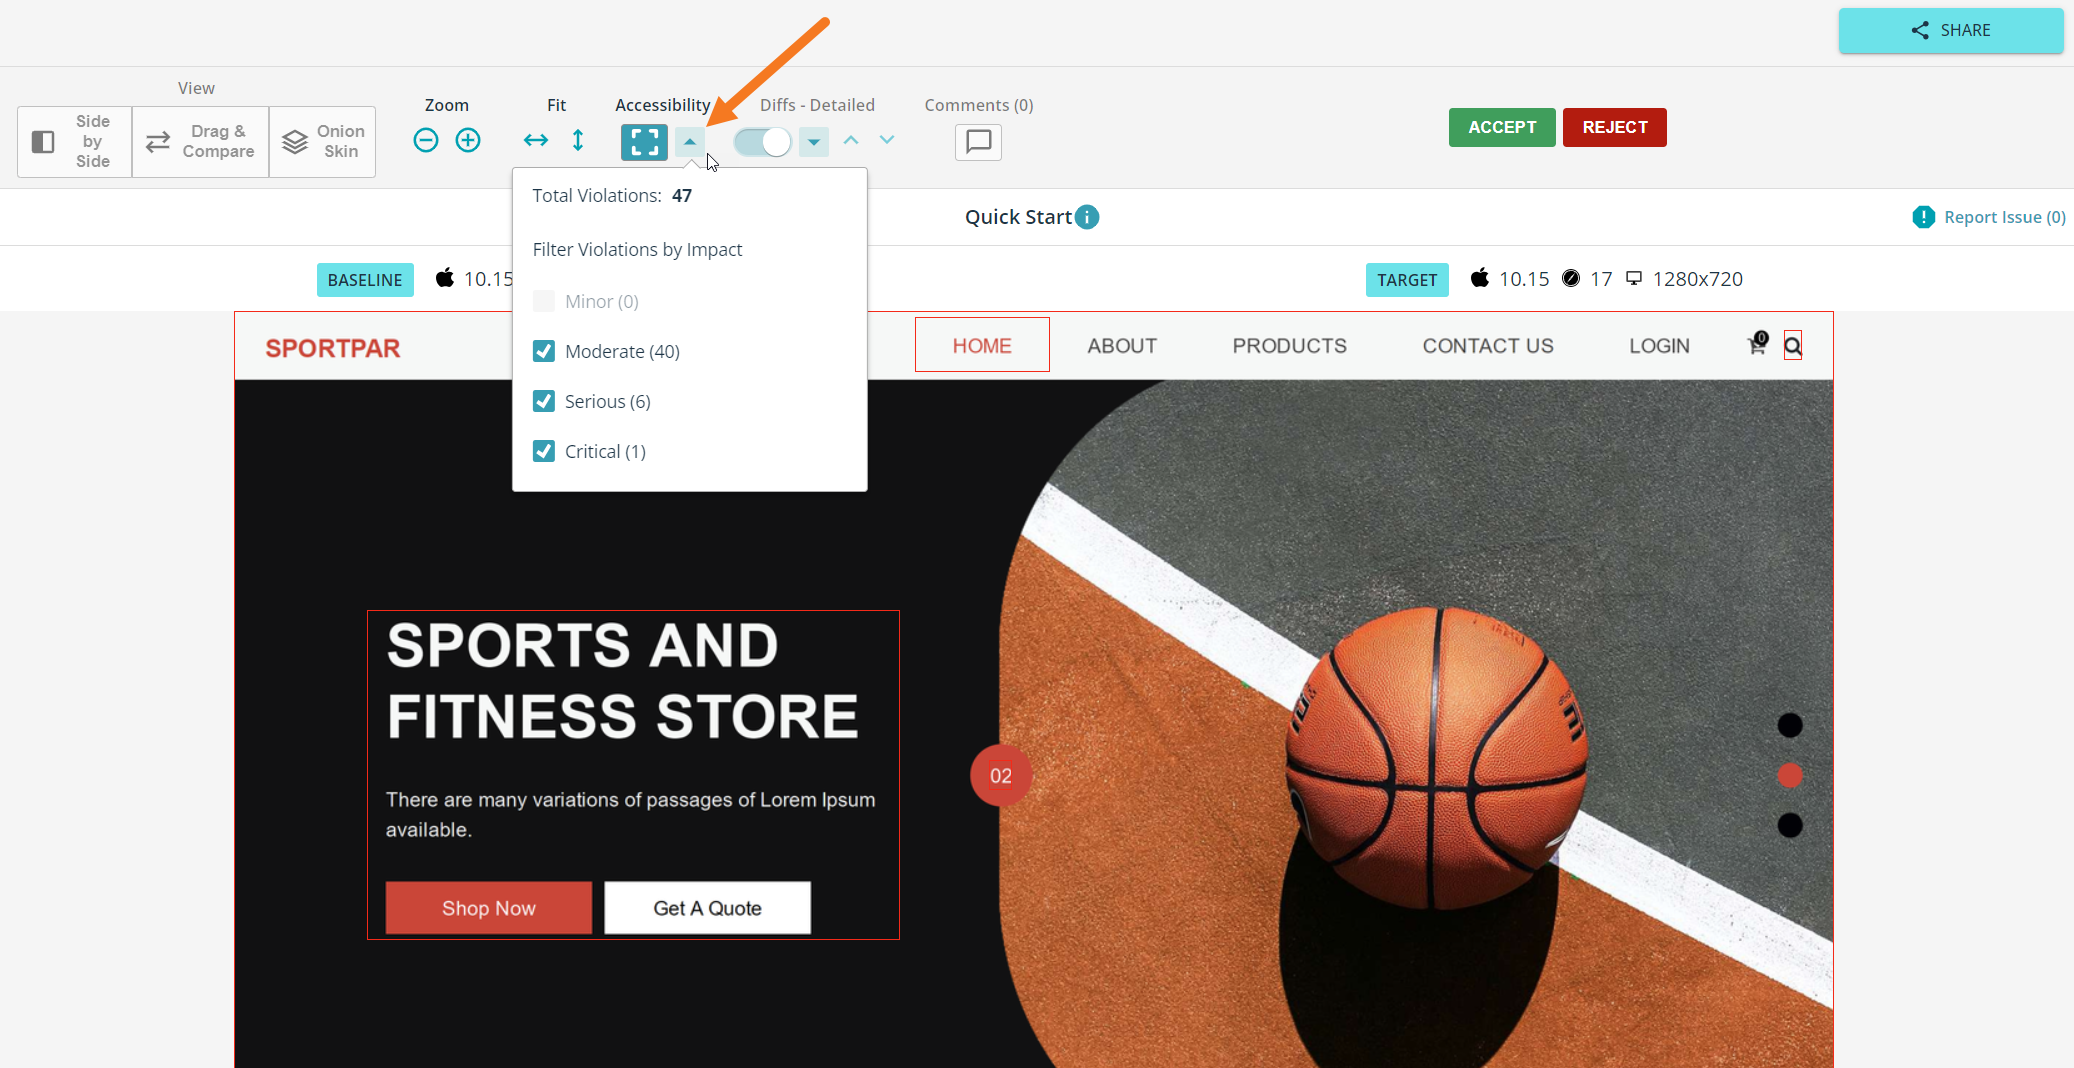 |
Accessibility Violation Details
The Violation Details pop-up contains the following information:
Warning: describes how the element violates accessibility.
Description: provides the basis of the violation.
Help: contains a link to the Deque University library that explains the violation and provides help on how to fix it
Location: shows the location of the violation. Click Copy to copy it to the clipboard.
Element: indicates the type of element that violates accessibility. Click Copy to copy it to the clipboard.
The library of accessibility violation types VisualTest uses is available here.
Accessibility SDKs Configuration
Below you can find SDK code snippet Accessibility examples for all the supported languages.
Here's the list of the supported WCAG tags:
'wcag2a', 'wcag2aa', 'wcag2aaa', 'wcag21a', 'wcag21aa', 'wcag22aa', 'best-practice', 'wcag2a-obsolete', 'ACT', 'section508', 'TTv5', 'EN-301-549', 'experimental', 'wcag***', 'section508.*.*', 'TT*.*', 'EN-9.*', 'cat.*'Playwright JavaScript SDK, Selenium JavaScript SDK, and Cypress SDK Accessibility
In the visualTest.config.js add
wcagTags: ['wcag2aa', 'wcag2a']
or
wcagTags: 'wcag2aa'
So the file would look like this:
module.exports = {
    projectToken: 'xxxxxxxxxxxxxx',
    wcagTags: ['wcag2aa', 'wcag2a']
}
Selenium Python SDK Accessibility
When setting up your project, in settings = {'projectToken': 'PROJECT_TOKEN'} add either ‘wcagTags’ : ‘wcag2aa’ or ‘wcagTags’ : [‘wcag2aa’, ‘wcag2a’ ] so the code would look either like this:
visualTest = VisualTest(self.driver, settings = {
                'projectToken': 'xxxxxxxxxxxxxx',
                'wcagTags': 'wcag2aa'
            })
Or like this:
visualTest = VisualTest(self.driver, settings = {
                'projectToken': 'xxxxxxxxxxxxxx',
                'wcagTags': ['wcag2aa', 'wcag2a']
            })
Selenium Java SDK Accessibility
When setting up your project, in VisualTest visualTest = new VisualTest(driver, "PROJECT_TOKEN"); add either put("wcagTags", "wcag2aa"); or put("wcagTags", Arrays.asList("wcag2a", "wcag2aa"));, so the code would look either like this:
VisualTest visualTest = new VisualTest(driver, new HashMap<String,Object>(){{
    put("wcagTags", "wcag2aa");
    put("projectToken", "PROJECT_TOKEN")
}});
Or like this:
VisualTest visualTest = new VisualTest(driver, new HashMap<String,Object>(){{
    put("wcagTags", Arrays.asList("wcag2a", "wcag2aa"));
    put("projectToken", "PROJECT_TOKEN")
}});
