
Collaborator comes with several clients. The choice depends on software and SCM systems you use in your workflow, the type of review materials, and the need for automating work using scripts.
Web Client is the default tool for all types of peer review tasks. To use Web Client, a user only needs a web browser. You can use Web Client for creating reviews, uploading local files and materials from SCM systems, participating in reviews as a reviewer or observer, inspecting review materials, doing administration tasks and so forth. Web Client supports reviewing the following types of materials: text files and source code, Word processing documents, spreadsheets, presentations, PDF documents, Visio graphics and images.
GUI Client is a tool that serves to upload materials from SCM systems to new and existing reviews. Because GUI Client does not provide means of editing review information or inspecting materials, it should be used in conjunction with another interface, such as Web Client.
Visual Studio Extension allows uploading materials to new and existing reviews directly from within Visual Studio. Materials can be local files or come from SCM systems. Visual Studio Extension also provides an interface for editing review information, participating in reviews as a reviewer or observer and inspecting review materials. Only text files and source code can be reviewed in Visual Studio Extension.
Eclipse Plug-in allows uploading materials to new and existing reviews directly from within Eclipse IDE. Materials can be local files or come from SCM systems. Eclipse Plug-in also provides an interface for editing review information, participating in reviews as a reviewer or observer and inspecting review materials. Only text files and source code can be reviewed in Eclipse Plug-in.
Command-Line Client allows working with Collaborator via the command line. It can be used by a human for uploading files, integrating with SCM systems, and querying the server, or as a part of an automated script in a sophisticated ALM / build system.
Create New Review
There are several ways of creating a review in Collaborator. The choice depends on the review workflow adopted by your team:
-
If you use pre-commit workflow, you can create a review in the Collaborator desktop clients (GUI Client or Command-Line Client).
-
If you use post-commit workflow, you can create a review in the Collaborator desktop clients (GUI Client or Command-Line Client) or Web Client.
-
If you use no source control management system, you can create a review in the Collaborator Web Client or Command-Line Client.
Regardless of your workflow, you can use extensions for Visual Studio and Eclipse (Visual Studio Extension and Eclipse Plug-in respectively) to create new reviews via the IDE.
Web Client
To create a review in the Web Client, click the New Review button on the Home screen:

You will see the Create Review Screen where you can specify information about the newly created review.
| Tip: | Alternatively, you may create a new review by copying any of existing reviews. This approach allows to retain some data (participant list, custom fields values, review materials) from the original review. See Copy Previous Review for details. |
GUI Client
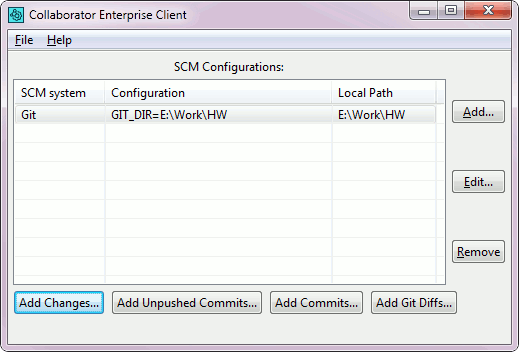
The GUI Client is used for adding items from source control management systems to Collaborator.
| Note: | Make sure you have configured connection to your SCM system. |

GUI Client Main Screen
To create a review in the GUI Client, you must add materials to a new review:
-
Select the needed SCM system from the SCM Configurations list.
-
Select one of the buttons below the list. The buttons are used to upload materials to a review. Different buttons are available for different SCM systems (See Main Screen for details).
-
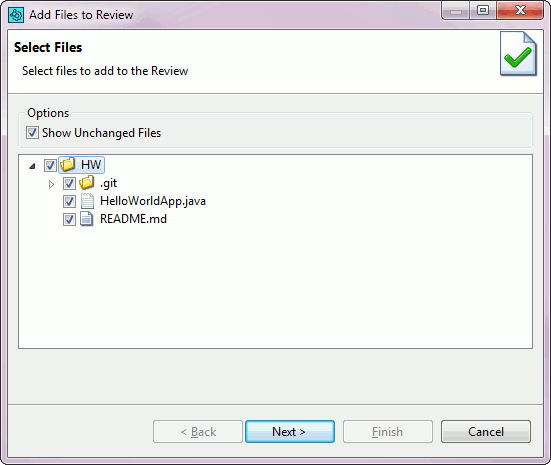
In the ensuing dialog, choose materials you want to add to the review. Click Next.
-
On the Select a Review screen, select Create New Review and type its title in the Title box. Alternatively, if you don't want to create a new review, select Add to Existing Review and select a review from the list below. Click Next.

-
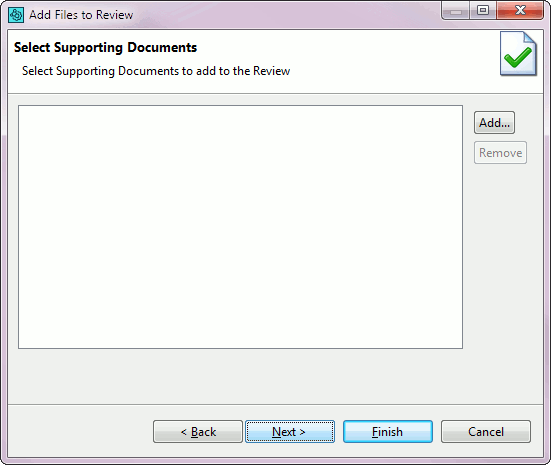
On the Select Supporting Documents screen, you can click Add and select supporting files you want to add to the review. If you don't want to add any, just click Next.
-
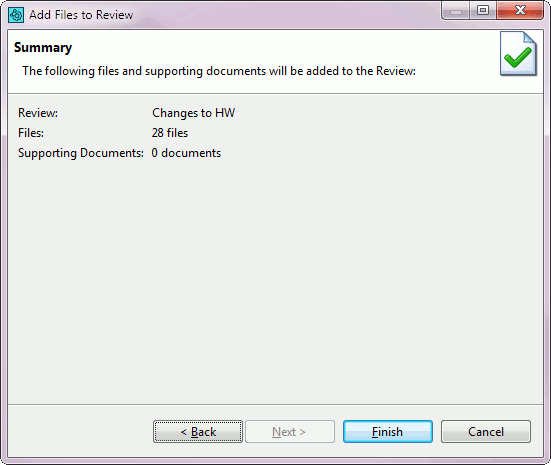
The Summary screen will show files and documents to be added to the review. Click Finish to create the review or Back to make changes.
Once the review is created, it will open in the Web Client, where you can specify information about the review and add participants.
Visual Studio Extension
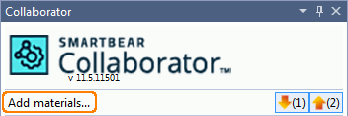
To create a Collaborator review from within Visual Studio IDE, use the Collaborator > Add materials main menu item, or the Add materials command in the toolbar of the Collaborator View in Visual Studio:
| Note: | Before using this command, we recommend that you configure SCM settings to let Collaborator Visual Studio Extension connect to your source control repository. See also Source Control Integrations. |
The command invokes the Add to Review Wizard that will lead you through the review creation process.
When the review is created, it will be displayed in the Review Screen.
Eclipse Plug-in
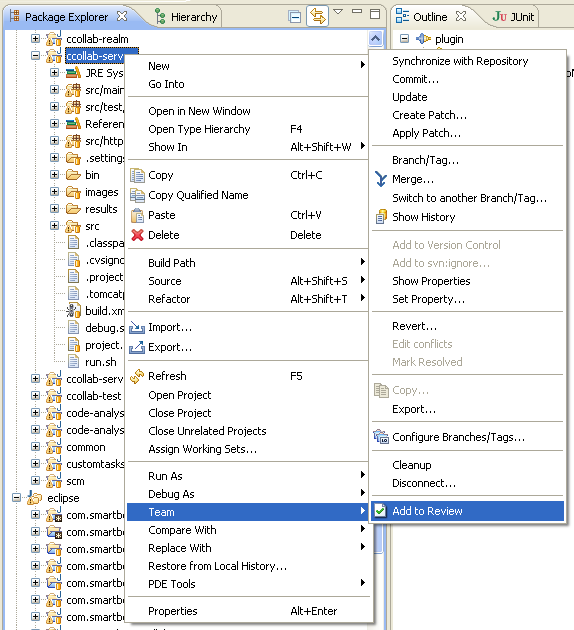
To create a Collaborator review from within Eclipse IDE, right-click on any Working Sets, Projects, Folders, or Files and select Team > Add to Review from the context menu:
This will launch the Add to Review Wizard that will lead you through the review creation process.
 |
The Team > Add to Review command uploads local copies of selected files. Once uploaded, they will be no longer synchronized with the SCM. To denote this, the Eclipse Plug-in displays an "Unsupported SCM System or Client" warning when you try to upload the local copies of files. To upload files to a review and keep them synchronized with the SCM:
|
When the review is created, it will be displayed in the Review Screen.
Command-Line Client
| Note: | Make sure you have configured connection to the Collaborator Server. |
To create a review via the Command-Line Client, use the ccollab admin review create command. The command's options allow to specify general information about the review.
If you want to create a review and copy some information from another review, use the ccollab admin review copy command. The options allow specifying information to be copied, such as the list of participants, values of custom fields, and materials attached to the review.
Specify General Information On Review
The next step in creating a review is specifying general information about it. The Collaborator Web Client, Visual Studio Extension and Eclipse Plug-in offer their own interfaces for editing general information. It can also be done via the Command-Line Client.
You can read about the General Information sections in the Collaborator Web Client, Visual Studio Extension and Eclipse Plug-in in the General Information topic.
Command-Line Client
If you didn't specify general information when creating a review or you want to change it, you can use the ccollab admin review edit command.
Assign Review Participants
The next step in creating a review is to invite people to the review and give each of them a role to play.
The commonly used roles are as follows:
-
Author: Responsible for the files under review and probably responsible for fixing any defects that are found.
-
Reviewer: Responsible for finding defects; is allowed to mark defects "fixed". The review is not finished until all reviewers approve it.
-
Observer: Invited to the review but if all the other participants are finished the review is complete. Useful when this user is not available just now and you do not want to wait for them to show up.
-
Moderator: Controls the pace and flow of the review; coordinates other people and decides when the review changes phases.
Each invitee can be assigned only one role. However, there is no limit on the number of invites, and, unless the administrator has configured things otherwise, there can be more than one user per role.
| Note: | The number of roles and their names and abilities are configured by your administrator. Therefore, the list of user roles on your server may be different from the list above. |
You can also choose a group as a review pool for a role if the group's settings allow doing so. All the members of the group will be notified, and the first to take the review pool selection will become a participant in the given role.
The Collaborator Web Client, Visual Studio Extension and Eclipse Plug-in have the Participants section in the Review Screen dedicated to assigning review participants; you can read about it in the Participants topic.
You can also use the Command-Line Client to add and remove review participants.
Command-Line Client
To add a participant via the Command-Line Client, use the ccollab admin review participant assign command.
To add a review pool assignment via the Command-Line Client, use the ccollab admin review pool create command.
To add a list of participants or pool participants to a review, use the ccollab admin review set‑participants command. This command clears all previously assigned participants and pool participants.
To copy all the participants from one review to another, use the ccollab admin review copy‑participants command.
To remove a participant from a review, use the ccollab admin review participant remove command.
To remove a review pool assignment from a review, use the ccollab admin review pool remove command.
Add Materials to Review
Review materials is what you are asking to review. Various types of materials can be uploaded into the review. This includes but is not limited to:
-
Files controlled by a version control system: changes committed to a remote server (pushed commits), changes that are not yet committed to a server (un-pushed commits), local changes, differences between files, changelists, branches and so on.
-
Arbitrary files from your computer: text files, word processing documents, spreadsheets, presentations, PDF documents, Visio graphics, images and so on.
The most common way to get files attached to a review is to use one of desktop clients: Command-Line Client, GUI Client, Eclipse Plug-in, Visual Studio Extension or Plug-ins for Perforce Visual Client. All of these clients can integrate with a version control system and easily upload local files or file-differences to the Collaborator server.

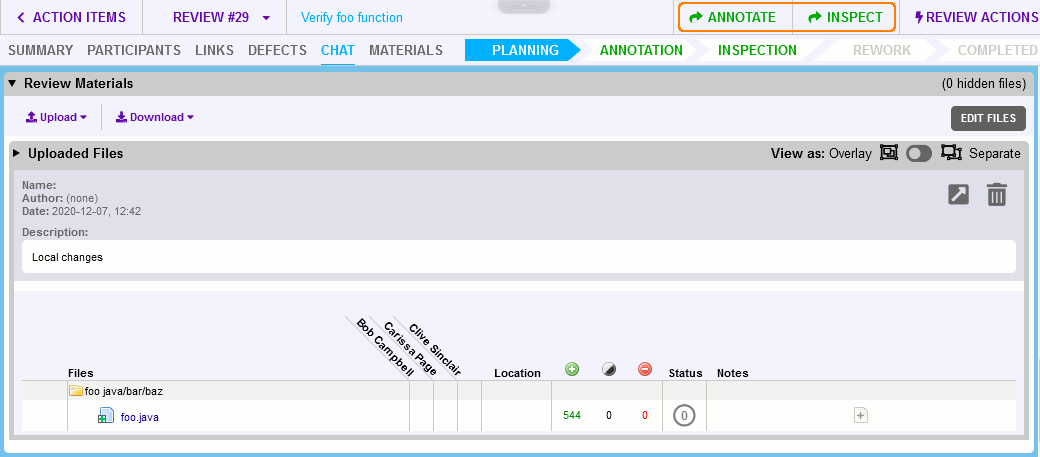
Local changes from files controlled by Git have been uploaded into this review via client.
Once you have attached anything to a review, it will be listed in the Review Materials section.
GUI Client
The process of attaching files via GUI Client is described in the Creating a review via GUI Client section.
Visual Studio Extension
To add review materials to the review in the Visual Studio Extension, do either of the following:
-
Select the Collaborator > Add materials main menu item.
-
Select the Add materials command in the toolbar of the Collaborator View in Visual Studio.
-
Click the Upload button in the Review Materials section of the Review Screen.
| Note: | Before using these commands, we recommend that you configure SCM settings to let Collaborator Visual Studio Extension connect to your source control repository. See also Source Control Integrations. |
Either of these commands will launch the Add to Review Wizard that will guide you through the process of attaching materials.
Eclipse Plug-in
To attach materials to a review, right-click on any Working Sets, Projects, Folders, or Files and select Team > Add to Review from the context menu:
This will launch the Add to Review Wizard that will lead you through the process of attaching materials.
|
The Team > Add to Review command uploads local copies of selected files. Once uploaded, they will be no longer synchronized with the SCM. To denote this, the Eclipse Plug-in displays an "Unsupported SCM System or Client" warning when you try to upload the local copies of files. To upload files to a review and keep them synchronized with the SCM:
|
Web Client
You can upload the following types of content from the Web Client:
-
Changes committed to a pre-configured version control system.
-
Arbitrary files from your computer.
Attaching changelists via Web Client
|
In order to perform these steps, your Collaborator server must be connected to a version control system as described in Version Control. |
-
Click the Upload button.
-
Select the name of the connected version control system from the drop-down list:

-
In the ensuing dialog, enter the unique IDs of the desired changelists and then click Attach.

You can attach any number of changelists to a single review. Also, you can attach changelists from different version control servers to a single review.
If there is an error retrieving that version or communicating with the server, you will see an error message.
Attaching Live URLs
You can attach live links to web sites. Attaching a live URL will display the live contents of the link during the review (rather than a local copy of the content). This feature is useful for accessing a document on a Wiki or document management system, particularly if you link to a specific version of that document.
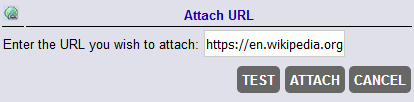
To add a web link:
- Click the Upload button.
- Select URL from the drop-down list.
- In the ensuing dialog, enter the desired URL and then click Attach
Notes:
- The URL must be a valid web URL, which should include the protocol specification (either http:// or https://).
- You will also see an error message if the specified URL is malformed.
- Collaborator does not check whether the specified resource is available. In fact, since it is a link, the contents and availability of the document can change at any time.
-
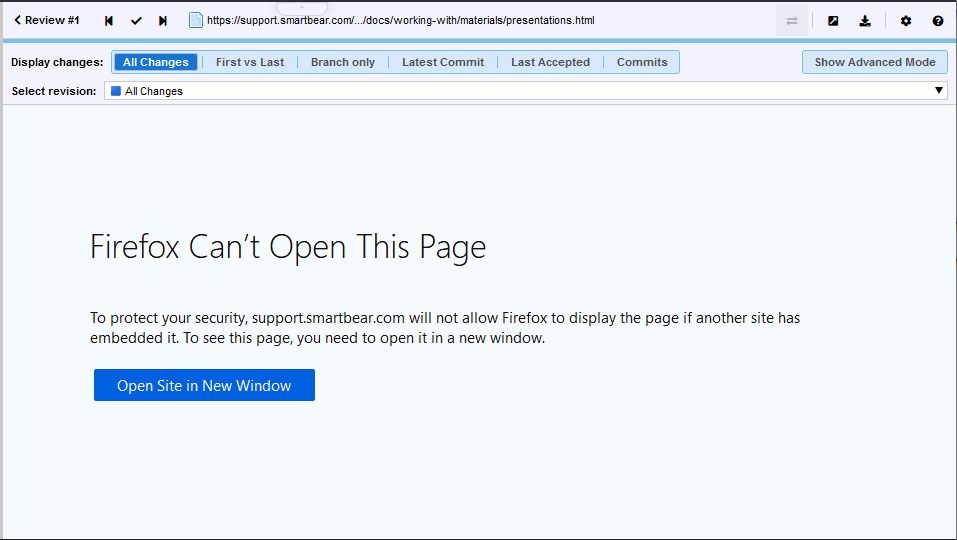
Collaborator displays the referred resource in a frame. The server can send requested contents with anti-framing headers. You will not see the referred content in this case. Depending on the web browser you use, you will see an empty frame or an error message saying that the content cannot be displayed in a frame:
Attaching arbitrary files via Web Client
You can also attach any arbitrary file (images, PDFs, and binary file types) from your local hard drive:
-
Click the Upload button.
-
Select Files from the drop-down list.
-
In the ensuing dialog, choose one or more files you want to attach and then click Upload.
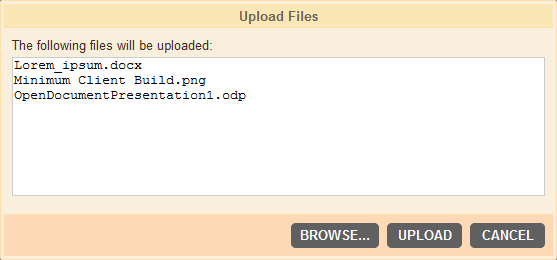
| Tip: | Alternatively, you may just drag your local files to the review web page. |
Command-Line Client
The following commands can be used to add various types of materials to a review:
|
Command |
Description |
|---|---|
|
Attaches locally modified files to a review. |
|
|
Attaches local files to a review without diffs. |
|
|
Attaches an atomic changelist to a review. |
|
|
Attaches differences between arbitrary versions of files to a review. |
|
|
Attaches differences between arbitrary versions of files in Subversion to a review. |
|
|
Attaches differences between arbitrary versions of files in AccuRev to a review. |
|
|
Attaches differences between arbitrary versions of files in CVS to a review. |
|
|
Attaches differences between arbitrary versions of files in Git to a review. |
|
|
Attaches differences between arbitrary versions of files in Mercurial to a review. |
|
|
Attaches differences between arbitrary versions of files in Perforce to a review. |
|
|
Attaches any two given versions of a file to a review. |
|
|
Attaches file versions in a ClearCase activity to a review. |
|
|
Attaches pending differences from an AccuRev stream. |
|
|
Attaches to a review all numbered local changes that fix a Perforce job. |
|
|
Attaches diffs between the specified git branch and the remote-tracking branch. |
| Note: | If you need to upload materials from an SCM system, make sure you have configured connection to the SCM system. |
To learn more about uploading arbitrary diffs from SCM systems to Collaborator, see Upload Diffs.
Complete Review Creation
When the materials are uploaded, you can start the review immediately or keep it for annotating.
To start the review process, you should move the review to the Inspection phase. Other participants will receive notifications about your new review, and it will be displayed in their Action Items list.
Alternatively, you can proceed to the optional Annotating phase. In this phase, all participants that you have added will be notified about this review and will be invited to add their comments and review materials. The review will not begin until you move it to the Inspection phase.
Web Client
To move the review to the Annotating phase, click the Annotate button in the review header. To start the Inspection phase, click the Inspect button.
Visual Studio Extension
To move the review to the Annotating phase, click the Annotate Review button in the Next Steps section. To start the Inspection phase, click the Begin Review button.

Eclipse Plug-in
To move the review to the Annotating phase, click the Annotate Review button in the Moving On section. To start the Inspection phase, click the Begin Review button.

Command-Line Client
To move the review to the Annotating phase, use the ccollab admin review annotate command. To start the Inspection phase, use the ccollab admin review finish command.
Delete Review Before It Starts
While a review is in the Planning phase, it can be deleted. Deleting becomes impossible once the review is moved to the Annotating or Inspection phase; such reviews can only be cancelled or rejected.
The option to delete reviews is only available if the system administration settings allow authors to delete their reviews.
Web Client
Select Review Actions > Delete in review header:

Visual Studio Extension
Click the Delete button on top of the Review Screen:

Eclipse Plug-in
Click the Delete Review button on the General Information toolbar:

Command-Line Client
Use the ccollab admin review delete command.
See Also
Participate in Reviews
Rework Defects
Web Client
GUI Client
Command-Line Client
Visual Studio Extension
Eclipse Plug-in
Review Screen