Collaborator supports reviewing images of the following formats:
- Joint Photographic Expert Group File (.jpg, .jpeg),
- Portable Network Graphics (.png),
- Graphics Interchange Format (.gif),
- Bitmap Image Files (.bmp).
| Note: | Reviewing images is supported in Collaborator Team and Collaborator Enterprise. For a complete list of differences between Collaborator editions, see the comparison page. |
 |
The Collaborator Visual Studio Extension and Eclipse Plug-in do not support reviewing image files. Use the Web Client instead. |
Image files must be renderable by the browser and be configured by the administrator to be treated as images.
Upload Images
To review images, just attach them to the review as you would any other file, and when you open the Diff Viewer, the content area will display the images for review.
View Differences
Images can be reviewed in two different manners: side-by-side or overlaid. Toggling between the two layouts is as simple as clicking the ![]() Orientation button on the toolbar.
Orientation button on the toolbar.
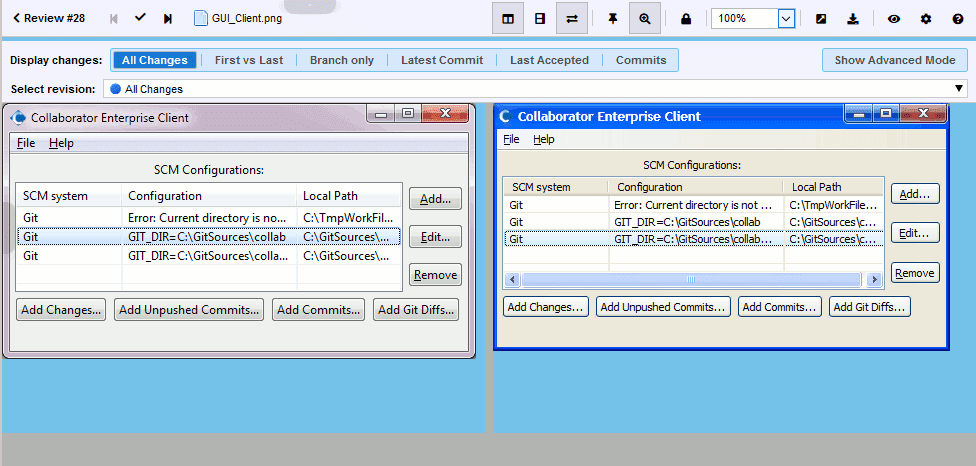
The side-by-side view displays the before and after images separately, one next to another. This layout is useful to see both images at the same time.

Side-by-Side Image Review
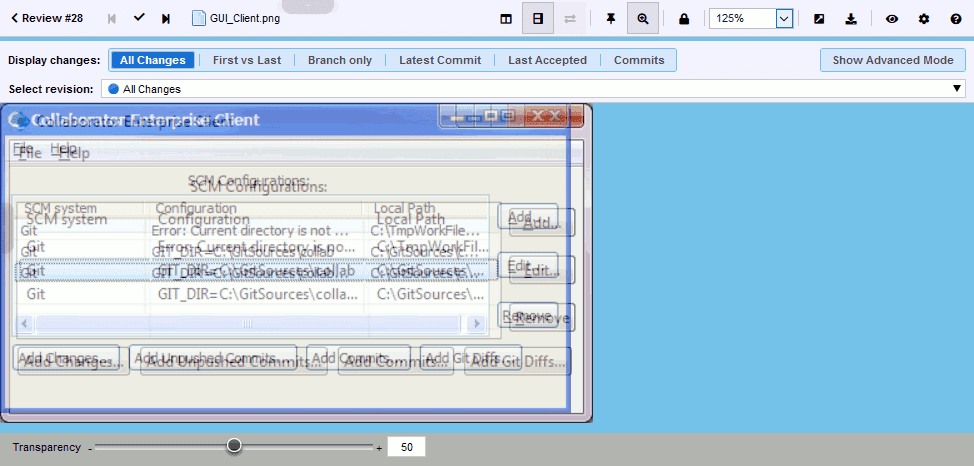
The overlaid view displays the after image over the before image (as image layers on photo editors). The Transparency selector adjusts the opacity of the top image and thus allows you to blend the two images together. This layout is useful to see the subtle differences between two images, including alignment differences and color variation.

Overlaid Image Review
Zoom In And Out
Both the side-by-side and overlaid view support zooming the images in the display. Whether zoomed in or out, the comment markers still refer to pixel locations in the image at 100% zoom, so subpixel comments are not supported. If a zoom operation would cause the currently selected location to scroll offscreen, the image will be scrolled to recenter the selected location.
The image rescaling for the zoom function is provided by the browser and may introduce artifacts depending on the type of image and the scaling algorithm chosen by the browser.
Make Comments and Mark Defects
Move Comment Pushpins
You can move an existing pushpin to a new position in a document. The feature should be enabled by administrator for all participants or for review creators only.
There are two ways to move a comment:
Using Drag and Drop
-
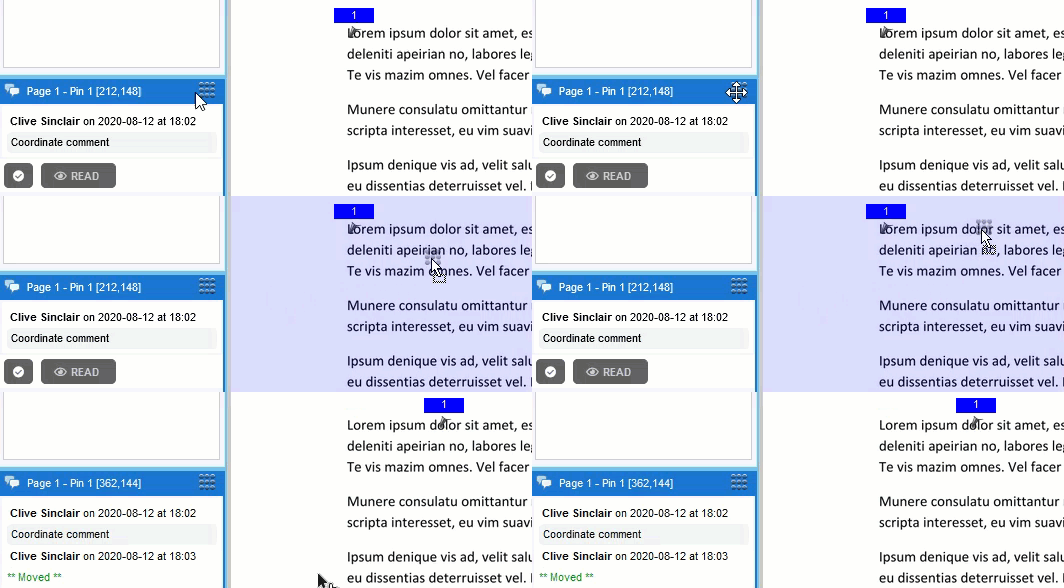
Drag the pushpin mark and drop it over the new position in the document.

Moving pushpins using drag-n-drop
Using Move Comment handle
-
Select the desired comment.
-
Click and hold the Move Comment handle (
 ).
). -
Drag the handle to the new position.

Moving pushpins using handle

On the left of the main Diff Viewer page, there is a pane for chat threads, where you can view and make comments and mark defects that should be fixed. When reviewing image files, you can create global, annotation, overall for file revision, coordinate (pushpin) and label comments and defects. Comment and defect description could be in plain-text or use rich-text and Markdown formatting, they could also mention other Collaborator users.
To comment on specific location, simply click the image at a point where you would like your comment to appear and begin typing. Collaborator will insert a pushpin ( ) to indicate the comment. The number in the pushpin head corresponds to the comment's order within the current image.
User can select some area (rectangle) in the document and create a conversation, connected to this area.
The pins may be turned off by clicking the pushpin toggle in the image review toolbar at the bottom of the content pane. This is useful when the pushpins cover important parts of the image.
Alternatively, you may specify an arbitrary label, such as "Header section", to describe the content you are referring to. Using labeled locations decreases the confusion that can occur when large changes occur in an image resulting in the pushpins not being adjacent to the corresponding context. Label text may not be updated.
To learn more about communicating during the reviews, see Types of Review Comments and Defects and Review Chats, Comments, and Defects topics.