Note: This page describes the bulk editor in AlertSite UXM. If you use AlertSite 1.0, see Bulk Editing (AlertSite 1.0).
Bulk editing is a way to make changes to multiple monitors at once. The bulk editor in AlertSite allows you to:
-
Enable or disable monitoring or alerting.
-
Change the monitoring locations and run interval.
-
Add or replace one-time and persistent blackouts.
-
Add or edit SLA objectives, operating periods, and exclusions.
-
Copy the blackout and SLA settings from one monitor to others.
-
Change custom properties.
-
Add monitor and alert notes.
Step 1 - Open the bulk editor and select monitors
To open the bulk editor:
-
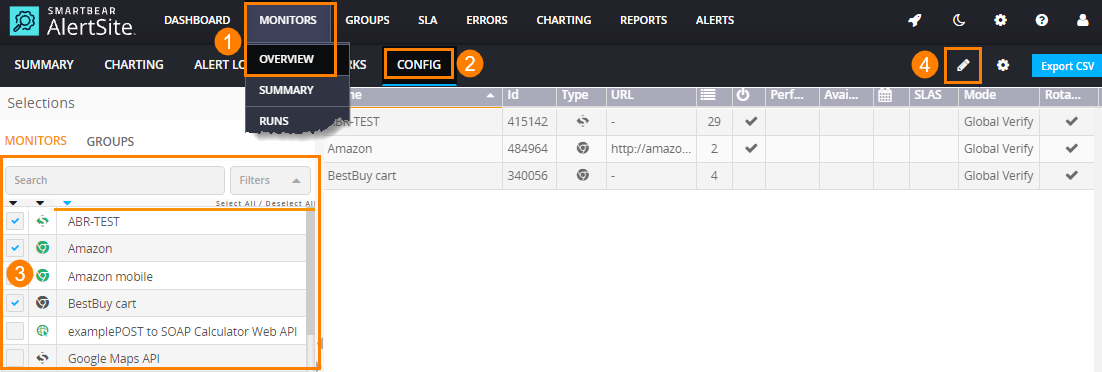
Go to Monitors > Overview.
-
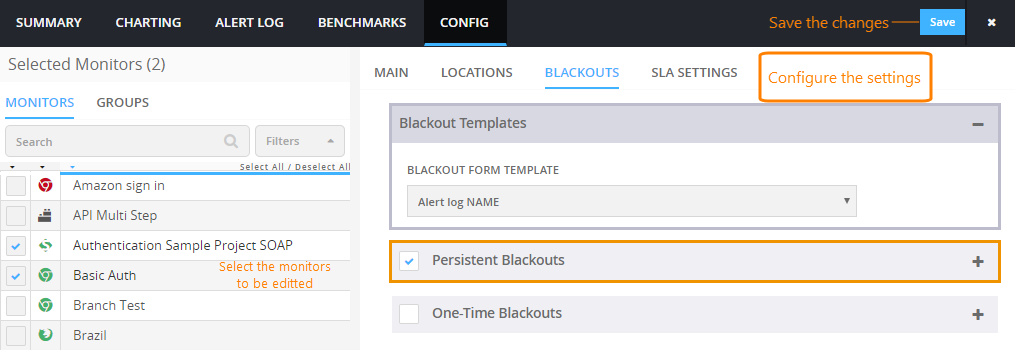
Swich to the Config tab.
-
Select the monitors on the left, then click Edit Monitors on the toolbar.
Step 2 - Change the settings
The settings you can bulk edit are organized into several tabs – Main, Locations, Blackouts and SLA Settings.
 |
You can edit only one tab at a time. To edit the settings from several tabs, edit one tab first, save it, then repeat with the other tabs. |
Main: monitoring status, run interval, notes, custom properties
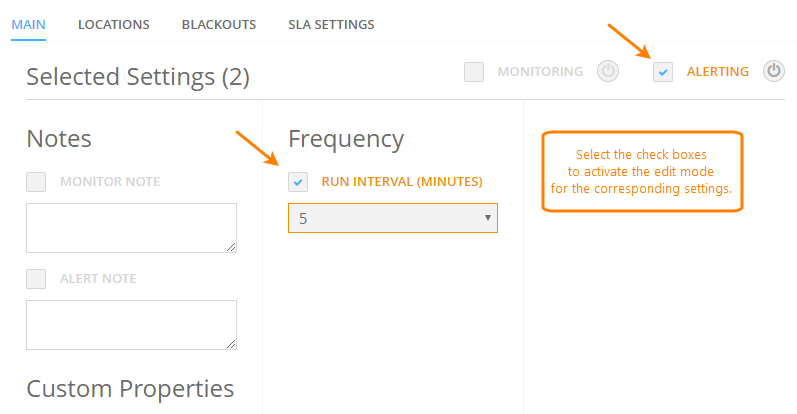
To bulk edit the settings on the Main tab:
-
Select the check boxes next to the settings you want to change. This will activate the edit mode for these settings.
-
Specify the new values.
-
Click Apply.
Locations
Use this tab to select monitoring locations for your monitors. You can choose to add the selected locations to the existing ones, or overwrite the currently used locations.
Blackouts
Use the Blackouts tab of the bulk editor to apply one-time and persistent (weekly) blackouts to multiple monitors at once:
-
In the monitor list on the left, select the check boxes next to the monitors you want to edit.
-
(Optional.) Under Blackout Templates, select a template monitor to copy the blackouts from. This will prepopulate the blackout configuration in the bulk editor with the values from that template monitor.
-
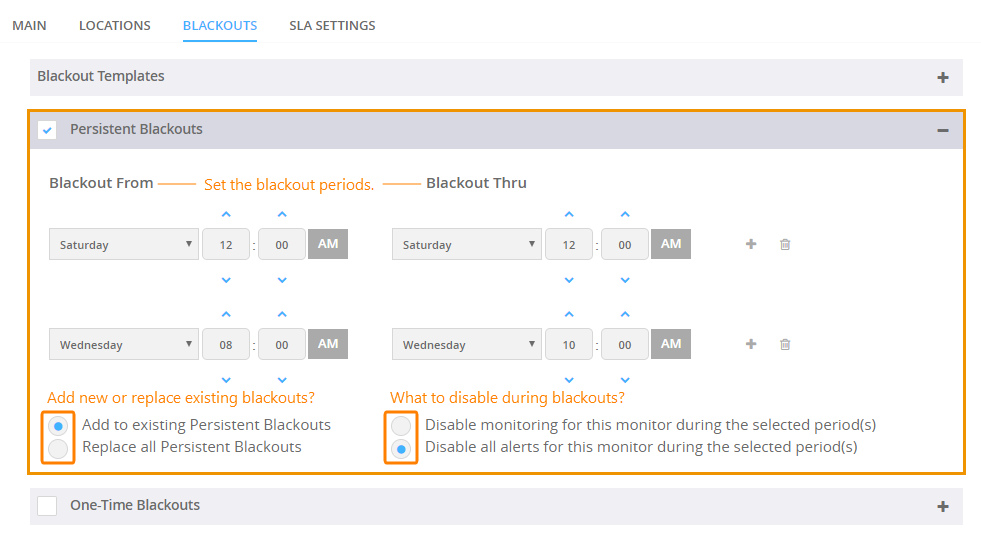
Configure Persistent Blackouts as required:
-
Select the check box next to the Persistent Blackouts section name.
-
Use the radio buttons to choose whether to add to existing blackouts or replace blackouts for the selected monitors.
-
Specify the blackout start and end dates (day of week and time). Use the plus button to add more blackout periods.
-
Choose whether to disable the monitors themselves or just the alerts for these monitors. Note that disabling a monitor also disables alerts.
In the example below, we disable monitor alerts on weekends and from 8 PM to 10 PM on Wednesdays.
-
-
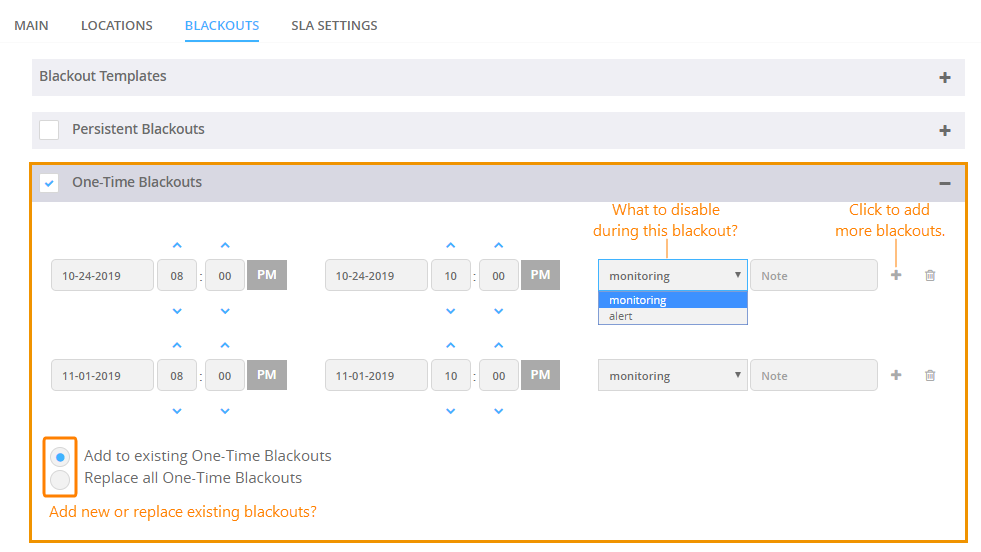
Configure One-Time Blackouts as required:
-
Select the check box next to the One-Time Blackouts section name.
-
Choose whether to add to existing blackouts or replace blackouts for the selected monitors.
-
Click to add blackouts. For each blackout, specify the following:
- the start and end date and time;
- what to disable – the monitor itself or just the alerts;
- an optional note.
In the example below, we add two blackouts that last from 8 PM to 10 PM.
-
-
Click Save and confirm the changes.
Once you have configured blackout settings for some of your monitors, you can use them as templates next time.
SLA settings
Use this tab to bulk edit monitor SLAs. You can create new SLAs, change SLA settings for multiple monitors at once, or copy SLA settings from one monitor to others.
-
On the left, select the check boxes next to the monitors you want to change SLA settings for.
-
(Optional.) Under SLA Templates, select a template monitor to copy the SLA configuration from. The editor will prepopulate the SLA values with those used by the selected template.
-
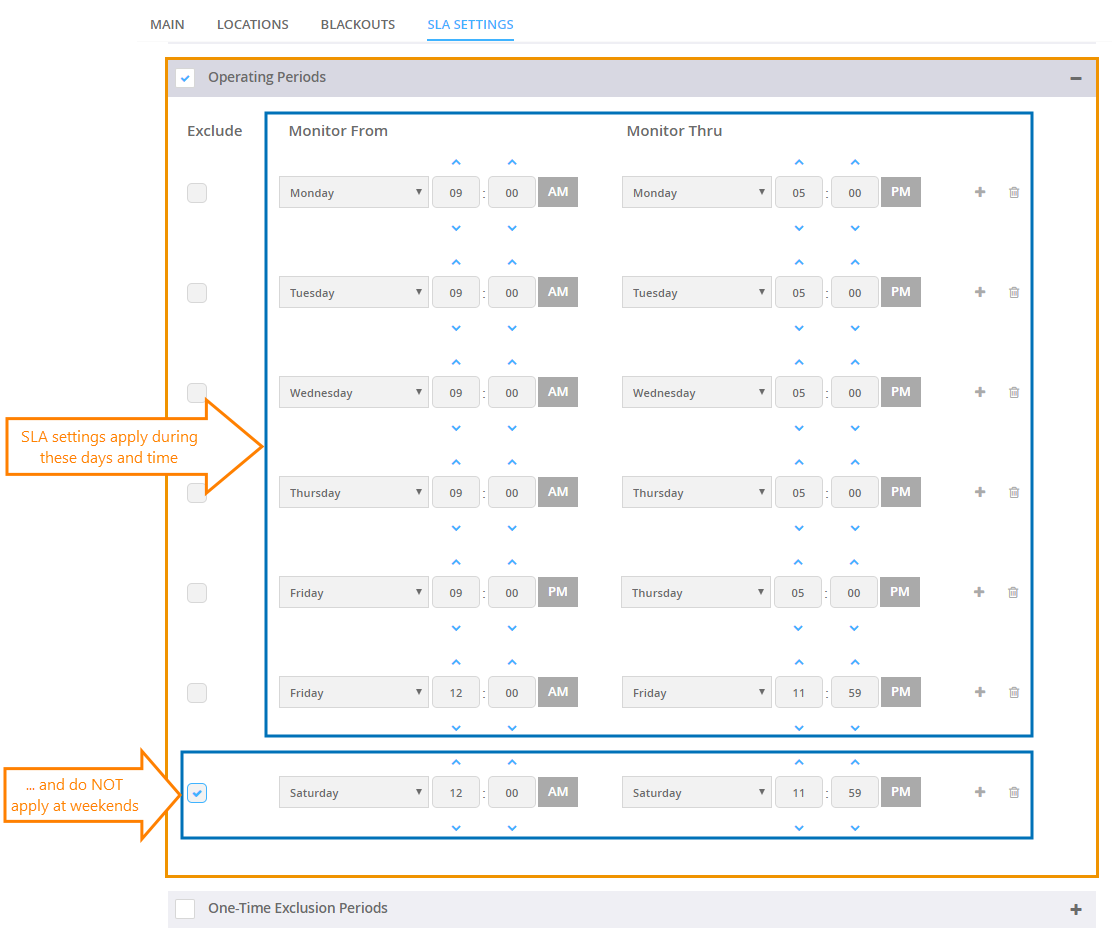
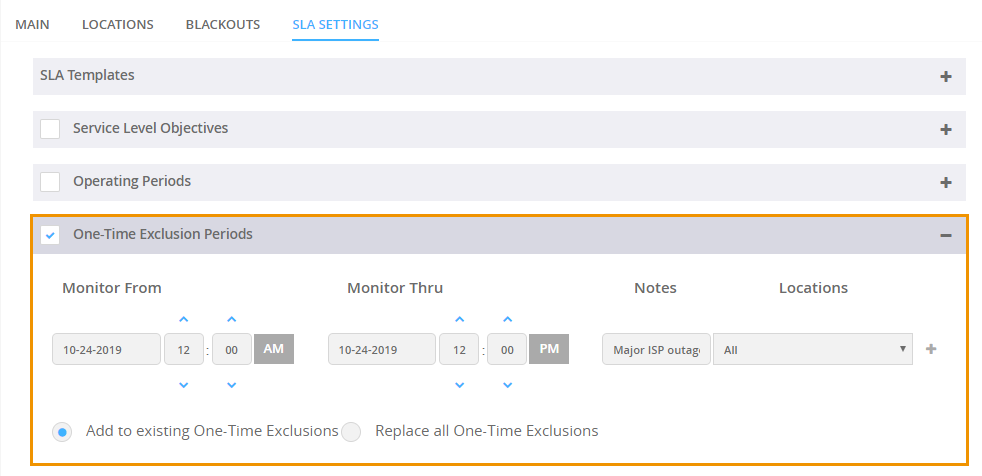
Select the check boxes next to the Service Level Objectives, Operating Periods, and One-Time Execution Periods section names and specify the corresponding settings:
-
Once you are happy with the SLA configuration, click Submit in the top right corner and confirm the changes.
Step 3 - Review and save the changes
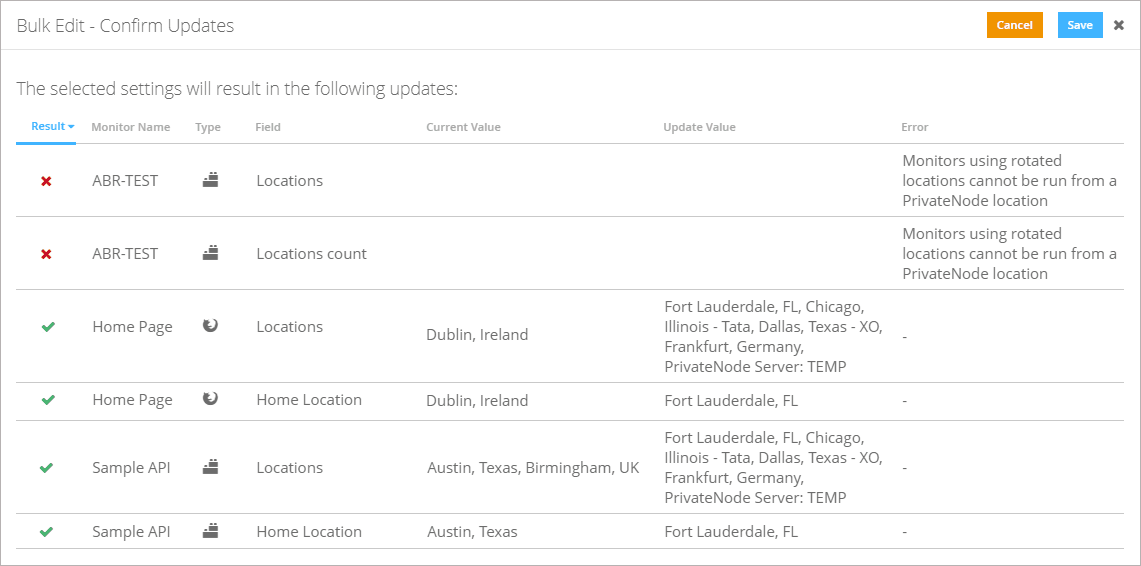
When you save the changes made on the Main or Locations tabs, the Confirm Updates dialog appears. It displays the current and new values for the changed options, and any issues with these changes. Review the changes and confirm the update.
In this confirmation dialog, each row corresponds to a single changed setting of a single monitor. The Status icons indicate the update status:
-
– OK.
-
– the current and new values are the same.
-
– the specified monitor setting cannot be changed for some reason. Most likely, the changes are incompatible with other monitor settings, or your AlertSite plan does not support the specified setting value. The Error column contains the detailed error description.
You can cancel the update in order to fix the errors or exclude the problematic monitors from the bulk update. If you continue without resolving the errors, the settings with the “error” status will not be updated.
After you confirm the update, you should see Settings saved to the selected monitors. At this point, you can click Export CSV to save the bulk edit results to a CSV file.
Bulk editing via API
You can use AlertSite JSON API to edit the monitor configuration programmatically. The API allows you to enable and disable monitors, change the monitoring locations, interval, timeouts, and other configuration settings. However, blackouts and SLA settings are not currently exposed through the API.
See Also
Scheduling Monitor Blackouts
Configuring Monitors
Selecting Locations for Monitoring
Monitor Notes
Enabling and Disabling Monitors and Alerts


 Service Level Objectives