You can configure blackouts to stop monitoring or alerting at specific periods, for example, when your web application is undergoing scheduled maintenance. This way, the maintenance time will not affect your application’s availability and performance data in AlertSite. Blackouts can be one-time or repeating every week.
Notes:
-
You must be an Admin, Co-Admin, or Power user to add or change monitor blackouts.
-
Alerting blackouts affect only availability alerts, like HTTP errors or timeouts. Performance alerts are sent during blackout periods as well.
Blackout types
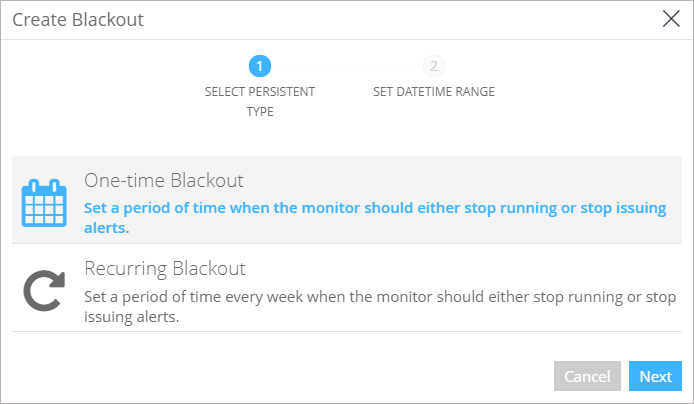
One-time blackouts are used when you have a single event during which you do not want monitoring or notifications to take place.
Recurring blackouts (also known as persistent blackouts in AlertSite 1.0) disable monitoring or error notifications for specified days and hours on a weekly basis. This is most useful when you have scheduled maintenance periods and want to temporarily halt monitoring during that time frame, or if you have recipients that you do not want to get alerts during certain times of the day or during weekends.
Dashboard blackout indicators
AlertSite UXM
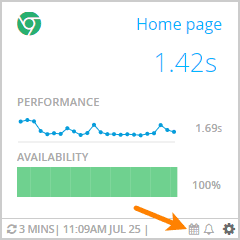
Monitors with upcoming blackouts have the icon on the Dashboard. In the list view, indicates one-time blackouts, and indicates recurring blackouts.
AlertSite 1.0
All the monitors that have blackouts configured have the ![]() clock icon next to their name on the Dashboard and in the other monitor lists. Clicking the
clock icon next to their name on the Dashboard and in the other monitor lists. Clicking the ![]() clock icon opens the blackout editor for this monitor.
clock icon opens the blackout editor for this monitor.
View and manage blackouts
AlertSite UXM
To view or change the blackouts for a monitor, open the monitor settings and switch to the Blackouts tab. Here, you can view all future, past, and recurring blackouts configured for this monitor. You can filter the blackouts by type to quickly find specific blackouts.
| Note: | Past one-time blackouts are hidden by default. To view them, unselect the Hide Past Blackouts check box. Note that past blackouts cannot be edited or deleted. |
The blackouts are listed in a table with the following columns:
| Column | Description |
|---|---|
|
Type |
one-time blackout or recurring blackout. |
|
Status |
Scheduled (upcoming) or Past. This column is hidden if the Hide Past Blackouts check box is selected. |
|
Schedule |
The start and end date and time for the blackout. |
|
Type |
What is disabled during the blackout – the Monitor itself, or just Alerts from this monitor. |
|
Note |
Optional blackout notes. For one-time blackouts only. |
|
Created By |
User who created this blackout. For one-time blackouts only. |
|
Actions |
– Edit this blackout. Only recurring blackouts can be edited. To edit a one-time blackout, delete it and create a new one. – Delete this blackout. Note that past one-time blackouts cannot be deleted. |
AlertSite 1.0
You can view or change the blackouts for a monitor on the Blackouts page of the monitor configuration screen. To open it:
-
On the Dashboard, click the
 clock icon next to the monitor name.
— or —
-
On the Dashboard, click the wrench icon next to the monitor. This opens the monitor configuration screen.
-
Click the Blackouts button in the top row of buttons.
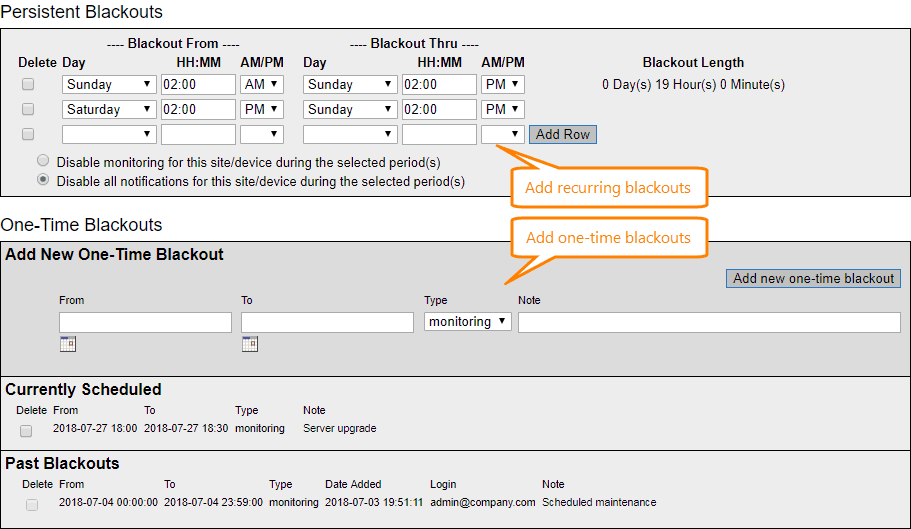
The blackout list is split into Persistent Blackouts (recurring) and One-Time Blackouts. One-time blackouts are further split into Currently Scheduled and Past Blackouts.
| Note: | Past blackouts cannot be edited or deleted. |
Add a monitor blackout
We recommend that you add blackouts at least an hour before the blackout scheduled time. This will allow the changes to reach through our network of monitoring locations.
AlertSite UXM
-
Open the monitor settings and switch to the Blackouts tab.
-
Click Add Monitor Blackout.
-
Choose whether you want a one-time or recurring blackout and click Next.
-
Under Blackout Type, choose whether to disable the monitor itself or just the alerts. Alert blackout means the monitor will still run but errors will not trigger alerts.

-
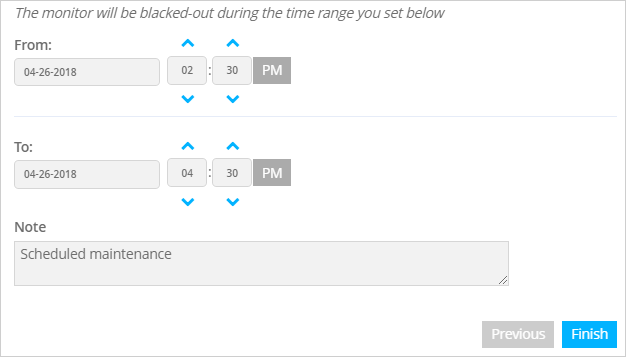
For one-time blackouts, set the start and end time.
-
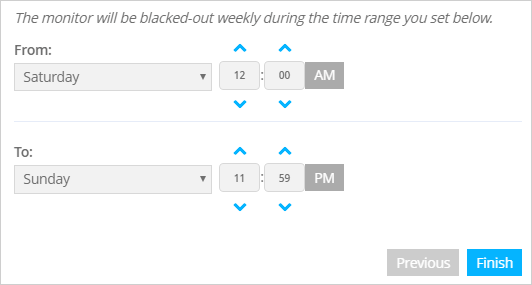
For recurring blackouts, select the starting day of the week and start time, then the ending day of the week and the end time. The blackout will occur weekly on this schedule.
-
Click Finish.
AlertSite 1.0
-
On the monitor configuration screen, click Blackouts.
-
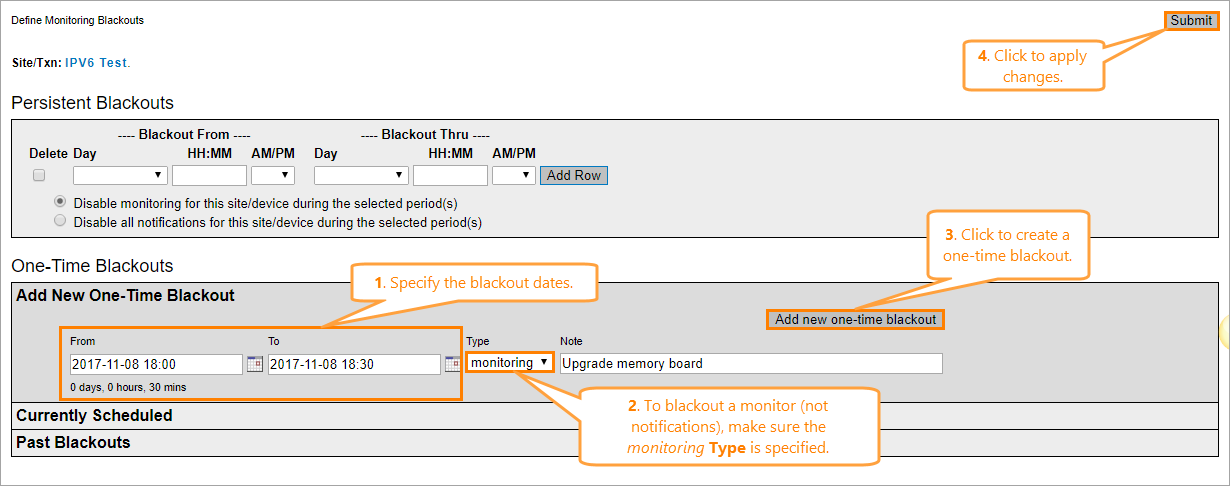
Specify the blackout settings of the needed blackout type.
For a persistent (recurring) blackout, select the starting day of the week and start time, then the ending day of the week and the end time. You need to also choose whether to disable monitoring completely, or only notifications (that is, the monitor still runs, but does not send alerts).
For a one-time blackout, set the start and end time.
-
Click Submit in the top right corner to save the changes.
Add blackouts to multiple monitors
You can use the bulk editor to add or change blackouts for multiple monitors at once. See Bulk Editing for details.
Change the blackout date and time
You can edit only recurring blackouts. To change a one-time blackout, delete it and add a new one.
AlertSite UXM
-
Open the monitor settings and switch to the Blackouts tab.
-
Click next to the recurring blackout you want to edit.
-
Set the new blackout time range and click Save.
AlertSite 1.0
-
On the monitor configuration screen, click Blackouts.
-
Change the time range for Persistent Blackouts as required.
-
Click Submit.
Delete a blackout
You can delete recurring blackouts and one-time blackouts set in the future. Past one-time blackouts cannot be deleted.
AlertSite UXM
-
Open the monitor settings and switch to the Blackouts tab.
-
Click next to the blackout you want to delete, and then click OK to confirm.
AlertSite 1.0
-
On the monitor configuration screen, click Blackouts.
-
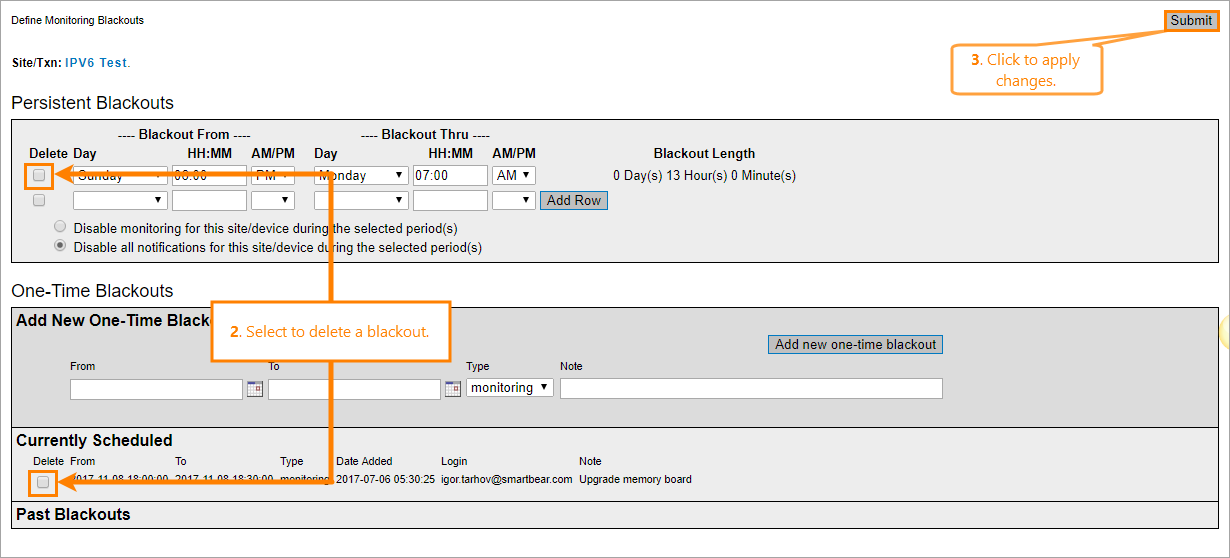
To delete a persistent blackout, select the corresponding Delete check box in the Persistent Blackouts section.
To delete a one-time blackout, select the corresponding Delete check box in the Currently Scheduled section under One-Time Blackouts.
-
Click Submit to save the changes.
See Also
Configuring Monitors
Enabling and Disabling Monitors and Alerts


 Example
