In QAComplete, you can link defects to requirements, agile tasks to releases and so on. This makes it easier to monitor your changes and integrate various types of items into your workflow.
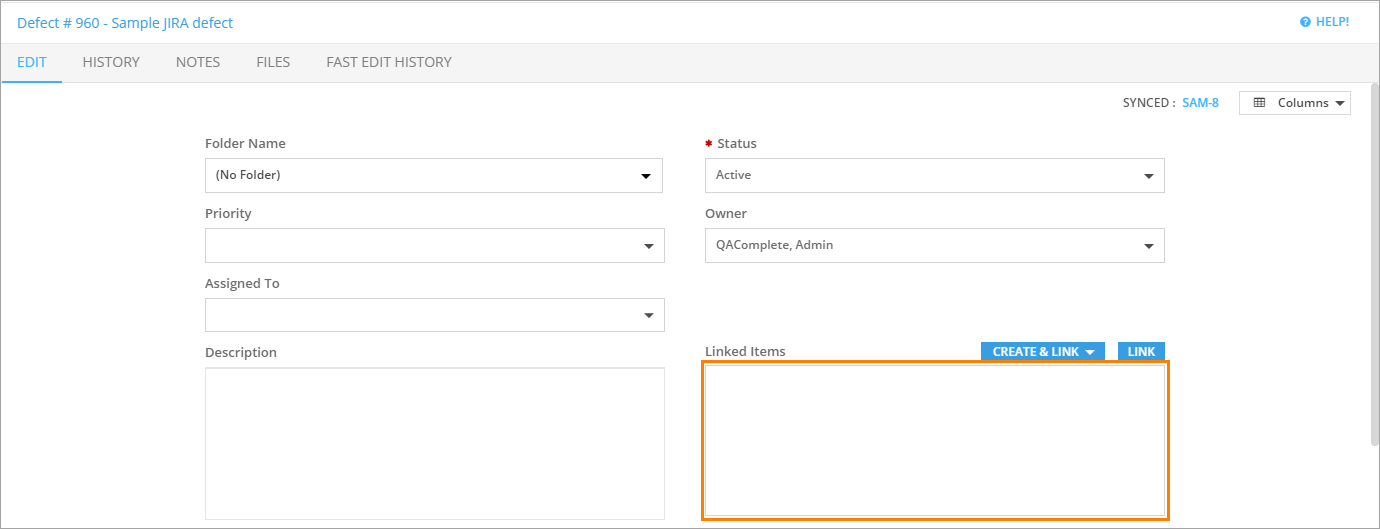
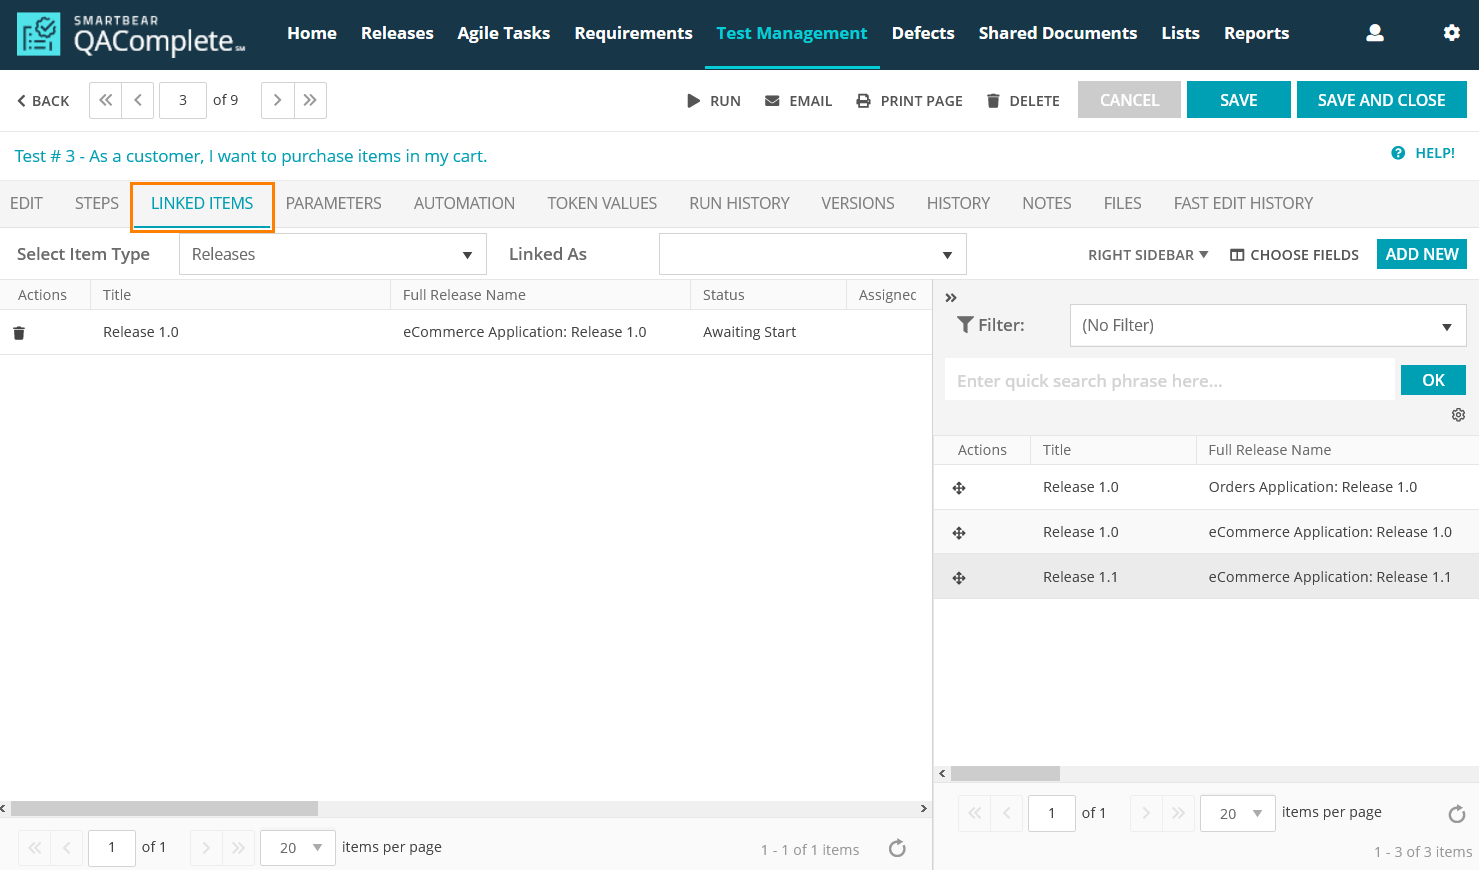
You can link items by using the buttons of the Linked Items panel on the Edit tab of the Add and Edit forms, or you can do that on the Linked Items tab of the Add and Edit forms.
The Linked Items panel on the Edit tab:
The Linked Items tab on the Add and Edit forms:
Create a link between items
To create a new link between items in the Linked Items panel:
-
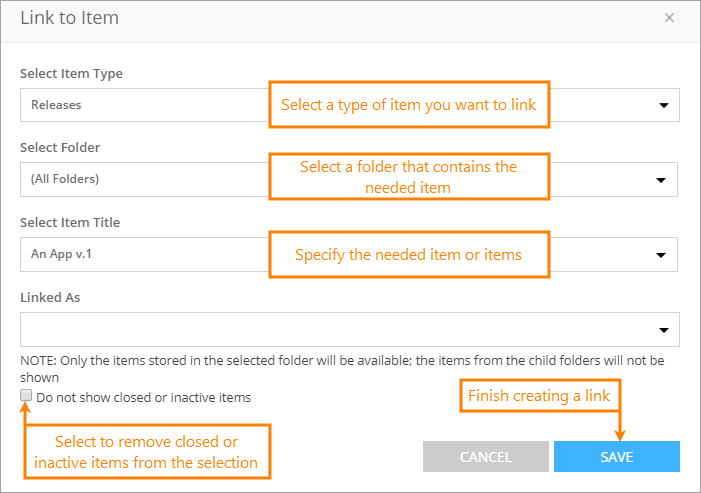
Open the Link to Items dialog:
Click Link in the Linked Items panel.
The Link to Item dialog will appear.
—OR—
Click Create & Link. Select a needed type of item in the drop-down list. The Create form will appear for the new item – link between this new item and existing one will be created automatically.
-
Select a type for the item you want to link in the Select Item Type drop-down list.
-
Select the folder containing the needed item in the Select Folder drop-down list.
Note: Only the items located in the selected folder will be available. To select an item from a child folder, select that folder in the drop-down list. -
Specify the title of the needed item in the Select Item Title field. You can select multiple items.
Tip: Unselect the Do not show closed or inactive items check box to create a link to closed or inactive items. -
(Optional) If you want to link a defect to a release, you need to select the type of the link in the Linked As drop-down list.
-
Click Save (Submit).
-
On the Edit form, click Save to apply the changes you have made.
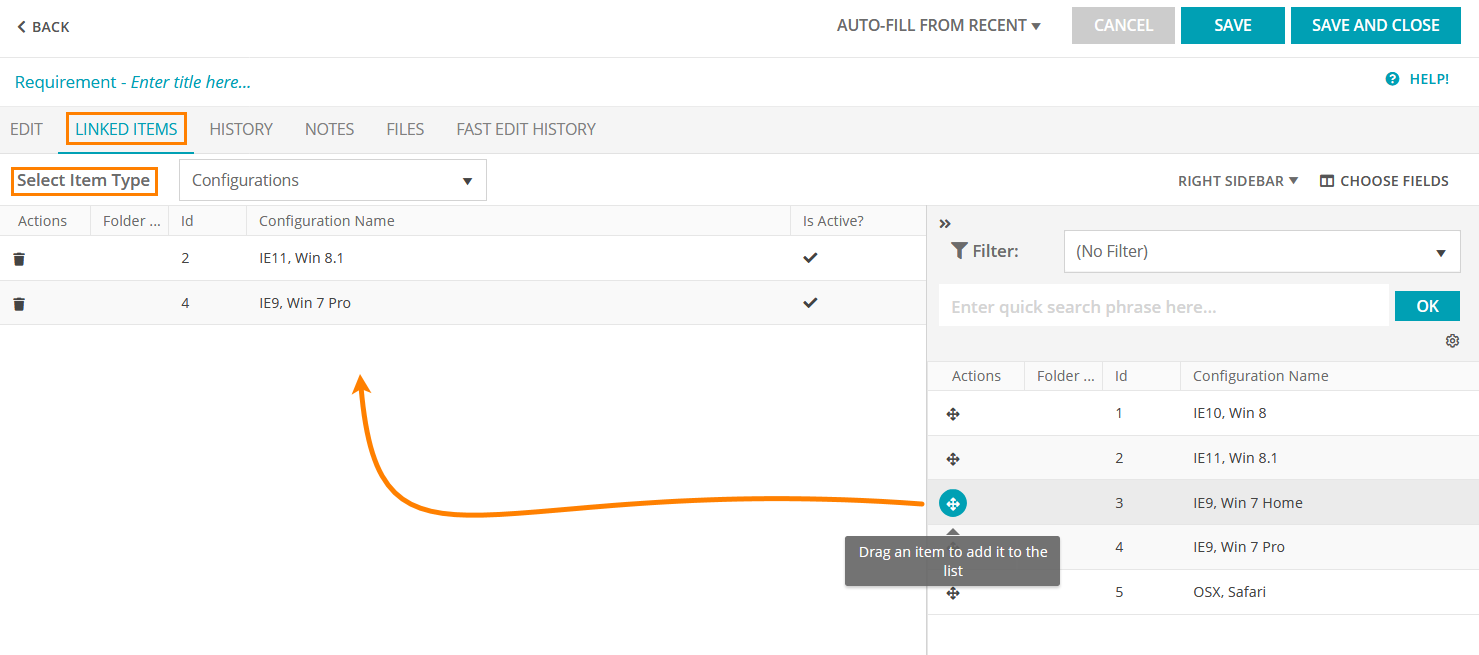
To link items on the Linked Items tab of the Add and Edit forms:
-
Open an item for editing by clicking , or click Add New in the top-right corner of the screen to open the Add form:
-
On the subsequent page, switch to the Linked Items page, select an item type, and drag items from the sidebar to the list on the left to create a link to the items of the selected type:
-
Click Save in the top-right corner to apply the changes.
The Traceability screen
On the Traceability screen, you can view and modify all existing links between items, as well as create new ones.
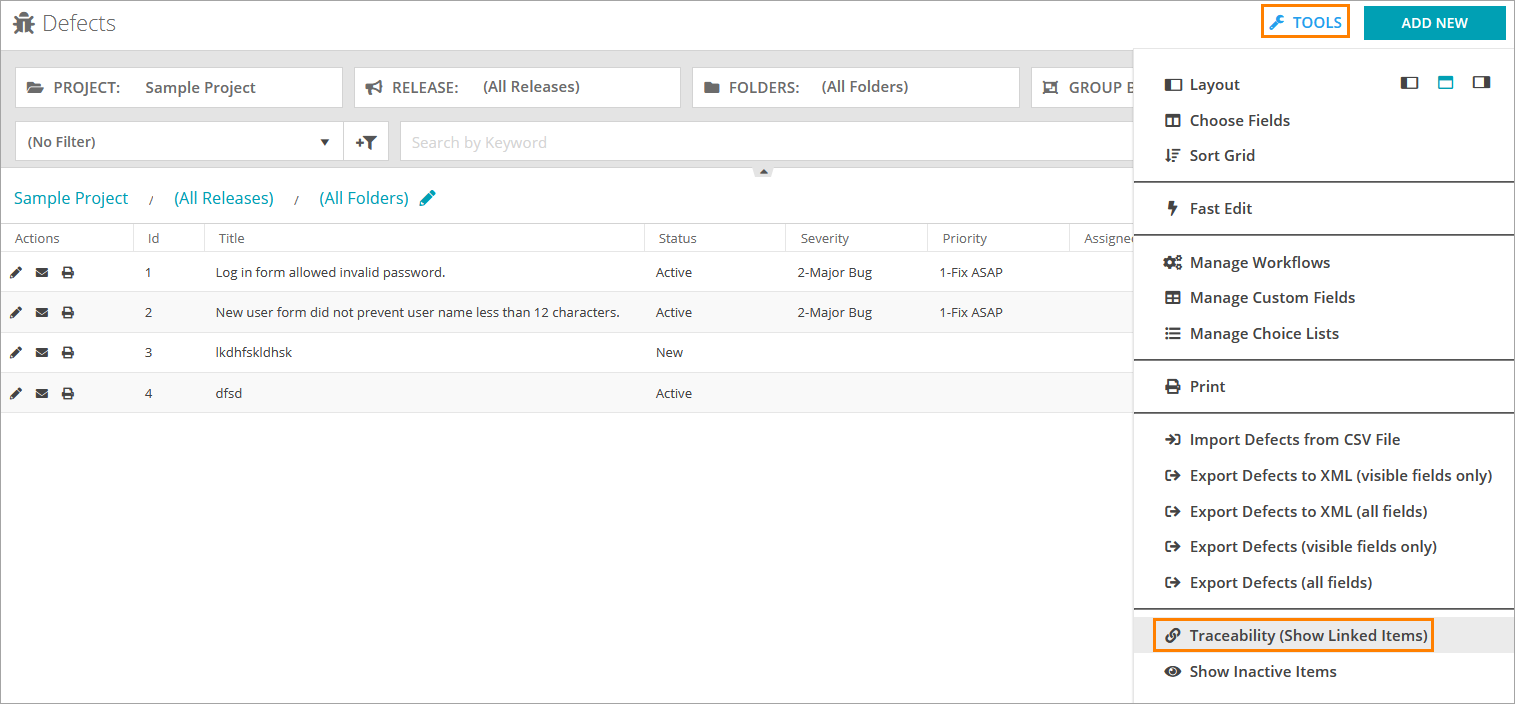
To view traceability (that is, the existing links between items):
Once this is done, you will see how many items of each type are linked to items on the selected screen:
The rightmost columns of the table show how many items of each type are linked to the specific item:
| Column | Description |
|---|---|
| The number of linked configurations. | |
| The number of linked defects. | |
| The number of linked releases. | |
| The number of linked requirements. | |
| The number of linked test sets. | |
| The number of linked tests. |
Click a number in the specific item type column to open the Linked Items page where you can see how many items of that type are linked.

