This topic describes how to attach files to items in QAComplete. You can attach mockups and flowcharts to help your colleagues get a better understanding of some new application features, provide screenshots and error logs for failed tests, and so on.
To start working with attachments:
-
Go to the item list screen.
-
Open the Edit form for the item you need.
-
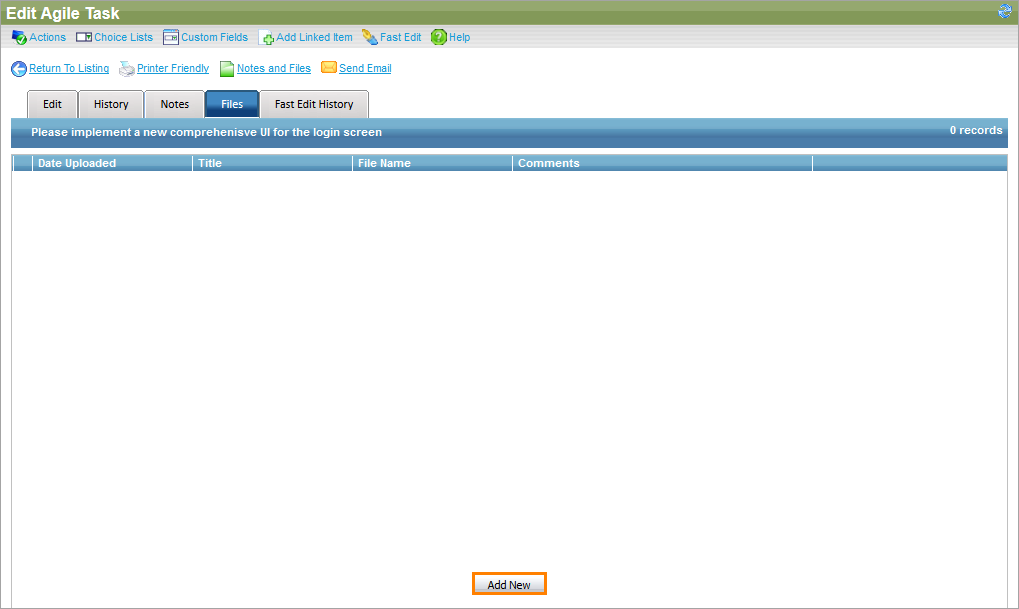
Switch to the Files tab.
On the Files tab, you can view the available files or upload new ones.
Upload files
To upload a file:
Do the following:
-
Drag and drop a file to the upload panel.
-
Click Choose File and navigate to the file you want to upload from your device.
-
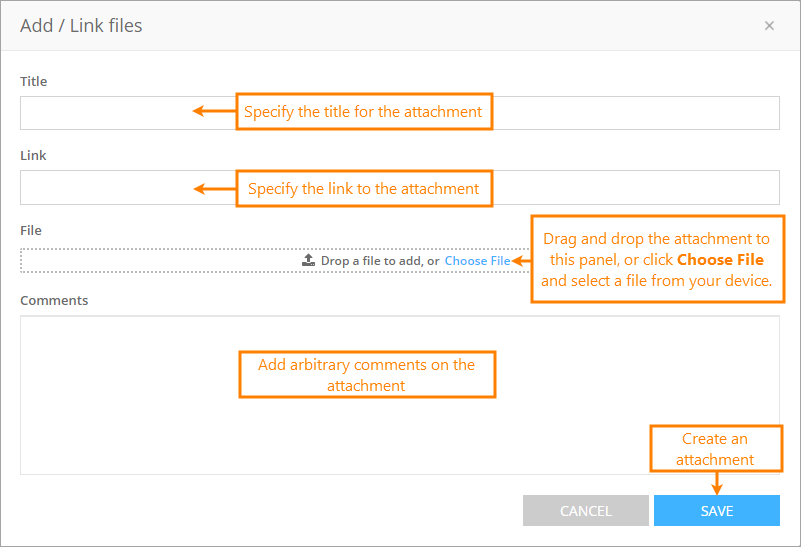
Click Add / Link Files to call the Add / Link files dialog.
In this dialog, you can either upload your file as described above, or you can specify a link to the file stored on another website.
You can also specify a name for your file in the Title field and add comments in the Comments edit box.
Once done, click Save to upload the file and close the dialog.
The attachment will appear in the Attachments table. Once it is there, click Save and Close to apply your changes and return to the item list.
-
Click Add New.
-
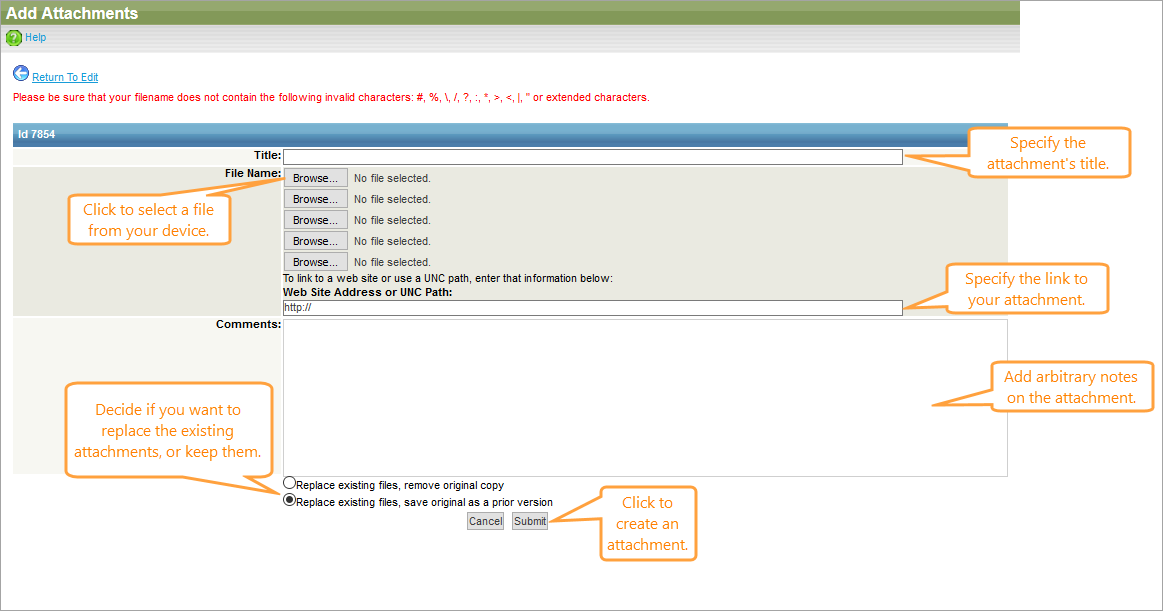
The Add Attachments form will appear.
In the Title field, specify a name for your file.
-
Specify the path to the file you want to attach:
- Click Browse to select the file to upload from your device
- Specify a link to the web site or the UNC path in the Web Site Address or UNC Path field
-
If needed, provide some additional information about the attachment in the Comments edit box.
Tip: The Comments edit box supports the Rich Text format. -
Choose whether you want to keep the existing attachments or whether you want to delete them:
- Replace existing files, remove original file – All the existing attachments will be replaced with the files you upload
- Replace existing files, save original as a prior version – All the existing attachments will be stored in QAComplete, the
Revision %number% replacedcomment will appear for them on the Files tab
-
Click Submit to upload the file and return to the Edit form.
| Note: | When attaching a file to a test, you can also select a specific step the file will be attached to. |
Attachment size limit
There is a size limit for files you can attach to QAComplete items.
-
SaaS: The maximum allowed size is 150 Mb. If you try to attach a file that exceeds the allowed limit, QAComplete will display an error message.
-
On-Premises: The maximum allowed size of an attachment is specified by the IIS settings on your QAComplete server. Contact your QAComplete administrator for information about your attachment size limit.
If the file you want to attach exceeds the size limit, you can upload it to a third-party file storage or put it to a shared folder in your network. After that, specify the path to the file in the path field.
Download attachments
To download an attachment:
Edit the attachment information
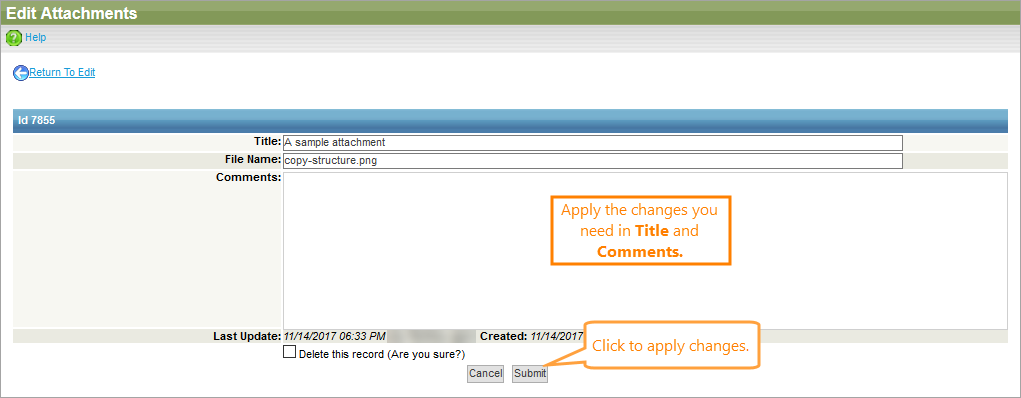
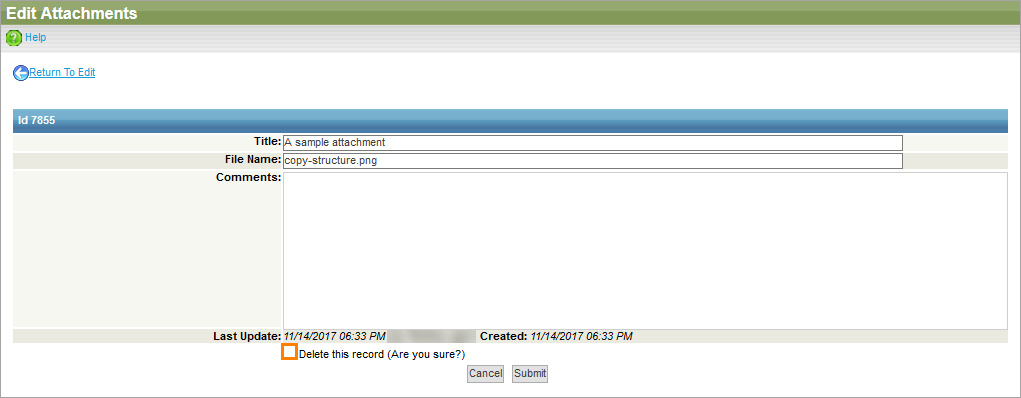
To edit the attachment title or comments:
-
Click within the corresponding cell in the table on the Files tab.
-
Make the changes you need.
Tip: For comments, you can use the Rich Text format. -
Save the changes.
Delete an attachment
To delete an attachment:


