A test host is a computer that runs your automated tests.
Requirements and considerations
-
Each host must have a unique computer name.
-
Before setting up a host in QAComplete, install and configure one of the supported automated testing tools.
-
On the machine you want to use as a host, install and configure the Test Agent.
-
 Make sure that any dependent libraries, data for data-driven tests, and other necessary information are available on the host, so your automated test can locate the data it needs for a successful run.
Test Hosts screen
After you install and configure the Test Agent on your test host, QAComplete will create a new test host item. To view your test hosts, go to Test Management > Test Hosts.
Filtering and search
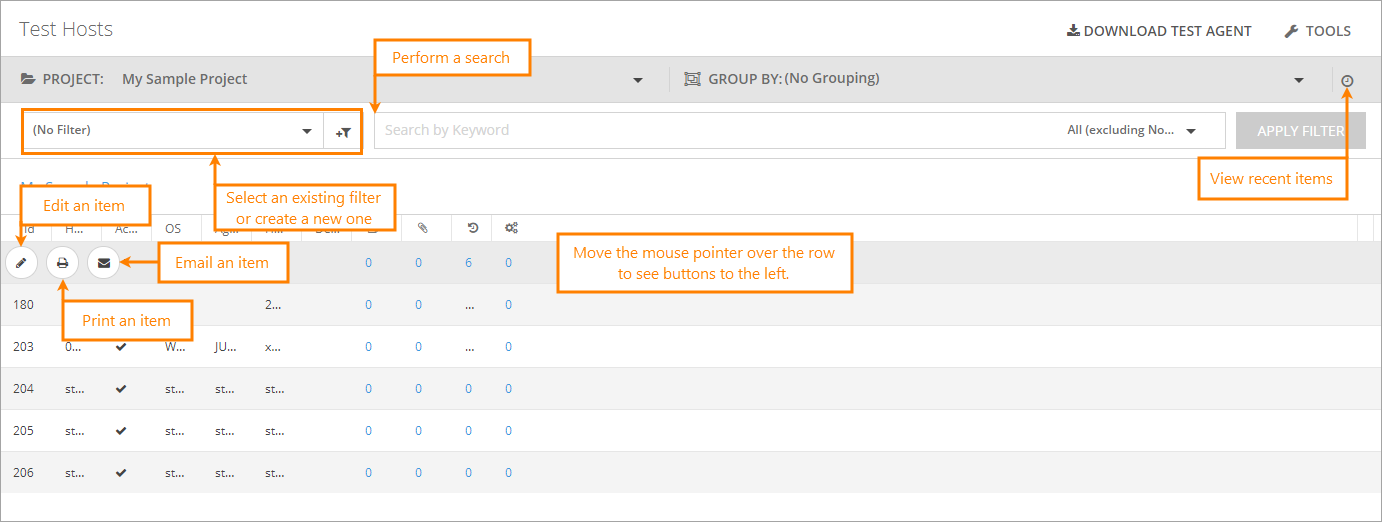
To filter the test list, use the Projects and Group By drop-down lists on the toolbar.
In the Filter drop-down list, select one of the predefined filters, or create a new filter by clicking New Filter.
To search by a keyword, specify the needed keyword in the search box and press Enter. After that, only the items that match your search query will be shown on the item list.
Click Recent Items to display a drop-down list containing the items that have been changed lately. Click an item in the list to edit its properties.
Additional actions
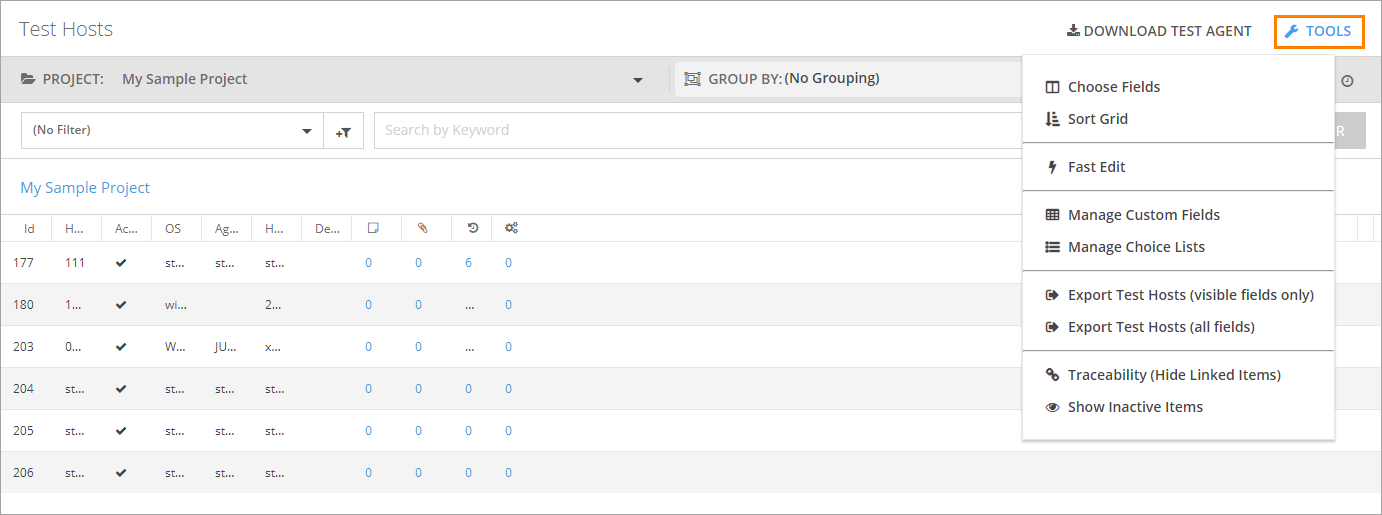
Click Tools to perform various actions on the Test Hosts screen:
To learn more about each available option, see Tools (Actions) Menu.
Use the buttons on the left of the test host’s row to perform various actions:
-
Edit – Open the Edit form for this test host. Use it to modify the test host’s properties.
-
Printer Friendly – Display the test host information in an easy-to-read printable form.
-
Email – Open the Send Email form. Use it to email the test host.
Edit a test host
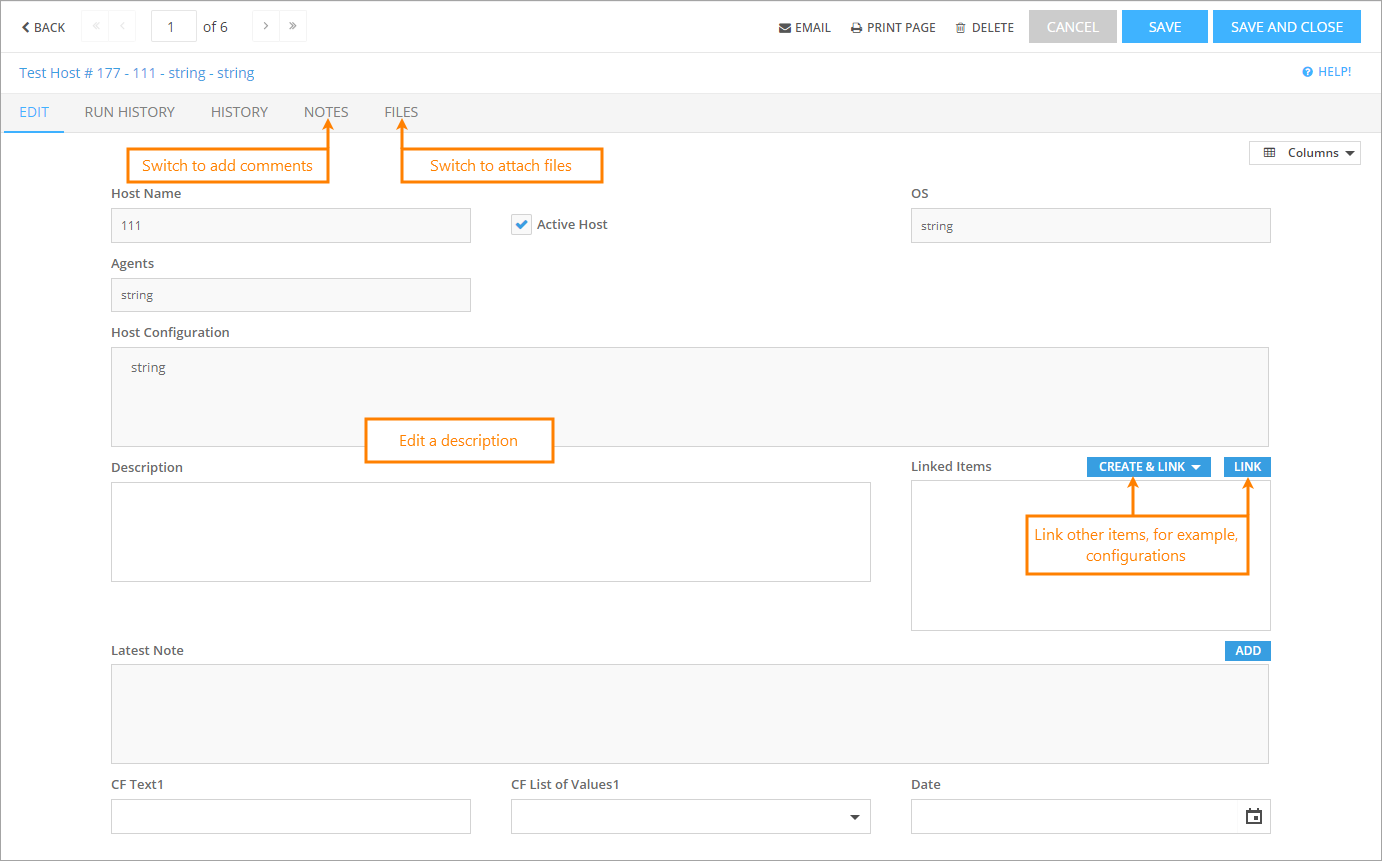
The Test Agent provides all information about the test host directly to QAComplete when the Test Agent is configured on the machine.
To view it, click Edit near the needed test host on the Test Hosts screen.
On the Edit Test Host form:
Link hosts to configurations
Linking hosts to configurations is necessary if you want to include automated test results to your Test Management reports. Do it in the same way as you link other items in QAComplete:
-
On the Linked Items panel of the Edit Test Host form, click Link:
-
Use the drop-down lists to select the needed configuration, then click Save.
Only one configuration will be used for reporting, so link one test host to one configuration.
| Tip: | Make sure to click Submit on the Edit Test Host form to store your changes in QAComplete. |
Configure the virtual machine hosts
QAComplete supports automated tests created for TestComplete and TestExecute that run on a virtual machine. We recommend that you disable automatic log opening after test runs to improve performance:
-
In TestComplete: Select Tools > Options in the main menu.
In TestExecute: Right-click the TestExecute icon in the notification area, then select Options in the context menu.
-
In the subsequent dialog, select Engines > Log.
-
Remove the selection from the Activate after test run check box, then click OK.
Configure TestComplete hosts
Before running TestComplete and TestExecute tests in QAComplete, make sure the following requirements are met:
-
Make sure the TestComplete service is running on the computer.
-
If a firewall or antivirus is installed, add the TestComplete and TestExecute services to the list of trusted applications.
-
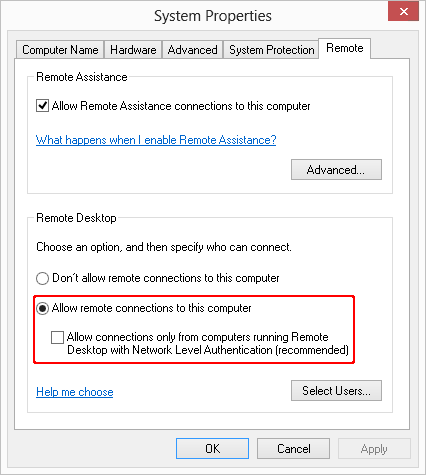
Make sure the remote connections are allowed:
-
On a machine with TestComplete or TestExecute installed, go to Control Panel > System > Remote Settings.
-
In the subsequent dialog, select Allow remote connections to this computer.
-
Remove the selection from the Allow connections only for computers running Remote Desktop with Network Level Authentication (recommended) check box.

Tip: In Windows 7, select Allow connections from computers running any version of Remote Desktop.
-
-
Check if the group policies are configured in accordance with the TestComplete remote testing recommendations.


