Use QAComplete filters to perform complex searches using multiple criteria.
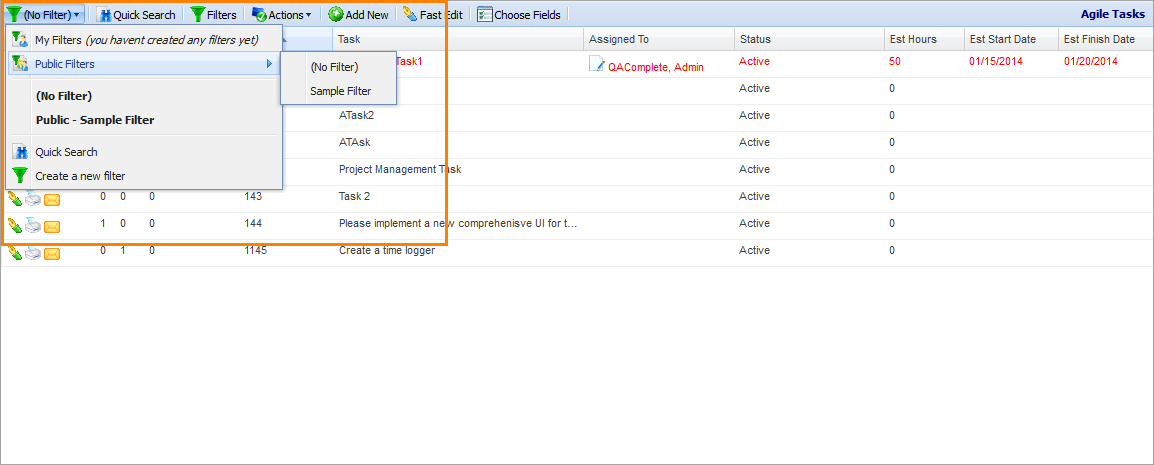
To select a filter, use the Filter drop-down list on the screen toolbar. Once you choose one, the items in the list will be fitered automatically.
| Tip: | The saved filters are grouped by private and public filters. |
To create a filter
-
Click the Filters icon.
-
The Manage Filters dialog will appear.
Specify a name for the new filter in the Filter Name field.
-
To make the filter available to all users of the project, click Public.
To make the filter available to all users of your QAComplete instance, click Visible in all projects.
-
Create specific search criteria using the items of the drop-down lists. To add more criteria, click the plus icon. To construct a query, you can also enclose the criteria in parentheses.
To delete a single criterion, click the Delete icon.
-
Once ready, click Save to create the filter and save it in QAComplete.
-
Click Filters on the screen toolbar.
-
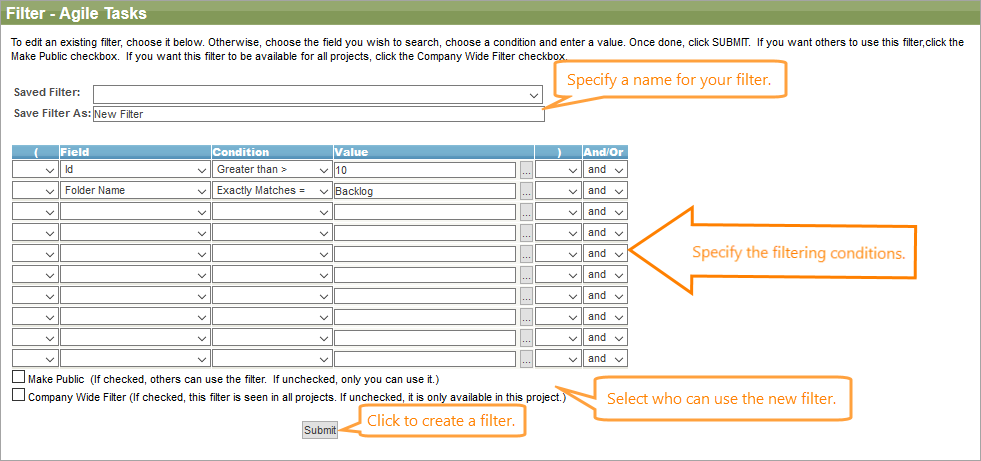
The Filter form will appear.
Specify a name for the new filter in the Save Filter As field.
-
To make the filter available to all users of the project, select the Make Public check box.
To make the filter available to all users of your QAComplete instance, select the Company Wide Filter check box.
-
Create specific search criteria using the items of the drop-down lists. To construct a query, you can also enclose the criteria in parentheses.
To delete a single criterion, unselect all the items in the drop-down lists on its row.
-
Once ready, click Submit to create the filter and save it in QAComplete.
To edit a filter
-
Click the Filters icon to open the Manage Filters dialog.
-
Select the needed filter in the Choose Filter drop-down list.
-
Make the changes you need.
-
Click Save.
-
Click Filters on the screen toolbar to open the Filter form.
-
Select the needed filter in the Saved Filter drop-down list.
-
Make the changes you need.
-
Click Submit.
To delete a filter
-
Click the Filters icon to open the Manage Filters dialog.
-
Select the needed filter in the Choose Filter drop-down list.
-
Click Delete.
-
Confirm the action in the subsequent dialog.
-
Click Filters on the screen toolbar to open the Filter form.
-
Select the needed filter in the Saved Filter drop-down list.
-
Select the Delete this filter check box.
-
Click Submit.


