About scenarios
In LoadNinja, a scenario (or load scenario) defines all the parameters for the load test run:
-
The number of virtual users to be simulated.
-
The “single-user” UI or API tests that these virtual users will simulate.
(A UI test is a sequence of user actions on a web page. These tests correspond to a user working with the website. And an API test is a sequence of API requests to the tested web service. They correspond to client apps working with the service.)
-
Load type.
-
Think time settings.
-
Error-handling options.
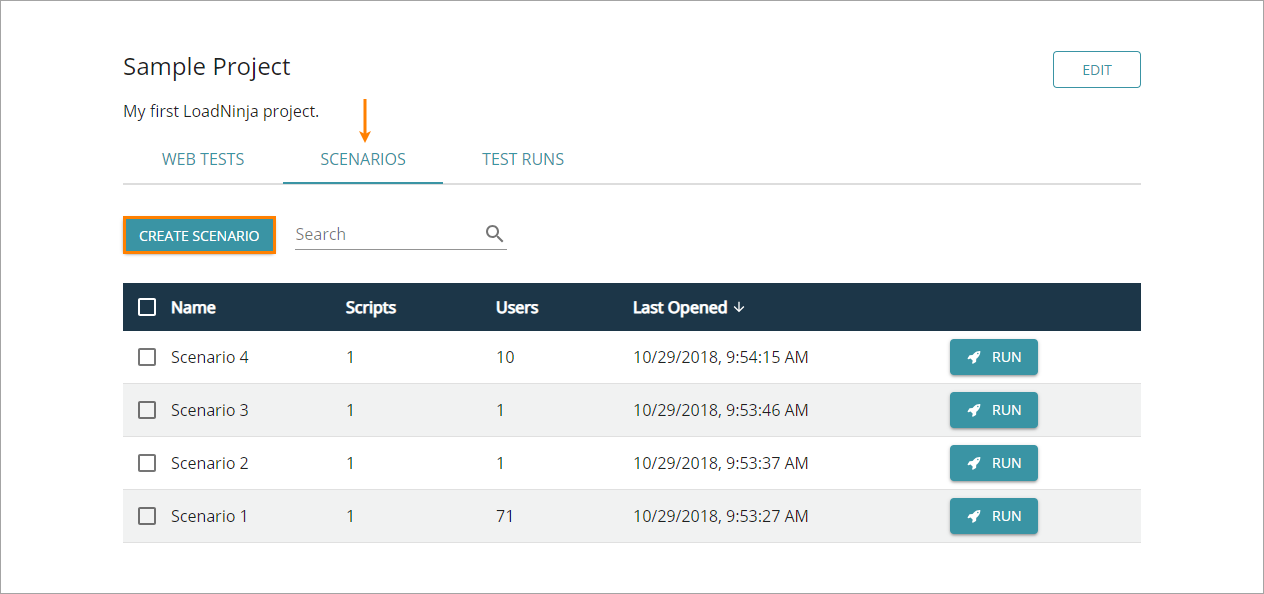
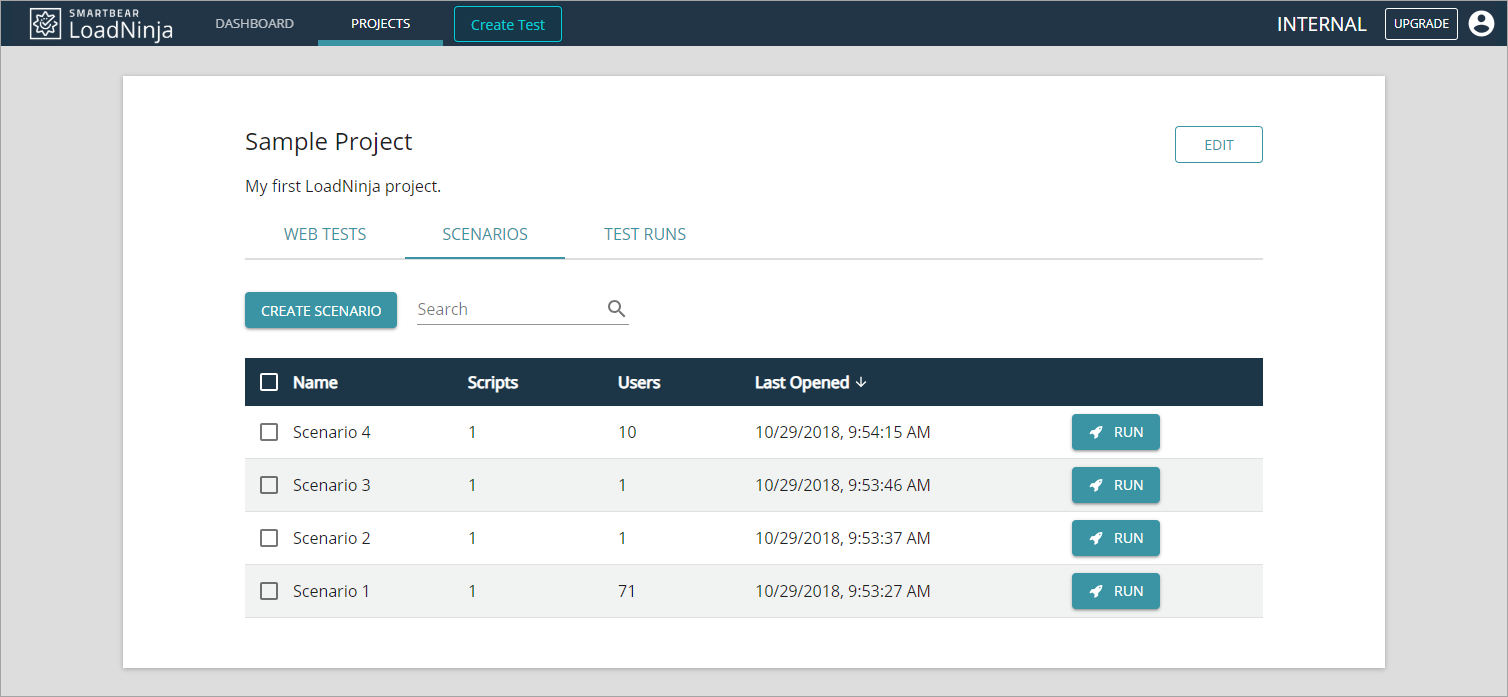
To work with scenarios of your project, go to the Load Test Scenarios tab of the project editor:
To view properties of some existing scenario, click this scenario in the scenario list.
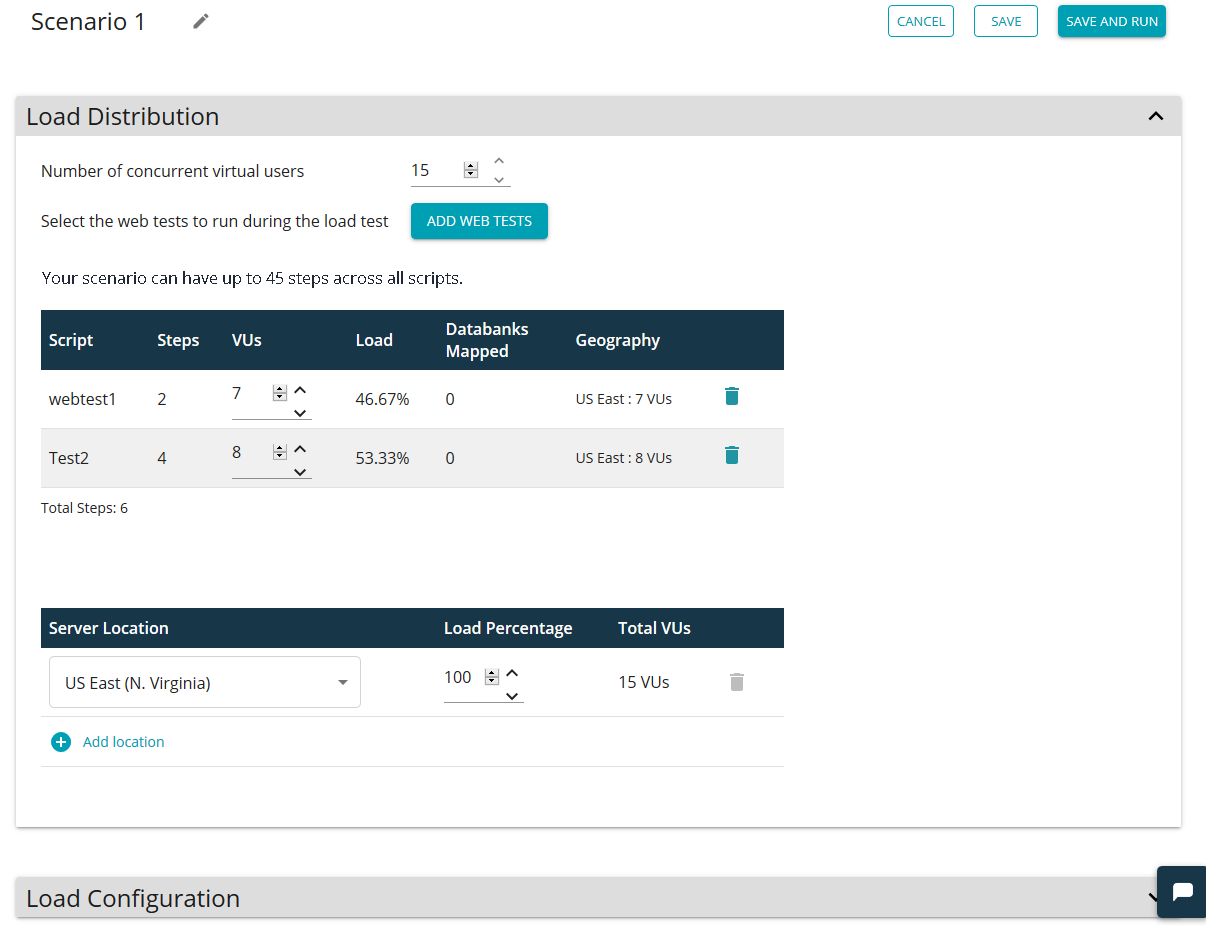
Here is a sample view of scenario settings:
Virtual users
-
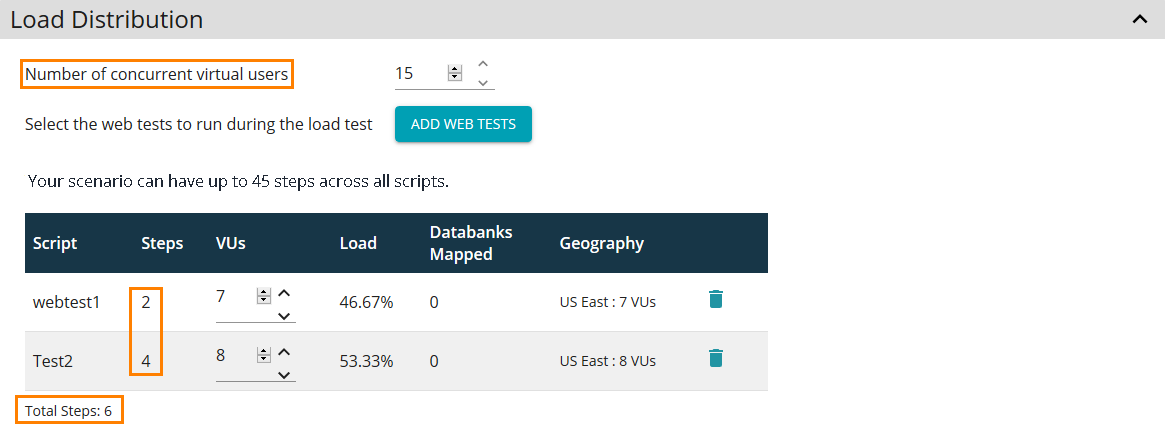
The Number of concurrent virtual users setting specifies the desired number of concurrent virtual users your load test will simulate. The maximum number is limited by your plan.
LoadNinja simulates every virtual user several times during the run. If some user completes their test, LoadNinja starts the next iteration of that virtual user.
-
Every virtual user runs one of UI or API tests, depending on the load distribution.
Currently, you can create scenarios that have either UI or API tests only. This is specified by the type of the first test you added to your scenario: if it is a UI test, you can then add only UI tests to the scenario. If it is an API test, you can add API tests only. To change the scenario type, remove all UI tests (or all API tests) from the scenario and add tests anew.
To run UI and API tests concurrently, create different scenarios for this and run these scenarios synchronously.
-
Each of UI tests can have multiple steps. Similarly, each of API tests can have multiple requests. The total number of all “UI-test” steps in a scenario must not exceed 60 regardless of the plan you have. The maximum allowed total number of API tests’ requests in one load scenario is 100.
Load types
Each scenario uses one of the following load types:
-
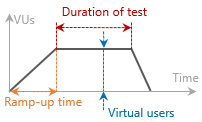
Duration-based means LoadNinja simulates virtual users for a specified period of time. If some virtual user completes its test, LoadNinja starts the next iteration of that user simulating the same test. The number of iterations is not limited. If the load-test time elapses, LoadNinja doesn’t start new iterations anymore.
-
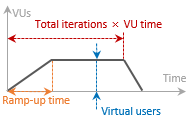
Iteration-based means LoadNinja simulates each virtual user for the specified number of times.
For more information on load types and other parameters, see Load Configuration Settings.
Scenario settings
For more information on scenario settings, follow these links:
Create a scenario
-
Go to Projects and click your project there:
-
In the project editor, switch to the Scenarios tab and click Create Scenario:
This will open the scenario editor.
-
At the editor’s top, click to rename the scenario. Specify a new name and press Enter:
-
Configure scenario settings as needed.
-
Click Save to save the scenario and to return to Projects:
Create a scenario from the UI test recorder
To create a scenario right after recording or editing a UI test:
-
Record a script as usual.
-
Click on the recorder’s toolbar to play back the script.
-
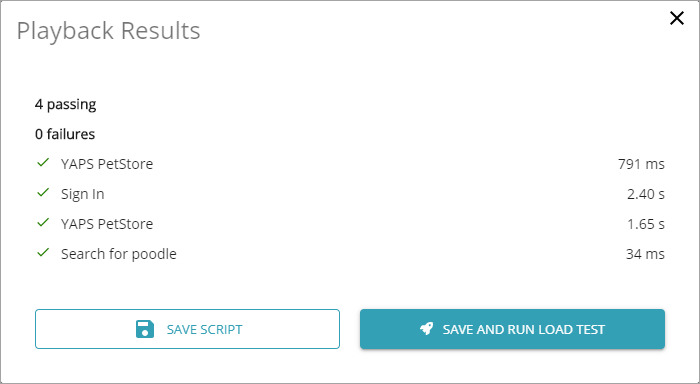
If the playback is successful, you will see a dialog from which you can run this script in a load test:
-
Click Save and run load test.
-
On the subsequent page, name your script and select the project you want to associate this script with, then click Save script and continue.
-
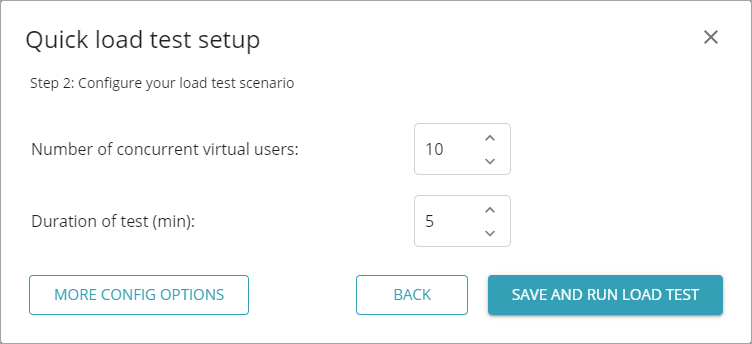
Next, configure the available settings:
-
Number of concurrent virtual users
The maximum number of concurrent virtual users (VUs) to be simulated during the run.
During the ramp-up period (if you use it), the number of concurrent virtual users will be less than this number. LoadNinja starts running the load test with 0 virtual users and adds them gradually during the ramp-up period until their amount reaches the value specified by the Virtual Users setting.
For information on how LoadNinja simulates virtual users, see load type descriptions.
-
Duration of tests (min)
Duration-based load tests run for some period of time. The Duration of test value sets the duration of the maximum load in minutes.
Note: For more information, see Load Configuration Settings.
Tip: To access other settings, click More config options. This will open the scenario editor.
-
-
Click Save and run load test to run the test based on the created scenario.
Edit a scenario
-
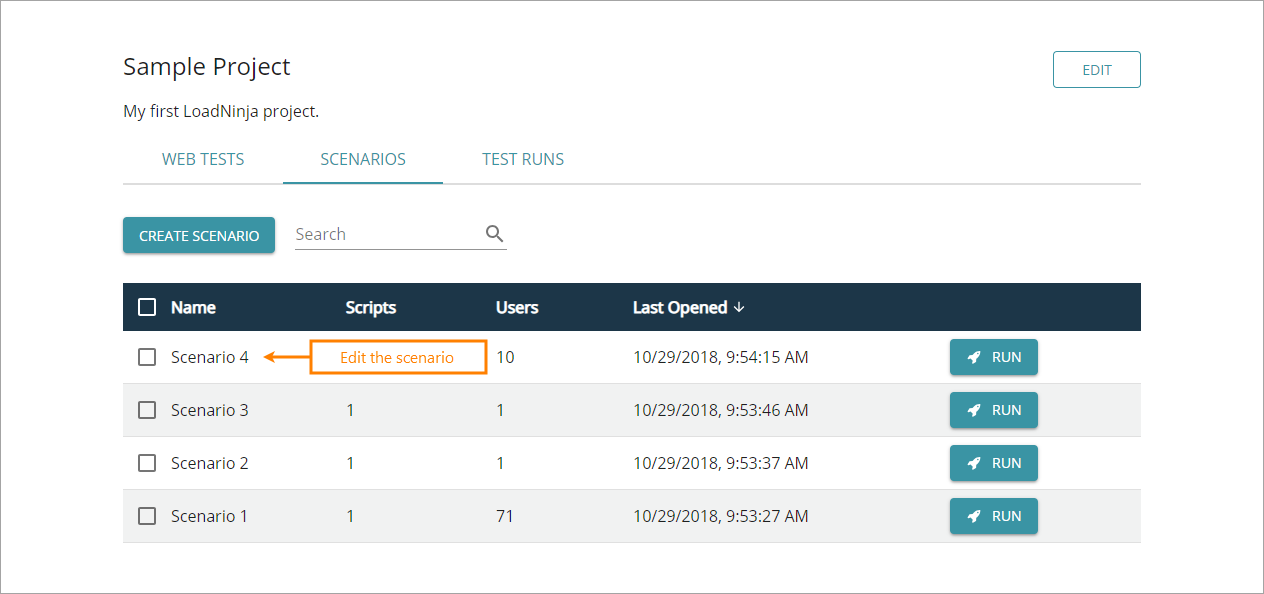
Find your scenario on the Projects > Scenarios page and click it there:
Tip: Use the search box to filter the scenario list. It allows searching for a specific character in a scenario name or for a specific date. -
Edit scenario settings in the scenario editor as needed.
-
Save the changes.
Run a scenario
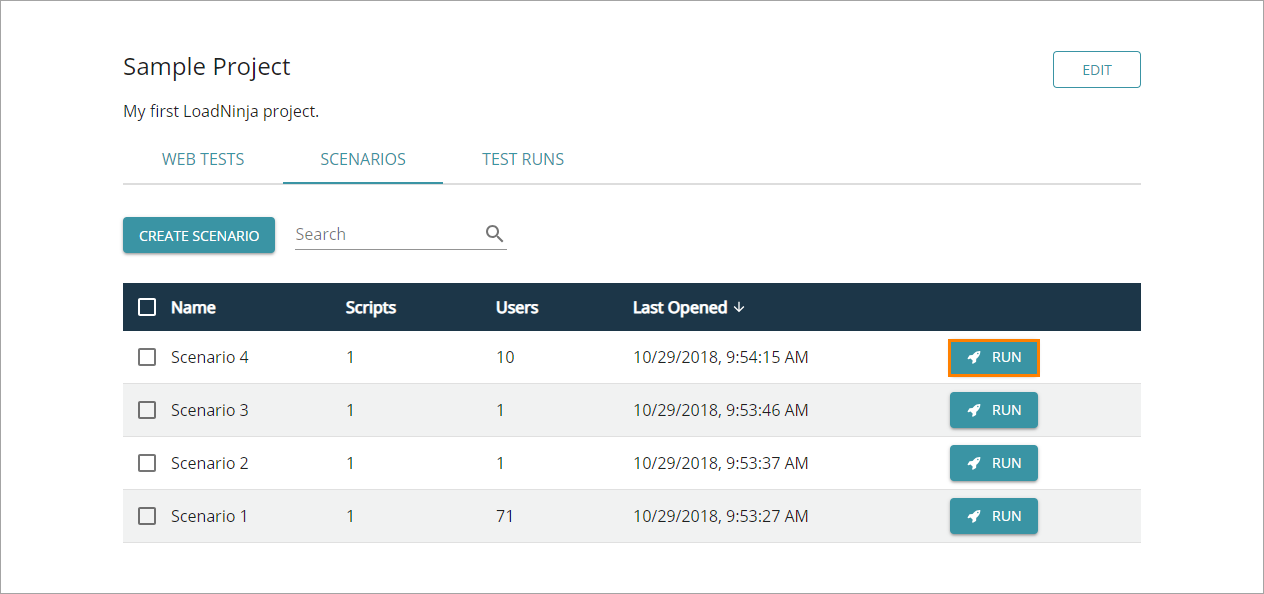
To run a load test based on a scenario, go to Projects > Scenarios, locate the needed scenario in the list and click Run on the right.
| Tip: | Use the search box to filter the scenario list. You can enter any part of the scenario name or date. |
To run a load test directly from the scenario editor, simply click Save and Run at the page’s top:
Delete a scenario
-
Go to Projects and click your project in the list.
-
In the project editor, switch to the Scenarios tab.
-
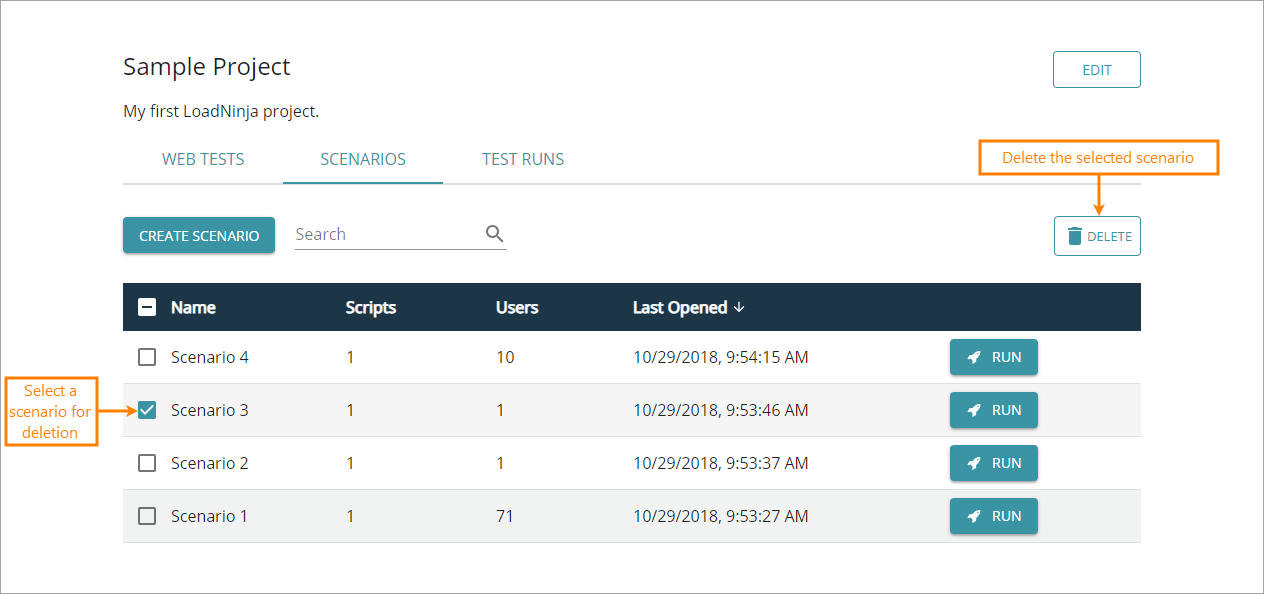
Find the needed scenario and select a check box on the left of it. Select the check boxes of other scenarios to be deleted.
Tip: Use the search box to filter the scenario list.
You can enter any part of the scenario name or of the Last Opened value. -
Click Delete (this button appears above the list after you select the check box).
-
Confirm the deletion in the subsequent message box.

 Load Distribution Settings
