In this section, you will learn how to tune LoadNinja according to your needs and achieve the best possible experience while using the product.
Projects
With LoadNinja projects, you manage your load testing process. See Projects to learn how to create, edit, and delete your projects.
LoadNinja settings screen
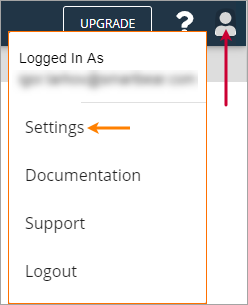
To open the settings screen, select > Settings on the LoadNinja toolbar:

Profile
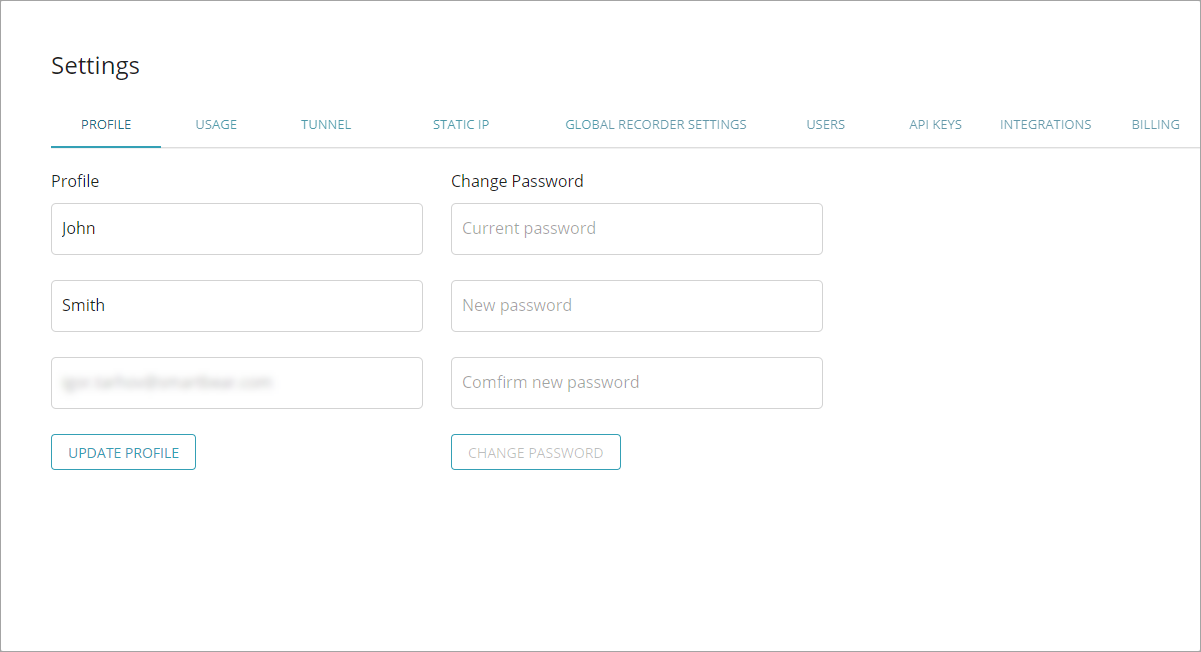
Use the settings on the Profile tab to modify your personal information and credentials.
The Profile column contains basic information about you and your account:
-
First name — Required. Your first name.
-
Last name — Required. Your last name.
-
Email — The email address you use to log in to LoadNinja.
Edit profile info
-
To update your first or last name: Specify new values in the corresponding fields, then click Update Profile.
-
To change the email address: Contact our Support team.
-
To change your LoadNinja password: Fill in the Change Password form:
-
Specify your current password in the Current password edit box.
-
Specify a new password in the New Password edit box.
 Your password must contain at least 8 characters, including at least one upper-case letter, one lower-case letter, and one special character.
 -
Confirm the new password in the Confirm new password edit box.
-
Click Change Password.
-
Usage
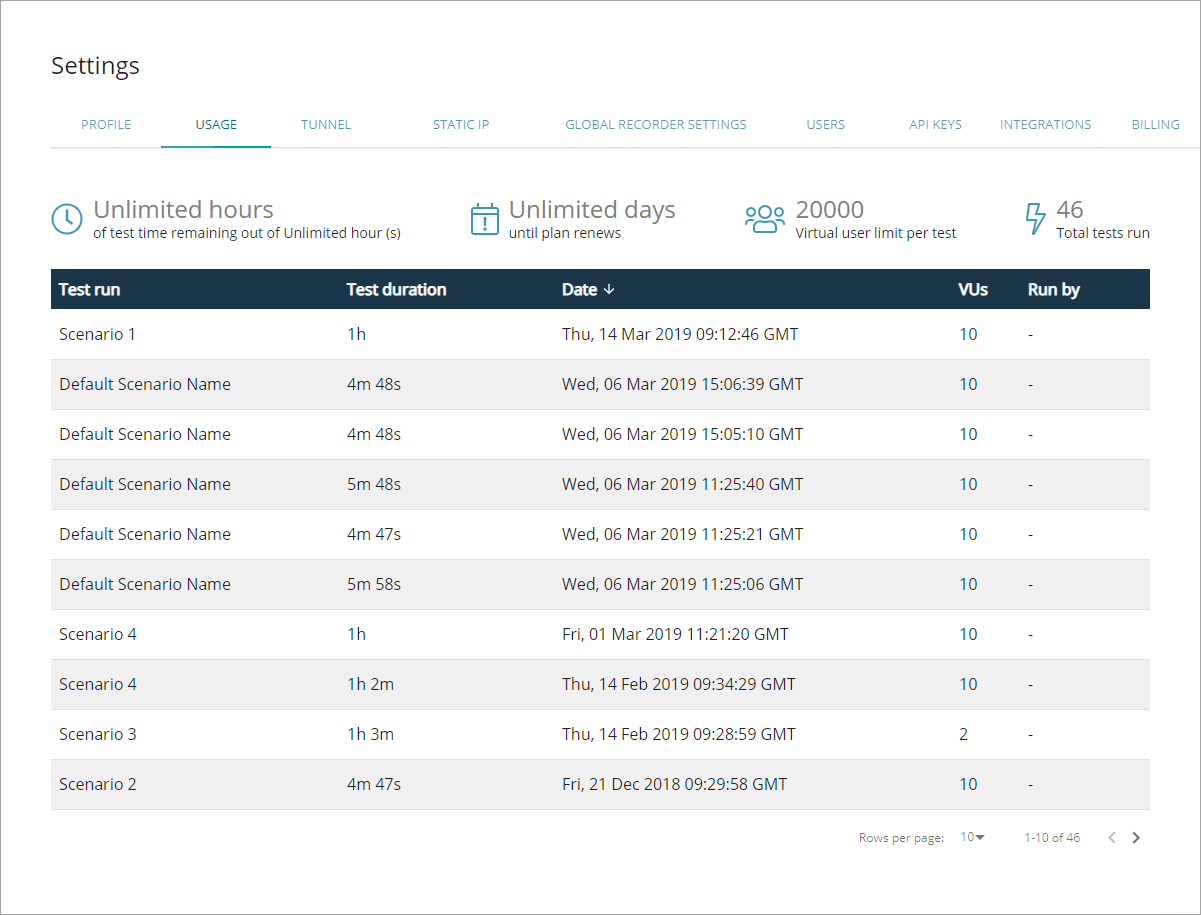
On the Usage tab in LoadNinja settings, you can view usage statistics of your LoadNinja account.
To open this tab, go to > Settings > Usage.
The toolbar shows your general usage statistics:
-
Hours — The remaining hours of load testing available to you.
-
Days — The remaining days until subscription renewal.
-
Virtual users — The total number of virtual users available for your load tests.
-
Total tests run – The number of load tests you performed in LoadNinja from the date your account was created.
In the Test runs table, you can view info on each LoadNinja test run.
Tunnel
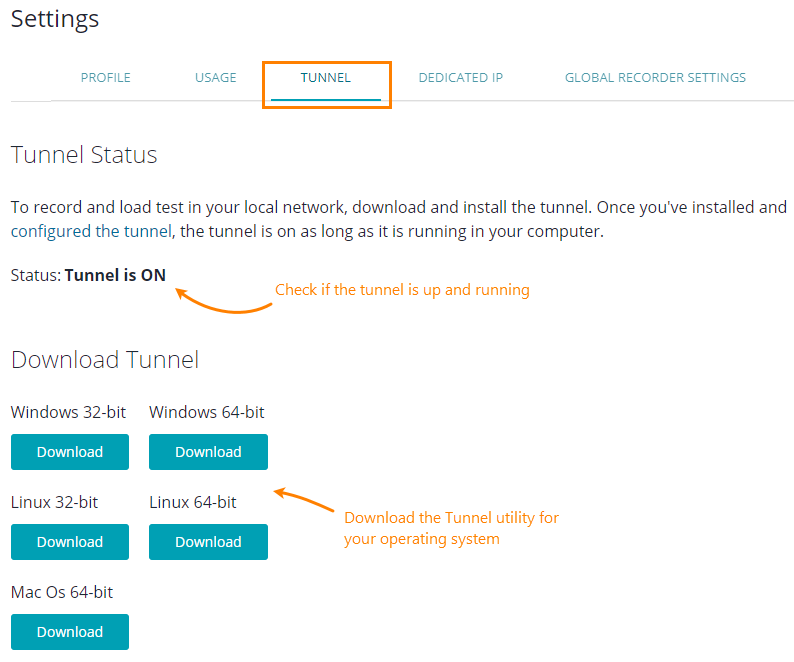
A tunnel is a private connection from the LoadNinja engine and your tested web application that is not publicly available. This can be an Intranet app running in your network or on your computer. That is, you use tunnels to record and run UI tests against these applications.
On this settings page, you can download the tunnel utility to your computer and check if the tunnel is up and running:
Note: Quite often, local web apps work behind a proxy or firewall. These proxies and firewalls should allow the tunnel utility to access the Web.
For complete information on how the tunnels work, see Test Web Apps in Local Network.
Static IP
On the Static IP tab, you can view the IP addresses of the load generator servers assigned to your account. This is especially helpful when you need to generate the load from specific IPs and to allow traffic from them to the tested web applications in your internal network.
To request a static IP for a load generator, contact our Support team.
Global Recorder Settings
On the Global Recorder Settings tab, you can adjust the default settings for the UI test recorder.
| Setting | Description |
|---|---|
|
Choose a server location where your test will run by default. The following locations are available:
|
|
| Ignore invalid certificate errors |
Select this check box to command LoadNinja to ignore invalid SSL certificates. |
Users
Use the settings on the Users tab to allow people from your organization to access your LoadNinja account to create UI and API tests, run load tests, and gather statistics.
API Keys
On the API Keys tab, you can retrieve and change the API key you use to access the LoadNinja REST API.
-
To view your API key, click .
-
To copy your API key to the clipboard, click .
-
To generate a new API key, click Regenerate.
 This action overrides the existing API key. If your application uses an outdated API key, it will not be able to connect.
Integrations
On the Integrations tab, you can learn how to run LoadNinja load tests from Jenkins builds.
Billing
On the Billing tab, you can learn about the existing billing plans and contact our Support team for assistance in changing your current plan.


 Table columns
