LoadNinja projects are a convenient way to manage the load testing process by organizing all data you need to create, run, and analyze your load tests.
Each project stores:
-
UI and API tests —“Single-user” interactions with websites and web services you want to simulate during load test runs.
-
Scenarios — Definitions of your load tests, that is, the “single-user” tests they contain and the settings they use.
-
Run results — Data on your load tests, various tables, and charts included.
To create a project
-
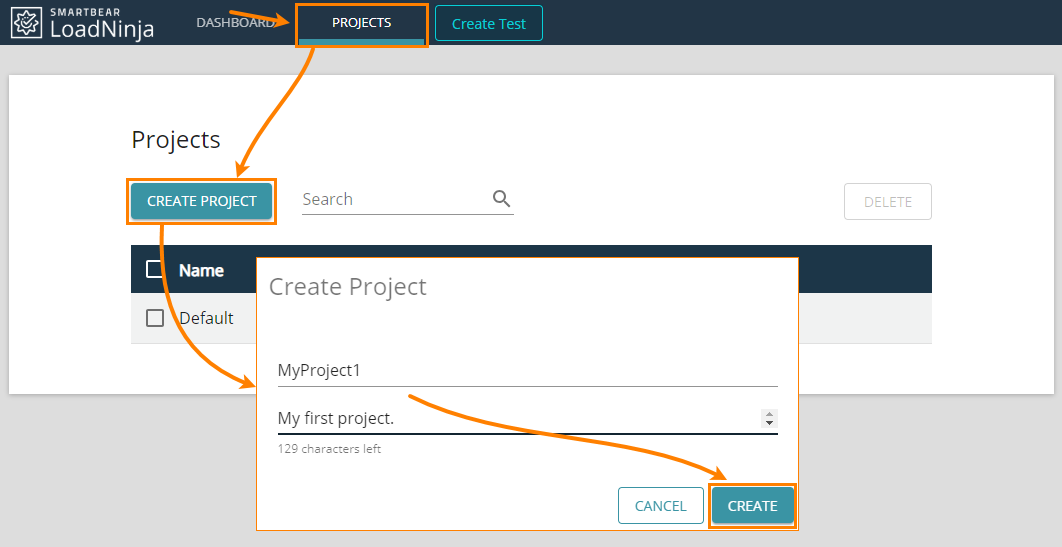
Go to Projects.
-
Once there, click Create Project.
-
In the subsequent dialog:
- Name your project (up to 30 alphanumeric characters with spaces).
- Enter some arbitrary descriptive info (up to 146 alphanumeric characters with spaces).
-
Click Create to confirm creating the project.
To edit project properties
-
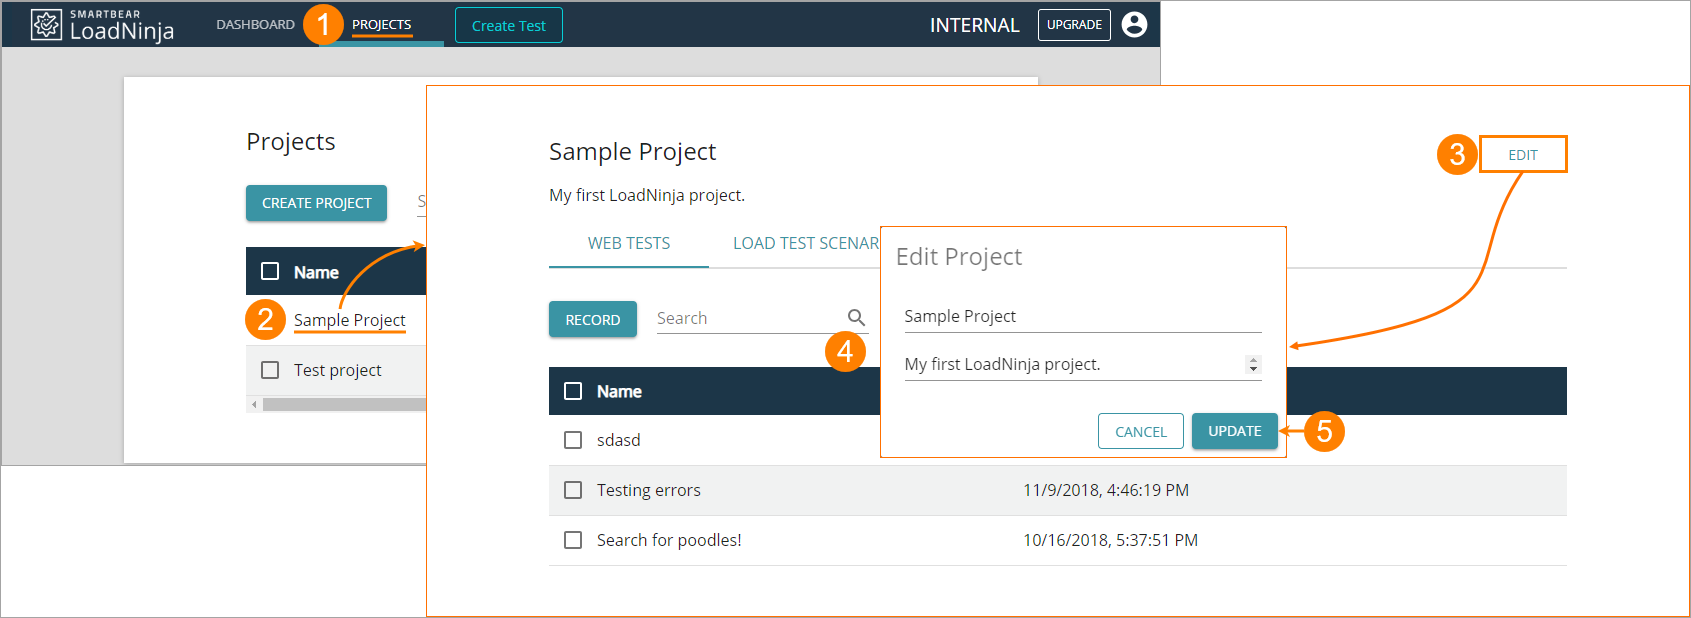
Go to Projects.
-
Click the needed project in the list. On the project’s screen, click Edit:
-
Modify the project’s name and description in the subsequent dialog.
Once ready, click Update.
To delete a project
-
Go to Projects.
-
Locate the project you want to delete in the list, then select the check box on its left.
-
Click Delete:
-
Confirm this action in the subsequent dialog.
 All items stored within the project you delete (UI and API tests, scenarios, run results) will be lost.


