Jenkins is a build management application that allows automating repeating tasks, such as running automated load tests on a regular basis. With Jenkins, you can automate launches of LoadNinja tests and integrate them into your build and test processes.
Install the LoadNinja Load Testing Plugin
To run LoadNinja in Jenkins, you need to install the LoadNinja Load Testing Plugin:
-
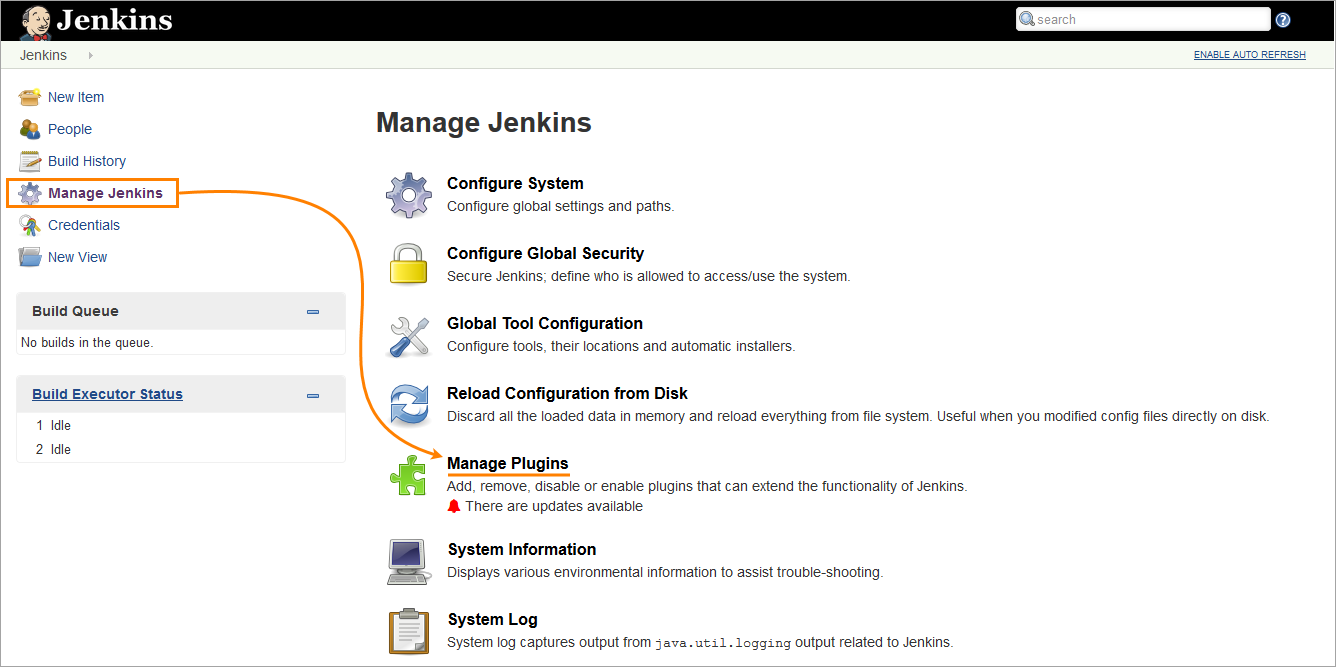
In your Jenkins instance, go to Manage Jenkins > Manage Plugins.
-
On the Available page, type
LoadNinjain the Filter field, then select the check box next to LoadNinja Load Testing Plugin once it appears in the list. -
Click either Install without restart or Download now and install after restart.
Run tests
To run a LoadNinja test as part of your build, configure the needed build:
-
 Make sure the LoadNinja Load Testing Plugin is installed.
 -
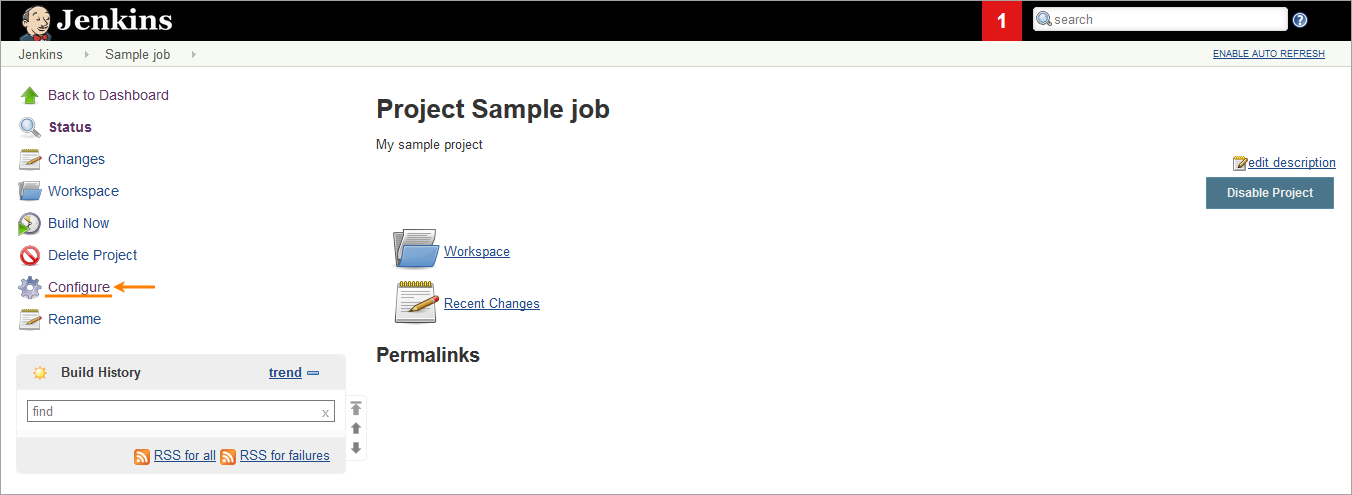
In Jenkins, select a job and click Configure.
-
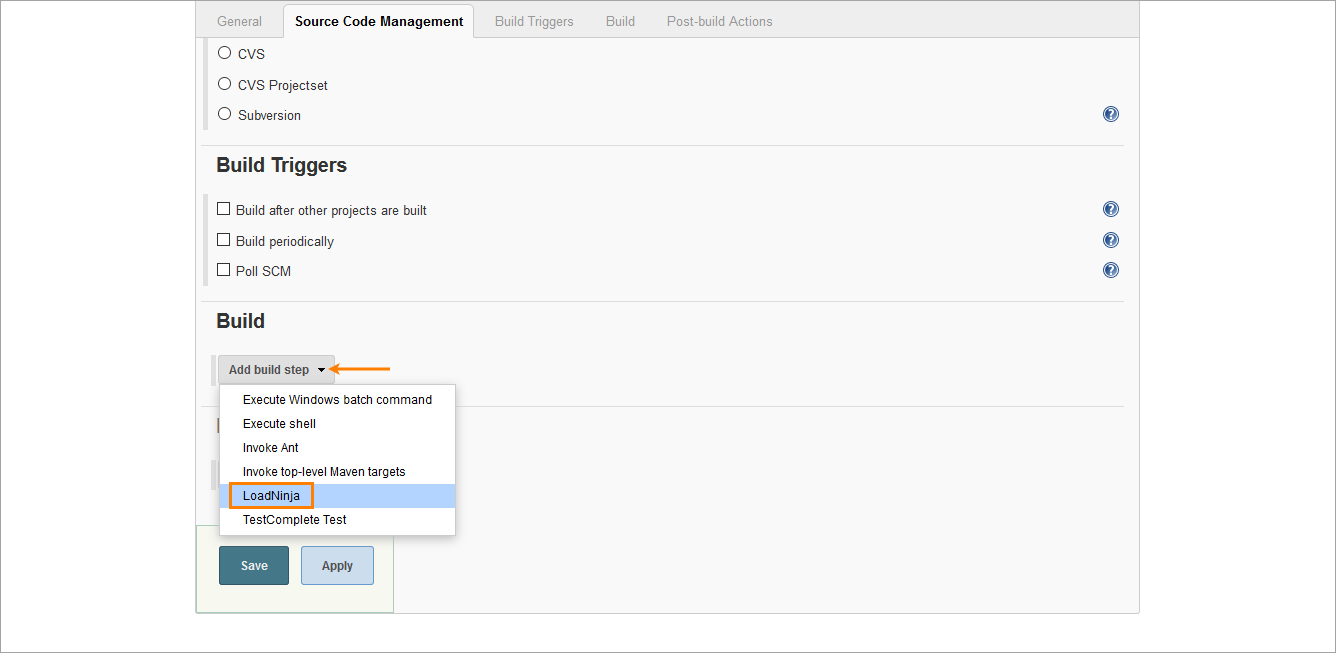
In the Build section, click Add build step > LoadNinja. This step is added by the LoadNinja Load Testing Plugin.
-
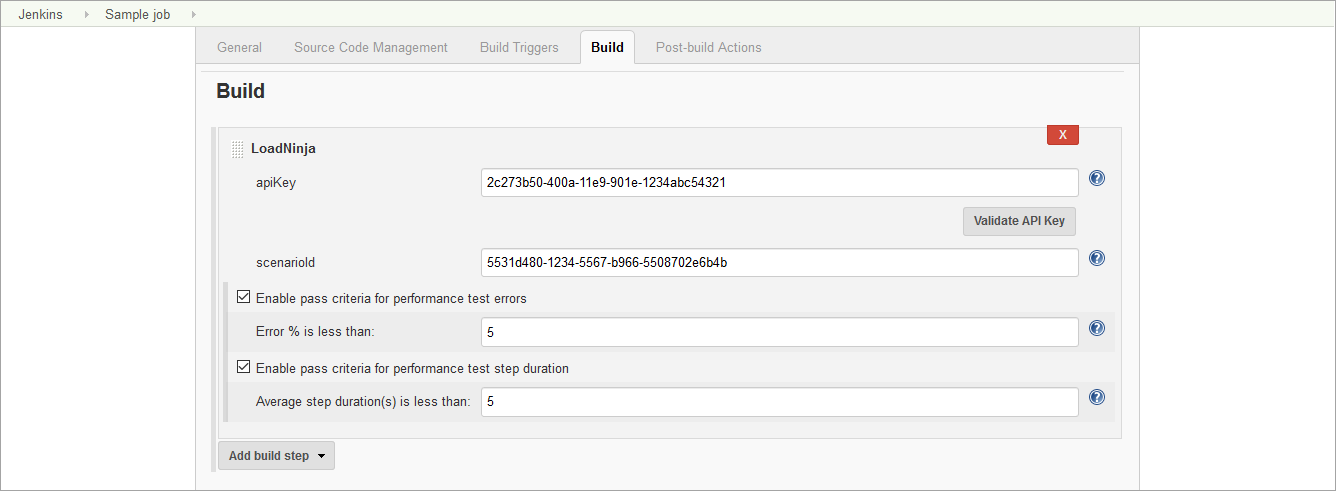
Specify the LoadNinja settings for this build:
-
apiKey — The unique LoadNinja API key of your account that is available in the LoadNinja settings dialog.
After you enter the key, click Validate API key to check whether Jenkins can access LoadNinja using the key.
How to get an API key
-
In LoadNinja, go to > Settings.
-
Switch to the API Keys tab.
-
Click Generate.
-
Confirm this action in the subsequent dialog.
-
After you do this, LoadNinja will generate an API key.
-
To copy the key to the clipboard, click .
-
To view the key, click .
-
To stop using this key and create a new one, click Regenerate, then confirm this action in the subsequent dialog.
-
-
-
scenarioId — The unique ID of the load test scenario you want to run. You can get it from the API or scenario URL:
-
-
(Optional) To command Jenkins to mark a test as passed only if the percentage of errors in this test is less than some value, select the Enable pass criteria for performance test errors check box and specify the desired value in the edit box that appears.
-
(Optional) To command Jenkins to mark a test as passed only if the average duration of a test step during the run is less than some value (in seconds), select the Enable pass criteria for performance test step duration check box and specify the desired value in the edit box that appears.
-
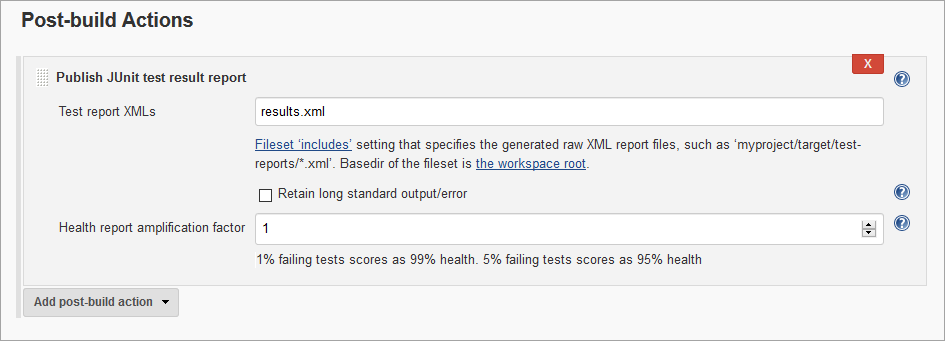
In the Post-build Actions section, click Add post-build action to select the type of reports you want to receive after the test run is over.
-
Select Publish JUnit test result report to receive a JUnit XML report.
Make sure to specify the name of the target file for reports in the Test report XMLs field.
After the build is finished, you will find the file in the workspace directory. To open the directory, click the Workspace link on the job page.
-
Click Save.
Usage notes
-
When a LoadNinja test is running, the plugin posts the current status of the test run to the Jenkins console output every 1 minute.

