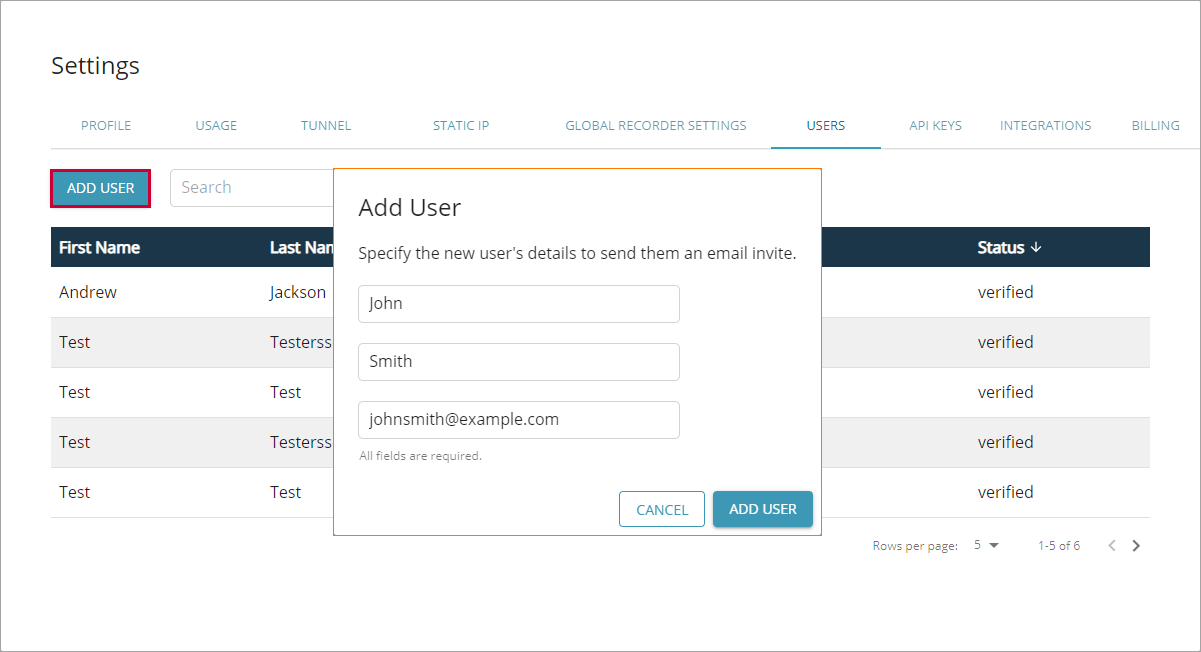
On the Users tab in LoadNinja settings, you can add users who will be able to access your LoadNinja account to record UI and API tests, run load tests, and gather statistics.
To open this tab, go to > Settings > Users.
Table
In the Users table, you can view info about the users who currently have access to your LoadNinja account:
| Column | Description |
|---|---|
| First Name | The first name of the user. |
| Last name | The last name of the user. |
| The email address used to log in to your account. | |
| Status |
The current status of the account:
|
-
To navigate through items, use the pagination button in the bottom right corner of the screen.
-
To change the number of items per page, specify the desired number of rows in the Rows per page drop-down list.
Add users
To add a user, click Add User and fill in the subsequent form:
-
In the First name edit box, specify the first name of the user.
-
In the Last name edit box, specify the last name of the user.
-
In the Email edit box, specify the email address the user will provide to log in to LoadNinja.
-
Click Add user to finish adding the user.
Notes
-
You cannot add users who have a paid account.
-
If you add a user who doesn't have a LoadNinja account, they will get an email with credentials to be used to log in.
-
If you add a user who has a trial account, they will get an email inviting them to collaborate. The user will have to accept the invitation and transfer their assets to the shared account.
 This cannot be undone.


