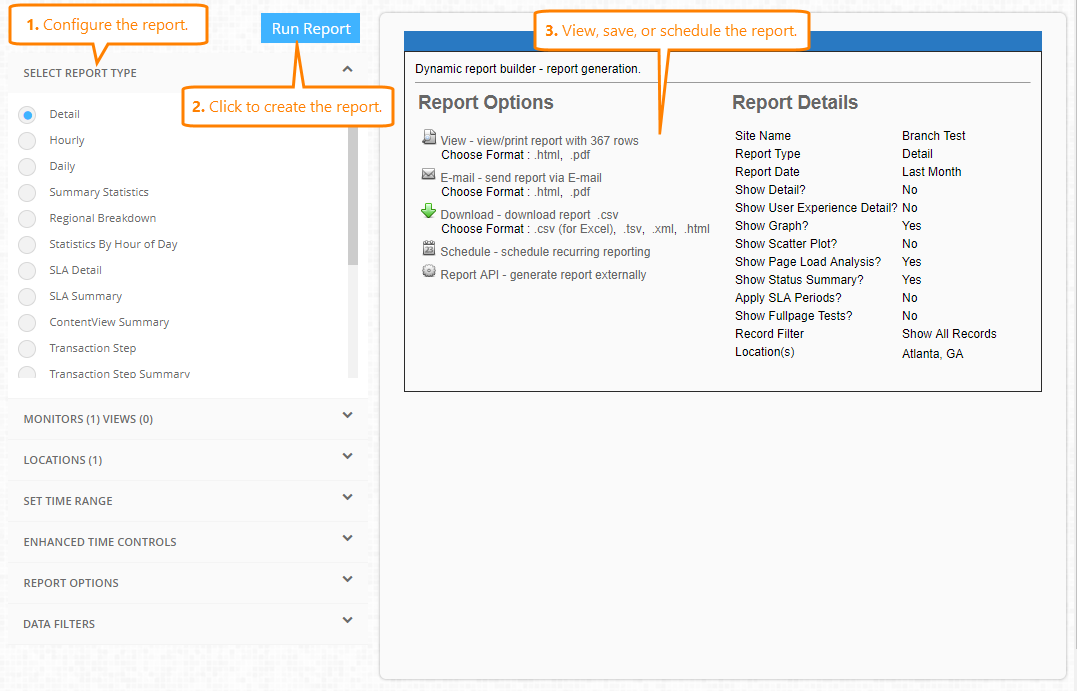
AlertSite can summarize your website availability and performance data for a specific time period in a single report. You can create ad-hoc (one-time) reports, and also schedule reports to be generated and emailed to you automatically daily, weekly, or monthly. Reports can be viewed as HTML or PDF.
Create reports
AlertSite UXM
-
Select Reports > Performance Reports from the top menu.
-
Configure the report – select the report type and the data to be included (see below).
Note: If you are going to schedule the report, select a relative date range, such as Yesterday. This also determines how often you want to receive the report:
-
Daily reports are Today, Yesterday, Last <N> Days, This Week (Monday through today), This Month (1st through today).
-
Weekly reports are Last Week (Monday through Sunday) and Last Business Week (Monday through Friday). They run on the first business day of the week, which is Monday by default, and can be changed using the My reporting week starts on option in your AlertSite account preferences.
-
Last Month reports run on the 1st day of every month.
-
-
Click Run Report.
AlertSite 1.0
-
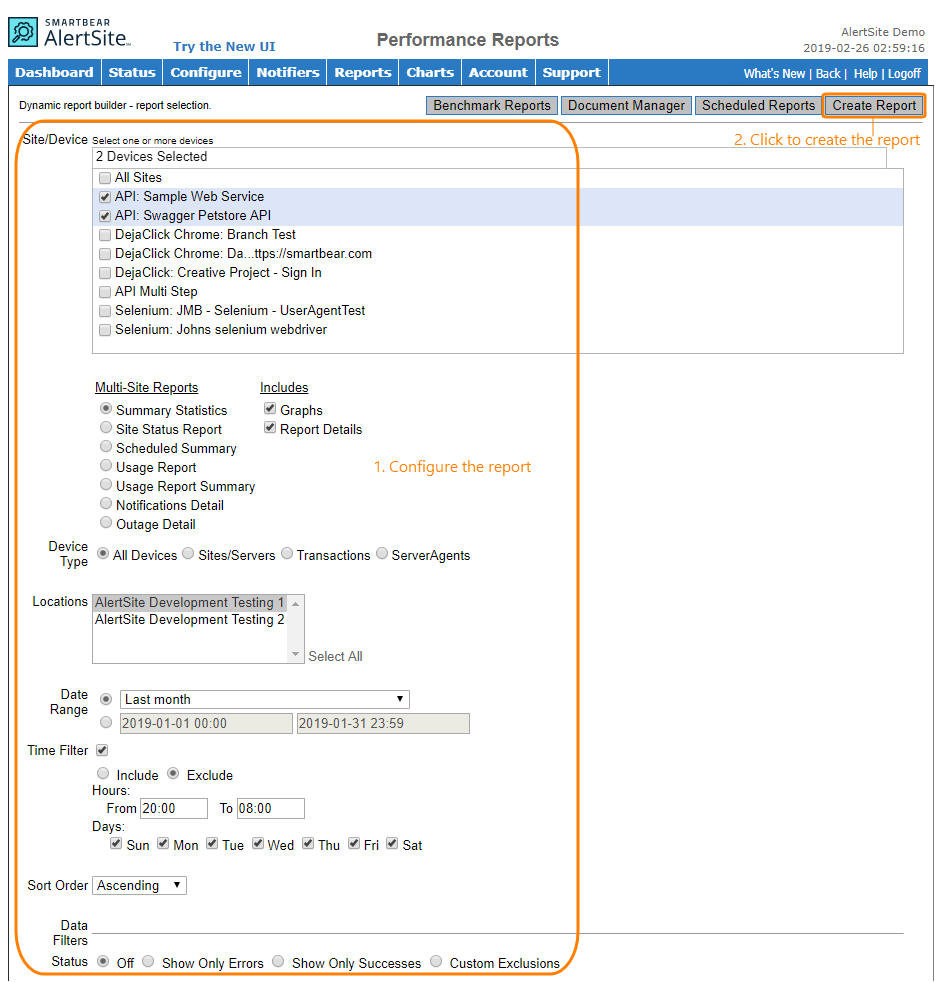
Select Reports > Performance Reports from the top menu.
-
Configure the report – select one or more monitors to report, the report type, and the data to include.
Note: If you are going to schedule the report, select a Relative date range from the drop-down list. Choose this value to match how often you want to receive the report:
-
Yesterday, Last 3 Days and similar daily reports run every day.
-
This Week and Last Week reports run every week.
-
This Month and Last Month reports run every month.
-
-
Click Create Report.
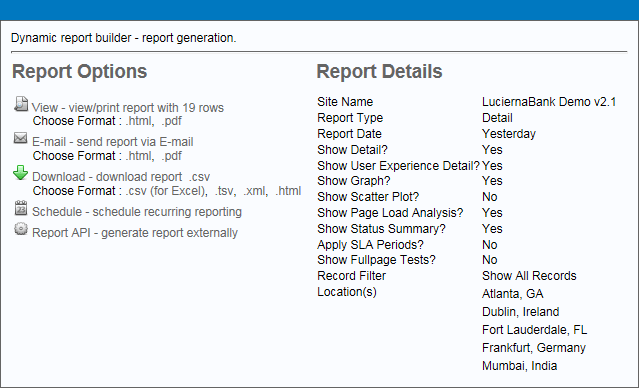
When the report is ready, you will see the Report Options and Report Details panels. Here, you can preview the report, email it, export the report data, or schedule the report to run regularly.
You can access the created reports later from the Document Manager. It stores your reports for their retention period or until you delete them.
Report configuration
Report Type (or Reports in AlertSite 1.0)
The type of the report to create.
Monitors (or Site/Device in AlertSite 1.0)
The monitors to include in the report. Depending on the report type, you can select one, several, or all monitors. The Detail and Notification Detail reports can also be created for individual ContentViews in DéjàClick monitors.
Locations
The monitoring locations whose results will be included in the report. Depending on the report type, you can select one, several, or all locations.
Time Range (or Date Range in AlertSite 1.0)
The time range of the report:
-
Relative – A relative period, such as Today or Last Month.
-
Exact – The exact start and end dates for the report. The selected period must be within the data retention period of your account.
The maximum possible range depends on the report type.
Enhanced Time Controls (or Time Filter in AlertSite 1.0)
An optional filter used to include or exclude data for specific days of the week and specific time of the day (such as Monday–Wednesday, 8AM–5PM).
Report Options (or Includes in AlertSite 1.0)
Additional options for the selected report type. See the report descriptions for available options.
The filters used to narrow down the report:
-
Status – Filters your report by the status of each test:
-
Off – Shows results of all tests.
-
Show Only Errors – Shows only failed tests, that is the tests with a status other than 0.
-
Show Only Successes – Shows only successful tests, that is the test with status 0, regardless of the full page status.
-
Custom Exclusions – Enables specific status codes to exclude from the report.
-
-
Fullpage – Filters your report depending on whether the results include full page response time time measurement in addition to the base page response time.
-
Off – Shows results of all tests.
-
Show Only Fullpage Results – Shows results with with full page response time only.
-
-
Outliers – Filters statistical anomalies out of your report:
-
Off – Shows results of all tests.
-
Remove Outliers – Removes measurements that fall outside the statistical norm, so the report will show the top 99.75% most commonly measured values. Use this filter to get a better picture of typical response time and to make report graphs more precise.
-
Excluded Statuses
The statuses to filter out from your report. This option is available if Custom Exclusions is selected in Data Filters.
Report retention period
By default, ad-hoc (one-time) reports remain for one day in the Document Manager. Scheduled reports remain for three months. If you need a longer report retention period, contact your AlertSite Sales Manager.
You can keep a report permanently by saving it in the Document Manager.
Report contents
See Report Types and Report Column Descriptions.


