AlertSite can summarize your website availability and performance data for a specific period in a single report. You can create ad-hoc (one-time) reports and also schedule reports to be generated and emailed to you automatically daily, weekly, or monthly. Reports can be viewed as HTML or PDF.
To schedule reports, use the Performance Reports dashboard. To access it, select Reports > Performance Reports from the top menu of AlertSite UXM or AlertSite 1.0.
Schedule a Report
-
Create a sample report. Make sure to select a relative date range for the report:
-
Daily reports are Today, Yesterday, Last <N> Days, This Week (Monday through today), This Month (1st through today).
-
Weekly reports are Last Week (Monday through Sunday) and Last Business Week (Monday through Friday). They run on the first business day of the week, which is Monday by default, and can be changed using the My reporting week starts on option in your AlertSite account preferences.
-
Last Month reports run on the 1st day of every month.
-
-
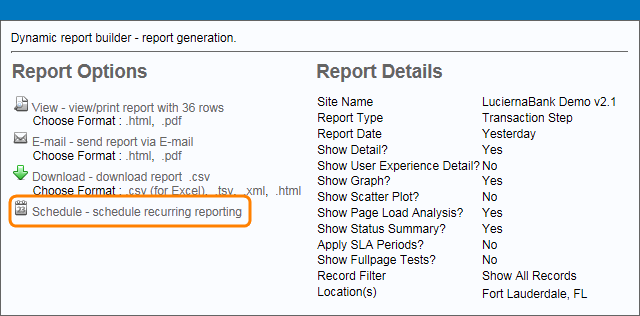
When the report is ready, click the
 Schedule link:
 -
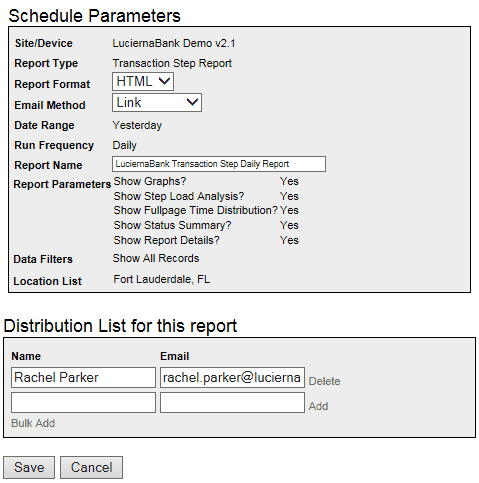
In the Report Scheduler dialog that appears, configure the report delivery:
-
Select the report format – HTML, Text, PDF or CSV.
Note: CSV format is not available for the following scheduled reports: Notification Detail, Page Objects, Regional Breakdown, Scheduled Summary, SLA Detail, Statistics By Hour of Day, Summary Statistics, Usage Report. -
For HTML reports, choose whether you want to receive the full report embedded in the email body or to receive a link to the report.
-
Enter the report name that will be used in the email title and in Document Manager.
-
When you generate a report for several monitors, you can choose whether the report should contain information about all the monitors (including those you created later). If you select No, choose the desired monitors from the list below.
-
Add the names and email addresses you want to send the report to.

-
-
Click Save.
When the schedule runs, it will create a report in Document Manager and also email this report to the specified email addresses.
Manage Scheduled Reports
Existing report schedules are displayed on the Reports > Scheduled Reports screen. Here, you can edit the schedules (for example, change the delivery format or recipients) and delete the schedules that you no longer need.
The schedule list has the following columns:
| Column | Description |
|---|---|
| Monitor Name (Site/Device in AlertSite 1.0) |
The monitor included in the report, or Multiple Sites if multiple monitors are included. In the latter case, you can edit the schedule to see which monitors are included. |
| Device Type (AlertSite 1.0 only) | The ”All“ label indicates schedules where you can change the monitors included in the report. |
| Report Name | The display name for this schedule. |
| Report Type | The type of the scheduled report. |
| Date Range | The time period covered by the report, such as Yesterday or LastWeek. |
|
Run Frequency |
How often the scheduled report runs: daily, weekly, or monthly. Weekly reports run on the first business day of the week, which is Monday by default. You can change this in the My reporting week begins on option in your AlertSite account preferences. Monthly reports run on the 1st day of the month. |
|
Most Recent Status |
The date and time the scheduled report last ran, and the report status. No Data means there is no monitoring data for the selected monitors, locations, report configuration and date range. This can happen, for example, if the monitor was disabled or deleted, or if the monitor no longer uses the locations that were selected for the scheduled report. |
| Edit the schedule options. | |
| Delete this schedule. |
To edit a report schedule
AlertSite UXM
-
Navigate to Reports > Scheduled Reports.
-
Click next to the schedule you want to edit.
-
Change the schedule options and click Save.
You can also edit report schedules from the Reports > Document Manager screen:
-
Filter the Document Manager to show Category: scheduled reports.
-
Click Edit Schedule next to the report whose schedule you want to change.
-
Change the schedule options and click Save.
AlertSite 1.0
-
Navigate to Reports > Scheduled Reports.
-
Click the schedule name to edit its options.

-
Change the schedule options and click Save.
Schedule options
You can change the following options for scheduled reports:
-
Report delivery format (HTML, Text, PDF, CSV)
-
Selected monitors (for multi-monitor reports only)
-
Email addresses to send the report to
The following options cannot be changed:
-
Report type
-
Report frequency (daily, weekly, monthly) and date range
-
Report sections (charts, details table) and data filters
-
Monitoring locations included in the report
These options are based on your selections performed when you initially scheduled the report. To change these options, you will need to delete the existing schedule and create a new one.
To change recipients of a scheduled report
Edit the schedule and change the report distribution list.
To unschedule a report
AlertSite UXM
-
Navigate to Reports > Scheduled Reports.
-
To delete a single schedule, click next to it.
To delete multiple schedules, select the needed ones and click Delete.
AlertSite 1.0
-
Navigate to Reports > Scheduled Reports.
-
Select the check boxes next to the schedules you want to delete, and click Delete Items.
| Note: | Existing reports created by this schedule will remain in Document Manager. They will be purged when your report retention period expires, or you can delete them manually from Document Manager. |
Remarks
Scheduled reports are typically delivered overnight between 2-3 AM EST.
AlertSite uses a third-party email service, SendGrid, to deliver the reports. To ensure successful report delivery, make sure your firewall allows email traffic from IP address 167.89.8.101.

