
| Note: | To use this guide, you need to know how to use AlertSite DéjàClick transaction recording tool. If you do not have the DéjàClick toolbar in your Firefox browser, go to the DéjàClick Downloads page to download the DéjàClick add-on and additional modules (TrueScreen and ImageMagick). If you have never used DéjàClick before, please go to the DéjàClick Quick Start Guide. After you have become comfortable with recording DéjàClick transactions, you will be able to move on to this more advanced feature. |
Overview
Today's websites have content from various sources, not only from your own company, but third-party content as well. DéjàClick™ ContentViews sorts this content, so you can create separate reports and notify the responsible owner of the content when it is down or in error. This helps you troubleshoot performance issues within your site without having to deal with poorly performing components from external sources.
ContentViews automatically captures all site content found in your transactions, allowing you to:
-
Easily monitor the components independent of each other.
-
Select and prioritize whether or not to receive notifications based on ContentView errors.
-
Create ContentViews-specific reports with graphs and charts.
ContentViews in AlertSite Dashboards
AlertSite UXM
Transactions with ContentViews configured are displayed with the CV icon on the AlertSite Dashboard. Click this icon to view the availability and response time by individual ContentViews.

Click the image to enlarge it.
AlertSite 1.0
Transactions with ContentViews are displayed with the ![]() icon on the AlertSite Dashboard. You can expand the transaction in the list to view its status, availability and response time by individual ContentViews.
icon on the AlertSite Dashboard. You can expand the transaction in the list to view its status, availability and response time by individual ContentViews.

Click the image to enlarge it.
If you do not see the CV icon next to your ContentView-enabled transactions, click Tab Preferences in the top right corner of the dashboard and make sure Show ContentViews in device grid is set to Yes.

Click the image to enlarge it.
Configure ContentViews
Before you start, you must first decide how you want to partition the content contained in your transaction. For example, you need only URLs with your web site's domain in one ContentView. In another, you need specific Content Delivery Network (CDN) URLs. In the third, you need other third-party URLs.
After you decided how to classify your content, you are ready to add and configure different ContentViews.
The ways to configure ContentViews are:
-
From the Properties sidebar.
-
By using the Validation menu.
In Plan-Based accounts, ContentViews can be included as an additional feature for most DéjàClick plans. Once added to an existing plan, you can configure ContentViews as described in this guide.
In Usage-Based accounts, ContentViews consume measurement credits at a rate of 1/4 usage credit per action in your AlertSite account. If no matching content is reported by the ContentView, no usage credits are charged to your account.
Add ContentViews from the Properties sidebar
In this example, we will create 3 ContentViews:
-
For the amazon.com domain, which we will call Amazon only.
-
For the ad.doubleclick.net domain, which we will call Doubleclick only.
-
For all other pages that do not contain amazon.com or ad.doubleclick.net but some other third-party content, which we will call Neither Amazon nor Doubleclick.
Amazon only
To create the first ContentView, Amazon only:
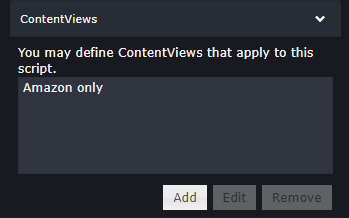
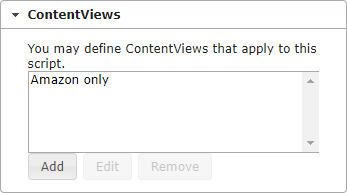
-
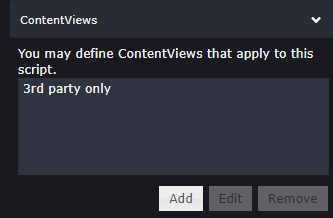
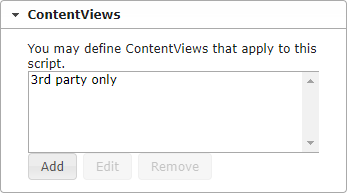
Switch to the Properties tab of the DéjàClick sidebar, locate ContentViews in the list and expand it.
DéjàClick 2.0

Click the image to enlarge it.
DéjàClick 1.x

Click the image to enlarge it.
-
Click Add.
-
Enter Amazon only in the Name field of the Add ContentView dialog.
Tip: ContentView names can be up to 80 characters long. DéjàClick 2.0

Click the image to enlarge it.
DéjàClick 1.x

Click the image to enlarge it.
-
Click (or
 in DéjàClick 1.x). This displays the Add ContentView Component dialog.
Move amazon.com from the Domains list to the Included list by clicking the arrow button and click OK.
DéjàClick 2.0

DéjàClick 1.x

Note: You can select one or more Domains, URLs, or ContentView from the Available list on the left and move your selections to the Included list on the right. There are no minimums and maximums of the number of selections you can add to your ContentView. You can also enter a specific URL as a ContentView component. To do this, click New and specify the URL in the Parameters section.
DéjàClick 2.0
DéjàClick 1.x
-
Click OK in the Add ContentView Component dialog which now displays amazon.com.
DéjàClick 2.0

Click the image to enlarge it.
DéjàClick 1.x

Click the image to enlarge it.
The Amazon only ContentView name is now in the ContentViews section of the Properties sidebar.
DéjàClick 2.0
DéjàClick 1.x
Doubleclick only
To create the second ContentView, Doubleclick only, repeat the above steps, enter Doubleclick only in the Name field, and select ad.doubleclick.net from the Domains list in the Add ContentView Component dialog.
| Note: | Pay attention to the Match Type options in the Add Component dialog. If you select Plain Text, the filter will find a match anywhere within the domain part of the URL. If you select Regular Expression, the filter will find a match anywhere in the whole URL, including any field pairs in the query string. |
Neither Amazon nor Doubleclick
Next, similarly to the first and second ContentViews, create the Neither Amazon nor Doubleclick ContentView that contains all domains in the transaction other than amazon.com and ad.doubleclick.net:
-
Add the third ContentView and enter Neither Amazon not Doubleclick in the Name field.
-
Click (or
in DéjàClick 1.x). -
Click New in the Add ContentView Component dialog.
-
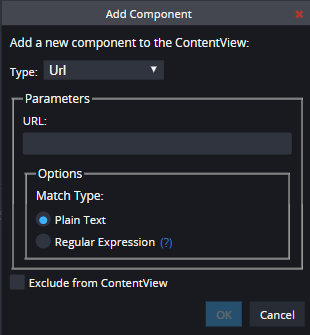
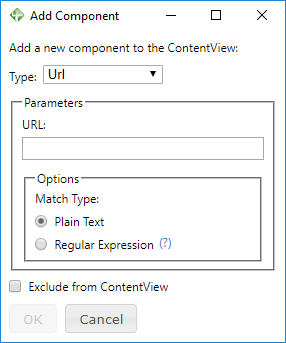
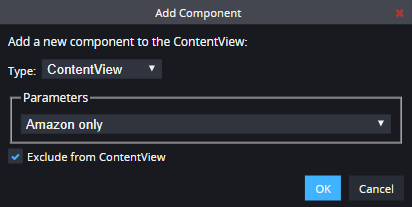
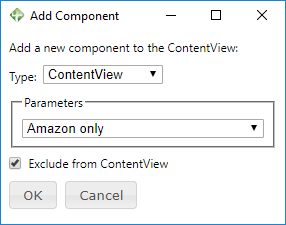
Set the following options in the Add Component dialog:
-
Select ContentView from the Type drop-down list.
-
Select Amazon only from the Parameters drop-down list.
-
Select the Exclude from ContentView check box.
-
Click OK.
DéjàClick 2.0
DéjàClick 1.x
-
Do the same to add Doubleclick only. Here is what the Add ContentView Component dialog looks like:
DéjàClick 2.0

DéjàClick 1.x

-
-
Click OK in the Add ContentView Component dialog.
-
Click OK in the Add ContentView dialog.
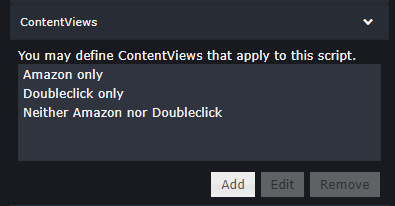
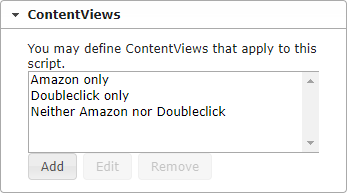
Now, the ContentViews property sidebar shows the three ContentViews:
DéjàClick 2.0
DéjàClick 1.x
Exclusionary ContentViews
If you need a ContentView for specific third-party objects, you can create a regular expression to exclude any objects, the URLs of which contain a specific string. For a set of strings, you can create a regular expression by using logical notation.
Exclude amazon from URLs
To create a ContentView for an object that does not have the amazon string anywhere in the URL:
-
Open the Add Component dialog.
-
Enter amazon in the URL field.
-
Select the Regular Expression match type.
-
Select the Exclude from ContentView check box.
-
Click OK.
Exclude several parts of URLs
 |
To exclude all objects with any of the strings in a ContentView, separate the strings with |, but not just list them or exclude separately. |
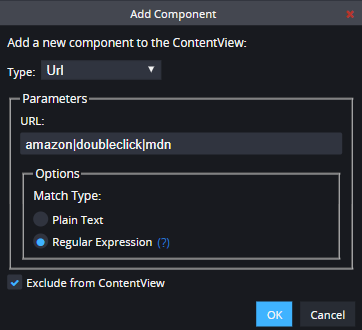
To create a ContentView for objects without amazon, doubleclick, or mdn in their URLs:
-
Open the Add Component dialog.
-
Enter amazon|doubleclick|mdn in the URL field (where | is the logical or or a vertical bar).
-
Select the Regular Expression match type.
-
Select the Exclude from ContentView check box.
-
Click OK.
DéjàClick 2.0
 |
 Click the image to enlarge it. |
 |
DéjàClick 1.x
 |
 Click the image to enlarge it. |
 |
Add ContentViews with validation selector
You can add ContentViews while recording or replaying the recorded script at the Action or Event level.
| Note: | To create ContentViews for the entire transaction, create them from the Properties sidebar. See the steps here. |
While recording a new transaction:
DéjàClick 2.0
-
Click
 and navigate to your starting page.
 -
At any time during the recording, when DéjàClick pauses for the next step, click Add Validation > ContentViews.
-
Follow the steps to add your ContentView as described.
DéjàClick 1.x
-
Click
 and navigate to your starting page.
 -
At any time during the recording, when DéjàClick pauses for the next step, click
 > Add ContentViews.
 -
Follow the steps to add your ContentView as described.
While replaying a recorded transaction:
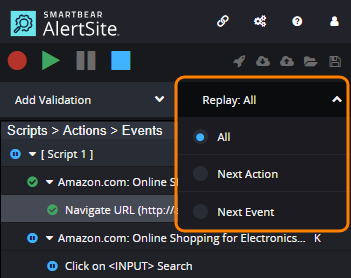
DéjàClick 2.0
-
Click the down arrow next to Replay and select Next Action or Next Event.
-
Click
 to step through the transaction.
 -
When the replay pauses, click Add Validation > ContentViews.
-
Follow the steps to add your ContentView as described above.
DéjàClick 1.x
-
Click the down arrow next to
 Replay and select Next Action or Next Event.
 -
Click
to step through the transaction. -
When the replay pauses, click
> Add ContentViews. -
Follow the steps to add your ContentView as described above.
Advanced configuration
Along with filtering of URLs, ContentView, and predefined lists, the Add ContentView dialog has three optional attributes you can use in addition to the URLs or Domains to separate URLs by:
DéjàClick 2.0

Click the image to enlarge it.
DéjàClick 1.x

Click the image to enlarge it.
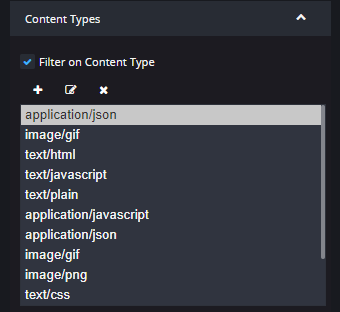
Content Types
DéjàClick 2.0
-
Select the Filter on Content Type check box.
-
Use the mini-toolbar to do the following:
-
Click , enter a new content type, and click OK to add a new content type to the list.
-
Click to edit the selected content type.
-
Click to remove content types from the ContentView.
-
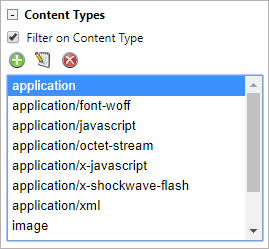
DéjàClick 1.x
-
Select the Filter on Content Type check box.
-
Use the mini-toolbar to do the following:
-
Click
, enter a new content type, and click OK to add a new content type to the list. -
Click
 to edit the selected content type.
 -
Click
 to remove content types from the ContentView.
-
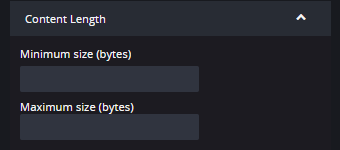
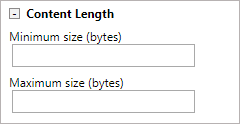
Content Length
-
Minimum size (bytes) – Minimum size of pages in bytes.
-
Maximum size (bytes) – Maximum size of pages in bytes.
DéjàClick 2.0
DéjàClick 1.x
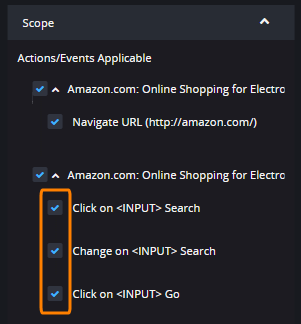
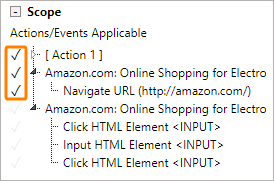
Scope
Click to the left of an action or event which is to be excluded from the ContentView.
DéjàClick 2.0
DéjàClick 1.x
You can also configure the ContentView to continue to the next action or event in case of an error. To do this, select the check box under Replay Options. Enable this option if the ContentView does not contain the critical path of the transaction.
DéjàClick 2.0

Click the image to enlarge it.
DéjàClick 1.x

Click the image to enlarge it.
After you recorded and verified your transaction and configured ContentViews, upload the script to AlertSite. You will be redirected to the Monitor Summary dashboard (or the Manage Transaction screen in AlertSite 1.0), where you can make more configuration changes, such as setting timeouts, locations, fullpage and capture options, ContentViews, transaction description, and so on.
Notification control
AlertSite UXM
To configure ContentView alerts in AlertSite UXM, open the monitor settings, select the Alerts tab and then select ContentViews Alerts. The options are:
-
Alerts Enabled – If selected, sends notifications in case of an error in the listed ContentViews.
-
Inherit Global Errors – If selected, reports global errors not associated with a ContentView URL. The following status codes apply to the option:
Code Description 80
Browser event timeout encountered.
81
Maximum transaction time was exceeded.
90
Unexpected processing exception occurred.
92
Maximum number of skipped events exceeded.
93
Missing instruction for dialog prompt.
96
Unable to parse transaction XML.
97
Target page element was not found.
7202
Fullpage Timeout.

Click the image to enlarge it.
AlertSite 1.0
To configure ContentView alerts in AlertSite 1.0, go to Configure > Transactions and click your monitor with ContentViews. In the ContentView Settings section, configure the following options:
-
Notify – If selected, sends notifications in case of an error in the listed ContentViews.
-
Inherit Global Errors – If selected, reports global errors not associated with a ContentView URL. The following status codes apply to the option:
Code Description 80
Browser event timeout encountered.
81
Maximum transaction time was exceeded.
90
Unexpected processing exception occurred.
92
Maximum number of skipped events exceeded.
93
Missing instruction for dialog prompt.
96
Unable to parse transaction XML.
97
Target page element was not found.
7202
Fullpage Timeout.

Click the image to enlarge it.
|
The ContentView Settings section is not displayed if the transaction does not have any ContentViews. |
By default, some global errors that occur in the transaction may affect individual ContentViews, but they do not affect the ContentView. That is why errors may be in the main transaction but not in the ContentView issue notifications. If you want a ContentView to inherit these errors from the main transaction, select the Inherit Global Errors check box for that ContentView. For example, if a fullpage timeout occurred on one step, you may want to pass that error through to the ContentView setup for your domain.
To receive notifications for the main transaction, make sure the Alerting option (or Notify on Error in AlertSite 1.0) is enabled in monitor settings because the script may fail while the ContentViews may still be successful.
Set up recipients
To control notifications, we recommend that you create a recipient group for all ContentViews, otherwise, all recipients in AlertSite will be notified on ContentView Errors.
To create a recipient group:
AlertSite UXM
-
Select Alerts > Recipient Groups from the top menu.
-
Click New Recipient Group at the upper right.
-
Enter a name for the group. For example, Amazon only CV group.
-
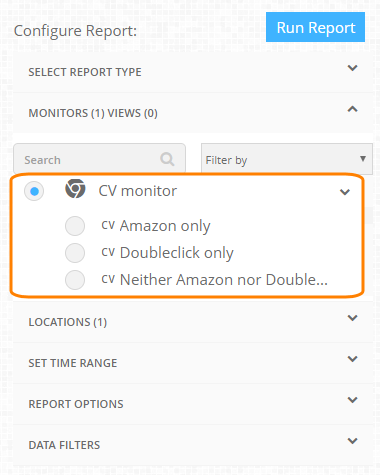
In the Monitors section, click the Add / Edit Monitors link, locate your monitor with ContentViews and expand it. Then, select the Amazon only ContentView and click Continue.
-
In the Recipients section, select recipients for the group and click Continue. In our example, we selected Administrator, Operations, and Marketing.

Click the image to enlarge it.
-
Click Save as new at the upper right.
-
Similarly, add two more groups:
-
The Doubleclick ads only CV group group for the Doubleclick only ContentView. In our example, we assigned Marketing to this recipient group.
-
The Neither Amazon nor Doubleclick content group group for the Neither Amazon nor Doubleclick ContentView. In our example, we assigned Management and Operations to this recipient group.
-
AlertSite 1.0
-
Select Notifiers > Notifier Groups from the top menu.
-
Click Add a New Group at the upper right.
-
Enter a group name in the Notifier Group Name field. For example, Amazon only CV group.
-
Locate the transaction in the Available Sites list, find the Amazon only ContentView, and click
 to move it to Included Sites.
 -
Select recipients from the Available Notifiers list and click
to move them to Included Notifiers. In our example, we selected Administrator, Operations, and Management.
Click the image to enlarge it.
-
Click Submit at the upper right.
-
Similarly, add two more groups:
-
The Doubleclick ads only CV group group for the Doubleclick only ContentView. In our example, we assigned Marketing to this recipient group.
-
The Neither Amazon nor Doubleclick content group group for the Neither Amazon nor Doubleclick ContentView. In our example, we assigned Management and Operations to this recipient group.
-
Now, when the pages with the amazon.com domain produce errors, only the Administrator, Operations, and Management recipients will be notified. If pages with ad.doubleclick.net in the domain name are in error, only the Marketing recipient will be alerted. And, when pages with any domains other than amazon.com or ad.doubleclick.net are in error, only Administrator and Operations will receive alerts.
Reporting
After uploading the transaction to your account, it will take some time for the transaction to run on the selected monitoring locations and start gathering performance data. Wait 10-15 minutes before creating a report.
You can create graphs and charts based on the selected ContentViews.
-
Performance Graphs (Availability, Response Time, and so on)
-
Scatter Plots
-
Report API for data extraction
The Detail and Notification Detail reports can be created for the entire transaction or for individual ContentViews. ContentViews are listed below the transaction name in the monitor list when you create these reports:
AlertSite UXM
AlertSite 1.0

Click the image to enlarge it.
 Show sample reports

