Interactive API Documentation
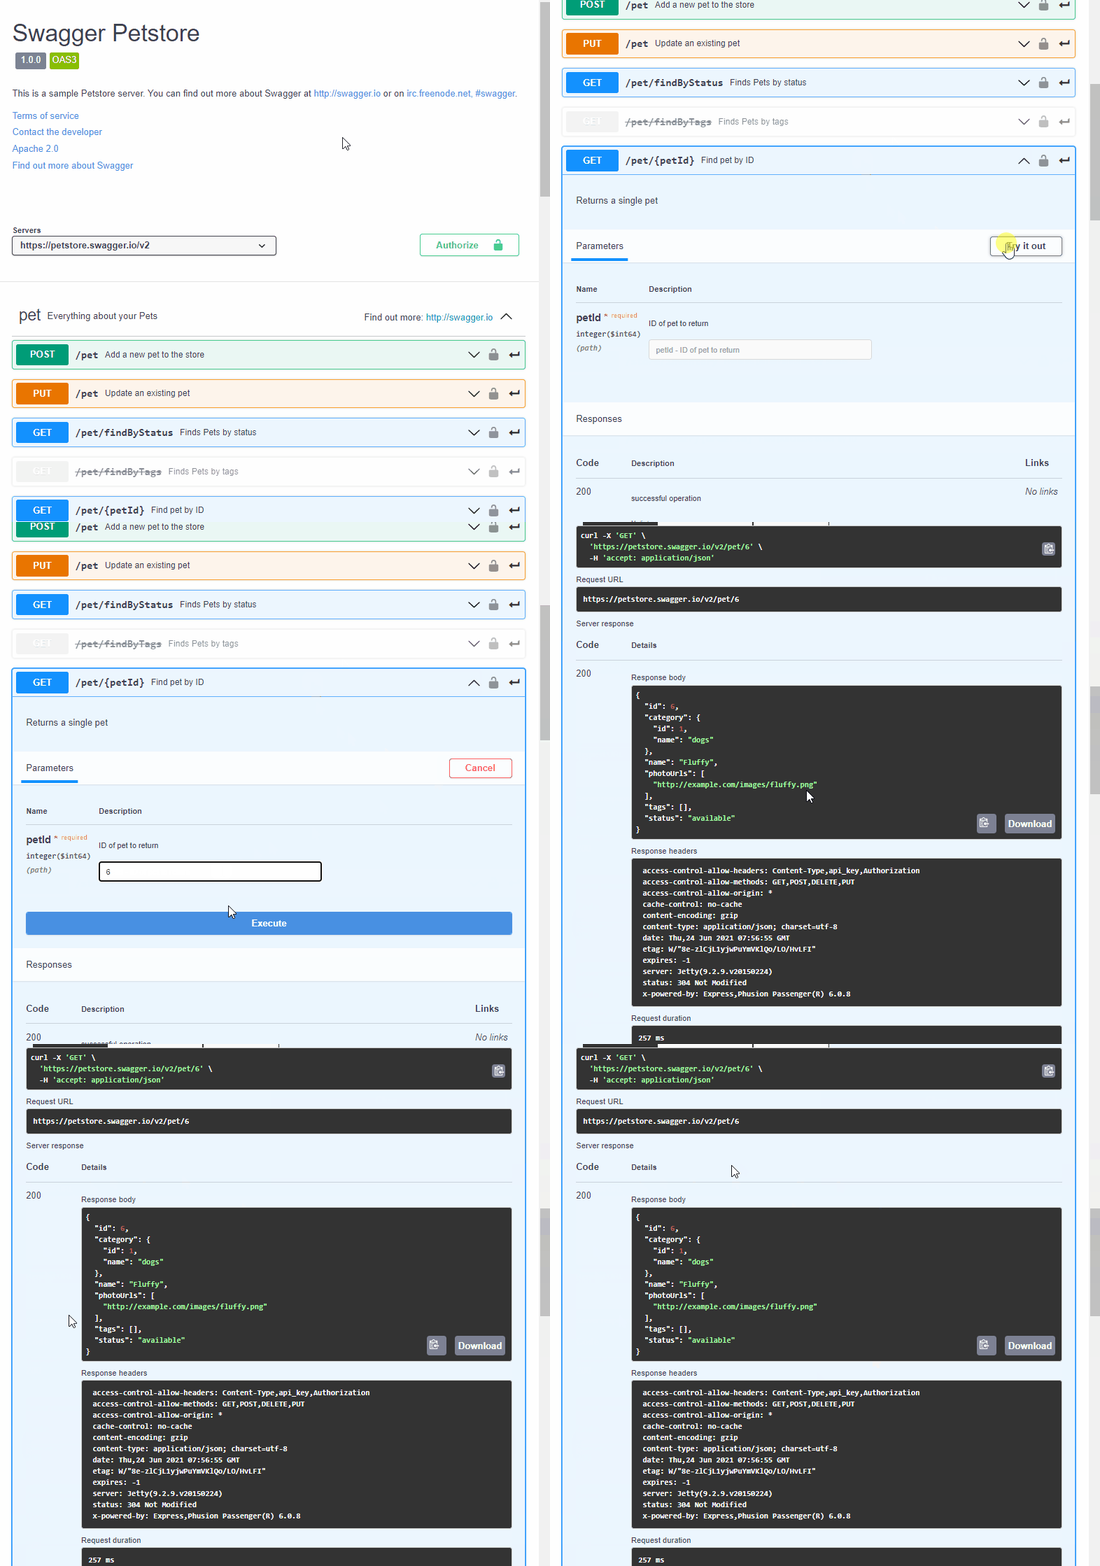
Swagger Studio generates interactive API documentation for your API definitions. Use it to explore the API endpoints, parameters, responses, and data models, and test the API calls directly in your browser.
You can preview your API documentation in either Swagger UI or Elements format. Use the toggle in the top-right corner of the Swagger Editor to select the preferred layout.
Note
This article describes the interactive API documentation in Swagger UI view. For details about the Elements styling, refer to the Stoplight Elements manual.
Documentation-only view
Click the  document icon on the Swagger Studio toolbar to view just the API documentation (or domain documentation) without the editor.
Share the documentation link with API consumers who need access to the API documentation.
Note
If your API is private, you must add consumers as collaborators with the View role to allow them to access your API documentation.
API documentation pages follow the same naming format as API and domain pages, but with the -docs suffix added after /apis (or /domains) in the address:
https://app.swaggerhub.com/apis-docs/{owner}/{name}/{version}
                                 ^
https://app.swaggerhub.com/domains-docs/{owner}/{name}/{version}
                                    ^
If you omit the version number, the documentation page will show the default version:
https://app.swaggerhub.com/apis-docs/swagger-hub/registry-api
"Try it out"
Important
AsyncAPI does not support The "try it out" feature.
Interactive documentation lets you test API calls directly from the browser using the Try it out button. Swagger Studio will show the response headers and body, the request duration, and the cURLcommand that can be used to send the same request from the command line.
 |
Target server for requests
For Try it out to work, your API definition must specify the host (in OpenAPI 2.0) or servers (in OpenAPI 3.0) so that Swagger Studio knows where to send requests:
swagger: '2.0'
host: myapi.com
schemes:
  - https
basePath: /v2

# or

openapi: 3.0.0
servers:
  - url: 'https://myapi.com/v2'
If you do not want to use a production server or do not have one yet, you can use Swagger Studio’s mock server. The mock server generates responses based on your API definition's response schemas and examples.
Routing requests
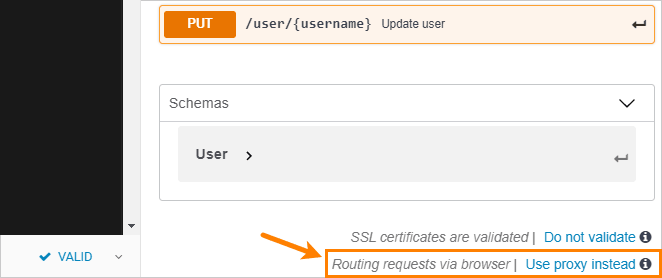
Swagger Studio lets you send "try it out" requests directly from your browser to the target server, or proxy the requests through the Swagger Studio server. It is recommended that you use a browser to access local APIs and a proxy for Internet-facing APIs.
You can change the routing mode at the bottom of the docs. The selected option is saved in the browser’s localStorage and applies to all APIs you test from this browser.

Routing requests via Swagger Studio proxy (default)
This is the preferred mode for Internet-facing APIs. "Try it out" requests from the browser are first sent to the Swagger Studio server, which forwards the requests to the target API server. Responses from the API server are returned to the Swagger Studio server and then to your browser. This approach avoids browser restrictions for cross-domain HTTP requests.

Advantages
No need for CORS support on the API server.
Supports user-defined parameters in the
Cookieheader.
Requirements
Swagger Studio supports both Internet-facing and local servers (except
localhost,127.*.*.*and172.18.*.*).
Limitations
The request timeout is not configurable and is set to 30 seconds.
When using Swagger Studio SaaS, "try it out" requests are proxied through the Swagger Studio cloud servers. If privacy or ownership of infrastructure is a concern, use routing via browser instead, or consider using Swagger Studio On-Premise hosted on your own infrastructure.
Requests cannot be sent to
localhost,127.*.*.*and172.18.*.*.
Routing requests via browser
In this mode, "try it out" requests are sent directly from the web page to the API server by using JavaScript.

Advantages
Supports both Internet-facing servers and local servers.
Requests are sent directly from your browser to the API server, without going through any intermediate infrastructure.
Requests are sent with browser cookies (but not with user-defined cookie parameters).
Requirements
The API server must support CORS and return the proper CORS headers in responses. For more information, see CORS Requirements for "Try It Out".
Limitations
Cannot send requests to HTTP (non-secure) servers, because the browsers block access to insecure content from secure web pages.
Cannot send user-defined values in the
Cookieheader and other forbidden request headers.Response headers displayed after "try it out" are restricted by the
Access-Control-Expose-Headersresponse header. If this header is missing, only simple response headers are displayed.The
Set-Cookieresponse header is not displayed due to browser security restrictions.
Troubleshooting "try it out" requests
TypeError: Failed to fetch
When routing requests via browser, this error occurs if:
the API server does not support CORS
the request is sent from an
https://web page to anhttp://(non-secure) server.
To avoid the issue, change the routing mode to .
OpenAPI 3.0 specifics
Some features of OpenAPI 3.0 are currently not supported in the Interactive Documentation. See here for known limitations.
Lazy loading
For OpenAPI, Swagger Studio reduces the documentation load time by loading external references only when they are needed for rendering. For more information, see: Lazy Loading.
Permalinks
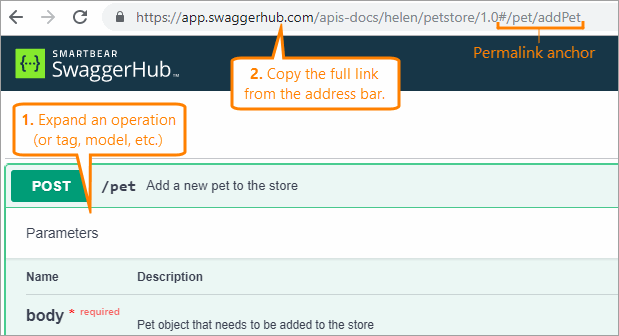
The API and domain documentation support permalinks to individual operations, tags, models, and domain components. To get a permalink to a specific item, expand the option and copy the complete link from the browser address bar.

When a user navigates to a permalink, the page automatically scrolls to the target item and expands it. Click the following link to try it:
https://app.swaggerhub.com/apis-docs/swagger-hub/registry-api/1.0.47#/APIs/searchApisAndDomains
Permalinks have the following syntax:
For tags and operations:
...#/TagName
...#/TagName/operationId
For other items:
...#/ItemType
...#/ItemType/ItemName
Following are few examples and their despcriptions:
Example | Description |
|---|---|
| Link to the |
| Link to the operation with ID |
| Link to the |
| Link to the |
| Link to the |