After you have created a test project, you can record scenarios to be simulated by one or more virtual users. To create a simple website load test, you need to record at least one user scenario. To do this:
-
Click
 Record User Scenario on LoadComplete Test Engine toolbar:
-
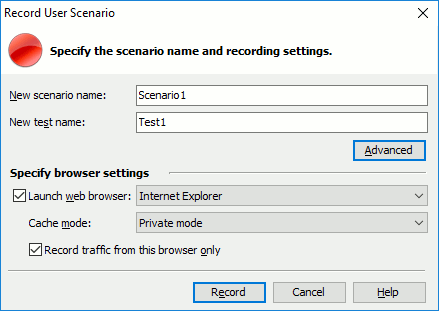
LoadComplete will open the following dialog:
-
In the dialog:
-
Enter the desired scenario name.
-
Enter the name of the single-user load test to be recorded.
(The single-user test is a load test that LoadComplete automatically creates when recording a user scenario. Typically, single-user tests are used to verify that the scenario works as expected. See the next section Verify the Recorded Scenario for more information. You can also use single-user tests to create load tests on the basis of recorded scenarios.)
-
Specify whether LoadComplete will automatically launch a web browser during scenario recording. For this purpose, enable the Launch web browser check box.
-
Select the web browser to use for test recording.
The dialog lists browsers installed in your operating system. If you are going to use a non-standard browser (for instance, if you are going to use a custom client application), clear the Launch web browser check box.
-
In the Cache mode list, select Private mode to activate the web browser’s private mode before recording.
-
Make sure the Record traffic from this browser only setting is enabled. This will filter out unneeded traffic from other browsers and applications.
Click Record to start the recording.
Upon closing the dialog, LoadComplete checks whether your recording settings match the settings recommended for recording scenarios without unneeded traffic. If they differ, it displays a message informing you about this and suggesting that you set the recommended values and continue. Of course, you can start recording with your current settings, if needed.
-
-
LoadComplete will configure your operating system to connect to the network through the LoadComplete proxy. (LoadComplete will restore your system settings after the recording is over).
If you use Firefox for recording, and your Firefox browser is not configured to use system proxy settings to connect to the network, LoadComplete will show you a warning. Configure Firefox to use system proxy settings and click Continue to proceed with recording.
If you use Firefox for recording, and your Firefox browser is not configured to use a Windows certificate store, LoadComplete will show you a warning. In this tutorial, you can ignore the warning and click Continue to proceed with the recording right away. However, we recommend that you configure your Firefox browser to use a Windows certificate store to avoid possible issues with recording secured traffic.
-
After LoadComplete has started the recording, it will display the Recording toolbar.

Recording Toolbar -
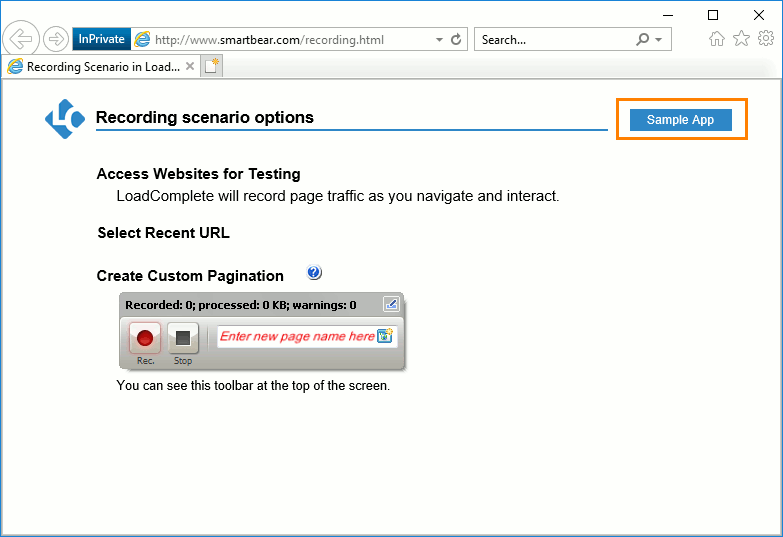
LoadComplete will also launch the web browser you have selected in the Record User Scenario dialog and open the Recording Scenario With LoadComplete web page. (This page resides on your computer and LoadComplete will not record opening it.)
From this page, you can navigate to a needed web page.
Click Sample App to navigate to the sample Web Orders application:
If you have not chosen a web browser for LoadComplete to launch, launch your browser and open the http://localhost/LoadComplete web page manually.
Note: If you are unable to open this page, make sure that both the sample app and IIS are installed on your computer, and IIS includes the features needed for testing (.NET Extensibility, ASP.NET 3.5, ISAPI Extensions, and ISAPI Filters). For more information, see LoadComplete Basic Test Sample. -
Perform the following actions (this is a sample sequence of expected actions):
Note: As you perform those actions, LoadComplete will process them and add requests to the scenario. The Recording toolbar will show the number of recorded requests, the amount of request and response data processed, and the number of warnings detected. -
Log in to the web application using the data the Login page contains:
Username: Tester
Password: test
Click Login.
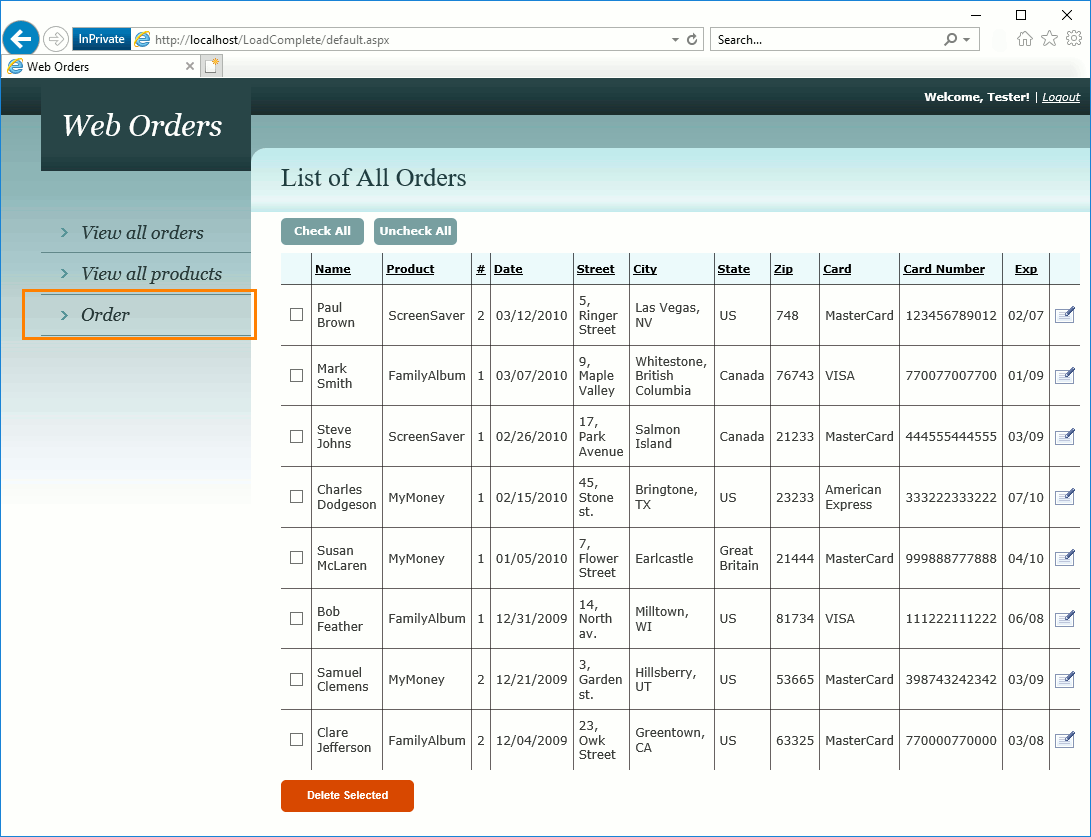
The application will show the main page that contains a list of orders. On the main page, you can create, modify or delete orders.
-
After the main page is shown, you can perform desired actions against the application (LoadComplete will simulate these actions for virtual users during the test run).
In this tutorial we will create a new order, make sure the application has added it to the orders list and then delete the order.
To create a new order, click the Order link on the left.
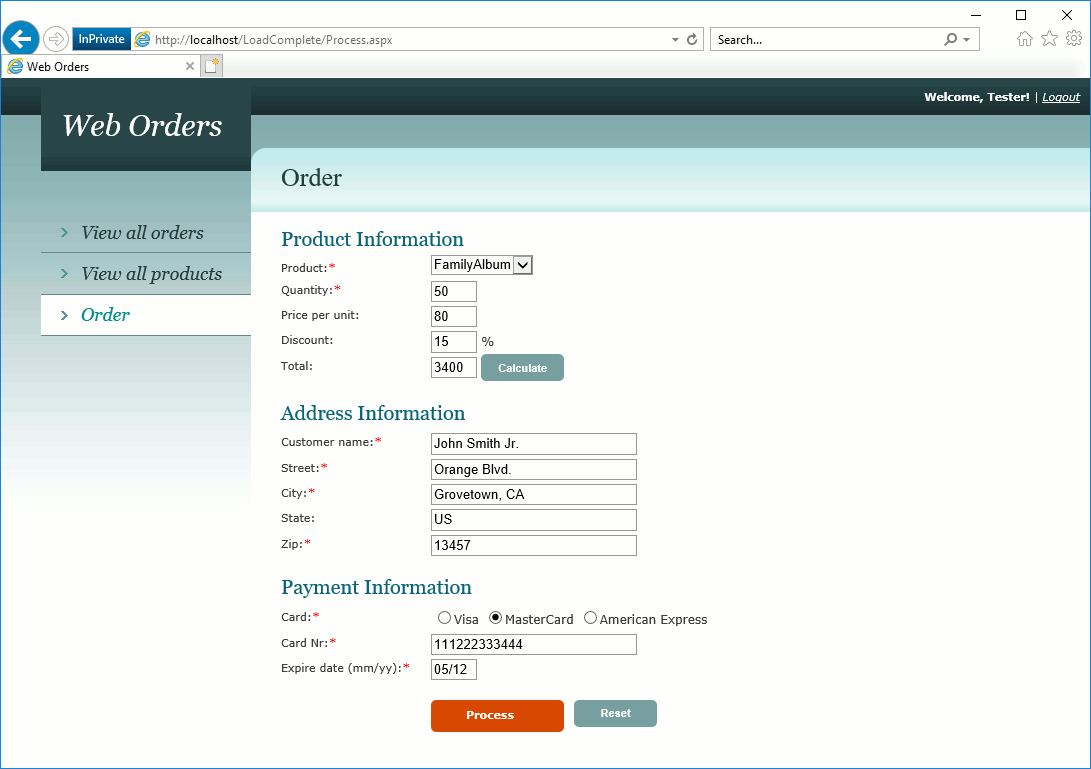
The browser will switch to the page that lets you add and modify orders.
-
To create an order, follow the instructions below:
Product: select FamilyAlbum from the drop-down list.
Quantity: enter 50 as the value of this field.
Click Calculate to populate the field connected with the price automatically.
Customer name: enter John Smith Jr. as the value of this field.
Street: enter Orange Blvd. as the value of this field.
City: enter Grovetown, CA as the value of this field.
State: enter US as the value of this field.
Zip: enter 13457 as the value of this field.
Select MasterCard.
Card Nr: enter 111222333444 as the value of this field.
Expire date (mm/yy): enter 05/12 as the value of this field.
Click Process to add the order with the specified information to the orders table.
-
Switch to the orders table. To do this, click the View all orders link on the left.
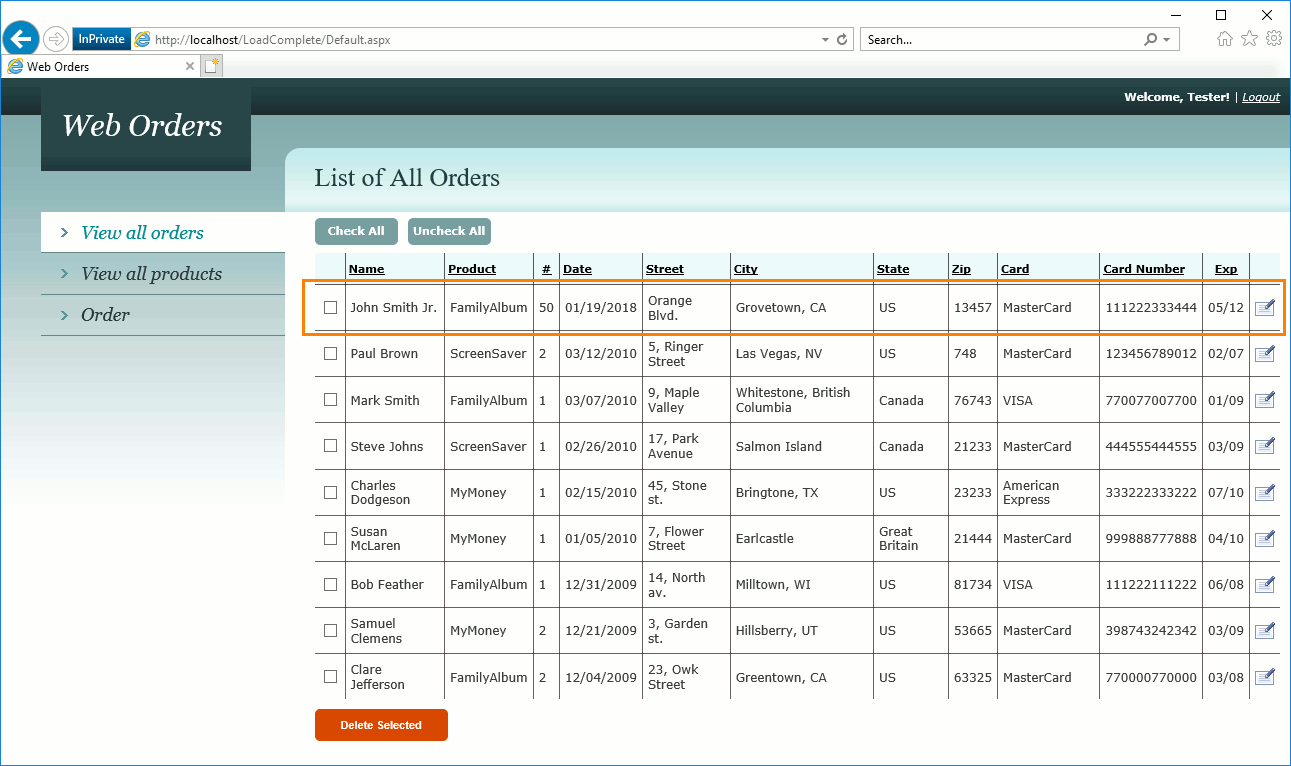
Make sure that the created order is shown in the table:
-
To delete the created order, select the check box to the left of the order and then click Delete Selected.
-
Now we will close the browser (click the X button at its caption).
-
-
After you have performed all desired actions against the web site, click
 Stop on the Recording toolbar. This will stop the recording.
 -
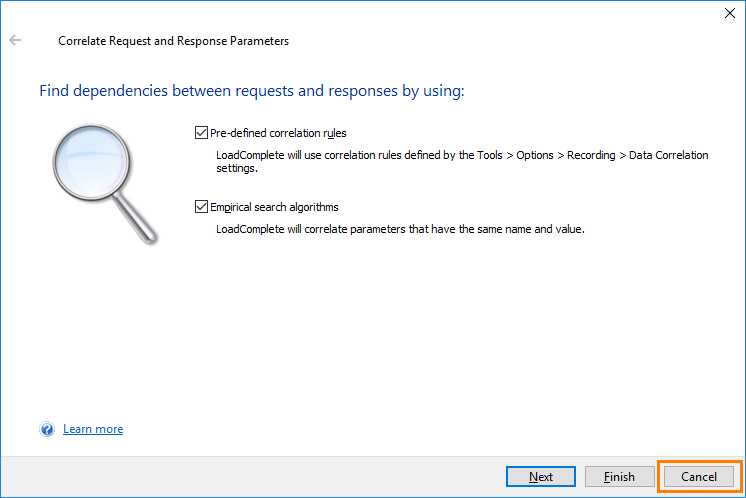
LoadComplete will show the Correlate Request and Response Parameters wizard suggesting that you find dynamic parameters in the recorded scenario and correlate them. Data correlation is beyond this tutorial scope. In the dialog, click Cancel to skip the data correlation.

 Prev
Prev