
This tutorial describes how to record and run scripts. A script is a sequence of user actions on the tested web pages. If you want to check whether your web app works well, follow the steps below.
Tutorial steps
1. Start recording
-
Select Record & Replay > Record a Script on the left panel.
-
Enter the URL of the page you want to test.
-
Select the desired screen resolution.
-
Click Record Script:

Click the image to enlarge it.
This launches the recorder.
2. Record user actions
Recorder screen
Here is a sample view of the recorder screen:

Click the image to enlarge it.
For more details on the recorder user interface, see Recorder UI Overview.
Record a script
To record a script simply work with the page in the internal browser as a regular visitor would do this: click links and buttons, input text, scroll the page contents, and so on. The recorder will register all your actions as events.
A step is a series of events on the same web page. When you navigate to another page on the tested website, the recorder automatically starts a new step. If needed, you can also start a new step manually or group the recorded actions into a new step.
For information on recorded events and their parameters, see Recorded Events.
The maximum recording time is 30 minutes.
Additional operations during recording
- Create a new step manually.
- Add an expect (also called validation or checkpoint).
- Record
hoverevents. - Navigate to a new page by typing its URL at the top of the internal browser.
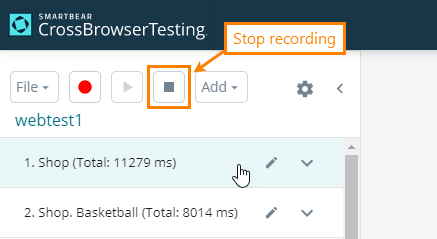
Stop recording
One web test typically corresponds to one user scenario. Once you’ve recorded all events that make that scenario, you can stop recording:
3. Play back the recorded script & save it
For test automation, it’s very important that the recoded test works correctly. We highly recommend that you play back the recorded events to ensure the test works as expected:

If the test doesn’t work, fix it: check and change event properties, record additional events, delete and re-record certain test parts, or re-record the entire test.
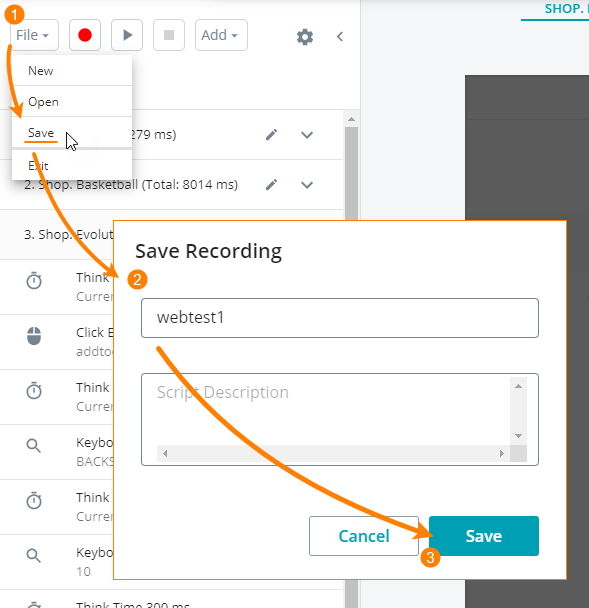
If the test works as expected, you can save it. To do this, selectSave Script in the message box that the recorder shows after successful playback, or select File > Save, enter the test name and optional description in the subsequent dialog, and select Save:
You can close the test recorder now.
 If you exit the recorder without saving it, you will loose your recorded events.
4. Create and configure a suite
To run a test on a regular basis, create a test suite and add the test to it:
-
Select Record & Replay > Replay a Suite on the left. Click New Suite on the right, then specify the suite name and optional description in the subsequent dialog:

Click the image to enlarge it.
Select Create.
-
To add scripts to the suite, in the subsequent dialog select Add Scripts and choose the scripts you want. Confirm your choice by selecting Add Scripts:

Click the image to enlarge it.
Notes:
-
You can add up to 10 scripts to a suite to test up to 10 different user scenarios during one run.
-
Scripts in the suite run in parallel. They are not synchronized.
-
You can add the same script to different suites.
-
-
After you’ve added scripts, you need to specify environments (or configurations) for the run. An environment (or configuration) is a combination of the operating system, browser, and screen resolution. Scroll the suite screen down to the Suite Browser List section, select the needed values and click Add Config:

Click the image to enlarge it.
You need to add at least one configuration. Without configurations, the suite will not run.
You can add up to 10 configurations to verify how the tested website works for clients using different systems. Every script in your test suite will run on every configuration you add.
Note: If you select an operating system first, the Browser drop-down list will have only those browsers that can run on the selected OS. To view all the browsers, clear the OS box.
Similarly, if you select a browser first, the Operating Systems list will have only the systems on which the selected browser can run. To view all the available systems, clear the Browser box. -
You can scroll the page down and schedule the suite runs, if needed. See Automated Test Scheduling for details:

Click the image to enlarge it.
Note: Scheduling is optional. You can always start a suite manually.
5. Run the test suite
On the Suite Settings screen, scroll the page up to the beginning and select Run Suite:

Click the image to enlarge it.
Another option is to select Record & Replay > Replay a Suite from the menu on the left, and click Run Suite for your suite:

Click the image to enlarge it.
You can also schedule suite runs.
Selecting Run Suite opens the screen where you can see information on the script execution. To monitor how scripts run, select Watch Run:

Click the image to enlarge it.
After the run is over, you will see results:

Click the image to enlarge it.
Select View Details to view the results of an individual script.
Select Share to share the results via public URL, email, Slack, or Jira. See Collaborating Integrations for details.
You can run a script out of any suite if you need it. Select Record & Replay > Record a Script from the menu on the left, find your script on the page and select Replay:

Click the image to enlarge it.
Difference between script runs
In the UI, you can play a script from the recorder screen, from the Record & Replay screen, and as part of the suite. Run a script from the recorder screen to verify if it works well. This option of executions are a little bit different from the others:
-
The script engine is slightly different, but produces very similar results.
-
There is no ability to choose an operating system or browser.
-
The playback’s results are not stored.
What’s next?
This tutorial is over. We recommend reading a bit more to learn how to get most out of your recorded tests:
 Using Databanks in Record and Replay