Viewing differences between documents is merely the beginning. The key to reviewing documents is communication.
There are various global and content-specific types of comments and defects in Collaborator. See Types of Review Comments and Defects for detailed description of each type.
This topic describes how to communicate during a review.
Make Conversation – Chatting at Particular Files, Lines, Coordinates, Cells
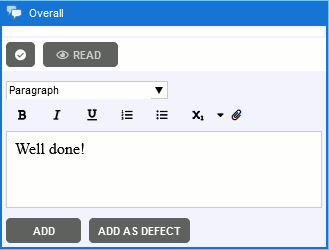
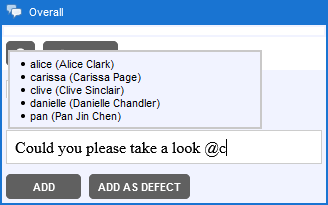
To start a general conversation about some particular file, open the desired file in the Diff Viewer, type your comment in the Overall section and click Add. Comment could be in plain-text or use rich-text and Markdown formatting, they could also mention other Collaborator users.
 |
 |
To start a conversation about some particular location (line, coordinates, cell), just click the desired location and start typing. The interface will open up automatically and accept your chat message:
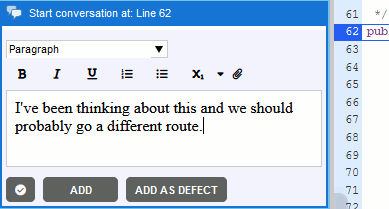
To cancel adding a comment or defect, just press Esc. This will clear input text (after confirmation) and will collapse the Chat pane if you were reviewing in Focus Mode.
When you click Add, your message is transmitted to all other users and you have started a threaded conversation for that particular location (line, coordinates, cell). In this case, it would look something like this:

Notice that the conversation is now threaded by line 62 and that a chat icon (![]() ) now appears next to the source line where the conversation was made.
) now appears next to the source line where the conversation was made.
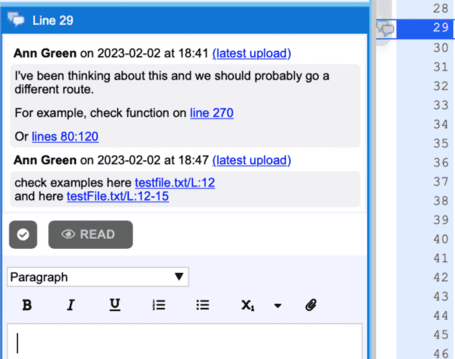
When you type the name of a file in the same review, it will turn into a link to that file. You can also link to a different line number/s in the current or another text file typing:
line NNN - will create link to desired line of the current file.
lines N1:N2 - will create link to desired range of the lines of the current file.
[file name]/L:NNN - will create link to line number of the another file. For example, test.txt/L:10
[file name]/L:N1-N2 - will create link to desired range of the lines of the another file. For example, test.txt/L:10-12
When another user chats on that same line, that message appears in yellow and yellow bubbles help make the conversation stand out as needing to be read. The screen updates immediately without the need to refresh the browser:
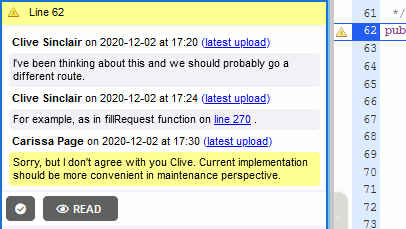
To answer a message, just type your answer in the chat window.
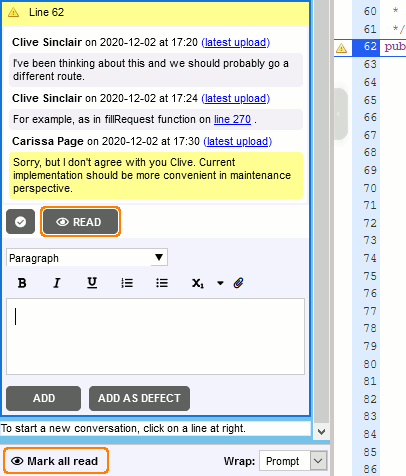
To clear the "unread chat" state without answering, click the Read button (there is also the Mark all read button at the bottom of the chat pane):
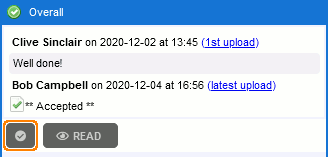
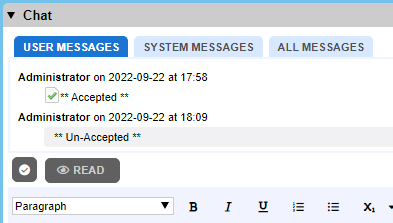
Accept Files and Comments
Edit Comments
By default comment editing is disabled in order to keep all comments intact for auditing purposes. If the the Allow to edit/delete comments server option is enabled, review participants could modify their own comments. Comment could be modified unless it is followed by another participant's comment.
To edit a comment:
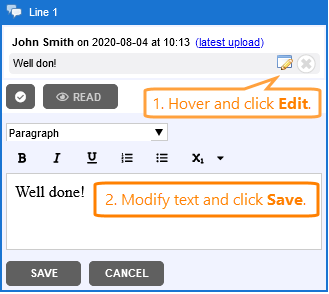
- Mouse-over the specific comment you would like to modify and click Edit.
- Modify comment text and click Save.
Convert Comment to a Defect
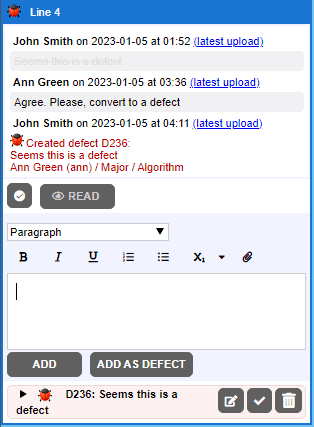
Review participants could convert only their own comments. Newly created defect is added to the end of conversation, with new date-time.
To convert comment to a defect:
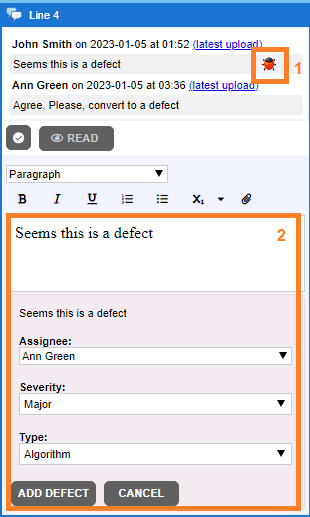
- Mouse-over the specific comment you would like to modify and click Convert to defect.
- Fill proper defect custom fields, modify comment text (if needed) and click Save.
Original comment, that was used for defect creation, marked as deleted (strikethrough text of comment).
Delete Comments
People have a knack for typing things that for various reasons they should not. Afterwards, they may want to discard their harsh, erroneous or otherwise inappropriate statements.
To discard a comment:
- Mouse-over the specific comment you would like to discard and click Delete.
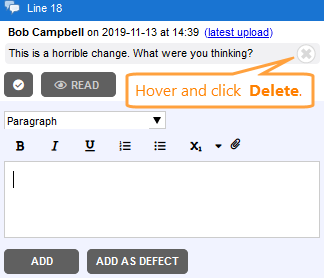
Further behaviour depends on the the Allow to edit/delete comments server option. By default comment deletion is disabled in order to keep all comments intact for auditing purposes. In this case the comment will not be actually deleted, but it will be displayed in a much more difficult to read manner. This styling is meant to deter the casual reader from actually reading the text.
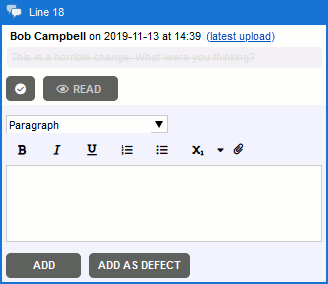
When the Allow to edit/delete comments option is enabled, a confirmation dialog is displayed and on agreement the comment is deleted permanently. Comment could be deleted unless it is followed by another participant's comment.
You cannot undo discarding/deleting a comment. System administrators are allowed to discard any comments. Regular users are allowed to discard their own comments.
Attach files to the comments
User can attach external files (e.g., screenshots, logs, etc.) to the comment. Attachments are added as links to the text of comments.
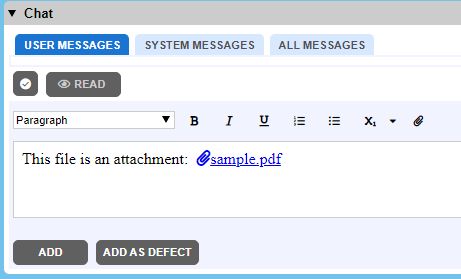
When a user clicks on the attachment’s link and Collaborator can render attached content, then Collaborator displays the context in the new tab of Web browser. Otherwise, Collaborator suggests to download the attached file. Files of restricted types cannot be attached. User can delete the attachment by editing comment.
Create Defects When Something is Wrong
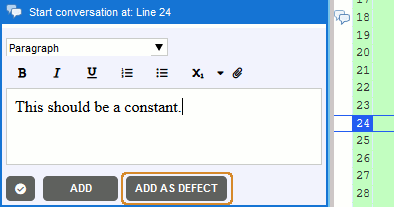
When you want to indicate that there is a problem that needs to be fixed rather than simply discussed you open a defect. Do this using the Add as defect button below the comment field:
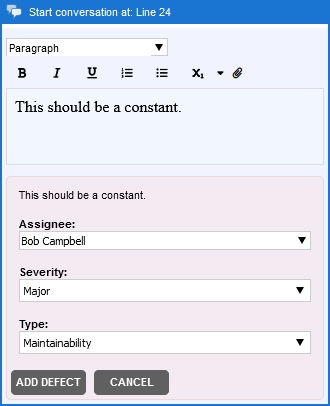
Besides the comment text, defects can be assigned to a specific participant, as well as have any number of additional fields. These are all completely configurable by the system administrator and can also vary depending on the review workflow that was originally selected for the review. Because this is completely configurable, this manual cannot say exactly what the fields will be or what they mean; ask your administrator for details. It is common to see fields like Severity, Type, Checklist items, and Phase-injected.
Once the defect is created, it is displayed in the Defect Log and Review Material sections of the Review Screen and in the Chat section of current file. The defect conversation is threaded. Open defects are denoted by red icon ![]() :
:
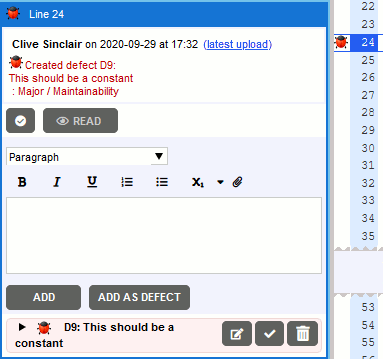
Every defect is given a unique number on the server; in the example above the number is D9. There will only ever be a single defect numbered D9, no matter how many defects, documents or reviews exist on the server.
You can have any number of defects on a single line; all will be logged into the list beneath the chat area.
 |
The word "defect" has many connotations that are inappropriate for peer review. This does not mean the problem will be mirrored in an external issue-tracking system, and it does not necessarily mean it was a bug! Even "bad documentation" can be a defect. A "defect" is just a way of identifying something that needs to be fixed. Moreover, if the word "defect" has a negative connotation in your environment, your Collaborator administrator can change it to another term. |
Verify Defects Have Been Fixed
Later, after the author has attempted to fix the defects and has uploaded the new files to the review, the reviewers will verify that the fixes do fix the defect and do not open more defects in the process.
When the fix is verified, locate the defect and click the Mark Fixed button in the defect pane.
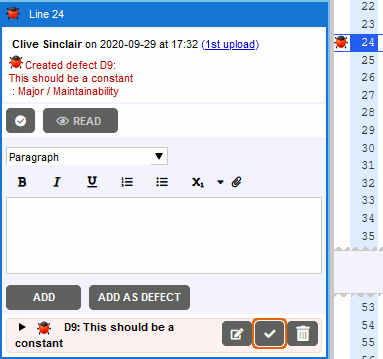
The defect icon will change to green ![]() to denote that the defect have been fixed. Comments about a defect’s activities (status change etc.) are attributed to the upload version against which the defect was created. The new state of the defect will be reflected in the Defect Log and Review Material sections of the Review Screen and in the Chat section of current file.
to denote that the defect have been fixed. Comments about a defect’s activities (status change etc.) are attributed to the upload version against which the defect was created. The new state of the defect will be reflected in the Defect Log and Review Material sections of the Review Screen and in the Chat section of current file.
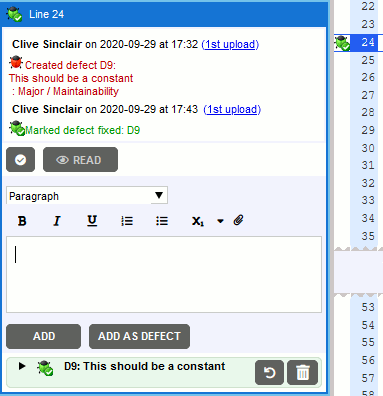
If the defect has re-appeared again in some subsequent revisions, you can reopen it by pressing the Reopen button in the defect pane.
Mark Defects As Rejected
It can happen that a defect was added which is not considered valid anymore. In such cases, participants can mark the defect as rejected.
When a defect is not valid, locate the defect and click the Mark Rejected button in the defect pane.
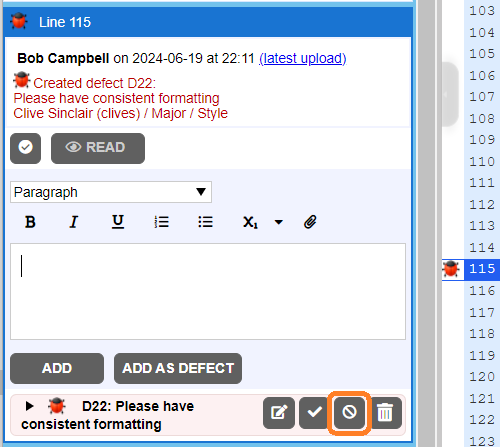
The defect icon will change to gray ![]() to denote that the defect have been rejected. Comments about a defect’s activities (status change etc.) are attributed to the upload version against which the defect was created. The new state of the defect will be reflected in the Defect Log and Review Material sections of the Review Screen and in the Chat section of current file.
to denote that the defect have been rejected. Comments about a defect’s activities (status change etc.) are attributed to the upload version against which the defect was created. The new state of the defect will be reflected in the Defect Log and Review Material sections of the Review Screen and in the Chat section of current file.
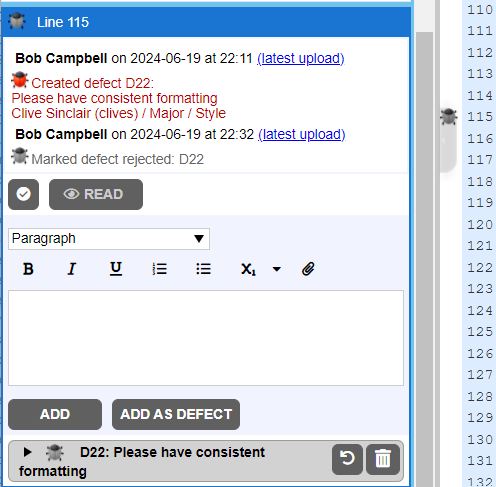
Later if the defect is considered to be valid may be due to scope change or any other reason, you can reopen it by pressing the Reopen button in the defect pane.
 |
Rejecting a defect is only supported from WebUI, Command-Line Client & Json API. It is not supported in Visual Studio Extension and Eclipse Plugin. |
Modify Defect Information
To modify defect information click the Edit button in the defect pane.
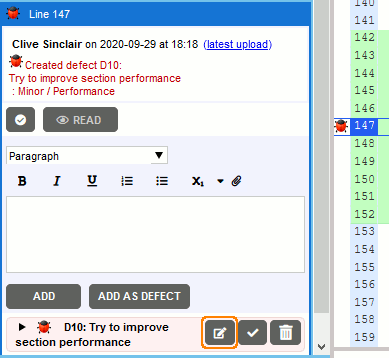
In the edit mode, you can change defect description and modify other defect custom fields. Also you can move the defect to external issue tracker (see next section for details on this). All of these activities will be logged into the chat conversation area as an audit trail of what happened.
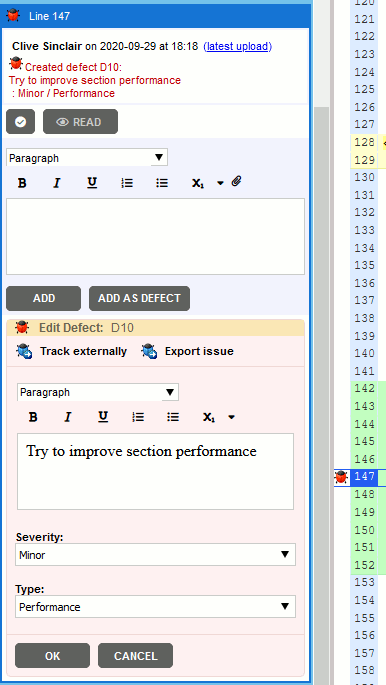
Externalize Defects
Sometimes you decide that a defect should be fixed at a later date. You do not want to mark it fixed because it is not fixed yet. But you do not want to delete it either because it is still a defect.
In this case you can move the defect to the external issue-tracking system and mark the defect as external. This special state tells everyone else that (a) the review can be completed but (b) the problem was not fixed during the review and (c) how to find the external issue for further auditing.
You may either create the issue (ticket, work item) manually and link it afterwards, or create new item directly from Collaborator and link it automatically. The latter requires, that your Collaborator administrators setup and configure issue-tracking integration.
-
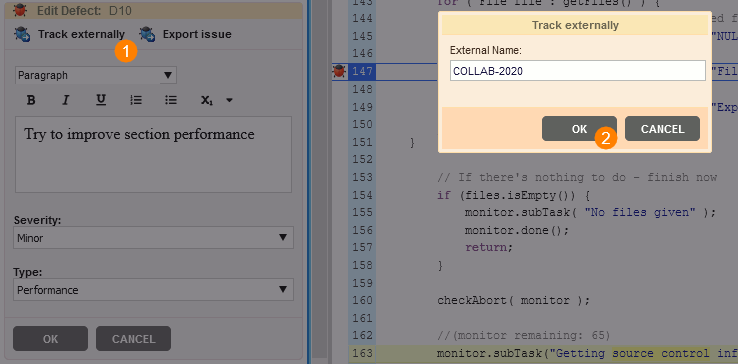
To link the defect to some existing issue (ticket, work item), press Track externally and specify the defect identifier in your external issue tracking system.
-
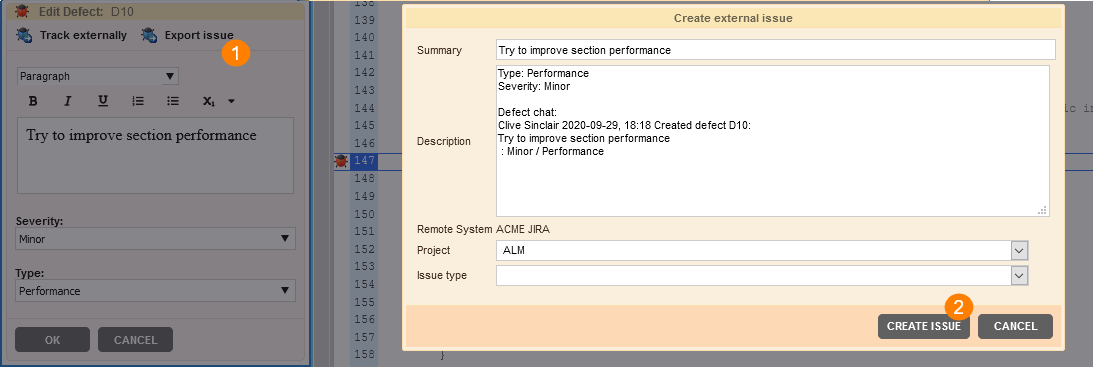
To create a new issue (ticket, work item), press Export issue and specify the defect details in the ensuing dialog.
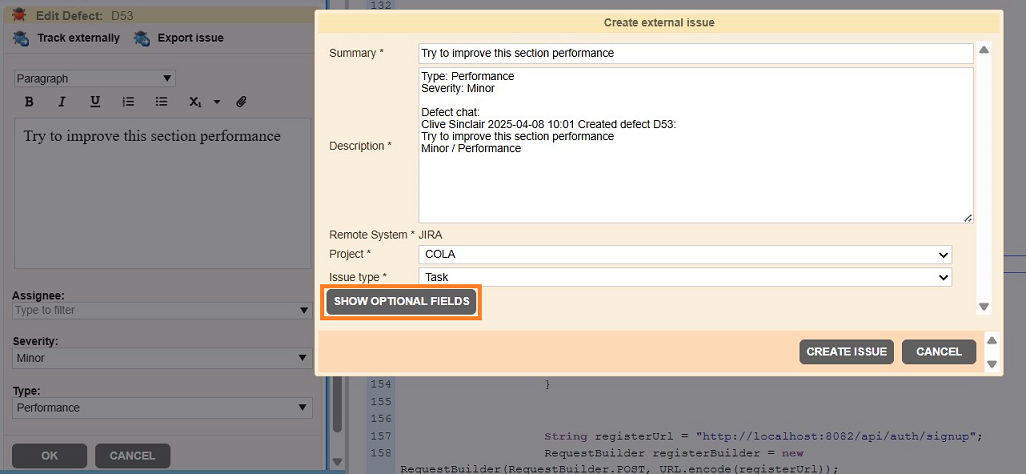
User can click on 'SHOW OPTIONAL FIELDS' button, to display optional fields.
Optional fields will start getting displayed. To hide the optional fields user can click on 'HIDE OPTIONAL FIELDS' button.
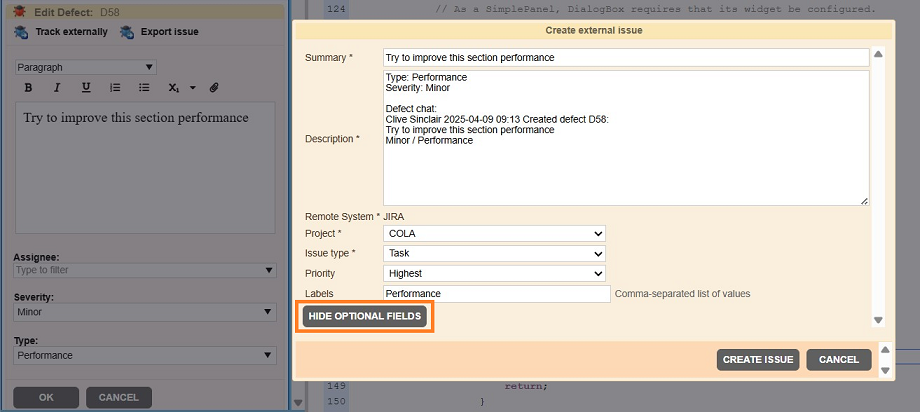

Hidden optional field values will not be considered during creating JIRA issue.
Any of these actions changes the state of the defect from "Open" to "Tracked Externally".
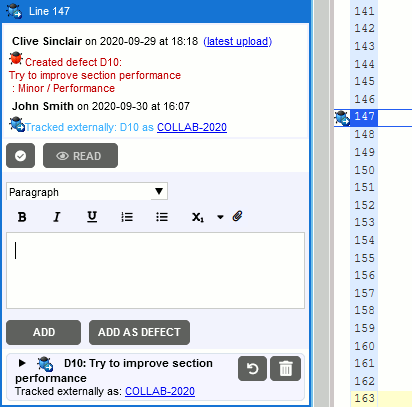
The defect icon will change to blue ![]() to denote that the defect have been tracked externally. The new state of the defect will be reflected in the Defect Log and Review Material sections of the Review Screen and in the Chat section of current file.
to denote that the defect have been tracked externally. The new state of the defect will be reflected in the Defect Log and Review Material sections of the Review Screen and in the Chat section of current file.
Delete Defects
Sometimes people could create defects by mistake and may want to delete them afterwards.
 |
It is tempting to delete a defect once the author has corrected the problem, but this is the wrong thing to do. You want to keep the defect record around, just mark it "fixed". Delete a defect only if it turns out that it really was not a defect at all. |
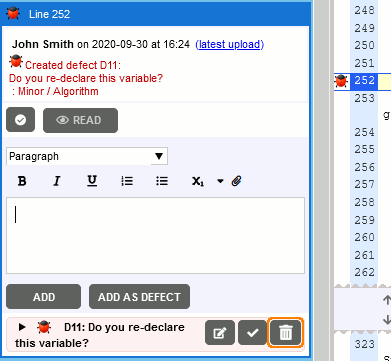
To delete a defect click the Delete button in the defect pane.
See Also
Types of Review Comments and Defects
Basic Concepts
Participate in Reviews
Rework Defects

