This guide explains how to deploy Private Node Server to a Microsoft Hyper-V environment using the Hyper-V Manager client.
Download
Request a download link for the virtual machine image from your AlertSite Sales Representative or Customer Success Advisor.
Prerequisites
In this guide, we use the Hyper-V Manager client application to import a VM to a Hyper-V server. Hyper-V Manager is available as part of Remote Server Administration Tools for Windows 10 or Hyper-V Management Tools for earlier versions of Windows. To learn how to install Hyper-V Manager, see:
Deployment: key points
-
When importing the VM, select the Copy the virtual machine (create a new unique ID) option.
-
The VM must be initially connected to a virtual network that has DHCP enabled. Once the VM is up and running, it can be configured to use a static IP address by using the web interface that is part of Private Node Server. After that, you can switch the VM to your preferred virtual network.
-
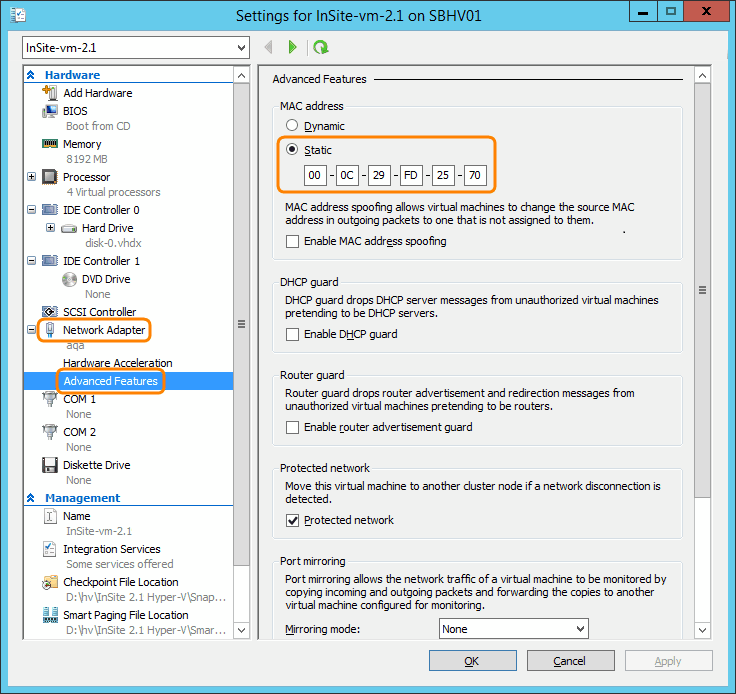
If you are going to deploy multiple VM copies, you will have to change the MAC address of each imported VM to a unique one.
-
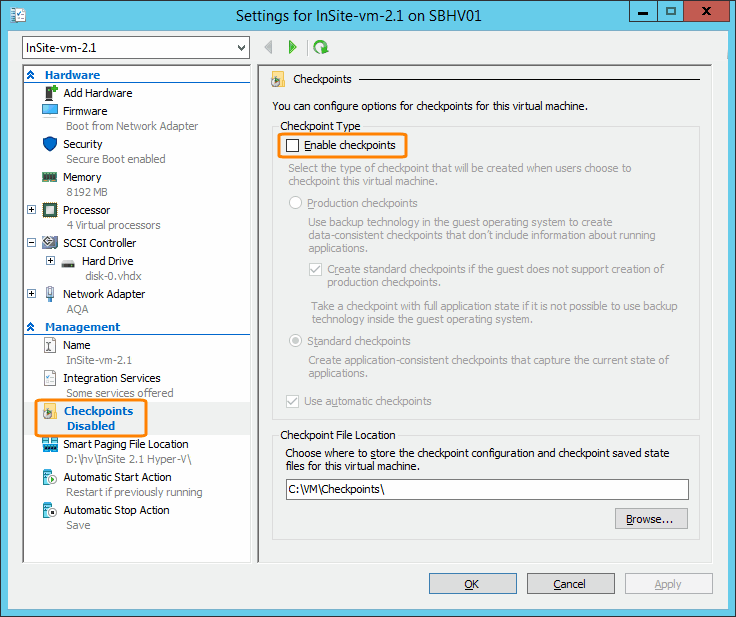
Using VM checkpoints (snapshots) with Private Node Server virtual machines is not supported, so they must be disabled. If you use some backup software that creates VM checkpoints, please exclude your Private Node Server VM from the backup. All monitoring data is stored and backed up on AlertSite servers, so there is no need to back up the VM using checkpoints.
Import the VM
-
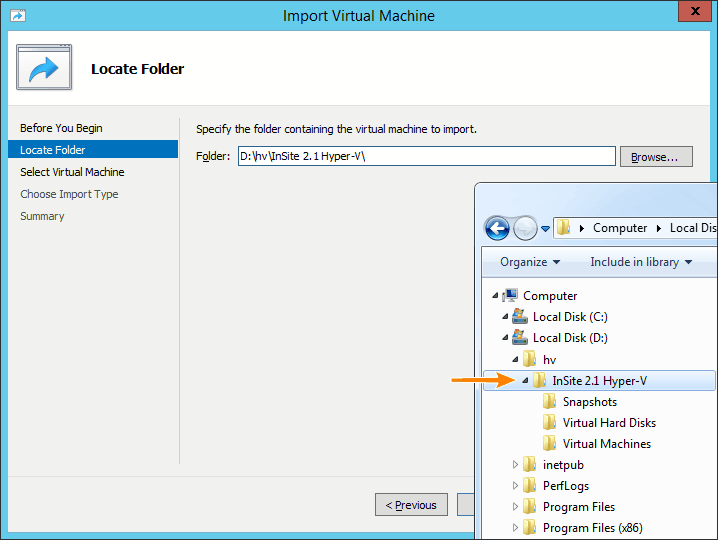
Download and unzip the VM. You will see the following files:
.
├── Snapshots
├── Virtual Hard Disks
| └── disk-0.vhdx
└── Virtual Machines
└── <VM_ID>.xml -
Open Hyper-V Manager on your computer.
-
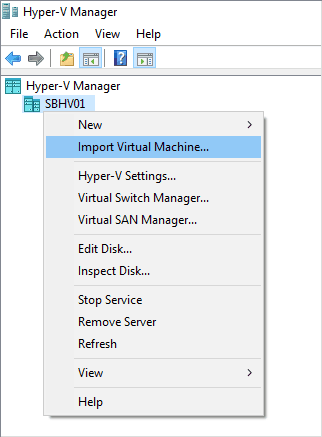
Right-click the Hyper-V server where you want to deploy Private Node Server, and select Import virtual machine from the context menu.
-
Click Next on the first screen.
-
Specify the folder to which you unzipped the virtual machine and click Next.
-
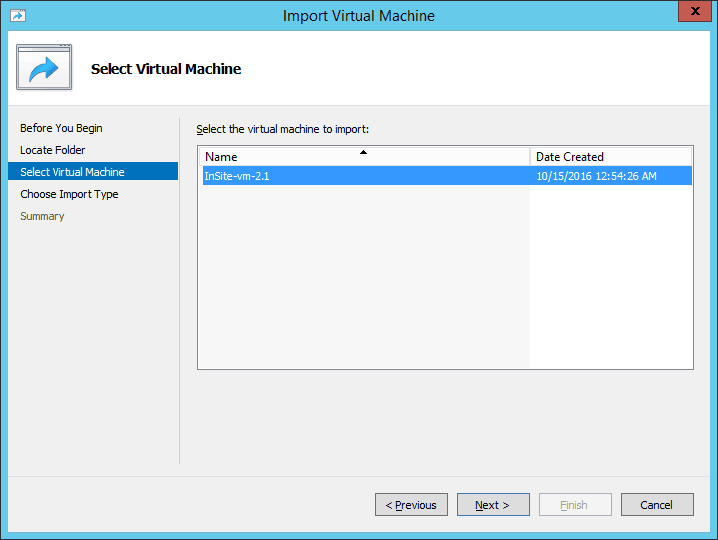
Select the virtual machine in the list and click Next.
-
On the Choose Import Type page, select Copy the virtual machine (create a new unique ID) and click Next.
-
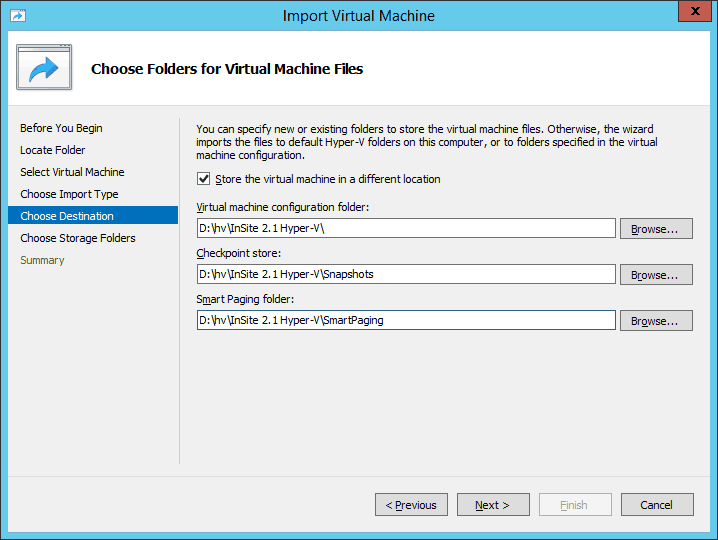
Specify the folders where VM files will be stored (or use the default ones) and click Next.
-
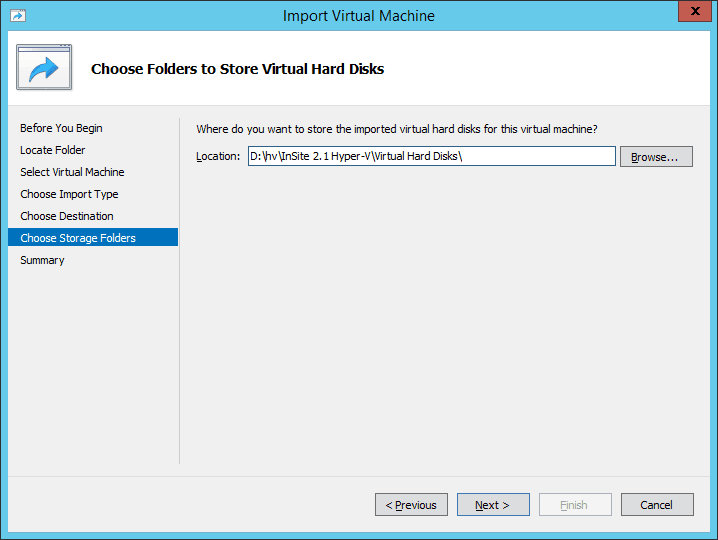
Specify the folder where the imported virtual hard disk will be stored and click Next.
-
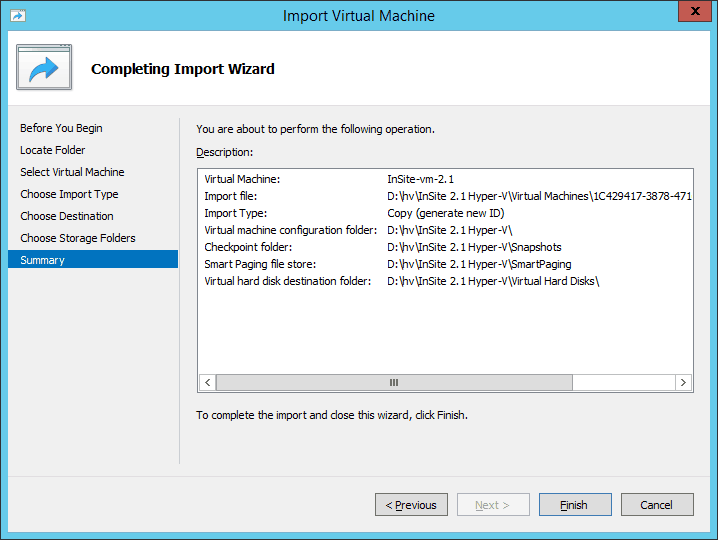
Review the VM import settings and click Finish.
-
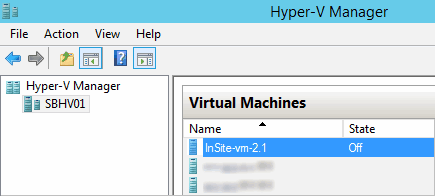
The importing process may take some time. Once it is complete, you will see a new virtual machine.
Adjust VM settings
Before you start the VM, you need to adjust its hardware resources and change certain configuration settings:
-
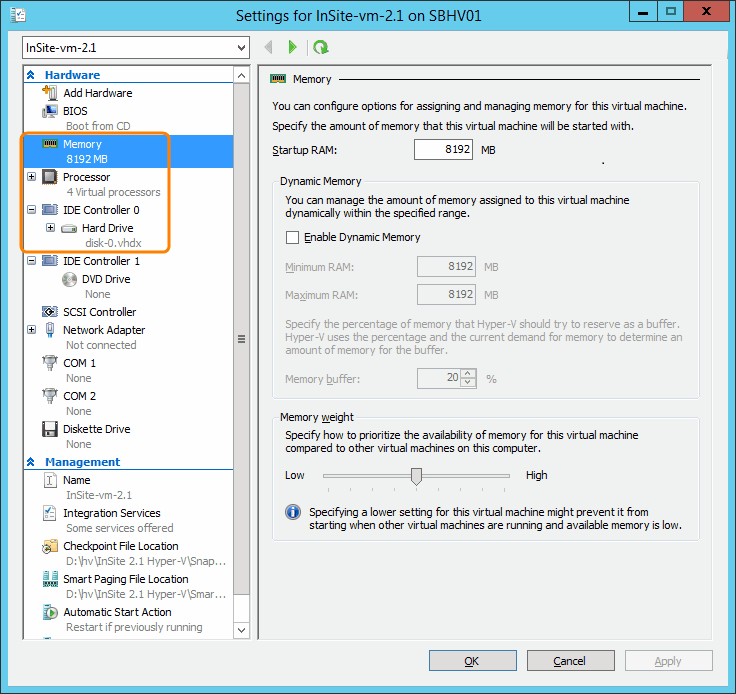
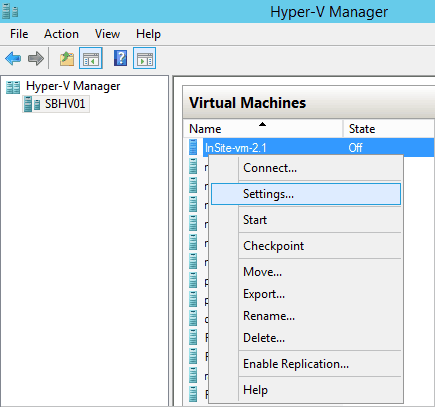
Right-click the VM and select Settings.
-
Increase the amount of Memory, Processor, and Hard Drive storage to meet the minimum system requirements for your VM type.
-
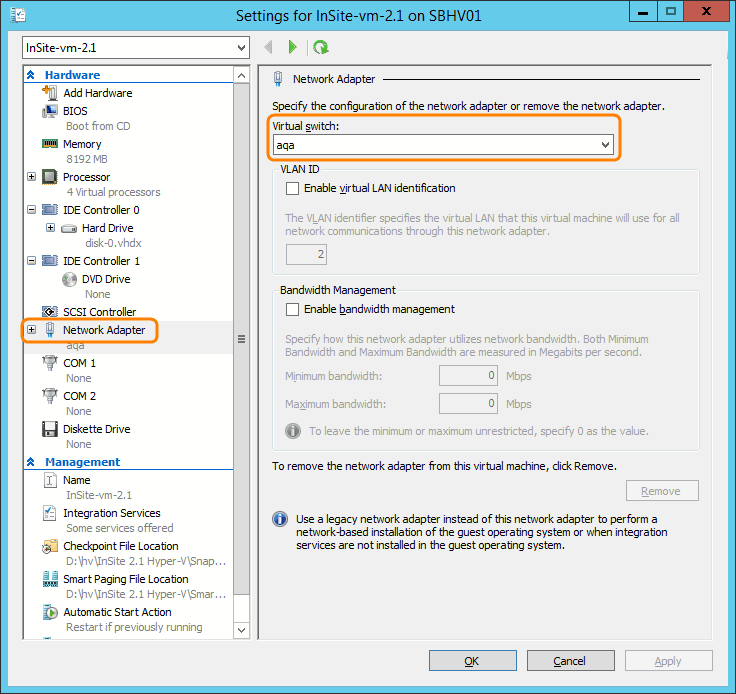
On the Network Adapter tab, select the virtual network adapter for your VM.
Note: This network must be DHCP-enabled and must be connected to the Internet. If needed, you can switch the VM to a non-DHCP network later, after the initial configuration. -
If you are going to add multiple copies of the VM, select the Network Adapter > Advanced Features tab and change the MAC address to a unique one.
-
On the Checkpoints tab, unselect Enable checkpoints to prevent creating checkpoints (snapshots) for this VM.
Note: This option is only available in Hyper-V on Windows 10 and Windows Server 2016. -
Change the other options as needed.
-
Click OK to save the changes.
Start Private Node Server
After you adjust the hardware options for the VM, you can power it on.
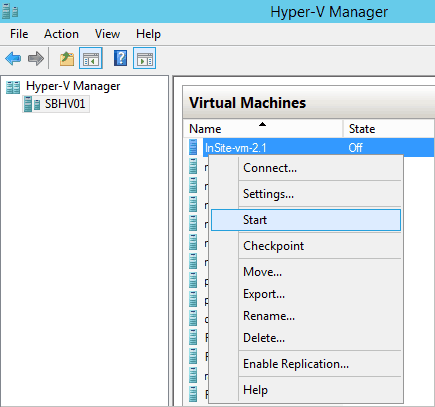
In a few moments, you will see the VM console.
Now, you need to know the IP address of your private node so you can access its Control Panel (web interface).
-
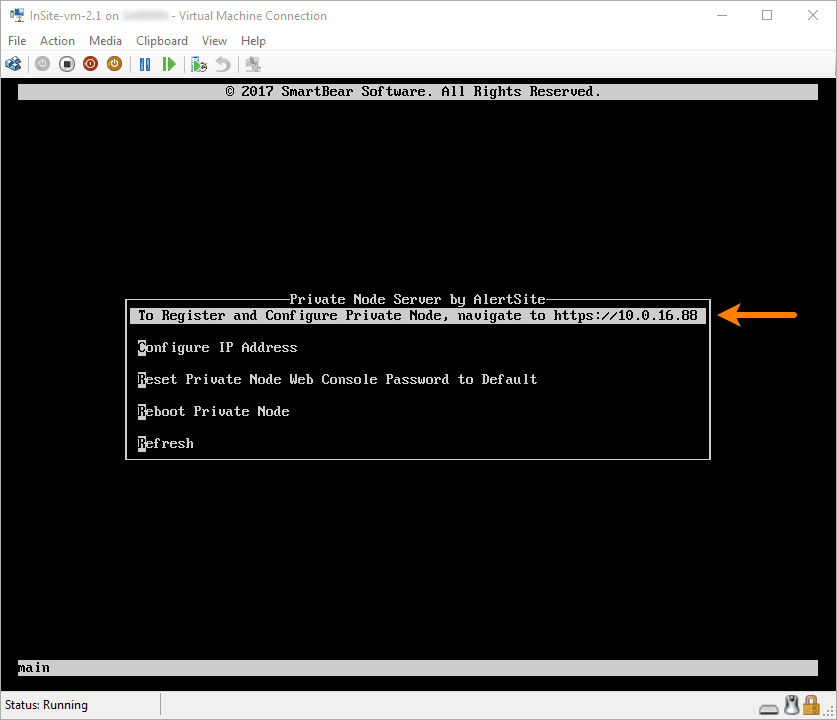
If you use Private Node Server 2.1 or later, you can see the IP address in the top right corner of the console menu:
-
If you use Private Node Server 2.0.x, the console will display a login prompt. Log in as insiteadm / 1nSitePa$$, then navigate to Configure Settings > Network Configuration. The IP address will be displayed there.
Once you know the IP address, you can access your Private Node Server from any computer on the same local network by navigating to https://<ip-address> in a web browser.
What’s next
There are a few more things you need to do to get your Private Node Server truly up and running:
-
Register Private Node Server in AlertSite – add your private node as a location in AlertSite.
-
Initial Configuration of Private Node Server – configure email relay and other internal options.
-
Monitor the location status:
-
Configure Connectivity Alerts – get notified when connectivity from the location to the AlertSite platform is lost.
-
Configure ServerAgent (optional) – monitor the node health and resource utilization.
-
See Also
Private Node Server Console
Private Node Server Control Panel (Web Interface)


