How to Run an Automated Test - Get Started with Reflect
If you never used Reflect, your account will be created automatically just after running your first automated test.
Notice
The first person to run the automated test (the person who initiates the Reflect account creation) becomes an admin of the Reflect instance.
There are two ways to run an automated test.
From a Test Case View
Note
Running a test case from the test script page does not create a test execution for you. Think of running tests from this view as customizing the test case or making sure it can be used with the AI, not as a real test case execution. Real test execution must be done in the Test Player view.
Accessing Automation Options in Zephyr Scale: Go to a Zephyr Scale test case with a Test Script type of Step by Step.
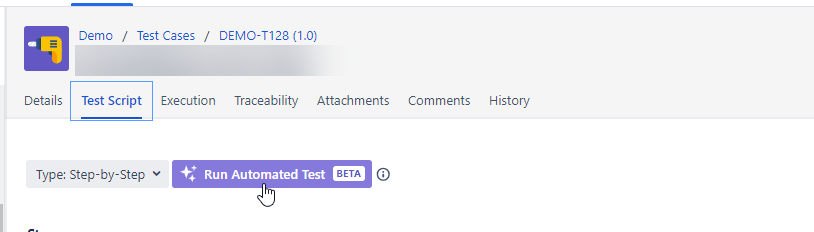
Running Automated Tests: In the Test Script tab, click the Run Automated Test button. This opens a new panel with configuration for automating the test case.
Configuring Test Options:
Starting URL: Enter the URL of the public website under test. The automated test will start by navigating to this URL.
Device Profile: Choose whether the test runs on a desktop browser, or emulates a tablet or mobile browser.
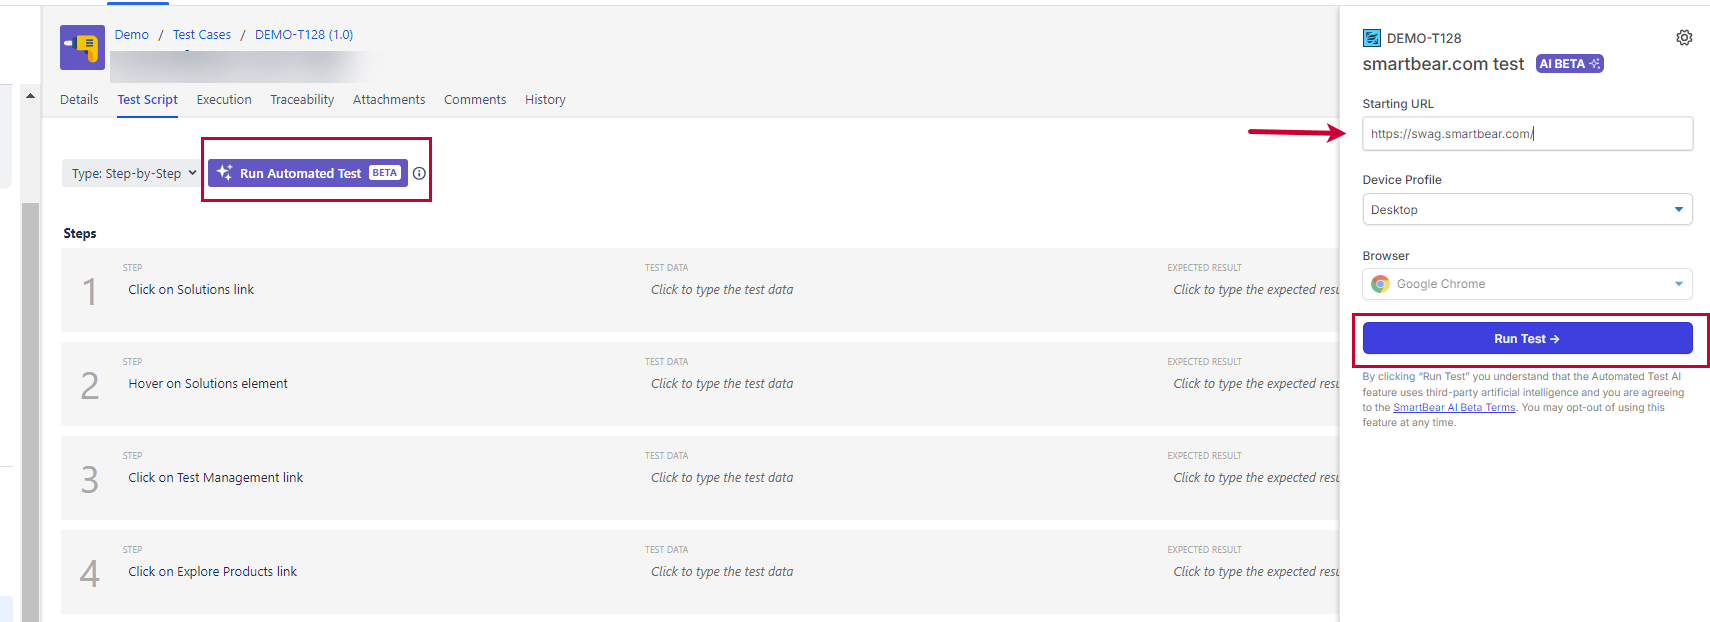
Starting the Test: Click the Run Test button.
Editing Test Steps: You are redirected to the suggestions page. Reflect displays some suggestions on how you can edit and/or split your steps. Next, a list of suggested improvements to the test will be displayed. These improvements are generated by the Reflect AI, and are designed to make your test easier for the AI to execute. Improvements may include corrections for spelling and grammar, rephrasing test steps for greater clarity, and splitting up test steps such that each step represents a single action or assertion.
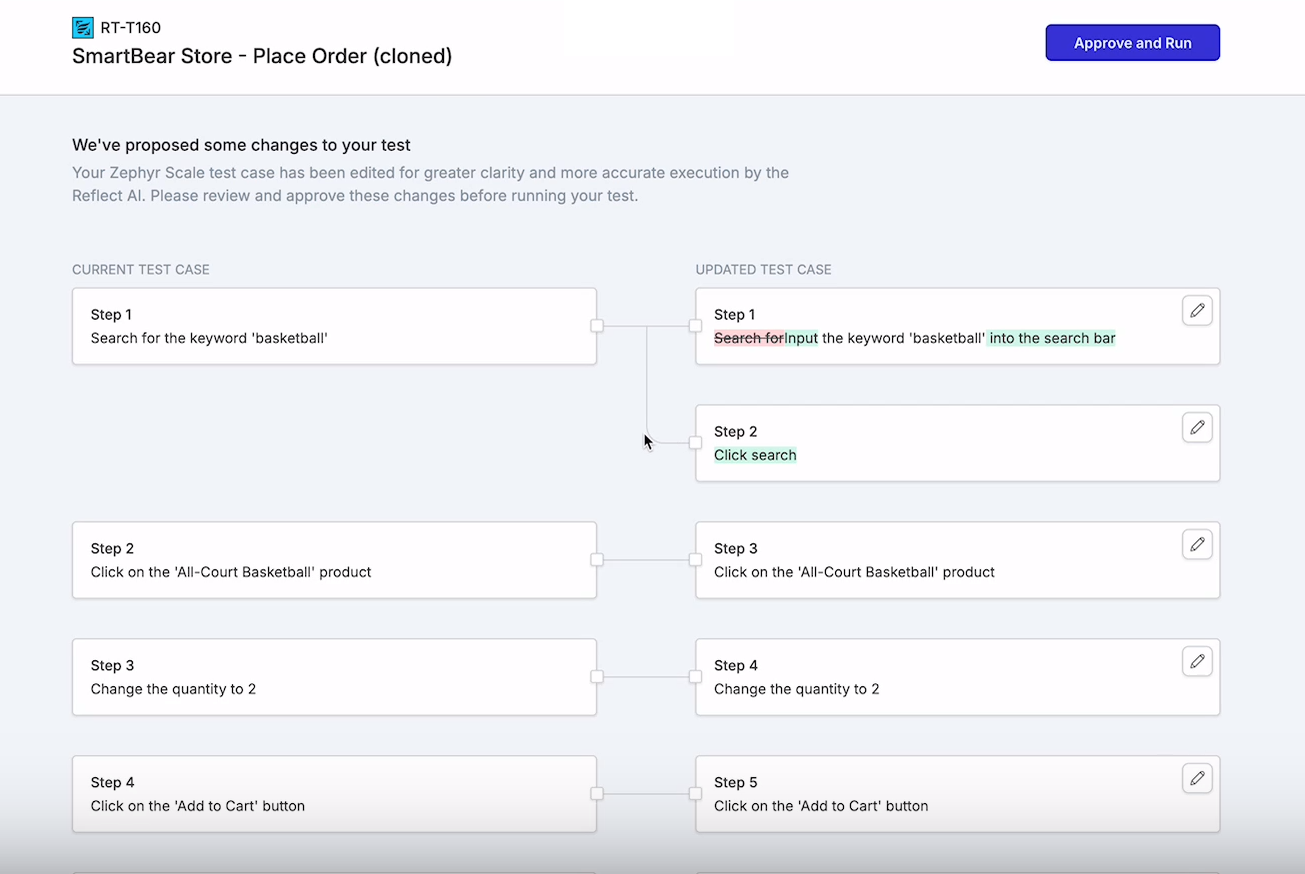
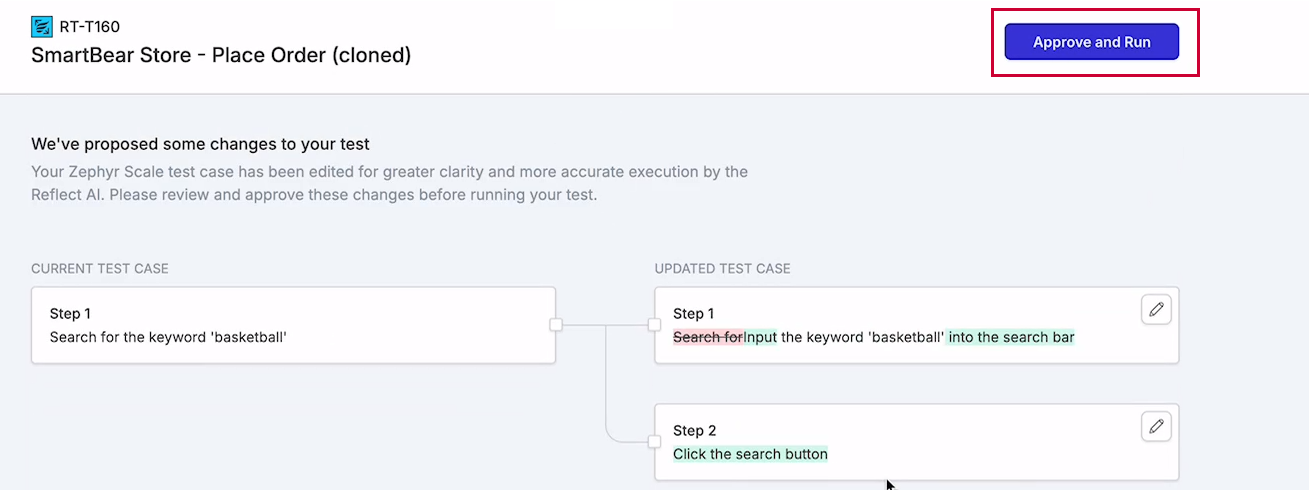
When you’re satisfied with your steps, click Approve and Run. The changes you just made in Reflect are synchronized back to Zephyr Scale.
Your test is running. Once it’s complete, you’ll see the following notice:
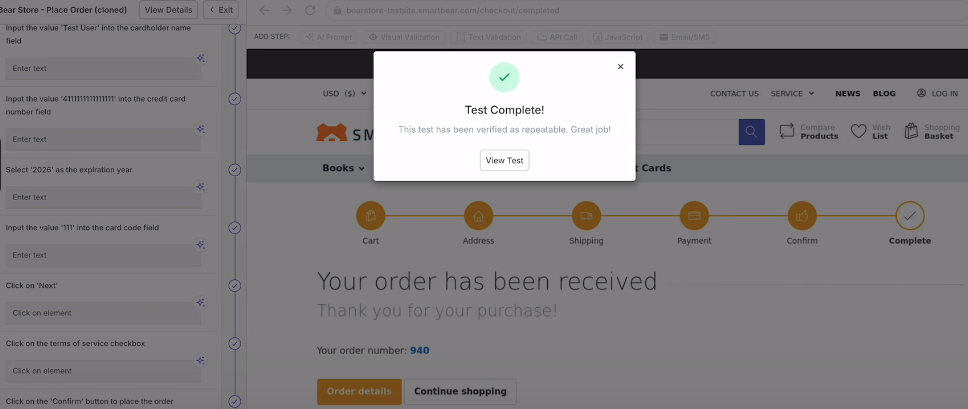
Now you can see the test.
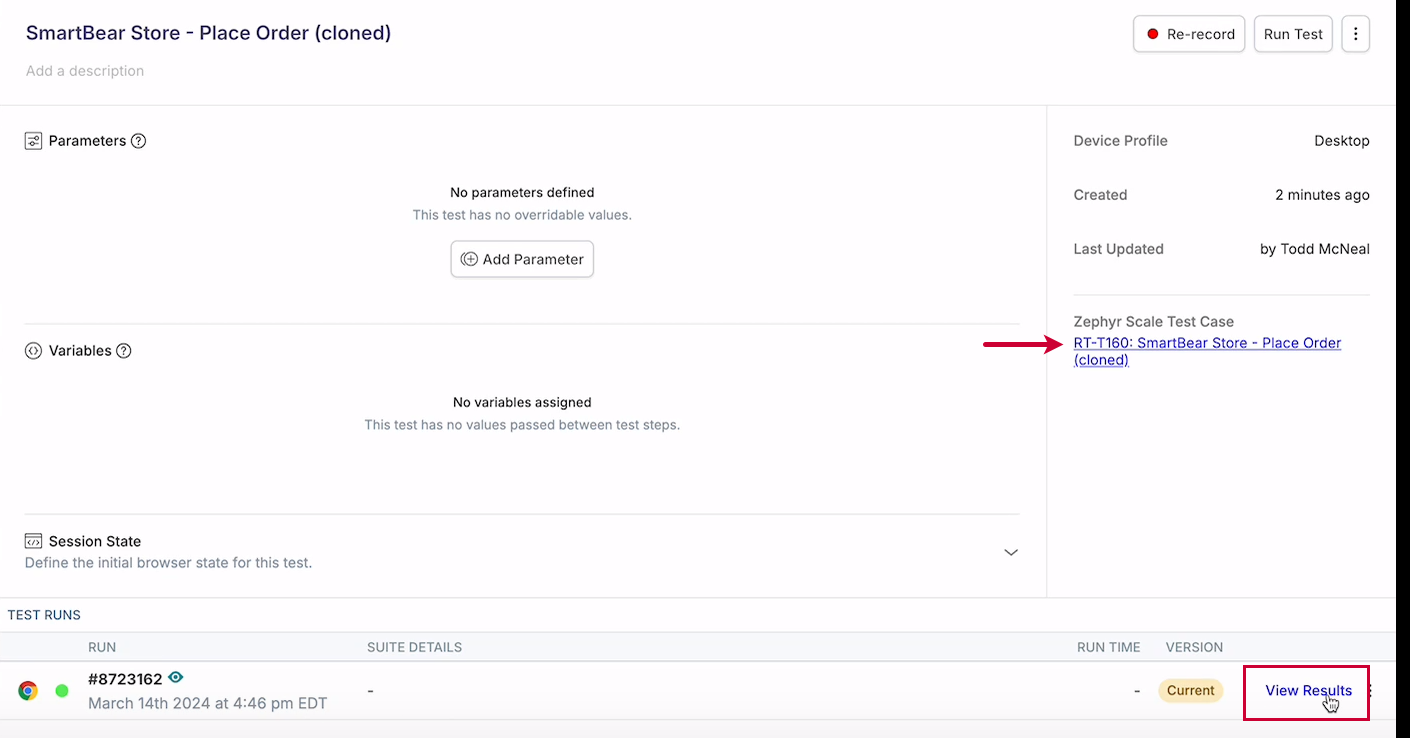
Click on View Results. This allows you to watch the recorded execution of a test case. When you click on "View Test", you will be redirected to the view shown in the screenshot above. You'll have a hyperlink to go to the test case in Zephyr Scale.
Note
Next time you’ll run the same test, you won’t be redirected to the new window. The test will run while you’re on Zephyr Scale page.
From a Test Player
You can run all of your tests in a test cycle at once, or you can run each test individually. If you choose to run all of your tests, they will run as automated tests in the same order as they are listed in the Test Player.
Go to a Zephyr Scale Test Cycle library. Select the desired cycle from the list.
Click Run Automated Tests.
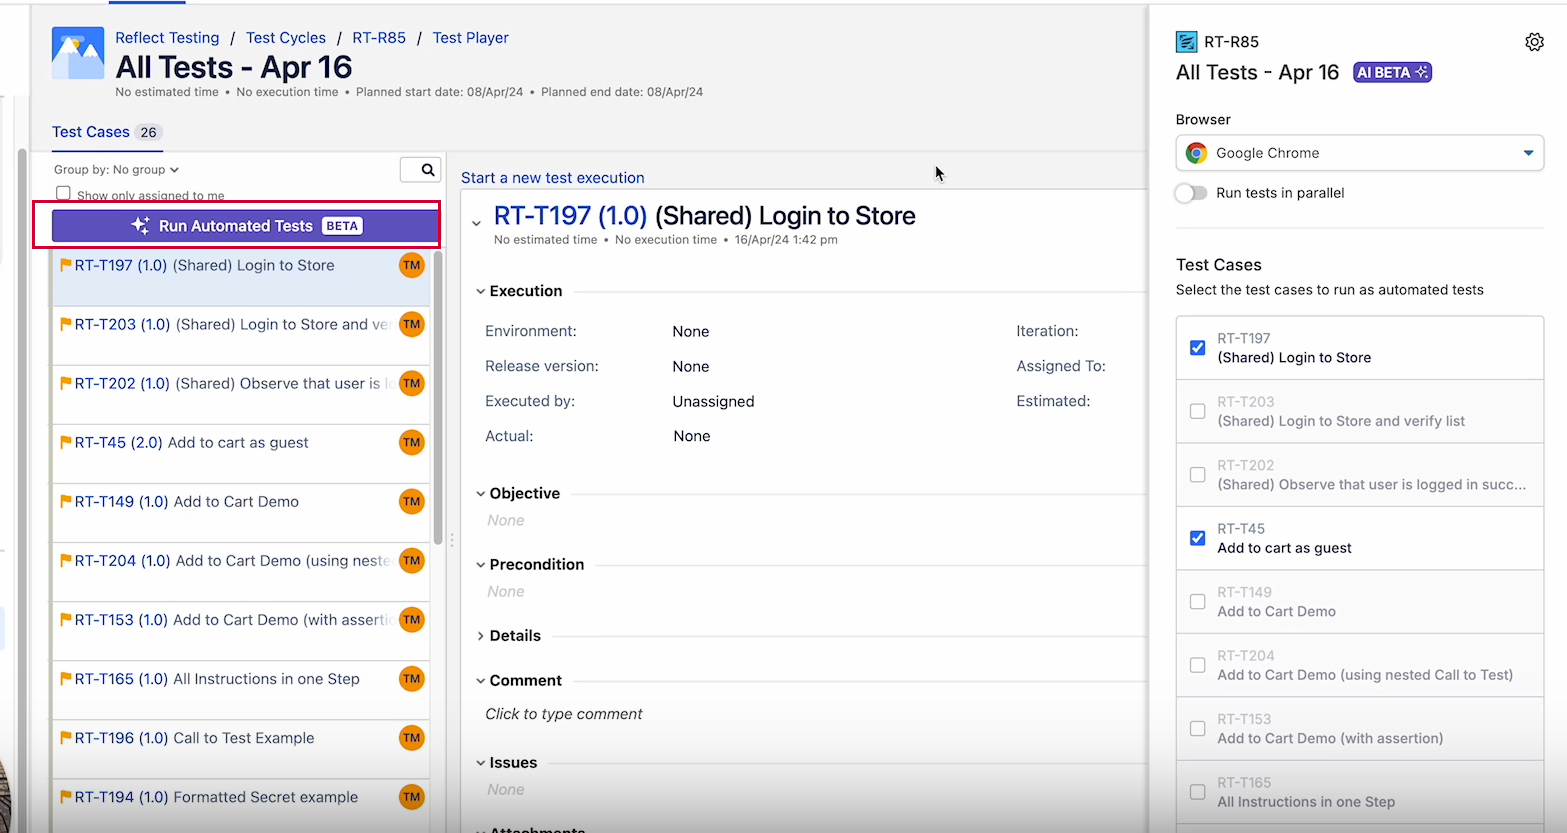
The list of the test cases included in this cycle appears on the right. The test cases that were already run have the enabled status.
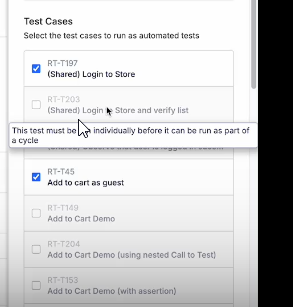
The disabled test cases have to be run individually before they can be part of the automated test cycle.
Choose the test case on the left pane to run it individually:
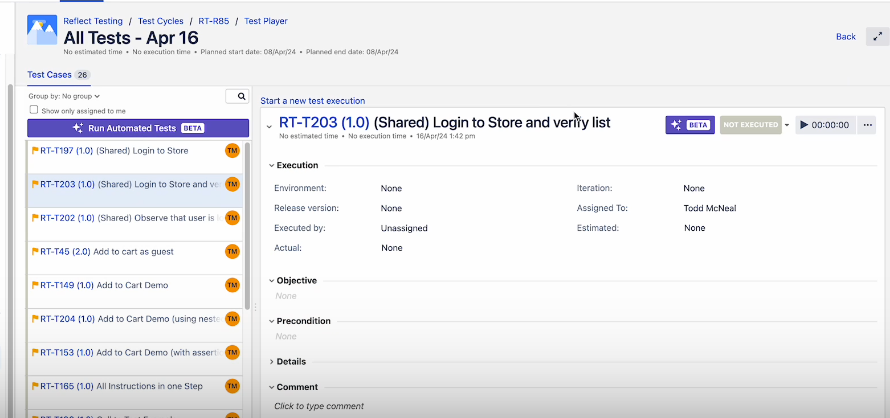
Click on the button.
Scroll down to run a test cycle with the selected test cases. You can select/remove enabled test cases from your run.
Click Run.
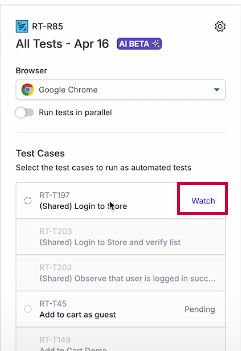
While the test is running you can click the Watch option that will take you to Reflect:
Refresh the page to see changes to the test execution statuses.
Note
If the Run tests in parallel toggle is on, test cases in the selected test cycle will be executed in parallel; if the toggle is off, tests in the test cycle will be executed sequentially.
Warning
To execute the test cycle that was already executed by Reflect, clone the Test Cycle in Zephyr Scale. To learn more, go to Editing, Cloning and Deleting Test Cycles